3
BATTERY INSTRUCTIONS:
Before replacing batteries make sure the units are
switched OFF.
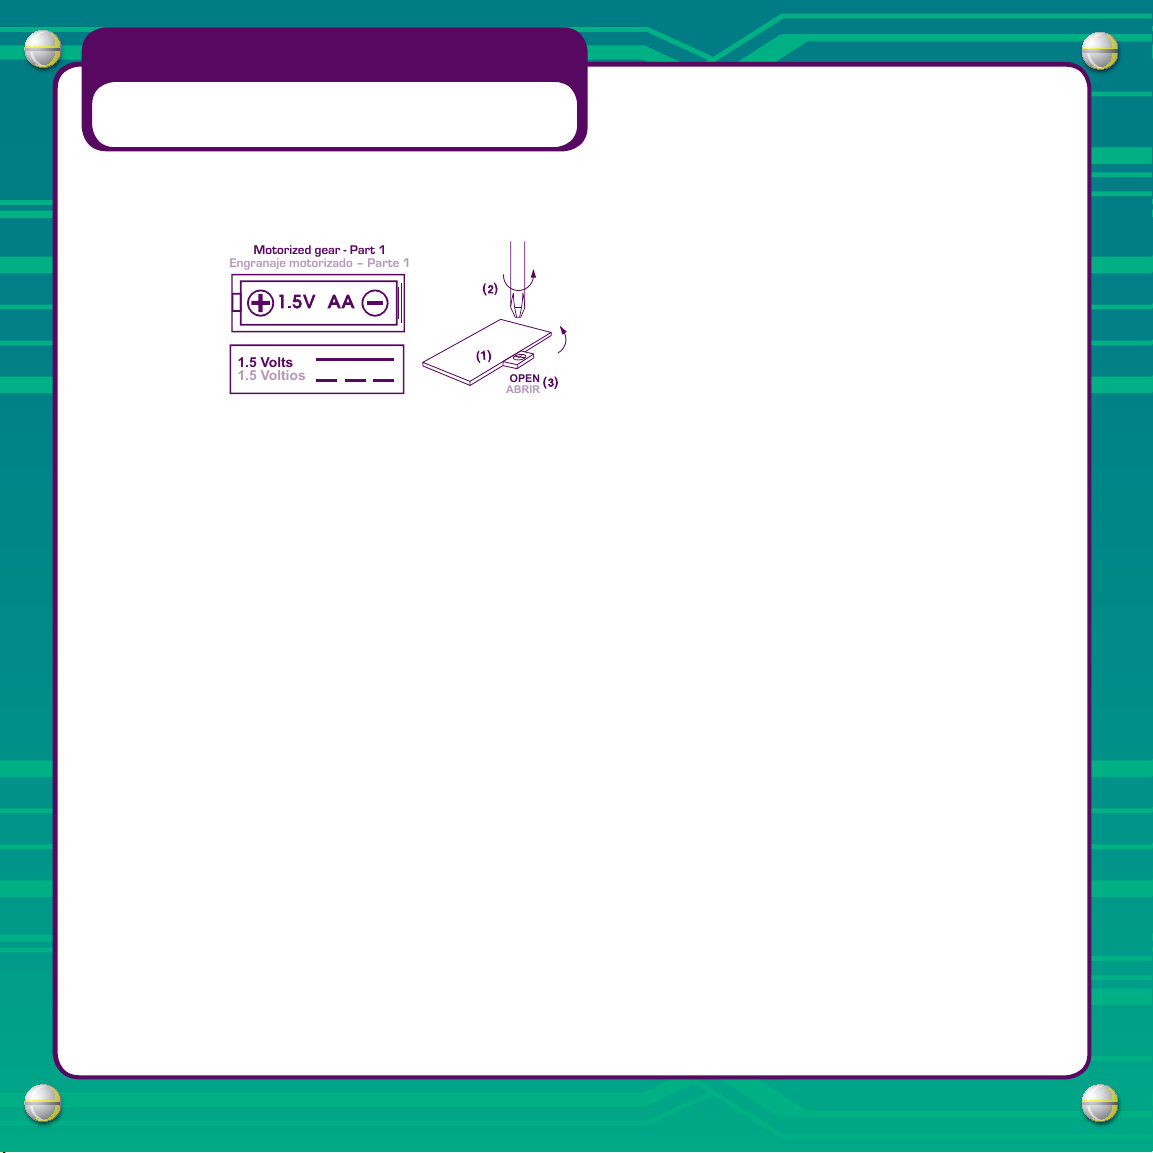
1) Battery compartment is located on the lower side of each unit.
2) Unscrew the battery compartment cover screw.
3) Open the compartment and insert “AA” size (UM3/LR6) battery.
• Do not use rechargeable batteries.
• Do not mix old and new batteries.
• Do not mix alkaline, standard (carbon/zinc),or rechargeable
(nickel-cadmium) batteries.
• Only batteries of the same or equivalent type should be used.
• Ensure batteries are inserted according to the correct polarity.
• Non-rechargeable batteries are not to be recharged.
• Keep packaging for reference since it contains
important information.
OPERATING INSTRUCTIONS:
1) After batteries have been installed properly, replace and secure
the battery cover.
2) To activate, switch the on/off switch for continous play or press the
on demand button for immediate play.
3) When not using your unit for an extended period of time
please be sure to remove the batteries from the mechanism.
INSTALACIÓN DE LAS BATERÍAS:
Antes de reemplazar las baterías asegurese de que la unidad
esté apagada.
1) El compartimento de las baterías se encuentra localizado en la
parte posterior del unidad.
2) Desatornille tapa del compartimento de las baterías.
3) Coloque una batería “AA” (UM3/LR6).
4) Vuelva a colocar y asegure la tapa de las baterías.
• No utilice baterías recargables.
• No mezcle baterías usadas con nuevas.
• No mezcle baterías alcalinas, estándar (carbón-zinc) o
recargable (niquel-cadmio).
• Se recomienda utilizar sólo baterías del mismo tipo o
equivalentes.
• Las baterías se deben colocar de acuerdo con la polaridad
correcta.
• No recargable, lus baterias no estein hechas para recargarse.
• Guarde el enuase como referencia ya que contiene informacion
importante.
INSTRUCCIONES DE OPERACIÓN:
1) Después de que las baterías se han instalado vuelva a colocar
y asegure la tapa de las baterías.
2) Para activar la unidad, presione el botón de encendido/
apagado para el uso continuo o el botón de movimiento para
uso inmediato.
3) Si la unidad no va a ser utilizada por un período largo de
tiempo, quite las baterías y guárdelas en un lugar fresco.
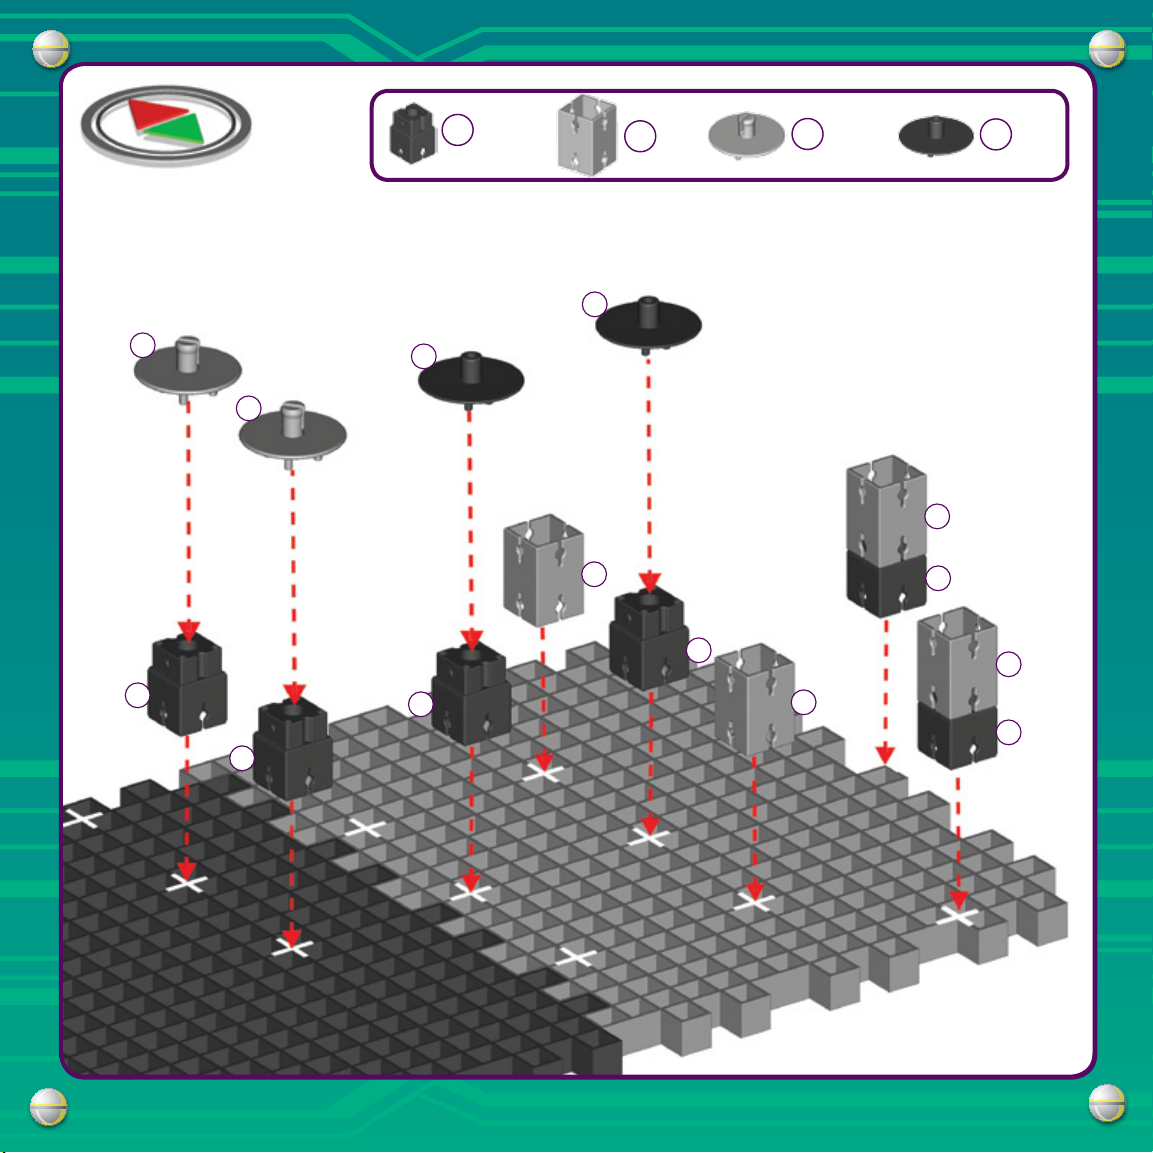
Motorized gear - Part 1
Engranaje motorizado – Parte 1
Battery Replacement
Cambio De Baterías
Uses 1 “AA” (UM3/LR6) size battery not included.
Requiere 1 pila tamaño “AA” (no incluida).
Getting Started
Battery Information for Parents and Kids
Inicio
Información de las baterías para padres y niños