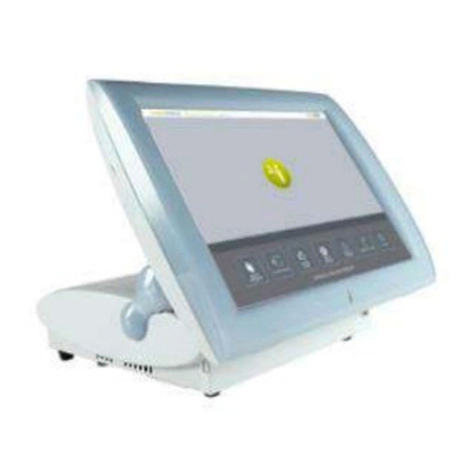
Impeto Medical SudoScan2 User manual

1
User guide
Version 3
03/03/2020 rev1

2
TABLE OF CONTENTS
1INTRODUCTION........................................................................................... 3
1.1 PATENTS..............................................................................................................................3
1.2 USE ....................................................................................................................................3
1.3 PRINCIPLE............................................................................................................................3
1.4 INSTALLATION.......................................................................................................................4
2START A SCAN ............................................................................................ 5
2.1 LOG IN ................................................................................................................................5
2.2 START A SCAN.......................................................................................................................5
2.2.1 START A SCAN FOR A NEW PATIENT...................................................................................5
2.2.2 START A SCAN FOR A PATIENT THAT ALREADY EXISTS IN THE SYSTEM.......................................6
2.3 DURING THE SCAN.................................................................................................................6
2.4 WHAT IF THE SCAN CANNOT BE STARTED?.................................................................................7
2.5 RESULTS INTERPRETATION ......................................................................................................7
2.5.1 ASYMMETRY ................................................................................................................7
2.5.2 QUALITY OF MEASURE...................................................................................................8
3ACTIONS TO PERFORM.................................................................................. 9
3.1 AFTER EACH SCAN:DISINFECTING THE ELECTRODES (ALL ELECTRODES) ...........................................9
3.2 ON SYSTEM REQUEST:TESTING THE HARDWARE...................................................................... 10
4REPLACE THE ELECTRODES ........................................................................... 11
4.1 HOW TO REPLACE SMART ELECTRODES.................................................................................. 11
4.2 HOW TO REPLACE STANDARD ELECTRODES............................................................................. 14
5PRECAUTIONS FOR USE AND TECHNICAL SPECIFICATIONS ..................................... 16
CONTACTS..................................................................................................... 27

3
1Introduction
The device is powered by the Windows 10 Entreprise LTSB operating system.
1.1 Patents
Submission number
Country/Region
0601239
FR
200680026807.6
CH
11/922.812
USA
06763845.2
EUROPE, DE, FR, UK
14/613.952
USA
0753461
FR
EP2008/052211
PCT (International)
08717066.8
EUROPE, FR
1258037
FR
1.2 Use
The device is a digital chrono-amperometric analyzer used for early identification and follow-up of
peripheral autonomic neuropathies.
1.3 Principle
The device measures the capacity of the sweat glands to release chloride ions in response to an electric
stimulus. It is a dynamic test for the sweat glands equivalent to cardiac stress test for the heart.
Note:
All options are not available in every region, please check with your distributor to see which product
is available in your region.
The device consists of the following:
A control panel and display
A power cable
Smart electrodes:
A foot smart dock and smart electrode
A hand smart dock and smart electrode
OR (exclusive) Standard electrodes:
A foot sensor plate
A hand sensor plate

4
1.4 Installation
Carefully follow instructions in the corresponding manual to ensure correct installation.
Complete installation should take no more than 15-20 minutes.
Impeto Medical is able to provide a printed version of this user guide within 7 business days following
the receipt of the request.

5
2Start a scan
When starting a scan, the first step is to determine if the patient is already in the database of the
system, or if it’s his first exam.
Note:
For any additional help, please press the Help button (bottom right corner).
2.1 Log in
1
To start a scan, you need to be connected to your account. When you are connected, an
indication of the account used is displayed at the bottom of the screen.
If you are not connected, click on the Log In button, select your account and enter your
password.
AFTER THE DELAY OF INACTIVITY, THE SYSTEM LOCKS ITSELF AND THE PHYSICIAN IS
LOGGED OUT OF THE SYSTEM.
2.2 Start a scan
2.2.1 Start a scan for a new patient
1
Once you are connected on the system, click on New Patient on the Home screen.
2
Set patient’s demographic information.
Notes :
-It is also possible to use any standard PC-compatible keyboard when connected to
one of the USB ports available on the Master Unit.
-Verify the data with your patient. Invalid (out of acceptable ranges) or missing data
will be highlighted with a RED background, and patient data should be re-entered.
IF THE PATIENT OR A HOMONYMOUS ALREADY EXISTS IN THE SYSTEM, THE USER WILL BE
INFORMED BEFORE STARTING THE SCAN.
PLEASE ENSURE THAT DEMOGRAPHIC DATA ARE DISPLAYED WITH THE RIGHT UNITS FOR
YOUR REGION (WEIGHTS IN KG OR POUNDS HEIGHTS IN CM OR FEET/INCHES.

6
2.2.2 Start a scan for a patient that already exists in the system
1
Once you are connected on the system, click on Patient History on the Home screen.
2
Using filters, select the patient from the patient list.
3
Click on the New Scan button.
4
The patient’s demographic information shall already be set. Verify with patient that they
are correct and modify them if needed.
2.3 During the scan
1
Click on the Scan button.
ENSURE THAT THE PATIENT IS CORRECTLY POSITIONED ONTO THE ELECTRODES BEFORE
STARTING A SCAN,WITH HIS BARE FEET ON THE FEET SENSOR PLATES AND APPLYING THE
PALMS OF HIS HANDS TO THE HANDS SENSOR PLATES.
2
During the acquisition, the scan can be stopped at all time.
-
DO NOT TOUCH THE PATIENT DURING THE SCAN.
THE USE OF USB PORTS DURING A SCAN CAN FREEZE THE PROGRAM APPLICATION.
PLEASE, DO NOT PLUG OR UNPLUG USB DEVICE ON THE SYSTEM DURING A SCAN.
3
Once the acquisition is complete, the results are displayed and the reports can be printed
THE DEVICE IS NOT A STORAGE MANAGEMENT SYSTEM AND DATA SHALL BE BACKED UP IN A
REGULAR AND FREQUENT BASIS.

7
2.4 What if the scan cannot be started?
If you filled in all information about the patient but the scan still cannot be started:
1
Smart Electrodes: Please check that the smart electrodes are correctly inserted within
their smart docks (ref. p11 to see how to insert a smart electrode within a dock).
Also, check that the smart electrodes were not swapped between the hands and feet
smart docks.
2
Smart Electrodes: Please check that the docks are correctly plugged in the system and
reboot the system.
3
All electrodes: Check if the following message appears on the top header of the program
screen.
This means that the connection between the application and the hardware has been lost.
Try to reboot the system.
4
If the issue persists, please contact Impeto Medical Technical Support (ref. p27).
Note:
Smart Electrodes: Red LEDS on the docks indicates that the scan cannot be launched.
If the issue persists after you followed the procedure above, please contact Impeto Medical Technical
Support (ref. p27).
2.5 Results interpretation
The device immediately populates results after a scan. The measured conductances are displayed on
the screen. Test results provide a measure of Galvanic Skin Response for each extremity, and a measure
of sudomotor function. Results are expressed as skin conductances measured in micro Siemens (𝜇𝑆).
The system has to be used by healthcare professionals for correct interpretation of the results and
correct follow-up of the recommendations given according to the results of the test.
2.5.1 Asymmetry
Asymmetry for hands and feet is computed using the following formula:

8
𝐴𝑠𝑦𝑚𝑚𝑒𝑡𝑟𝑦 = (𝐿𝑒𝑓𝑡 𝐸𝑙𝑒𝑐𝑡𝑟𝑜𝑑𝑒 𝐶𝑜𝑛𝑑𝑢𝑐𝑡𝑎𝑛𝑐𝑒 − 𝑅𝑖𝑔ℎ𝑡 𝐸𝑙𝑒𝑐𝑡𝑟𝑜𝑑𝑒 𝐶𝑜𝑛𝑑𝑢𝑐𝑡𝑎𝑛𝑐𝑒)
max (𝐿𝑒𝑓𝑡 𝐸𝑙𝑒𝑐𝑡𝑟𝑜𝑑𝑒 𝐶𝑜𝑛𝑑𝑢𝑐𝑡𝑎𝑛𝑐𝑒, 𝑅𝑖𝑔ℎ𝑡 𝐸𝑙𝑒𝑐𝑡𝑟𝑜𝑑𝑒 𝐶𝑜𝑛𝑑𝑢𝑐𝑡𝑎𝑛𝑐𝑒)
2.5.2 Quality of Measure
If the patient moves slightly during the scan, a message appears to inform the user.
Then the user is given the opportunity to accept the results or re-scan the patient. Selecting Accept
will allow the current results to be saved within the patient’s follow-up. The report will be generated
with a note stating that the patient moved during scan and that results may be compromised.
Selecting Re-Scan will return the user to the scan page to start a new scan.
If the patient is either electrically grounded (ie. touched during the scan) or an internal issue may have
occurred during the scan, a message appears to inform the user that the results are compromised and
cannot be used
Selecting the Re-Scan button will prompt the current scan to be cancelled. The user will be returned
to the scan page to start a new scan. If the issue persists, please contact Impeto Medical Technical
Support (ref. p27).
Notes:
-When performing a Re-Scan, the number of remaining scans will not be decreased unless
the user accepts the scan results with the observed error or the scan is performed anew.

9
3Actions to perform
3.1 After each scan: Disinfecting the electrodes (all electrodes)
IMMEDIATELY AFTER EACH SCAN, IT IS IMPORTANT TO CLEAN ALL SMART ELECTRODES WITH THE
MANUFACTURER APPROVED CLEANING SOLUTION.
This will not only disinfect but also neutralize the electrochemical reactions which have taken place on
the electrodes during the scan. Additionally, this stops the corrosion process which would otherwise
quickly damage the electrodes’surface.
1
Deposit only a small quantity of cleaning product on each electrode.
2
Wipe the electrodes until dry with Soft Tissue Wipes
Strictly adhere to the cleaning solution’s instructions for use.
Please refer to the website www.impeto-medical.com/en/cleaning-products.

10
3.2 On system request: Testing the hardware
The Quality Check test verifies that the device is functioning optimally. Quality check should be done
on a regular and frequent basis and on system request.
Note: If an error occurs during normal use of the device, perform a Quality Check test. If the test
indicates that the device passed and you are still encountering issues, please contact your distributor
or Impeto Medical Technical support (ref. p27).
It is important that no one stands on the electrodes while performing a Quality Check.

11
4Replace the electrodes
All options are not available in every region, please check with your distributor to which product is
available in your region.
4.1 How to replace Smart Electrodes
Please plan in advance when placing your replacement electrodes orders.
Upon receiving a new order, a set of electrodes will be shipped to replace existing used electrodes
once all scans have been used.
When there are no scans left, the system prevents the user from starting a scan and the Scan button
shows “Change Plates” and turns red instead of showing “Scan” and being green:
Note :
-Be sure to change hand plates and foot plates at the same time.
-Do not disconnect electrode docks from the master unit to replace electrodes.
Once you have received a new set of smart electrodes, follow the instructions to replace them:
1
On the underside of the electrode dock, loosen the locking screw and hold it down.
Locking
screw

12
2
Then remove the electrode to be replaced by pulling it out gently.
3
Insert the new electrode into the dock by gently sliding it in until the electrode is firmly
aligned within the dock base.
4
Tighten the locking screw.
Locking
screw

13
After the change of electrodes, return to the main program screen and then click the New Patient
button. The number remaining of scans will be updated and displayed on the top right header of the
screen.
IF DOCKS HAVE BEEN DISCONNECTED FROM THE SYSTEM, PLEASE PLUG THEM IN AGAIN AND
RESTART THE SYSTEM. SMART ELECTRODE REPLACEMENT DOES NOT REQUIRE THE DOCKS TO BE
DISCONNECTED FROM THE SYSTEM. RESTARTING THE SYSTEM AFTER INSTALLATION OF THE NEW
SMART ELECTRODES IS NOT REQUIRED.
WHEN PLUGGING THE ELECTRODES IN OR OUT OF THE SYSTEM, ENSURE THAT THE PLUGS ARE
CORRECTLY INSERTED IN THEIR SOCKET AND REMEMBER TO PULL THEM GENTLY.
Note:
When you replace your smart electrodes, you can safely dispose of your old smart electrodes or
recycle them in accordance with your local regulation and/or recycling process.

14
4.2 How to replace Standard Electrodes
When the sensor plates have to be replaced, please follow these instructions to unplug the old
sensor plates and plug in the new ones:
1
Unscrew the sensor plates’ cable retention bracket, if installed.
2
Grab the larger part of each plug and gently pull it backwards.
3
When installing a new set of sensor plates, please ensure the plugs are correctly seated in
the socket to ensure a proper connection.
Green cable in the Green Hands plug, Purple cable in the Purple Feet plug
Green cable
Purple cable

15
WHEN PLUGGING THE ELECTRODES IN OR OUT OF THE SYSTEM, ENSURE THAT THE PLUGS ARE
CORRECTLY INSERTED IN THEIR SOCKET AND REMEMBER TO PULL THEM GENTLY.

16
5Precautions for use and technical
specifications
Principle of the device
Low voltage is applied to sensor plates in contact with the hands and feet, areas with the highest sweat
gland density. The electric current stimulates the sweat glands which, in response, release chloride
ions (Cl-).
At low voltage, the stratum corneum acts as a capacitor and only the sweat ducts allow the
transmission of ions from the skin to the sensor plates. This ensures that the measurements taken
correspond solely to the sweat gland function.
There is an observable electrochemical reaction between the Cl- ions and the anode.
The device records the electrochemical conductance related to the concentration of the chloride ions
released from the sweat glands and detected by the sensor plates (on the hands and feet).
The device is composed of a software integrated into a touch-screen Windows 10 PC computer and
connected to 4 sensor plates placed on the feet, the hands.
General operation of the device
The patient positions his bare feet on the feet sensor plates, applies the palms of his hands to the
hands sensor plates.
After entering the patient demographic information (last name, first name, age, gender, height,
weight), the operator will initiate the software and activate the electronic circuitry of the device, which
will then apply DC voltage to the sensor plate and will measure the current passing through the sensor
plates.
Several successive cycles of measurements are carried out in an automatic way and all the measured
values are recorded on the hard disk. Data-processing is then performed to compute the conductance
on each sensor plate.
At the end of the measurement cycle, which lasts approximately 3 minutes, the user can see the
displayed patient report on the screen and also has the option of printing out a hard copy of the report.
No control is accessible to the patient. The device has to be used by healthcare professionals for correct
interpretation of the results and correct follow-up of the recommendations given according to the
results of the test.
Precautions of use and maintenance
Transport
If it is necessary to pack, to transport or deliver the device after its use, it is recommended to arrange
all its elements in their housing and position of origin.

17
Pay particular attention to carefully arrange the sensor plate cables in the locations especially designed
for them in the protection foams, not to damage or weaken them.
The box can be stored upright or laid down.
The device does not comprise any accumulator.
Recycling
At the end of its lifetime, the device must be returned to Impeto Medical’s authorized distributor,
which will return it to Impeto Medical, in order to ensure the recycling of certain components.
The components and the accessories of the device are free of mercury and of components containing
this element.
Protection against moisture
DO NOT USE THE DEVICE IN A WET OR DAMP ENVIRONMENT.
Electromagnetic compatibility (see Table 1 and Table 2)
The device is not protected from the effects of the discharges of an external defibrillator, nor against
high frequency currents or strong electromagnetic disturbances out of IEC 60601-1-2 Edition 4
requirements. The use near of mobile telephones or wireless fixed telephones can cause signal
disturbances.
The use of portable and mobile RF communication devices (for example: cellular telephones) can
influence the analysis carried out during the recording, as the recorded signals can be disturbed by
electromagnetic interferences.
The device should not be used in the presence of ionizing radiations (x-rays, gamma rays …) because
those could erase the internal storage.
For the tables concerning the electromagnetic emissions and the immunity of the recorder, see the
appendices of this user guide.
Maintenance of the device and sensor plates
No particular maintenance is necessary.
The external case and the cables of the sensor plates can be cleaned using a slightly wet tissue or with
a very small amount of soapy water. Do NOT use any detergent product, alcohol or acetone.

18
To avoid corrosion and ensure the best conditions of hygiene, the feet and hands sensor plates must
be cleaned immediately after each patient with an Impeto Medical approved cleaning solution.
ONLY PERSONEL AUTHORIZED BY IMPETO MEDICAL IS ALLOWED TO PERFORM ANY REPAIRS OR
MAINTENANCE ON THE DEVICE (MAINTENANCE, CALIBRATION, ETC.).
All the technical documents (component part lists, descriptions, calibration instructions) are kept by
Impeto Medical.
The warranty is null and void if the device was opened and repaired by any unauthorized person.
Warranty will hold only against manufacturing defects and certainly not for any mechanical damage
due to mishandlings or misuse. Refer to manual for proper use of the equipment.
Use and storage conditions:
-Do not block the vents
-Do not use the device in a dusty environment
-Do not use the device in an environment rich in oxygen, with vapors or inflammable gases
-Keep the device away from all inflammable sources
-The device is not meant to be sterilized
-Use the device inside
-Keep the device in a dry environment
-Maintain a minimum distance of 20cm (about 8 inches) around the device
Description of the pictograms affixed on the device and on the case
The following pictograms are affixed on the device:
Indicates that the parts applied of the device are of type BF (IEC 60601-1).
IClass of electric protection.
Indoor use only
The device is in conformity with European Directive 93/42/EEC.
Warning

19
Registered Trademark
Indicates the manufacturer catalogue reference
Indicates the manufacturer lot code
Indicates the serial number
Tells the user the need to consult the instructions for use
The product must be disposed in an appropriate structure for recovery and
recycling
RF Non-ionized radiation
RoHS Restriction of Hazardous Substances (Directive 2011/65/UE + 2015/863/UE)
The following pictograms are affixed on the case:
Handle with care

20
Fragile
Keep dry
Keep upright
Recyclable
Indicates the temperature limit that the medical device can be safely exposed
to
Indicates the range of moisture that the medical device can be safely exposed
to
Indicates the range of atmospheric pressure that the medical device can be
safely exposed to
Use of the sensor plates
Information about the use of the sensor plates are provided as guidance only.
Table of contents
Other Impeto Medical Medical Equipment manuals
Popular Medical Equipment manuals by other brands
Optimum Medical
Optimum Medical Ugo Fix 3006 user guide
Avantik
Avantik QS12 instruction manual

AMSL Diabetes
AMSL Diabetes t:slim X2 Training booklet

Arizant Healthcare
Arizant Healthcare Bair Hugger 500/OR Operator's manual

OCENCO
OCENCO M-40 SCSR Instruction booklet
WARDRAY PREMISE
WARDRAY PREMISE MR5501P Operator's manual
