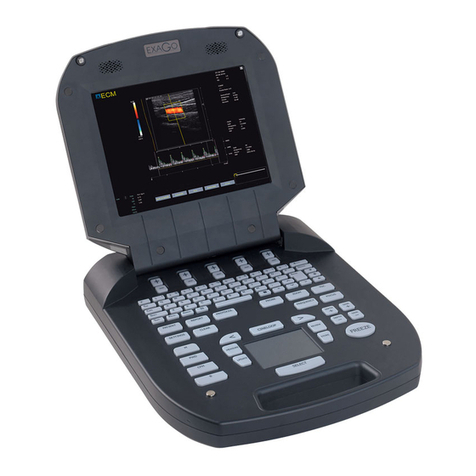
IMV ImaGo User manual

Your complete animal imaging solution
Instruction
manual

2|
Contents
1. Safety instructions
2. Getting started
3. Presentation of the device
4. Connection of peripherals
5. Cleaning and disinfection instructions
6. Environmental conditions of use
1. Safety instructions
2
2
3
11
11
11
1.1 Probe information
1.1.1 Probe types and corresponding applications
The probes provided with the Imago device are the following :
• LB760P Linear Rectal probe, 7,5 MHz (this rectal probe is used
for gynaecology and reproduction diagnosis).
• LB760 S Linear Rectal probe, 7,5 MHz (this rectal probe is used
for gynaecology and reproduction diagnosis).
• CB360S Convex probe, 3.5 MHz (this external probe is used for
the following applications : general, abdominal, obstetrics).
• LB740R Linear probe, 7.5 MHz (this external probe is used for the
following applications: general, orthopedics, small parts).
• SB355M Mechanical probe, 5 MHz (this external probe is used
for the following applications: general, abdominal, small parts).
• DB355M Mechanical probe 5 MHz (this rectal probe is used for
gynaecology and also abdominal, small parts).
1.1.2 Handling of probes
• Probes are fragile and require careful handling, care and
cleaning. Probe care includes daily inspection, cleaning and
disinfection between animals. Please refer to chapter 5 for
further instructions.
• Do not bend or twist the probe cable. If the probe housing
becomes cracked or broken or there are cuts or openings
in the cable, the electrical safety of the probe may be
compromised.
• Do not immerse the probe connector in any liquid. Immersion
can destroy the electrical safety features.
1.1.3 Ultrasound gel
Some ultrasound gels and lotions can damage probes.
Agents containing the following chemicals are known to damage
probes:
• Acetone
• Methanol
• Denatured ethyl alcohol
• Mineral oil
• Iodine
• Any lotion or gel that contains perfume.
Check gel contents before use.
2. Getting started
2.1 Connection and disconnection of probes
To connect a probe, place the probe connector in the slot on the
back left of the scanner with the connector pointing upwards. Turn
the locker in the middle of the connector with slight pressure to
engage the locking mechanism. When the mechanism is engaged,
push and make a quarter turn clockwise so that the probe is
connected.
The probes can be changed during the examination without
restarting the scanner, just freeze the image before.
To disconnect a probe, make a quarter turn anti-clockwise to
unlock the connector. Take the connector out of the scanner and
store the probe safely, protected from any shocks.
2.2 Starting of the device
Only supplied power cord can be used to power the system. To
start the ImaGo, ensure a probe is connected and press the power
switch on the right side of device.
The ImaGo equipment starts in B mode with the probe connected.
If no probe is connected, the system will display ‘no probe’.
Connect a probe and press ‘Freeze’, or restart the equipment.
To turn off, press the power switch again and a shutdown
procedure will run before the system turns off.

Instruction manual
www.imv-imaging.com | 3
3. Scanner menus
3.1 Keyboard description
The menu displays on the left side of the screen. You can change it to the right side; Settings >System >Activate ‘Right-Handed’
Do not use any instruments to touch the screen that could damage it.
3.1.1 Simplied Interface
When the device is initially started, only the homepage is shown (below left) to facilitate the use of the device. When in Freeze mode
(below right) other functions are available. To return to homepage, press freeze again.
3.1.2 Normal Interface
After turning the scanner on, 3 pages are available; you always start on page 2 (below, center) as default setting.
Current page

4|
When image is frozen, 2 pages are available:
3.2 Keyboard function
3.2.1 Simplied Interface
Current page
Gain: press + to
increase the gain
and – to decrease it.
Depth: press + to
increase and – to
lower the depth.
Freeze: allows to
freeze the image
and the other menu
appears (see below).
P1, P2, P3: Easily
access pre-registered
presets (factory or
user settings)
1 2
3
4
1
2
3
4
Settings: access to user’s set
up.
Review: to vizualise images
and clips saved.
Distance: to make
measurements on frozen
image.
Brightness: to be increased
or lowered.
Freeze: allows to come back
to B image.
Cineloop: allows to review
the last registered images of
the ultrasound session.
Store I: allows to register an
image.
Store C: allows to register
the last few seconds on the
scanned session (clip/video).
1 2
5
7
1
2
3
4
5
6
7
8
3 4
6 8
3. Scanner menus
Live scanning Freeze menu

Instruction manual
www.imv-imaging.com | 5
3.2.2 Normal Interface
When the device is initially started, only the homepage is shown (below left) to facilitate the use of the device. When in Freeze mode
(below right) other functions are available. To return to homepage, press freeze again.
1 2
5
1
3
4
Compulsory elds
Application: The following choices are available; cow, horse, sheep, sow, llama, dog, cat. Press load to conrm your choice.
Preset: Access factory presets of the system, which are highlighted in yellow, or save/load your own presets.
Protocol: Access all measurements and tables available for the chosen application. Each applications has its own protocols.
Patient: Record patient data, save animal data, scroll patient list and start a patient exam. Don’t forget to click ‘end of exam’ after
nishing or the patient le will be erased when the system is turned off.
Report: View a report while an exam is in progress. This report can be exported to a USB in Review. If no exam is in progress, the report
key remains inactive.
Review: Access images and video clips that the user has previously recorded. The review mode will access USB drive automatically if
there is one connected. When connecting the USB, just wait for ‘USB’ indication at the bottom of the screen to access USB images and
clips. If no USB connected, the review mode will access the internal memory of the device.
M: Start M mode. Position the red line with the track pad and press select to start the measurement.
Dual: Splits the screen. Press select to switch from one side to the other. You can freeze the image on one side and take measurements.
Settings: Enter user settings
Exit: If image is live, press exit. If image is frozen, click freeze and exit.
6
2
3
4
5
6
8
79
7
8
9
10
10
Page 1

6|
1Freq/Focus AutoSelect: Focus will move
automatically according to depth.
Distance: A new distance will be automatically
activated after the rst one.
Follicles: Automatically measure follicle diameter.
Different options are available: On Live/On
freeze, Ellipse/Diameter, One scan/two scan
Fat + Muscle: When image is frozen and function
is active, you can directly proceed to backfat
measuring.
Grid: Activates grid mode on screen
Image Formats: Choose preferred format for
saving images
Annotations: You can record the 10 frequently
used annotations for inserting comments in
frozen images. If Restore the last annotation
is activated, the last annotation will be
automatically proposed.
2
3
1
4
235
6
4
56
7
7
1System: Change date and time
About: Software version and manufacture date
Auto Freeze: add details
USB: If you have problems storing using USB
drive, activate this function
Keypad: Activate Azerty/Querty keypad
Right-Handed/Left-Handed: Reverse screen
depending on preference
Energy Save: Screen deactivates after 20s
inactivity when using BUGs. Only available in
large screen mode.
Reset: Reset the conguration system of
IMAGO with factory settings
2
3
4
5
6
1
2
3
4
5
6
8
8
9
3. Scanner menus
7
9

Instruction manual
www.imv-imaging.com | 7
Access to the User Protocol menu to create user-dened protocols. The contextual menu includes:
• Create: add a new line in the User Protocols list. Start by selecting the application in the list to the left in which the user protocol
should be created. The user can select which measurements from the Protocol Items list will be included in the user protocol by
clicking on the corresponding box. Protocol name can be modied by typing the new name in the text eld located in the lower
left part of the menu. Press Save when selection is nished.
• Delete: delete the selected User Protocol from the User Protocols list.
• Save: save the created User Protocol.
• Tables: display the current protocol table in data or graphical mode (Data/Graph control). Next and Previous controls are used to
review equivalent table with different authors (if any).
• Exit: exit the User Protocol menu and return to the Settings menu.
To activate a user protocol, select the Application, click on Patient, select Exam and choose the protocol for the examination.
Full screen: activating
full screen mode.
The only visible
indications are date
& time, battery level,
probe name, preset
application and name,
and frequency. Press
Exit to return to the
conventional mode.
7

8|
Depth: Access vertical cursor to change depth depending
on current probe and application.
Frequency: Choice of 3 frequencies depending on probe
you are using.
Focus: Vertical cursor that gives you a choice of focus
positions.
Gain: Gain control is represented by a tuner button
that is turned by pressing the white dot. It will be green
when activated. Turn clockwise to increase gain and
anticlockwise to decrease.
TGC: In TGC, 4 cursors will appear that correspond to
different area of the screen. TGC allows you to chose gain
by zone. Pulling cursor to the right will increase gain and to
the left will decrease.
Zoom: To magnify a part of the screen, press Zoom and
choose preferred window, x1.5, x2, x3. then position the
window over the part of the screen you would like to
magnify. Press B to return to normal imaging.
Distance: Distance allows you to make measurements
without having to freeze the picture. Position cursor
with touchpad, press valid to start measurement and
move second cursor. Toggle will switch sides on your
measurement. Press Valid again to close the measurement.
Distance will display at the bottom of the screen. You can
do up to 7 measurements on the same image.
You can put up to 7 measurements on the same image (4
distances, 2 Ellipses, 1 trace).
Delete: Delete any measurement on the screen (select the
one(s) you want to delete using the key Select).
1
1 2 3
4 5 6
7 8
2
3
4
3
5
6
7
8
Dynamic range: This function allows you to create a harder
or smoother picture. Press the Dynamic key and chose
your dynamic range on the vertical cursor. The lower the
dynamic is the harder is the picture and the higher the
dynamic is the smoother is the picture.
Average: This function allows you to adjust the persistence
of the image among SLOW – SLOW MEDIUM – MEDIUM FAST
& FAST.
Power: You can modify the emission power of the probe.
Press the Power key and choose your emission power in %
on the vertical cursor.
Brightness: Allows you to change the screen brightness.
U/D: Reverse the image on the screen
L/R: Change the side of the picture
Smoothing: 3 levels are available ; level 3 is the highest ;
level 2 is active as a standard feature.
Fat: Automatic measurement of back fat (for pigs with
sector or linear probes ; cattle or small ruminants with linear
probe). Available in frozen mode also.
1
1 2 3
4 5 6
7 8
2
3
4
3
5
6
7
8
Page 2 Page 3
3. Scanner menus

Instruction manual
www.imv-imaging.com | 9
Protocol: Protocol - Access different measurement and
gestation tables, this is in accordance with the specie
selected in application mode.
Patient: Access patient menu.
Report: Allows the user to review the report while doing an
exam.
Review: View the pictures and the video clips that you
have previously recorded.
Fat: Automatic back fat measurement. Available in live
mode too. Ensure application is correct before measuring.
Annotations: Allows you to write annotations on a frozen
picture or choose an annotation that you have previously
recorded in the settings menu.
Settings: Preset the machine to your own convenience,
and have access to the user protocols.
1
1
2 3 4
5 6
2
3
4
5
6
7
FREEZE page 1
7
Distance: Make a measurement on a frozen image.
Ellipse: This allows to draw an ellipse on a frozen picture.
Trace: This allows to draw a trace on a frozen picture.
Select: Switch between different measurements on the
frozen image.
Delete: Delete measurements, eillipses or traces from the
screen.
Cineloop: Displays cineloop menu.
Store I: Store current frozen image.
Store C: Store cineloop that has just been created.
1
1
4 5
6
2
3
4
5
6
7
FREEZE page 2
7
2 3
8
8

10 |
CINELOOP : Replay the last seconds of scanning that have just been done (124 pictures with linear and convex probes ; 62 pictures with
sectorial probe).
Play the cineloop.
Pause the cineloop.
These keys allow the user to skip forward and back through the cineloop
Return back to review mode with the list of cineloops.
Back to main menu of freeze.
Return to B mode menu and unfreezes the image.
1
2
3
4
5
6
321
4
5 6
3.2.3 Moving from Normal to Simplied interface
Within Settings function
When in simplied mode, only the
essential functions will be displayed.
In simplied mode, you can select
three different presets (P1, P2, P3).
Choose for each from factory presets
or your own user presets.
Once selected, click save. Unticking
Simplfy will return the scanner to
normal mode.
3. Scanner menus

Instruction manual
www.imv-imaging.com | 11
4. Connection of peripherals
The Imago equipment can be connected to several peripherals:
5. Cleaning and disinfection instructions
5.1 Cleaning and disinfection of the device
The following disinfection solutions have been tested and their
compatibility with the components of the device has been proved:
• Cidex
• Cidex plus
• Cidex OPA
It is recommended to use one of these solutions to avoid any
deterioration during the cleaning and disinfection process. Using
any other solution other than those indicated as it may damage
components of the scanner.
5.2 Cleaning and disinfection of probes
The following disinfection solutions have been tested for their
compatibility with the components of the probes:
• Alkazyme
• Klenzyme
• Cidezyme
• Nu-Cidex
• Anioxyde
• Gigasept-FF
• Steranios
• Cidex OPA
It is strongly recommended to use one of these solutions in order
to avoid any deterioration during the cleaning and disinfection
procedure.
!
Warning:
Do not pour liquid directly on to the scanner.
Before closing the case, ensure the scanner and
probe are dry.
6. Environmental conditions of use
The device is designed and tested be operated within this range of
temperature:
• -20°C to +60°C during transportation and storing
• -10°C to +40°C during operation.
To preserve battery life, the system should be stored with a charge
of between 15-50% and at a room temperature of 30°C (86°F).
Turn
On/Off
Charge
Led
Battery
Charge
Power
Supply For
Goggles
Composite
Video
USB
Port
Bluetooth Port

12 |
Your BUG does not contain user
serviceable parts. Servicing
must be done by IMV imaging
authorised service centres. Your
BUG device is sealed, do not try
to take it apart.
Your equipment should be
returned periodically to an IMV
imaging service centre. Our
qualified service engineers will
use special test equipment to
thoroughly check the instrument
and advise of any work that
appears to be necessary.
If your BUG requires servicing,
please contact an official
authorised service centre or the
distributor in your country. •
Ireland
IMV imaging
Unit 2, Block 3
CityNorth Business Campus
Gormanston, Co. Meath
K32 ER81
Ireland
+353 (0) 42 932 0070
www.imv-imaging.ie
United Kingdom HQ
IMV imaging
Imaging House
Phoenix Crescent
Strathclyde Business Park
Bellshill ML4 3NJ
Scotland, UK
+44 (0) 1506 460 023
www.imv-imaging.co.uk
France
IMV imaging
126, Boulevard de la
République
16000 Angoulême
France
+33 5 45 92 03 57
www.imv-imaging.fr
North America
IMV imaging
2900 43rd Street NW
Suite 600
Rochester
MN 55901, USA
(507) 529-8200
(800) 210-9665
F 507-529-8205
www.imv-imaging.com
South Africa
IMV imaging
6 Crieff Rd
Parkview
Johannesburg
2193
+27 82 6164685
www.imv-imaging.co.za
Australasia
BCF Ultrasound
Australasia Pty Ltd
10/56 Norcal Road
Nunawading 3131
Melbourne, Victoria
Australia
+61 3 9894 8980
www.bcfultrasound.com
5. Service centres

Instruction manual
www.imv-imaging.com | 13

facebook.com/IMVimaging
twitter/IMVimaging
www.imv-imaging.com
info@imv-imaging.com
+44 (0) 1506 460023
Contact us now
© IMV imaging, V.1 July 2019/ Instruction manual ImaGo
Your complete animal imaging solution
Table of contents
Other IMV Medical Equipment manuals
Popular Medical Equipment manuals by other brands

LINET
LINET Essenza 300 instructions
Therafin
Therafin SQUEEZE MACHINE owner's manual
Exsurco Medical
Exsurco Medical amalgatome MD Quick reference guide
Merit Medical
Merit Medical SCOUT Instructions for use
Acrel
Acrel AITR Series Installation and operation manual
Sizewise
Sizewise Platinum Series user manual
