2.3 Product Functions
The base has three main functions as below:
DX8000 charging : Connect the base with the power adapter, then place DX8000 on
the base to get charged.
Serves as extended communication ports of DX8000: Network port, serial port, USB
port, etc.
Typical applications: Enables DX8000 to communicate with host computer via serial
port, and get Ethernet through Network port.
Environmental conditions for running, storing and delivering the product:
Temperature
Humidity
Atmospheric pressure
Running ~4
Storage and Delivery -~
Running 10 %~ 90%
Storage and Delivery 5%~90%( )
86kPa~106 kPa; Below 2000 meters above sea level
2.2 Environmental Conditions
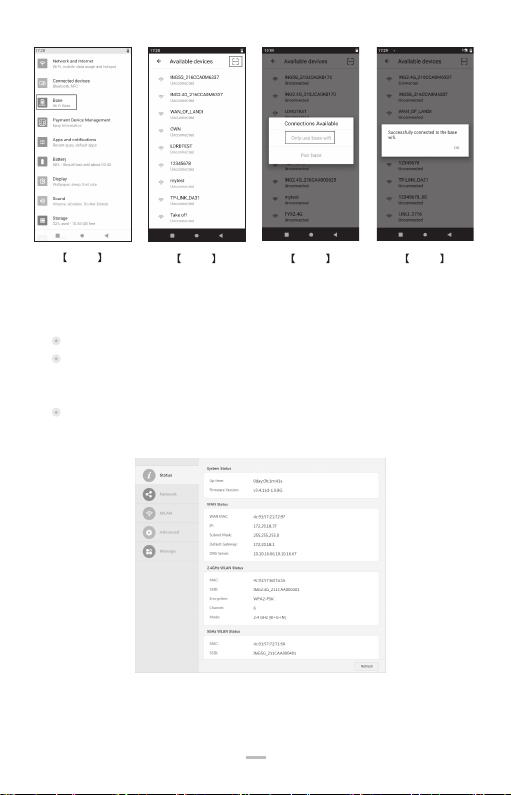
3. WiFi connection
3.1 Connect DX8000 to the base WiFi
Power on the base.
Click “Settings” menu on DX8000 , and then click “Base” [step 1]
Click the “scanning box” [step 2], and scan the Data matrix code label on the back of base.
On the Pop-up menu, we can choose “Only use base wifi ”. [step 3]
After that , we can get the “Successfully Connected” status.[step 4]
5
AXIUM DX8000-BASE-W1
07/25
Copyright© 2023 Ingenico –
Banks and Acquirers International Holding SAS
All rights reserved