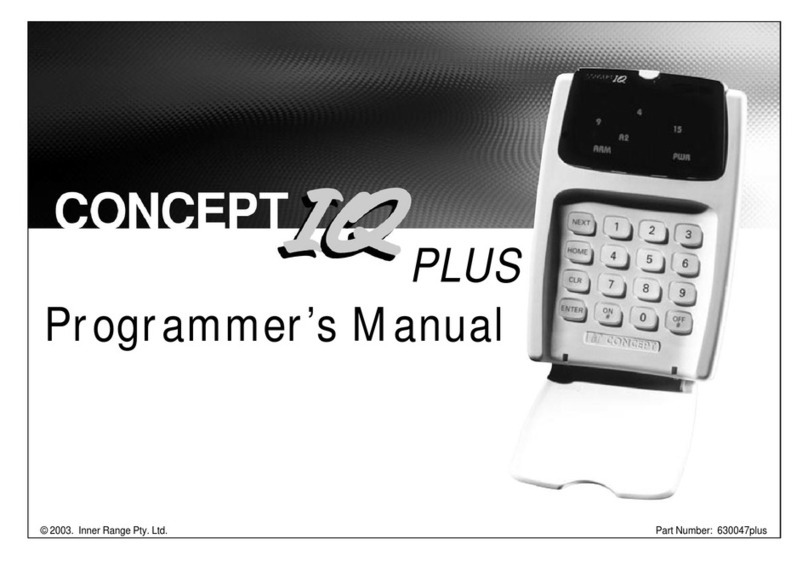
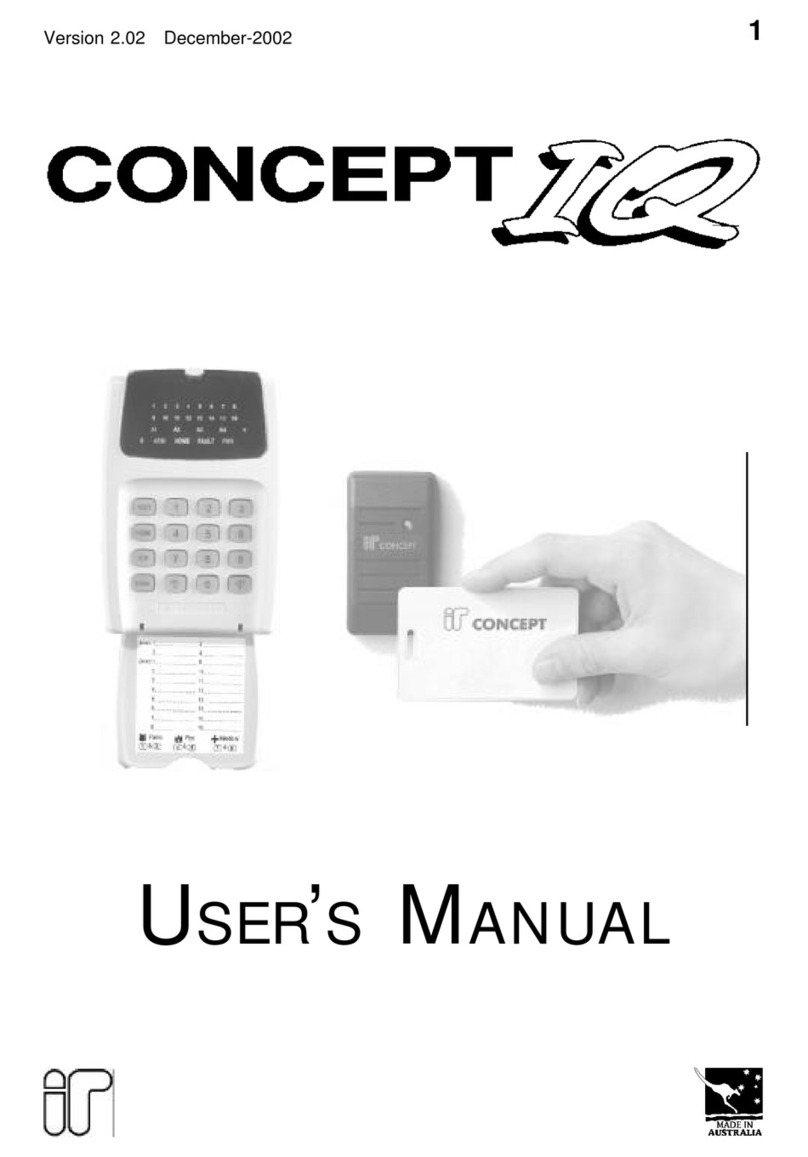
Inner Range CONCEPT IQ User manual

1
Version 1.03 January-2002
USER’SMANUAL

2Version 1.03 January-2002
CUSTOMER: ...............................................................................................................
...............................................................................................................
PHONE: ...........................................FAX: ...........................................
INSTALLED BY: ...............................................................................................................
...............................................................................................................
PHONE: ...........................................FAX: ...........................................
MAINTENANCE & SERVICE: ..........................................................................................
...............................................................................................................
PHONE: ...........................................FAX: ...........................................
MONITORED BY:..............................................................................................................
...............................................................................................................
PHONE: ...........................................FAX: ...........................................
AREAS: 1.......................................................2.................................................
3.......................................................4.................................................
ZONES: 1.......................................................2.................................................
3.......................................................4.................................................
5.......................................................6.................................................
7.......................................................8.................................................
9.......................................................10 ...............................................
11 .....................................................12 ...............................................
13 .....................................................14 ...............................................
15 .....................................................16 ...............................................
System Details

3
Version 1.03 January-2002
System Details ............................................................................. 2
1. Introduction
1.1 System Overview ........................................................................... 4
1.2 Types of Users. Installer, Master & Normal Users. .................... 5
1.3 Default Users ................................................................................. 5
2. The LED Terminal (Operator Terminal)
2.1 Special key functions..................................................................... 6
2.2 Beeper indications. ........................................................................ 6
2.4 Lamp indications. ........................................................................... 7
3. User Operations
3.1 Quick Arming.................................................................................. 8
3.2 Arming / Dis-arming a Single-Area system. ................................. 8
3.3 Arming / Dis-arming Areas in a Multi-Area system...................... 8
3.4 Arming / Dis-arming individual Areas in a Multi-Area system. .... 9
3.5 Isolating (Bypassing) Zones and System Inputs ......................... 9NEXT 10
3.6 Emergency Alarm activation. -Panic, Fire and Medical Alarms..10
3.7 PIN Code Duress alarm activation ............................................... 10
3.7 Acknowledge alarms. .................................................................... 10
4Master Operations
4.0 Accessing the Operational Modes................................................ 11
4.1 Adding / Changing / Deleting Users. ............................................ 12 NEXT 20
4.2 View history. ................................................................................... 14 NEXT 21
4.3 Walk test mode. ............................................................................. 14 NEXT 22
4.4 Setting the Real-Time Clock. ........................................................ 15 NEXT 23
4.5 Auxiliary Control and Test mode................................................... 16 NEXT 24
4.6 Fault Analysis mode. ..................................................................... 16 NEXT 25
4.7 Zone Self Test display. .................................................................. 17 NEXT 26
4.8 Program Telephone numbers. ...................................................... 18 NEXT 27
4.9 View Software Version number. ................................................... 19 NEXT 28
4.10 Acknowledge Door Alarms............................................................ 20 NEXT 29
4.11 De-Isolate System Inputs. ............................................................. 21 NEXT 90
4.12 Test Siren and Strobe (Auxiliary 1)............................................... 21 NEXT 91
4.13 Battery test. .................................................................................... 21 NEXT 92
4.14 Test transmission. (Test report) ................................................... 21 NEXT 93
4.15 Day alarm on / off. ......................................................................... 22 NEXT 94
4.16 Reset Latching Auxiliaries............................................................. 22 NEXT 96
4.17 Answer Phone................................................................................ 22 NEXT 97
4.18 Reset Smoke Detectors. ............................................................... 22 NEXT 99
5Telephone Remote Control ........................................................ 23
6Domestic Dialer Reporting ......................................................... 24
7System Inputs Table.................................................................... 25
Notes .............................................................................................. 26
Contents

4Version 1.03 January-2002
1. Introduction
1.1 SYSTEM OVERVIEW
Your CONCEPT IQ System.
Thank you for purchasing this CONCEPT product.
Your CONCEPT IQ System is part of a product family that has been protecting people and property,
controlling personnel access and automating building functions in an enormous variety of premises
and industrial sites for over 12 years.
In designing the CONCEPT IQ, Inner Range has used it’s extensive experience to produce a very
affordable alarm system that offers a comprehensive suite of operations and functions particularly
suited to domestic and small commercial premises.
In addition to this, the Operator interfaces (The LED Terminal, Remote Key, etc.) and operational
procedures have been designed to be simple to use, without compromising the power and flexibility
of the system.
Basic Operation.
Security monitoring in your system is provided by different types of detectors connected into Zone
Inputs. These are individually programmed to define the requirements for Alarm Processing,
Reporting, Siren activation and Testing, etc.
System Inputs monitor Faults and System Alarms such as Power Problems, Tampering,
Communication Problems, Fuses and Keypad Emergency Alarms (Panic, Fire, Medical & Duress).
The Installer enables the Siren and Reporting options for each System Input required.
Areas. The system can be configured in Single or Multi Area Mode according to the site
requirements. Up to 4 Areas are available and each Area can be Armed in “AWAY” or “HOME”
modes. Zone Inputs are assigned to one or more Areas and become active when an Area that they
area assigned to, is Armed (turned On). Zone Inputs can also be configured as “24 Hour” Zones
that are always active. (e.g. For Fire, Panic & Duress alarms)
The LED Terminals can be configured for Multi-Area mode or assigned to a Single Area.
Access Control operations for up to 4 Doors is also available via the Enhanced LED Terminals.
The Siren has a programmable timer and can generate 4 different siren tones for Burglary, Fire,
Medical & Panic alarms. System Alarms are differentiated from Zone Alarms by a pulsing siren tone.
A Strobe output is provided and additional Auxiliary outputs can be configured to indicate different
types of alarms or system status, provide additional warning of Entry, Exit & Auto-Arm timers,
Automatically turn lighting and other appliances on and off, etc.
System reporting is via “Contact ID” or “Domestic” dialing options with a Secondary telephone
number, Telephone line monitoring and Test reporting for a higher level of system integrity.
Remote Control operations can be performed via a telephone when the optional DTMF Card is
fitted, and the system can also provide automation functions via the 4 TimeZones. These can be
used to turn Auxiliaries On and/or Off and to control Areas. The TimeZones include provision for up
to 10 Holiday dates and automatic Daylight Saving adjustment is also catered for.
5
Version 1.03 January-2002
User 1. The Installer.
User 2. The Master User. Factory Default PIN code = 0123 or 012345. See below.
User 3 - User 47. General Users who can be programmed as Master Users.
User 48. Reserved for system functions (e.g. Reporting Auto-arming etc.)
The Default Master PIN Code is 0123 if the system is programmed for 4 Digit PIN Codes, or 012345
if the system is programmed for 6 Digit PIN Codes.
This Code should be changed as soon as possible. Ensure that a new Master PIN code is chosen
that is secure, but will not be forgotten.
1.2 TYPES OF USERS
1.3 DEFAULT USERS:
The system has 2 special Users and 45 normal Users. The system can be configured for 4 digit or 6
digit PIN codes depending on the requirements of the site. The normal Users can each be assigned
a “User Type” and their “User Areas” to define the items that they can control and the operations that
they can perform.
Installer - User 1:
The Installer can perform all Installer operations, and all Master operations except for User
programming. The Installer can only change their own PIN code.
Master User - User 2:
The Master User can perform all the Master operations and has access to all Areas.
The Master operations include; Edit Users, View history, Walk test Zones, Set Real-time clock,
Siren/Strobe/Auxiliary Testing, Fault Analysis, View Software Version, Test Battery and Door Bell
Enable/Disable.
The Master User can also perform all User operations. (This includes Arming / Dis-arming the
system, Isolating zones and Acknowledging alarms.)
The Master User automatically has permission to control all the Areas, Zones and Auxiliary outputs
in the system. These permissions cannot be changed for User 2.
Any normal User can also be programmed as a Master User if required. In a multi-area system, a
normal User programmed as a Master User can only add a new User or edit existing Users who can
access a subset of their own Area list.
Normal Users - User 3 to User 47:
Normal Users can perform a variety of operations such as Arming / Dis-arming , Isolating zones and
Acknowledging alarms with various levels of functionality as defined by the User’s “User Type”.
DURESS Codes:
Each User in the system has their own unique “Duress” PIN Code. Your Duress PIN Code is the
same as your normal PIN Code except that the value of the last digit is increased by 1.
Only the last digit is changed, all other digits of the PIN Code remain the same as the normal PIN.
e.g. If PIN is 3456: 3457 is the Duress Code. If PIN is 3459: 3450 is Duress code.
If PIN is 123456: 123457 is the Duress Code.

6Version 1.03 January-2002
2. The LED Terminal
2 or 3 Short Beeps: A User, Master or Installer function was successful.
1 Long Beep: A User, Master or Installer function has been unsuccessful.
Continuous Short Beeps*:Entry Delay Timer, Exit Delay Timer or Auto-arm Warning.
*NOTE:
Single Area systems. All Terminals in the system will beep in response to Exit delay, Entry delay or
Auto-arm warnings.
Multi-Area systems. Only Terminals associated with a particular Area will beep in response to that
Area’s warning functions. IMPORTANT NOTE: Terminals not associated with an Area will only beep
on Area 1 warning functions.
2.2 BEEPER INDICATIONS.
PANIC. Keys 1 & 3 pressed simultaneously.
FIRE. Keys 4 & 6 pressed simultaneously.
MEDICAL. Keys 7 & 9 pressed simultaneously.
REX. (Request to Exit) <OFF> Key.
(Enhanced Terminals only)
AUTO-LOGOFF: The Terminal will automatically
logoff the operator if there is no keypad activity
detected for 30 seconds.
2.1 SPECIAL KEY FUNCTIONS
CLR -Set the data in the current Address to the
Factory Default.
-Clear the data already entered if you have
made a mistake.
-Logoff the Terminal. (Exit the current Mode
of operation)
ENTER -Selects the specified programming Address.
(After PIN Code and the Address number
have been entered)
-Saves the data entered in a programming
Address.
NEXT -Select a Master User operation. (Enter PIN code, press <NEXT> then the Mode number.
HOME -Used to Arm the system, or an individual Area, in Home Mode.
Master User:
-Used to step through programming Addresses (Users or Telephone numbers)
-Used to toggle between Zone Test modes.

7
Version 1.03 January-2002
2.3 LAMP INDICATIONS.
Lamp ON OFF FLASHING
ZONE Lamps
1 to 16 When the Zone
is Un-sealed.
(If the "Zone
activity" option
enabled)
When the Zone
is Sealed. FAST: *
When there has been an
Alarm / Tamper on the Zone.
SLOW: *
When the Zone has been Isolated.
AREA Lamps
A1, A2, A3, A4 Area is Armed.
(Multi-Area mode
only)
Area is Dis-armed. There has been an Alarm in the
Area.
(Multi-Area mode only)
ARM Area/s are armed
in normal mode. System not armed
in normal mode. -
HOME Area/s are armed
in home mode. System not armed
in home mode. -
FAULT ^ A system input is
currently in alarm. No system inputs
are in alarm. FAST: *
A system input has been in alarm
and must be acknowledged.
SLOW: *
When a System Input has been
Isolated.
PWR AC mains OK AC mains problem. -
ARM & HOME --System is in "Isolate" mode.
(NEXT, 10)
FAULT & PWR - - System is in "Master Operations"
mode. i.e. NEXT functions.
0Used to display values in programming mode.
NOTES: ^ See "Fault Analysis Lamps" in Chapter 4.6 or the "System Inputs Table".
* Alarm indication takes priority over Isolate indication.

8Version 1.03 January-2002
3. User Operations
SINGLE AREA SYSTEM: Enter Area number; , to Arm the system.
Enter Area number; , to Arm the system in Home Mode.
MULTI-AREA SYSTEM: Enter Area number; , to Arm the system.
Enter Area number; , to Arm the system in Home Mode.
NOTE: If the Terminal is in Single Area Mode, only the Associated Area can be Armed.
Arming with PIN code (If enabled in your system)
Enter PIN; ... , to Arm the system.
Enter PIN; ... , to Arm the system in Home Mode.
Disarming the system
Enter PIN; ... , to Dis-arm the system.
Each LED keypad can be configured for Single-Area Mode or Multi-Area Mode.
The Lamps A1, A2, A3 & A4 show when each Area is Armed.
Arming the system.
Enter PIN; ... ,
Enter PIN; ... , ,
Dis-arming the system.
Enter PIN; ... ,
Enter PIN; ... , ,
3.2 ARMING / DISARMING A SINGLE-AREA SYSTEM.
3.3 ARMING / DIS-ARMING AREAS IN A MULTI-AREA SYSTEM.
3.1 QUICK ARMING. (If enabled in your system)
Single Area Mode Multi-Area Mode
Arms Area assigned Arms all Areas in the
to the Terminal. User’s Area List.
Arms all Areas in the -
User’s Area List.
Dis-arms Area assigned Dis-arms all Areas in
to the Terminal. the User’s Area List.
Arms all Areas in the -
User’s Area List.

9
Version 1.03 January-2002
3.4 ARMING / DIS-ARMING INDIVIDUAL AREAS IN A MULTI-AREA SYSTEM.
3.5 ISOLATING (BYPASSING) ZONE INPUTS AND SYSTEM INPUTS NEXT 10
The LED keypad allows the User to Arm and Dis-arm individual Areas in a Multi-Area system.
The Lamps A1 A2 A3 A4 show when each area is armed.
The procedure for Arming an individual Area is the same for Multi-Area and Single-Area mode.
The Area selected must be in the User’s Area list.
Arming the system.
Enter PIN; ... , Area number , then
Dis-arming the system.
Enter PIN; ... , Area number , then
Enter the Isolate Zone mode. (NEXT 10)
Enter PIN; ... , then , ,
The <ARM> and <HOME> Lamps will flash together.
Isolate / De-Isolate Zone Inputs or System Inputs.
Enter the Zone Input or System Input number; ... (One to Three digits), then .
System Input numbers are listed in the “TABLES” section at the rear of this manual.
When a Zone Input is Isolated, the <Zone Lamp> will flash slowly.
When any System Input is Isolated the <FAULT> Lamp will flash slowly.
To Isolate or De-Isolate more Inputs, simply repeat this step for each Input.
An Isolated Zone Input is De-Isolated by following the same procedure.
When the Input is De-isolated, the Zone Lamp slow flashing will stop.
Isolated System Inputs can only be De-Isolated by the Installer or a Master User Code. (NEXT 90)
Exit the Isolate Zone mode.
Press
ARM / DISARM

10 Version 1.03 January-2002
Depending on the configuration of the Emergency Alarm options, each different Emergency alarm
can activate the Siren and/or the Dialer communications.
Consult with the Installer to detemine how each Emergency Alarm will operate.
The Emergency Alarms are activated by pressing two specific keys on the Terminal keypad
simultaneously.
PANIC and keys pressed at the same time.
FIRE and keys pressed at the same time.
MEDICAL and keys pressed at the same time.
If enabled in your system, this function allows the User to activate the PIN Code Duress alarm while
performing any normal LED Terminal operations.
When activated, the system sends a silent Duress report to the Central Monitoring Station. No local
indication is provided. See additional notes on Page 5.
To activate the PIN Code Duress alarm.
Simply enter your PIN code at an LED Terminal in the normal manner, but increase the last digit of
your PIN by a value of 1. NOTE: If the last digit is a 9, then it becomes 0.
e.g. If your PIN code is 3456 then enter 3457. If your PIN code is 3579, enter 3570.
Note the details of any alarms.
When an alarm has occurred, the details of the alarm are displayed on the LED Terminal:
- The Zone Lamps will flash fast to indicate the Zone (or Zones) that are in alarm.
- The Area Lamps will flash to indicate the Area (or Areas) in which the alarm has ocurred.
Dis-Arm the System.
Follow the normal procedure for Dis-Arming the System.
NOTE: In a Multi-Area System, the Area in which the Alarm has occurred must be Dis-Armed.
Acknowledge the Alarms.
Enter PIN; ... ,
Performing this operation when the System is Dis-Armed will acknowledge the alarms.
i.e. Clear the alarms from the display.
3.6 EMERGENCY ALARM ACTIVATION. -PANIC, FIRE AND MEDICAL ALARMS.
3.7 PIN CODE DURESS ALARM ACTIVATION.
3.8 ACKNOWLEDGE ALARMS

11
Version 1.03 January-2002
Master User Operations
4.0 ACCESSING THE OPERATIONAL MODES.
The Default Master Code is 0123. (Or 012345 is system is configured for 6 Digit PIN codes)
This Code should be changed as soon as possible after installation.
When choosing a new Master Code, ensure that a PIN code is chosen that will not be forgotten,
while still providing security against unauthorised access.
Master User Operations require the User to Access a number of different Operational Modes.
This is done by entering a valid Master PIN code, then pressing the <NEXT> key before selecting
the 2-digit Mode number. e.g.
Enter PIN; ... , then , then the Mode number; ,
This key sequence must be used to access all Operational Modes described in this section.
The descriptions of each operation will only show the key sequence <NEXT>, n, n. when showing
how to access the Operational mode required. Remember that this is preceded by the PIN code.
Master Operations Mode Indication.
The <FAULT> and <PWR> Lamps will flash together to indicate that the system is in Master User
Operational Modes.
Exiting the Master User Operations.
Press to exit any of the Master Operations.
4.1 Adding / Changing / Deleting Users. ......................................................................NEXT 20
4.2 View history. ..............................................................................................................NEXT 21
4.3 Walk test mode.........................................................................................................NEXT 22
4.4 Setting the Real-Time Clock. ..................................................................................NEXT 23
4.5 Auxiliary Control and Test mode.............................................................................NEXT 24
4.6 Fault Analysis mode. ...............................................................................................NEXT 25
4.7 Zone Self Test display. .............................................................................................NEXT 26
4.8 Edit Telephone numbers..........................................................................................NEXT 27
4.9 View Sofware Version number. ...............................................................................NEXT 28
4.10 Acknowledge Door Alarms. .....................................................................................NEXT 29
4.11 De-Isolate System Inputs. .......................................................................................NEXT 90
4.12 Test Siren speaker and Strobe (Aux. 1). ...............................................................NEXT 91
4.13 Battery Test. ..............................................................................................................NEXT 92
4.14 Test Transmission. (Test report) ............................................................................NEXT 93
4.15 Day Alarm on / off.....................................................................................................NEXT 94
4.16 Reset Latching Auxiliaries. ......................................................................................NEXT 96
4.17 Answer Phone ..........................................................................................................NEXT 97
4.18 Reset Smoke Detectors...........................................................................................NEXT 99

12 Version 1.03 January-2002
1. Enter the User Editing Mode.
Press , , .
2. Enter the User number to be changed.
Press , then the User number (User 2 to User 47), then
The User number will be displayed on the Terminal via the Zone Lamps.
NOTE: If the User number is greater than 16, the first digit will be displayed via a flashing Zone
Lamp. If you need to check the User number, press to view the second digit.
3. Enrol the User’s Access Card. (If required)
Present the Card at any Access Reader in the system within 30 seconds of selecting the User
number.
Three short beeps will sound to confirm that the Card has been enrolled and assigned to the
selected User.
If the Card is already assigned to another User, or is not recognised by the system, one long beep
will sound to indicate a problem.
4. Enter the new PIN Code.
Press , then the new PIN number ... (4 or 6 digits), then
Three short beeps will sound to confirm the PIN number has been programmed.
If the PIN is rejected, one long beep will sound to indicate a problem.
5. Assign the User Type.
Press
Press , then the new User Type number , then
USER TYPE: 0Arm only Can only Arm the system.
1Arm/Dis-arm Can Arm and Dis-arm the system.
2Arm/Dis-arm/Isolate Can Arm/Dis-arm the system and Isolate Zones.
3Master Can perform all operations above & Master User Operations.
2 beeps will sound to confirm the new User Type has been programmed.
4.1 ADDING / CHANGING / DELETING USERS. NEXT 20
ADDING OR CHANGING A USER

13
Version 1.03 January-2002
6. Assign the User Area or Areas. (Only required if you have a Multi-Area System)
Press (A long beep will sound if the System is not in Multi-Area mode)
Then for each Area that is to be assigned to this User,
Press , then an Area option number , then
OPTION: 0All Areas De-selected.
1General Area (Single Area Mode) or Area 1 (Multi-Area Mode) selected.
2Area 2 selected
3Area 3 selected
4Area 4 selected
When access control is provided, Area assignment also detemines which Doors a User may access.
Access is only granted at Door/s associated with the User’s Area/s.
2 beeps will sound to confirm the new Area Option has been selected.
e.g. If Area 1 and Area 3 are to be assigned to the User;
Press <*>, 1, <ENTER>; <*>, 3, <ENTER>.
To change another user simply repeat steps 2 to 7.
1. Enter the User Editing Mode.
Press , , .
2. Enter the User number to be changed.
Press , then the User number (User 2 to User 47), then
The User number will be displayed on the Terminal.
3. Delete the User.
Press , then to delete the PIN code and/or Card data for this User number..
DELETING A USER
ADD / DELETE USERS

14 Version 1.03 January-2002
1. Enter the View History Mode.
Press , , .
The most recent event will be displayed first. Up to 128 Events are stored in the History.
2. View the other Events.
Press to view the Next Event.
Press to view the Previous Event.
If the are no further events to be displayed, one long beep will sound.
History Event Types.
Arm <ARM> Lamp.
Armed in Home Mode <HOME> Lamp.
Dis-arm <ARM> and <0> Lamp.
Zone Input in alarm <Zone 1> to <Zone 16> Lamp.
System Inputs in alarm <0> Lamp.
4.2 VIEW HISTORY. NEXT 21
1. Enter the Zone Alarm Test Mode.
Press , , .
In Alarm Test Mode, any Zone Input in the Terminal’s Associated Area that goes into the Alarm (or
Un-sealed) state will cause:
- The corresponding Zone Lamp to fast flash.
- The Siren to sound for 3 seconds.
- The Terminal beeper to emit a short beep.
2. Select Zone Tamper Test.
Press to switch between Alarm Test Mode and Tamper Test Mode.
In Tamper Test Mode, any Zone Input in the Terminal’s Associated Area that goes into the Tamper
state will cause:
- The corresponding Zone Lamp to slow flash.
- The Siren to sound for 3 seconds.
- The Terminal beeper to emit a short beep.
NOTES: While in the Zone Test Mode, the <HOME> key can be used to toggle between the Alarm
Test Mode and the Tamper Test Mode at any time.
4.3 ZONE TEST. NEXT 22

15
Version 1.03 January-2002
1. Enter the Real-Time Clock Programming Mode.
Press , , .
2. Enter the current Time and Date.
Press , then the Time & Date data: ... (11 digits), then
The date and time are stored in the following order: mm:hh ; DD:MM:YY ; d
i.e. Minute, Minute; Hour, Hour; Day, Day; Month, Month; Year, Year; Day Of Week:
4.4 SET THE REAL-TIME CLOCK. NEXT 23
e.g.
TIME & DATE: DATA STRING:
1) 07:24 AM, Monday, June 5, 2001 2,4,0,7,0,5,0,6,0,1,2, <ENTER>
2) 05:15 PM, Thursday, September 20, 2001 1,5,1,7,2,0,0,9,0,1,5, <ENTER>
3. View the current Time and Date.
After entering the Real Time Clock Programming Mode, the first digit (Tens of seconds) of the Time
and Date Data will be displayed on the Terminal Zone Lamps.
Press the key to step through the 13 digits in the Time and Date Data.
e.g. Using the Time and Date in Example 1 above, the following data will be displayed:
<NEXT> 23 1st digit of “Seconds” will be displayed.
<NEXT> 2nd digit of “Seconds” will be displayed.
<NEXT> 2 will be displayed. (minute)
<NEXT> 4 will be displayed. (minute)
<NEXT> 0 will be displayed. (hour)
<NEXT> 7 will be displayed. (hour)
etc.
When the end of the data is reached, a long beep will sound to indicate there are no more
characters to display, and the first digit will again be displayed.
IMPORTANT NOTE: In the event that power is completely removed from the Control Module (i.e.
Both the AC input and the Battery are disconnected), when power is restored, the Real-Time Clock
will need to be re-programmed to the current Time and Date
TIME & DATE
Minute (00 - 59)
Hour (00 - 23)
Day (01 - 31)
Month (01 - 12)
Year (00 - 99)
DAY OF THE WEEK
Sunday 1
Monday 2
Tuesday 3
Wednesday 4
Thursday 5
Friday 6
Saturday 7

16 Version 1.03 January-2002
1. Enter the Fault Analysis Mode.
If the <FAULT> Lamp is ON, Press , , .
The Zone Lamps on the Terminal are used to display the Faults and Alarms. See following table.
2. Note the details of any System Inputs currently still in Alarm.
System Inputs that are currently in Alarm will be indicated by Fast flashing on the relevant Zone
Lamp. These Alarms cannot be acknowledged until the problem is rectified.
3. Acknowledge any previous Faults and Alarms.
Press . System Inputs that have been in Alarm but subsequently restored since the last
Acknowledgement will be indicated by Slow flashing on the relevant Zone Lamp.
Note the datails of the Alarm/s displayed.
Press to Acknowledge and Clear any of the Faults or Alarms that are not currently in Alarm.
This will also cancel the Siren if activated.
When a Fault or Alarm has been Acknowledged, the corresponding Zone Lamp will be turned OFF.
If all System Inputs have been Acknowledged the <FAULT> Lamp will be turned OFF.
IMPORTANT NOTES:
1) Press to toggle between the “Current Alarms” & “Previous Alarms” displays.
2) Zone self test (Lamp 10) can only be cleared from “Zone Self Test Display” Mode (NEXT 26).
3) Door Alarm (Lamp 15) can only be cleared from “Acknowledge Door Alarms” Mode (NEXT 29).
1. Enter the Auxiliary Control and Test Mode.
Press , , .
2. Change the State of an Auxiliary Output.
Enter the Auxiliary Output number (1 or 2 digits);
then Press: to turn the Auxiliary ON.
OR to turn the Auxiliary OFF..
If necessary (e.g. When testing the Auxiliary), remember to return the Auxiliary to it’s original state
before exiting Auxiliary Control and Test Mode.
4.5 AUXILIARY CONTROL AND TEST MODE. NEXT 24
4.6 FAULT ANALYSIS MODE. NEXT 25

17
Version 1.03 January-2002
1. Enter the Zone Self Test Display Mode.
If a Zone Input fails the Zone Self Test, the <FAULT> Lamp will be displayed on the Terminal.
“Fault Analysis Mode” (NEXT 25) will also display the “Zone Self Test fail” Lamp (Zone 10).
To view the Zone or Zones that have failed the Zone Self Test, Press , , .
2. Note the details of any Zones that have failed the Zone Self Test.
The Zone 1 to Zone 16 Lamps will indicate any Zones that have failed the Zone Self Test so that
appropriate action may be taken. e.g. A detector fault may need to be rectified by the Installer.
3. Acknowledge the Zone Self Test fault.
Press to acknowledge any Zone Self Test faults.
When a Zone Self Test fault has been acknowledged, the corresponding Zone Lamp will turn OFF,
and the “Zone Self Test fail” Lamp <Zone 10> in “Fault Analysis Mode” will also be cleared.
If all System Inputs have been acknowledged the <FAULT> Lamp will be turned OFF.
4.7 ZONE SELF TEST DISPLAY. NEXT 26
LAMP
1AC Fail.
2Low battery.
3Cabinet Tamper.
4Siren monitor.
5PWR fuse.
6Battery fuse.
7Comms fail.
8System reset.
9Keypad lockout.
10 Zone self test.
11 Keypad Medical Alarm.
12 Keypad Panic Alarm.
13 Keypad Duress Alarm.
14 Keypad Fire Alarm.
15 Door Alarm.
16 Program Change.
FAULT ANALYSIS LAMPS
FAULT ANALYSIS

18 Version 1.03 January-2002
1. Enter the Telephone number programming Mode.
Press , , .
2. Program the new Primary Telephone number.
Press , then the Telephone number ... (Up to 15 digits), then
The digits are entered according to the following table.
Telephone number digit to program: 0 to 9 # * Pause (1 Second)
Key to Press on keypad: 0 to 9 # * <NEXT>
Value displayed on Zone Lamps: 0 to 9 10 11 12
e.g. Telephone number: 1 Pause 1234 5678 is entered by the key sequence:
<*>, 1, <NEXT>, 1, 2, 3, 4, 5, 6, 7, 8, <ENTER>
If a mistake is made while keying in the Telephone number digits, press to clear all the digits
entered and start keying in the number again.
3 beeps will sound to confirm the new Telephone number has been programmed.
If the Telephone number was rejected, one long beep will sound to indicate a problem.
3. View the Telephone number.
After entering the Telephone number Programming Mode, Press
The first digit of the Telephone number will be displayed on the Terminal Zone Lamps.
Press the key to step through all the digits in the Time and Date Data.
e.g. Using the Telephone number example “1 Pause 1234 5678”, the following data will be
displayed:
<ENTER> 1 will be displayed.
<NEXT> 12 will be displayed.
<NEXT> 1 will be displayed.
<NEXT> 2 will be displayed.
etc.
When the end of the Telephone number is reached, 3 short beeps will sound to indicate there are no
more digits to display, and the first digit (1 in this example) will again be displayed.
4. Program a new Secondary Telephone number. (Optional)
Press and wait for the Terminal to sound a short beep.
Press , then the Telephone number ... (Up to 15 digits), then
4.8 PROGRAM THE TELEPHONE NUMBERS. NEXT 27

19
Version 1.03 January-2002
1. Enter the View Software Version number Mode.
To view the current Software Version number on the Terminal, press , , .
The 1st digit of the 4-digit Version number is displayed by the corresponding Zone Lamp flashing.
2. View the Software Version number.
To display each of the remaining digits of the Version number press the key..
When the last digit is displayed, and the <NEXT> key is pressed, a long beep will sound and the first
digit will again be displayed.
e.g. If the version number is V 1.0.0.3
<NEXT>, 2, 8. Zone 1 will be flashing
<NEXT> 0 will be flashing
<NEXT> Zone 3 will be flashing
<NEXT> Long beep will sound and Zone 1 will be flashing again.
4.9 VIEW THE SOFTWARE VERSION NUMBER. NEXT 28
The digits are entered in the same manner as described for the Primary Telephone number.
If a mistake is made while keying in the Telephone number digits, press to clear all the digits
entered and start keying in the number again.
3 beeps will sound to confirm the new Telephone number has been programmed.
If the Telephone number was rejected, one long beep will sound to indicate a problem.
While in the Secondary Telephone number programming Mode, the number can be viewed as
described in Step 3.
5. Program a new Callback Telephone number. (Optional)
Press and wait for the Terminal to sound a short beep.
The Callback Telephone number is Programmed and Viewed as described for the Primary and
Secondary Telephone numbers.
After the Callback number has been Entered and/or Viewed, pressing again will return to
Primary Telephone number programming if required.
Otherwise, press to exit Telephone number programming.
A long beep will sound indicating that there are no more phone numbers to program.

20 Version 1.03 January-2002
1. Enter “Acknowledge Door Alarm” Mode.
If Zone Lamp 15 on the Terminal indicates a Door Alarm when in “Fault Analysis Mode” (NEXT 25),
one or more Door Alarms need to be acknowledged.
Press , , .
2. Acknowledge any Door Alarms.
Door Alarms will be indicated by the relevant Zone Lamp 1 to 4.
Note the datails of the Alarm/s displayed.
Press to Acknowledge any Door Alarms.
When a Door Alarm has been Acknowledged, the corresponding Zone Lamp will be turned OFF.
If all System Inputs have been Acknowledged the <FAULT> Lamp will be turned OFF.
4.10 ACKNOWLEDGE DOOR ALARMS. NEXT 29
Other manuals for CONCEPT IQ
2
Table of contents
Other Inner Range Security System manuals

Inner Range
Inner Range IQ plus Operating and maintenance manual

Inner Range
Inner Range CONCEPT IQ User manual

Inner Range
Inner Range 4000 User manual

Inner Range
Inner Range Concept 2000 User manual

Inner Range
Inner Range Integriti Prisma Keypad User manual

Inner Range
Inner Range CONCEPT IQ. PLUS Operating and maintenance manual

Inner Range
Inner Range 3000 User manual