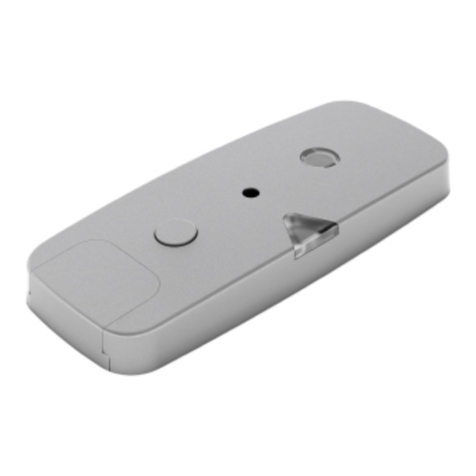
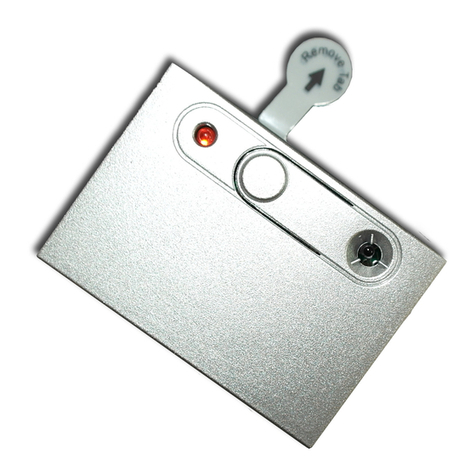
Innohome Stove Alarm SA101 User manual

1
2
IMAGES BILDER BILLEDER

SA101

SA101

3
12
4
5
IMAGES BILDER BILLEDER

GB Stove Alarm SA101 User Manual 1-16
DE Herd Alarm SA101 Gebrauchsanlei-
tung 17-36
DA Komfuralarm SA101 Brugsvejled-
ning 37-56

Congratulations!
You now own one of the most intelligent
cooker safety products in the world.
Before using this product, please read the information in ‘safety
instructions’ first, then familiarize yourself with the information
provided in the user manual. Always observe all safety instructions.
For any questions or uncertainties about using the product, ask a
specialist or obtain information online from www.innohome.com.
The user manual is an integral part of the product and contains
important information about use, installation and handling. After
reading, store the manual in a safe place, and if passing the product
to third parties, make sure to include the manual.

CONTENTS
FOR ALL IMAGES PLEASE REFER TO THE FRONT AND BACK COVER
smart safety for your kitchen
USE 1-5
1. Innohome Stove Alarm 1
2. Stove Alarm use 2-3
2.1. Meaning of alarm signals 4
3. Monthly Maintenance 5
INSTALLATION 5-8
4. Installing the Stove Alarm 5-8
SETTINGS 9-12
5. Hob type setting 9-10
6. Sensitivity level 10-12
ADDITIONAL INFORMATION 12-16
7. Battery replacement 12-13
8. Troubleshooting 13-15
9. Technical Information 15
10. Warranty 16
11. EU Declaration of Conformity 16

STOVE ALARM SA101 USER MANUAL
This product is for indoor use only.
This product is not suitable for professional kitchens.
Avoid having the Stove Alarm closer than 10 cm (4’’) distance to the
ear while signalling an alarm, due to risk of damage to hearing.
Do not leave small children unsupervised with the product, its parts
or packaging, due to risk of fatal injury from choking.
Do not disassemble.
Do not damage any gas, electricity, water or telecommunication
lines during drilling and xing work.
When Stove Alarm signal has been reset manually, the alarm cannot
be triggered by the rate of temperature rate of change for 30 minutes.
The Stove Alarm’s alarm is not triggered if the hob’s temperature is
too low for a hazardous situation to be identied, or if the cooker auto-
matically limits a temperature increase.
When disposing of batteries, cover the battery contacts, due to risk
of explosion.
Do not short-circuit or charge batteries, due to risk of injury from
explosion.
Do not attempt to open or burn batteries due to risk of explosion.
If the batteries are leaking avoid skin and body contact by using
suitable protective gloves and clothing, due to risk of injury from corro-
sive acid.
Batteries
Safety instructions

1
STOVE ALARM SA101 USER MANUAL
Package contents
Stove Alarm including bat-
teries
Magnetic plate
User Manual
Sticker
Description – see image 1
in the front cover
1 push-button for resetting
the alarm signal
2 operation indication
3 battery protection strip
4 magnetic plate
5 temperature sensor
USE
The Stove Alarm reacts to a dangerously high temperature or
steep temperature rise. The rate of temperature increase alarm
is based on the steep temperature rise that happens when the
cooking vessel’s liquid has dried out. Reacting to the tempera-
ture rise allows for an early detection and prevention of re risk
situations.
The Stove Alarm adjusts its sensitivity based on the user(s)’s
cooking style. The sensitivity can also be individually adjusted,
however in most cases this is not necessary. The Stove Alarm is
suitable for electric and gas hobs.
The Stove Alarm does not necessarily cover all possible
hazardous situations, but signicantly improves the safety
of the cooker.
1. Innohome Stove Alarm

2
STOVE ALARM SA101 USER MANUAL
2. Stove Alarm use
The stove alarm rst emits a one-minute long pre-alarm signal
( ), followed by a main alarm signal ( )
which lasts for up to 5 minutes.
alarm
7

3
STOVE ALARM SA101 USER MANUAL
If the Stove Alarm signals during normal cooking, press
the push-button during the first minute pre-alarm signal
(). This tells the Stove Alarm to adjust its sensitivity (see
adjustment period below).
Note do not reset the pre-alarm signal unless the Stove Alarm sig-
nals in a normal cooking situation.
If the Stove Alarm ( ) signals, turn the hob o.
The alarm signal stops when the temperature starts to fall. You
can also stop the alarm signal by pressing the push-button
once.
Signalling during normal cooking – adjustment period
When the Stove Alarm is newly installed, it will first go
through an adjustment period, during which it learns the
user(s)’s way of cooking and the installation environment,
adjusting its sensitivity accordingly. During this time, some
false alarms may be triggered, until the Stove Alarm’s indi-
vidual settings are ready.
The Stove Alarm may interpret placing a hot oven tray on
the cooker or removing a pot from a hot hotplate as a haz-
ardous situation and signal a short alarm.

4
STOVE ALARM SA101 USER MANUAL
Sound Meaning Course of Action
A short beep
every few
seconds
(pre-alarm)
The Stove Alarm
has detected a high
temperature or a steep
temperature rise on
the cooker surface. This
is a pre-alarm signal
that starts one minute
before the actual alarm.
If the alarm was triggered
by a normal cooking
situation, reset the pre-
alarm signal by pushing
the push-button once.
This tells the Stove Alarm
to adjust its sensitivity. If
the alarm was triggered
by a hazardous situation
wait until the alarm signal
starts before resetting the
alarm.
Repetitive fast
beep, beep,
beep (actual
alarm)
The Stove Alarm
has detected a high
temperature or a fast
temperature rise on the
cooker surface (alarm
signal).
First turn the hob o,
then reset the alarm
signal by pushing the
push-button once.
A beep once a
minute (battery
warning)
The Stove Alarm has a
low battery.
Replace the battery, see
section 7. The battery
alarm can be delayed for
12 hours by pushing the
Stove Alarm push-button
once.
2.1 Meaning of alarm signals

5
STOVE ALARM SA101 USER MANUAL
Test the functionality of the Stove Alarm at least once a month
by pressing the Stove Alarm push-button until you hear a sig-
nal.
Clean the Stove Alarm by wiping it with a cloth dampened with
a mixture of household detergent and water. Only use a cloth
that does not leave bres.
Do not immerse the device in water.
Electric hob
(for gas hob go to page 7)
1. Remove the protective plastic strip (3, see image 1 in the
front cover), the Stove Alarm emits a beep. Press the Stove
Alarm push-button once.
2. Attach the Stove Alarm underneath the cooker hood or on
the wall (see instructions for wall installation at the end of
this section). When nished, do a test alarm by pressing the
Stove Alarm push-button until the Alarm emits a beep. Reset
the test alarm by pressing the push-button once.
4. Installing the Stove Alarm
INSTALLATION
3. Monthly Maintenance

6
STOVE ALARM SA101 USER MANUAL
Cooker hood installation
Install the Stove Alarm as close to the central point of the cook-
er as possible but 10 cm (4’’) from the cooker hood lights – 5
cm (2’’) for LED lights. The Stove Alarm must be installed on
a level surface so that it is pointing directly downwards, it
can be attached on the grease lter grid. See image above for
preferable installation locations – area marked with number 1
is the preferred location, area marked with number 2 is the sec-
ond option. The Alarm cannot be installed in areas marked with
‘ X ’.

7
STOVE ALARM SA101 USER MANUAL
Clean the surface of dirt and grease using a detergent, and
dry it well. Place the Alarm under the hood using its own mag-
nets or use the magnetic plate included. Peel o the magnetic
plate’s red protective foil, then attach the plate pressing around
the plate with rm presses.
Note - If the cooker hood is higher than 65 cm (25.5’’) above
the cooker, set the Stove Alarm sensitivity level manually
(see section 6).
Gas hob
1. Press the Stove Alarm push-button and hold it down. Whilst
holding the push-button, remove the battery protection
strip (3, see image 1 in the front cover). The Stove Alarm
emits two beeps signifying that the Stove Alarm has been
set to gas setting. Release the push-button.
If the Stove Alarm only emits one beep the gas setting was not
implemented successfully. In this case go to ‘Hob type setting’,
section 5.
2. Attach the Stove Alarm on the wall. When nished, do a test
alarm by pressing the Stove Alarm push-button until the
Alarm emits a beep. Reset the test alarm by pressing the
push-button once.

8
STOVE ALARM SA101 USER MANUAL
Wall installation
The Stove Alarm should be installed in as central a position as
possible, at 40 cm (16’’) height. The Alarm can be attached using
screws (see instructions below) or the included magnetic plate.
If using the magnetic plate, clean the surface of dirt and grease
using a detergent, and dry it well. Then peel o the magnetic
plate’s red protective foil, then attach the plate pressing around
it with rm presses.
Note if attaching on the wall when using with an electric
hob, set the sensitivity level manually to‘1’(see section 6).
Installing the Stove Alarm with screws (see images 1-5 in
the back cover)
1. Undo the screw on the bottom of the alarm.
2. Detach the back cover.
3. Remove the magnets by pushing them out.
4. Mark the holes with a pencil.
5. Partially screw the screws on the wall to marked spots, leav-
ing them a little bit raised. Slide the Stove Alarm into place.

9
STOVE ALARM SA101 USER MANUAL
5. Hob type setting
SETTINGS
Changing the hob type setting
The following operation changes the Stove Alarm’s hob type
setting from electric hob setting to gas hob setting, or the other
way round.
This may be required if the gas setting was not successfully im-
plemented when rst initializing the Stove Alarm, or if you later
change your cooker to a dierent type.
1. Push the Stove Alarm push-button and hold it down. Whilst
holding the push-button, use a screwdriver to briey press
the setup button at the bottom of the‘L-shaped’ hole on the
bottom surface of the Stove Alarm (see image 2 in the front
cover). Keep holding the push-button.
2. Release the push-button immediately after the Stove Alarm
emits a beep. If the Stove Alarm emits another beep after,
it has been changed gas hob setting (if not, it has been
changed to electric hob setting).
Checking the hob type setting
Use a screwdriver to briey press the setup button at the bot-
tom of the ‘L-shaped ‘ hole on the bottom surface of the Stove
Alarm (see image 2 in the front cover).

10
STOVE ALARM SA101 USER MANUAL
The Stove Alarm emits one or two beeps depending on its set-
ting. One beep signies electric hob setting, two beeps signies
gas hob setting.
Manual setting of the Stove Alarm sensitivity level
The sensitivity level needs to be set manually if the Stove Alarm
is installed
- underneath a cooker hood that is higher than 65 cm (25.5’’)
above the cooker top -> see table below
- on the wall when using with electric hotplates -> set the sensi-
tivity to level 1
The grey area indicated in the table shows where, in normal
use, no manual setting of the sensitivity level is required. The
level is indicated by the numbers 1 to 15, where 1 represents
the most sensitive level, and 15, the least sensitive. The factory
setting is 3.
1. Use a screwdriver to once push the setup button which is
located in the ‘L-shaped’ hole on the bottom surface of the
Stove Alarm (see image 2 in the front cover). Release the set-
up button (the Stove Alarm emits a beep).
cm
inch
level
120 90 80 70 60 50 40 - - 30
47 35 32 28 24 20 16 - - 11
1 2 3 4 5 6 8 - - 15
6. Sensitivity level

11
STOVE ALARM SA101 USER MANUAL
Checking the sensitivity level
To check which sensitivity level has the Stove Alarm been set to,
carry out the procedure below.
1. Press the Stove Alarm push-button for about ve seconds,
until you hear a beep.
2. Press the push-button again, until you hear a beep.
3. The Stove Alarm will now emit as many beeps as is the sen-
sitivity level it has been set to, and a signal X that gives infor-
Beeps (given in two lots) Sensitivity level
2 + 2 2
3 + 3 3
4 + 4 4
... ...
15 + 15 15
2. Press the Stove Alarm push-button for about 5 seconds, until
you hear a beep.
3. Release the push-button and press again straight after, hold-
ing until the Stove Alarm emits a beep.
4. Now press the push-button as many times as the level (1-16)
you wish to set it to, with short presses. Wait for the light to
go o between each press of the push-button.
5. The Stove Alarm now confirms its sensitivity level with
beeps:

12
STOVE ALARM SA101 USER MANUAL
ADDITIONAL INFORMATION
Beeps (given in two lots) Sensitivity level
2 + x 2
3 + x 3
4 + x 4
... ...
15 + x 15
mation to Innohome technical sta. The signals are given in
the format of 2+X for level 2, 3+X for level 3, and so on:
7. Battery Replacement
A low battery causes the Stove Alarm to emit a beep once a
minute. The battery alarm can be reset by pushing the Stove
Alarm push-button once: it will restart after 12 hours. The Stove
Alarm uses CR2032 type batteries.
To change the battery
1. Open the Stove Alarm’s cover by unscrewing the screw on
the bottom of the Alarm (see image 1 in the back cover).
2. Remove the circuit board. Lift the battery holder string with
the help of a screwdriver and slide the batteries out.
Other manuals for Stove Alarm SA101
2
Table of contents
Languages:
Other Innohome Security System manuals

Innohome
Innohome Smart Socket SSC100 User manual

Innohome
Innohome Stove Alarm SA100 User manual

Innohome
Innohome SGS1030 User manual

Innohome
Innohome SA102RF User manual

Innohome
Innohome Stove Guard 300 User manual

Innohome
Innohome Stove Alarm SA101 User manual

Innohome
Innohome SGK510 Stove Guard User manual