Innomax Luxury Support Series User manual

SETTING UP YOUR AIR SLEEP SYSTEM
1. Unpack the Box
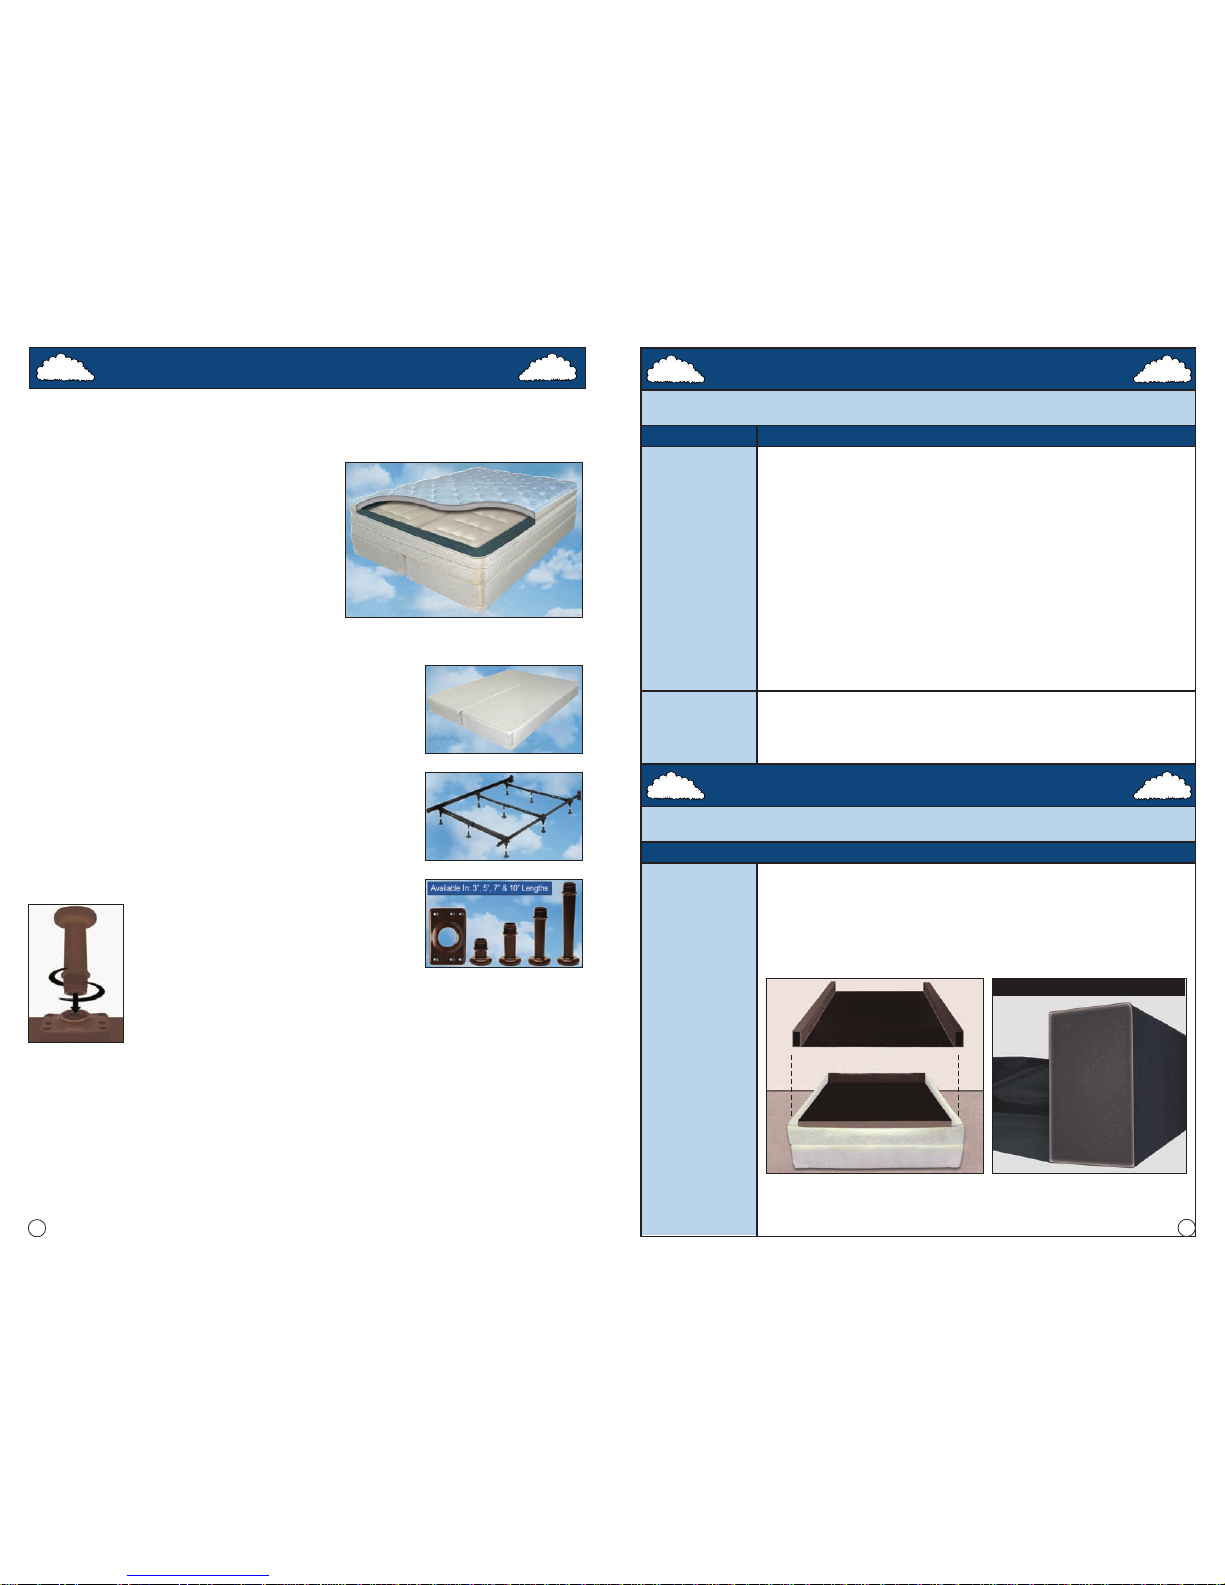
Take all of the components out of the box. You should have the following items:
•Power Edge Support Rail System Includes:
-Attached Head/Foot Rails
-Attached Side Rail Assembly
•Heavy Duty Air Chambers
•Air Inflator Unit With Wired Hand Controls
•Comfort Layer (Either Grey or White Material)
•Mattress Cover/Pillow Top Enclosure
•K or Q Split or Single T/F Foundation (Optional)
2. Your entire Adjustable Air Support System can be easily assembled.
First step, determine where your bed will be positioned
and assemble your support frame. This can be a metal
bed frame, a platform pedestal or the light weight
Versaleg™ system. Assemble the metal frame or
pedestal in the desired location and place your foundation
in the frame with the open side down. Many platform
pedestals don’t require the use of a foundation. For
VersaLeg™ assembly, place the foundation halves on
the floor with the open side up. Position the Versaleg™
plates on all four corners of each foundation half and
then place one plate on each side approximately half
way between the head and foot plates. Use four of the
provided screws to attach each plate to the foundation.
Repeat this process for the second
foundation piece. Once the plates have
been secured, twist the threaded end of
the Versaleg™ into each plate. Once all
have been inserted, simply flip the foundation over so the legs
rest upon the ground and you have the firm, flat side of the
foundation is facing up. You are now ready to begin the bed
assembly. For the assembly video of this product please visit:
www.innomax.com or www.youtube.com under the channel name InnoMaxSleep
1
AIR SUPPORT ASSEMBLY INSTRUCTIONS
3. Unfold the mattress enclosure and completely unzip the cover.
Insert the head and foot rail inside the cover. The head of the bed should be marked
as head rail and will have two slits in the black webbing material. This is for the exit
of your air chamber hoses. The side rails are inserted in between the head and foot
rails with the webbing as smooth as possible. Make sure the webbing does not run
under the rails to the other side of the bed (see DIAGRAM A1). Doing so will make the
black webbing too short. The black webbing (see DIAGRAM A2)shows proper installation.
(Please see next page for diagram A1 & A2)
SIDE RAILS 2ND
HEAD & FOOT RAILS
FIRST
Digital Air Inflators: Only one control operates at a time.
1.) First, make sure the connection from the pump to the air chamber is secure.
2.) Nominal changes in readout may be caused by cooling of air after filling, temperature changes
in general or may be noticed for a week or two after the system has been set up and acclimated.
3.) Switch chamber connections to pump (right to left and vice versa) then reinflate to see if the same
chamber is losing air.
4.) Reinflate air chambers then disconnect air lock connectors from pump to see if chamber holds
air.
5.) O-Ring on Pump Connectors may occasionally need to be cleaned or replaced (available a
hardware store).
*If issue persists, contact authorized dealer for replacement.
1.) Check connectors by filling the chamber with air, disconnect the hose from the pump, then
submerge the fitting in a glass of water.If bubbles are coming out of the fitting, a small leak is
present.
*If the connector is leaking, contact authorized dealer for replacement.
Potential Air
Loss In
Chamber
Checking
For Connector
Leaks
SUGGESTED ACTIONSISSUE
Troubleshooting Tips For Air Chambers
Digital Air Inflators: Only one control operates at a time.
SUGGESTED ACTIONSISSUE
Troubleshooting Tips For Bed Assembly
Foam Rails
Do Not
Appear To
Be The
Correct Size
1.) If installed upside down or not completely unfolded Rails will not reach top to bottom or side
to side. Properly install by inserting Top to Bottom Rails first. Slit holes in Top to Bottom sling
material should be positioned at head of bed for threading Air Hoses to Pump. Side to Side Rails
are then inserted to form dish with slit holes again positioned at head of bed. Labels adjacent to
slit holes point to headboard to confirm right side up installation. Be sure that Rails and sling
material is completely unfolded and installed right side up to verify correct size. Please note that
Rails may bow in until Air Chambers are filled.
*If Rails do not fit after verifying slings have been completely unfolded and are being installed
right side up, contact authorized dealer for assistance.
CORRECT
6

4. Install the air chambers with the brass coupling on the bottom of the
chamber. Push the air hose through the slits in the black webbing and cover. The
hose can be pulled through until they are snug inside the foam rail system.
RIGHT
PORT
LEFT
PORT
WALL
POINT
CONTROL
TOWARDS
FOOT
WHEN
FILLING
TO
INFLATE
THE
CORRECT
SIDE OF
THE BED.
PLACE
THE AIR
INFLATOR
UNDER
THE BED
FRAME
WITH
THE
PORTS
FACING
THE
WALL.
5. Place the air inflation unit on
the floor at the head of the bed
with the air ports facing toward
the wall. If the unit will be used
on a hardwood or tile floor, it is
recommended a towel or other
dampening material be used
under the air inflator to minimize
any vibration or noise. The hand
controls feature extra long cords
with a telephone style clip in
connection. Gently push the
connector into the ports on the
side of the inflator. Note: Use A Surge Protector To Prevent
Pump Damage.
2
A1
INCORRECT
Black Webbing Running Under Rails A2
CORRECT
Black Webbing Running Straight Out
From Rails
6. The barrels on the end of the air hoses are designed to attach to the air
port using the patented Sure Lock™ system. Gently slide the rotating collar of
the barrel onto the port of the inflator and twist the collar clockwise until it locks in
place. This system will ensure a tight seal. Please do (CONTINUED)
Digital Air Inflators: Only one control operates at a time.
Inflator
Pump Not
Powering Up
1.) Use of a surge protector is recommended.
2.) Make sure the electrical outlet is working and any appropriate light switches are turned on.
3.) Make sure the surge protector is plugged in, reset to operate and that the power switch is turned on.
4.) Unplug the pump from the power supply & plug it back in allowing the system to reboot.
5.) Check the fuse in the back of the pump to see if it is blown.
*If pump is still not working properly, contact authorized dealer for replacement.
1.) The Digital Air Sleep System MUST BE acclimated to room temperature for 24 hours prior
to attempting to operate. Failure to do this may result in the Digital Air Sleep System not
functioning properly.
1.) Unplug the control that is not working and plug it back in making sure it is secure.
2.) If no response, Switch the controls on the pump and try again.
*If there is still no air coming from the non-working port, contact authorized dealer for
pump replacement.
*If air is now coming out of the previously non-working port, and the port that was previously
working no longer works, contact authorized dealer for control replacement.
Dual System
Only Fills One
Side
Noise or
Vibration Issue
Caution
1.) Atowel placed underneath pump will help to quiet the noise especially if inflator is placed
on wood, tile or linoleum floor.
Control
Readout
Differs
From Time
To Time
1.) The Digital readout on the hand control will vary depending on many external factors such as
changes in temperature or exposure to direct sunlight, seasonal room temperature changes, bed
temperature changes, with or without sleeper, taking the reading while in bed or standing next to the
bed.
2.) Readings may differ when lying in a different position. For example, the digital readout may
differ when laying on your side versus your back or stomach.
3.) The digital readout will fluctuate during inflation and/or deflation. Once the button is released,
briefly touch button once and the control and inflator will synchronize. The reading will then reflect
the realtime pressure setting.
4.) Readouts will differ when there is somebody on the bed versus nobody being on the bed.
This is due to a difference in pressure on the air chamber when a body is in or out of the bed.
Toverify realtime readout once you've adjusted bed to your comfort preference and while lying
on the bed in your normal sleep position, briefly touch the firm or soft key and the number should
now represent a realtime readout on the control.
5.) Check readout after laying in bed and again the next morning while still in bed. Then, repeat
one more time the night after without making any changes to the sleeping conditions. Doing so
will indicate whether there is a significant change in the readout.
*If a significant number difference is noticed under consistent circumstances, contact authorized
dealer for assistance.
Pump seems to
operate slow
1.) The amount of padding and overall thickness of the top on your mattress will impact the
ability to feel rapid changes in air pressure settings. This is normal and is not an issue with the
inflator. The support provided by the air chamber & inflator is not compromised by thicker
mattress tops, only the corresponding sensation of change is affected. Foam overlay insert for
chamber(s) may optionally be positioned under chamber(s).
Inflator Keeps
Filling & Won't Stop
Pump Reads High
Without Air Chamber
Attached
Inflator Runs But
No Air Flow Into
Air Chamber(s)
*Contact authorized dealer for replacement pump. *
Troubleshooting Tips For Digital Air Inflators
SUGGESTED ACTIONSISSUE
5

*The exception to this step is for owners of the Air-
Cell™ system. The Air-Cell™ features a reversible
latex and Memory-Cell®overlay which is sized
to fit over the air chambers and cover the Power Edge rail system completely.
7. Place the comfort layer on top of the air
chambers. This should completely cover the
chambers and drop just inside the Power Edge
Support Rail System. (see DIAGRAM A1).
A1
not over tighten the connector
to prevent damage to the
port. At this point, you are
ready to begin the inflation
process.If your pump has
the “bed fill” feature, depress
that button on either control to
fill the chamber automatically.
If your pump does not have
this feature, press and hold
the “Firm” or “^” button until
the chamber is completely
inflated. On digital inflators, the
reading will be approximately
50mmHg. For analog air
inflators, the pump will begin to slow and create a
sputtering sound. This will signal a full chamber. The
inflators are designed to prevent damage to the
chamber from overfilling. Repeat this process for filling
the opposite side of the bed for a dual air sleep system.
*DO NOT OVER TIGHTEN *
34
8. Zip up the cover/pillow top, install new mattress pad and sheets. Enjoy a
great night’srest.
Other Innomax Medical Equipment manuals

Popular Medical Equipment manuals by other brands


CORNING
CORNING 4930 instruction manual

Weinmann
Weinmann SOMNOvent CR Short instructions for use

DENTAURUM
DENTAURUM orthoX scan Instructions for use

MIETHKE
MIETHKE SENSOR RESERVOIR Instructions for use and Technical description

Body Clock
Body Clock Profile TENS Instructions for use

Launch
Launch Creader 971 user manual