Innova AirLeaf ECA644 User manual

ECA644 - ESD645 - ECA649 - ECA647 - ESD648
EWF644 - EWF647 - E4T643 - E2T543 - B3V137
B4V642 - B10642 - BM1151- BM0152
DC Inverter
EN
User manual

2
Innova S.r.l
Compliance
We would first of all like to thank you for having chosen one of our products.
We are sure you will be happy with it because it represents the state of the art in the technology of
home air conditioning.
By following the suggestions contained in this manual, the product you have purchased will operate
without problems, giving you optimum room temperatures with minimum energy costs.
This unit complies with the following European Directives:
• Low voltage 2014/35/EU; • Electro-magnetic compatibility 2014/30/EU;
The pictograms in the next chapter provide the necessary
information for correct, safe use of the appliance in a rapid,
unmistakable way.
Symbols
U
User
- Refers to pages containing instructions or information
for the user.
I
Installer
- Refers to pages containing instructions or information
for the installer.
S
Service
- Refers to pages containing instructions or information
for the CUSTOMER TECHNICAL ASSISTANCE
SERVICE installer.
Editorial pictograms
Safety pictograms
Warning
- The operation described may cause physical harm if
not carried out in accordance with safety regulations.
Dangerous electrical current
- Make personnel aware that the operation described
may lead to electrical shocks if not carried out in
accordance with safety regulations.
High temperature danger
- Of safety regulations, the risk of burns caused by
contact with components with high temperatures.
Prohibition
- Refers to prohibited actions.
This booklet code N273005E - Rev. 00 - (09/18) consists
of 44 pages.

3
1
2 ECA644 - ECA647 - EWF644 - EWF647
3 ECA649
EN
General table of contents
GENERAL
1.1 General waenings .................................................................6
1.2 Fundamental safety rules ............................................................6
2.1 SMART TOUCH electronic control panel with device side continuous modulation . . . . . . . . . . . . . . . . . . . 7
2.2 Display ..........................................................................7
2.3 Key function ......................................................................7
2.4 General On Switch .................................................................8
2.5 Activation ........................................................................8
2.6 Heating/cooling operation modes setting .................................................8
2.7 Stand By.........................................................................8
2.8 Temperature selection ..............................................................8
2.9 Automatic operation ...............................................................9
2.10 Silent operation ...................................................................9
2.11 Night-time operation ...............................................................9
2.12 Operation at maximum ventilation speed ................................................9
2.13 Key lock ........................................................................9
2.14 Reduce brightness to minimum .......................................................9
2.15 Deactivation .....................................................................10
2.16 Room temperature probe regulation offset ...............................................10
2.17 Switching off for long periods ........................................................10
2.18 Error signals .....................................................................10
3.1 Wall-mounted SMART TOUCH electronic control panel with room probe ........................11
3.2 Display ........................................................................11
3.3 Key function .....................................................................11
3.4 General On Switch ................................................................12
3.5 Activation .......................................................................12
3.6 Heating/cooling operation modes setting ................................................12
3.7 Stand By .......................................................................12
3.8 Temperature selection .............................................................12
3.9 Automatic operation ..............................................................13
3.10 Silent operation ..................................................................13
3.11 Night-time operation ..............................................................13
3.12 Operation at maximum ventilation speed ...............................................13
3.13 Key lock .......................................................................13
3.14 Reduce brightness to minimum ......................................................13
3.15 Deactivation .....................................................................14
3.16 Room temperature probe regulation offset ...............................................14
3.17 Switching off for long periods ........................................................14
3.18 Error signals .....................................................................14

4
4 E4T643
5 E2T543
6 B3V137
7
4.1 SMART TOUCH electronic control panel with fixed speed modulation ..........................15
4.2 Display ........................................................................15
4.3 Key function .....................................................................15
4.4 General On Switch ................................................................16
4.5 Activation .......................................................................16
4.6 Heating/cooling operation modes setting ................................................16
4.7 Stand By .......................................................................16
4.8 Temperature selection .............................................................16
4.9 Ventilation speed regulation .........................................................17
4.10 Key lock .......................................................................17
4.11 Reduce brightness to minimum ......................................................17
4.12 Deactivation .....................................................................17
4.13 Room temperature probe regulation offset ...............................................18
4.14 Switching off for long periods ........................................................18
4.15 Error signals .....................................................................18
5.1 4-speed on board LCD electronic control panel ..........................................19
5.2 LED indications ..................................................................19
5.3 Key function .....................................................................19
5.4 General On Switch ................................................................19
5.5 Activation .......................................................................20
5.6 Heating/cooling operation modes setting ................................................20
5.7 Stand By .......................................................................20
5.8 Temperature selection .............................................................20
5.9 Ventilation speed regulation .........................................................20
5.10 Key lock .......................................................................21
5.11 Reduce brightness to minimum ......................................................21
5.12 Deactivation .....................................................................21
5.13 Switching off for long periods ........................................................21
5.14 Error signals .....................................................................21
6.1 On-board speed selector for connecting to standard thermostat. ..............................22
6.2 LED indications ..................................................................22
6.3 General On Switch ................................................................23
6.4 Activation .......................................................................23
6.5 Stand By .......................................................................23
6.6 Ventilation speed regulation .........................................................23
6.7 Deactivation .....................................................................24
6.8 Switching off for long periods ........................................................24
6.9 Error status warnings ..............................................................24
MAINTENANCE
7.1 External cleaning .................................................................25
7.2 Air suction filter cleaning ............................................................25
7.3 Suggestions for power saving ........................................................27

5
8
9
EN
TROUBLESHOOTING
8.4 Troubleshooting ..................................................................28
8.5 Troubleshooting table ..............................................................28
INNOVAPP OPERATION
9.1 Minimum system requirements .......................................................30
9.2 Downloading and configuring the APP ..................................................30
9.3 App features ....................................................................32
9.4 General control screen .............................................................32
9.5 Menu ..........................................................................32
9.6 My Products ....................................................................33
9.7 Mode .........................................................................34
9.8 Scheduling .....................................................................35
9.9 Remote access . . . . . . . . . . . . . . . . . . . . . . . . . . . . . . . . . . . . . . . . . . . . . . . . . . . . . . . . . . . . . . . . . . 38
9.10 Groups ........................................................................39
9.11 Preferences .....................................................................40
9.12 Control with several devices .........................................................41
9.13 Troubleshooting ..................................................................42

6
S
I
U
1.1
1.2
General waenings
Fundamental safety rules
This instruction is an integral part of the booklet of the
appliance on which the kit is installed. Please consult
this booklet for general warnings and fundamental safety
rules.
This manual is designed only for the qualified and
authorised installation technician, who must be
sufficiently trained and in possession of all psycho-
physical requirements as per the law.
All operations must be carried out with care and
according to best practices, and in compliance with
workplace safety regulations.
After unpacking, check that the contents are intact and
that all parts are included. If not, contact the agent who
sold the appliance to you.
It is forbidden to modify the safety or adjustment
devices without authorisation from and indications of the
manufacturer.
It is forbidden to dispose of, or leave in the reach of
children, the packaging materials which could become
a source of danger.
Repairs or maintenance must be performed by the
Technical Assistance Service or by qualified personnel
in accordance with this manual. Do not modify or tamper
with the appliance as this could create dangerous
situations and the manufacturer will not be liable for any
damage caused.
GENERAL
Remember that some fundamental safety rules should
be followed when using a product that uses electricity
and water, such as:
The unit can be used by children over the age of
8, and by people with reduced physical, sensory or
mental capabilities, or with no experience or necessary
knowledge, as long as they are monitored or after they
have received instructions on the safe use of the unit
and have understood the dangers involved.
Children must not play with the appliance.
The cleaning and maintenance that must be
performed by the user should not be carried out by
children without supervision.
It is forbidden to touch the appliance with wet hands
or body when barefoot.
It is forbidden to carry out any cleaning before having
disconnected the appliance from the electricity mains
supply by turning the system master switch to "OFF".
It is forbidden to modify the safety or adjustment
devices or adjust without authorisation and indications
of the manufacturer.
It is forbidden to pull, cut or knot the electrical cables
coming out of the appliance, even if it is disconnected
from the mains supply.
It is forbidden to poke objects or anything else through
the inlet or outlet grills.
It is forbidden to open the doors which access the
internal parts of the appliance without first turning the
system master switch to "OFF".
It is forbidden to dispose of or leave in the reach of
children the packaging materials which could become
a source of danger.
It is forbidden to climb onto the appliance or rest any
object on it.
The external parts of the appliance can reach
temperatures of more than 70°C.
7
S
U
I
AB
2.1
2.2
2.3
EN
A Display
B Keys
These controls make room temperature adjustment (with
offset settable from the keyboard) completely autonomous
through the AUTO, SILENT, NIGHT and MAX programmes
by means of a probe located in the lower part of the device,
ensuring anti-freeze safety even when set to stand-by.
The control panel has a memory, so settings will not be
lost if the appliance is switched off or in the power supply
is cut.
Controls cannot be installed on the SLI and RSI
versions.
After 20 seconds from the last action the panel
brightness will be reduced for improved night-time
comfort, and the room temperature will appear on the
display. Press any key to restore maximum brightness.
The 10 kΩ water temperature probe positioned in the
device battery regulations the minimum level when heating
(30°C) and the maximum level when cooling (20°C).
The various functions are set using 8 backlit keys:
Any statuses and alarms are also shown on the display by
using 8 specific symbols:
ECA644 - ECA647 - EWF644 - EWF647
Automatic operation
Silent operation
Maximum ventilation speed
Night-time operation
Heating on
Cooling on
Supervision on Flashing with presence switch CP
closed.
Alarm indicator (solid light)
Panel off indicator
Resistance active indicator
Temp + is for increasing the set temperature
Temp - is for decreasing the set temperature
Heating / Cooling: for changing the operation
mode between heating and cooling
Sets the regulation ventilation speed between
a minimum and maximum value to an entirely
automatic mode
Night-time operation: limits ventilation speed
to a contained level and the set temperature
is adjusted automatically.
Maximum speed operation: Allows for the
maximum ventilation speed to be set
ON/Stand-By: for activating the device or for
putting it in stand-by.
Silent: limits ventilation speed to a more
contained value
SMART TOUCH electronic control panel with device side continuous modulation
Display
Key function

8
S
U
I
2.4
2.5
2.6
2.7
2.8
In order to manage the device via the control panel, this
must be connected to the mains electricity.
If a general switch is installed on the power line, this must
also be switched on.
- Turn the device on by activating the general switch
One of the two symbols flashing means that the water
temperature (hot or cold) is not sufficient, and stops
the fan until the temperature reaches a level suitable for
reaching the required temperature.
If after switching the power on the board detects the
H2 probe, start-up occurs in normal conditions with the
minimum and maximum thresholds.
The board also has a function when there is no H2 probe,
in such cases the fan stop thresholds are ignored.
When the control is in this operating mode, anti freezing is
in any case guaranteed. If the ambient temperature drops
below 5°C, the solenoid valves on the hot water output
and the boiler are opened.
The adjustment range is from 16 to 28°C in intervals of
0.5°C, but out-of-range values are also accepted, from
5°C to 40°C (unless in auto mode).
Only set these values for brief periods, and then set a
intermediate value.
The controller is very precise - set it to the required value
and wait for the controller to regulate itself according to the
actual room temperature detected.
To activate the device
Key Operation Display
Keep the Heating / Cooling key pressed for approx. 2 seconds to change the mode
between heating and cooling, which is indicated by the 2 symbols that appear if heating
or cooling is active.
When heating, the symbol displays when the set point is higher than ambient
temperature, both are off when the set point is lower.
When cooling, the symbol displays when the set point is lower than ambient temperature,
both are off when the set point is higher.
In the 4 tube version, with the automatic cooling/heating regulation system, when both
symbols are displayed it signifies the set point having been reached (neutral band).
Key Operation Display
Press and hold the ON Stand-By key for approx. 2 seconds. No illuminated signals on
the display at all means that the system is in stand-by (no operation). Off
Key Operation Display
Press the ON Stand-by key From off to on
Select one of the 4 operating modes by pressing the relative key.
Key Operation Display
Set the required room temperature using the two increase/decrease keys to set the
temperature value on the 3-digit display.
20.5
General On Switch
Activation
Heating/cooling operation modes setting
Temperature selection
Stand By

9
S
U
I
2.9
2.10
2.11
2.12
2.13
2.14
EN
Ventilation speed adjustment is carried out automatically
between the minimum and maximum values, according to
the distance of the actual room temperature from the set
point, according to a PI-type algorithm.
Ventilation speed is limited to a contained maximum value.
By selecting this mode, ventilation speed is limited to a
very contained level and the set temperature is adjusted
automatically, as follows:
- decreases by 1°C after one hour and by another degree
after two hours in heating mode;
- increases by 1°C after one hour and by another degree
after two hours in cooling mode;
In this operation mode, the maximum possible power level
is activated whether heating or cooling.
Once the desired room temperature is reached, we
recommend selecting one of the other 3 operation modes
for increased comfort and sound levels.
Key Operation Display
By pressing both the + and - keys for 3 seconds, all keys are locked locally, and this is
indicated by "bL" appearing on the display.
All actions are disabled to the user and whenever any key is pressed, "LOC" will appear.
To unlock the keys, repeat the sequence.
bL
Key Operation Display
Press and hold the Max Operation key. The function being activated is indicated by the
relevant symbol appearing on the display.
Key Operation Display
Press and hold the Night-time operation key. The function being activated is indicated
by the relevant symbol appearing on the display.
Key Operation Display
Press and hold the Silent key. The function being activated is indicated by the relevant
symbol appearing on the display.
Key Operation Display
Press and hold the AUTO key. The function being activated is indicated by the relevant
symbol appearing on the display.
After 20 seconds from the last action, the panel brightness
will be reduced for improved night-time comfort, and the
room temperature will appear on the display.
If this brightness is still disturbing, the display can be
switched off completely.
Key Operation Display
With the display off, press and hold the + key for 5 seconds until "01" is displayed.
Use the - key to change the value to 00 and wait 20 seconds to check the setting has
been accepted. 00
Automatic operation
Silent operation
Night-time operation
Operation at maximum ventilation speed
Key lock
Reduce brightness to minimum

10
S
U
I
2.15
2.16
2.17
2.18
When switching off for a season or for holidays, proceed
as follows:
- Deactivate the device
- Turn the general unit switch to off.
The antifreeze function is not active.
As the detection probe is towards the bottom of the
device, the temperature detected may at times differ from
the actual room temperature.
By using this function, the value displayed can be adjusted
in a range from -9/+12 K in intervals of 0.1°C.
Use this adjustment with care, and only after having
actually detected a discrepancy compared with the actual
room temperature using a reliable device!
Key Operation Display
With the display off, press and hold the - key for 5 seconds to access the menu which
allows adjustment (using the + and - keys) of the AIR probe offset displayed, from -9
to +12 K in 0.1 K intervals.
After 20 seconds from the last action, the panel switches off and the setting is stored.
00.0
The controller also ensures anti freezing when in stand-by.
Key Operation Display
Press and hold the ON Stand-By key for approx. 2 seconds. No illuminated signals on
the display at all means that the system is in stand-by (no operation). Off
Switching off for long periods
Error signals
Deactivation
Room temperature probe regulation offset
Error Display App
Faulty room temperature (AIR) probe E1 AIR
Problem with fan motor (e.g. blockage caused by foreign objects, faulty rotation sensor). E2 MOT
Water temperature probe fault for 2-tube versions (H2).
In this case, ensure that the probe installed is 10 kΩ. E3 H2
Cold water temperature probe fault for 4-tube versions (H4).(Only for ECA647) positioned on the
main battery. E5 H4
Engaging of grille microswitch S1 due to filter cleaning operation Gr GRL
The flashing of one of the 2 symbols indicates that the water temperature (hot or cold) is not
and causes the fan to Stop. H2NI

11
S
U
I
3.1
3.2
3.3
EN
ECA649
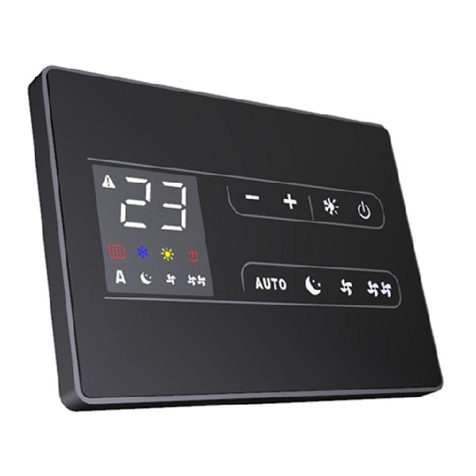
The remote wall-mounted control ECA649 is an electronic
thermostat with a room temperature probe for controlling
one or more (up to a maximum of 30) fan coils / cooler-
radiators in broadcast mode (with simultaneous control
transmission) equipped with electronic control for ESD645
or ESD648 remote operation .
The control panel has a memory, so settings will not be lost
if the appliance is switched off or in the power supply is cut.
Any anomalies on individual connected terminal are
not indicated on the wall panel.
Anti-freeze protection is guaranteed via the
temperature probe when in stand-by.
After 20 seconds from the last action, the panel
brightness will be reduced and the room temperature
will appear on the display. Press any key to restore
maximum brightness.
Any statuses and alarms are also shown on the display by
using 8 specific symbols:
Automatic operation
Silent operation
Maximum ventilation speed
Night-time operation
Heating on
Cooling on
Supervision on Flashing with presence switch CP
closed.
Alarm indicator (solid light)
Panel off indicator
Resistance active indicator
The various functions are set using 8 backlit keys:
Temp + is for increasing the set temperature
Temp - is for decreasing the set temperature
Heating / Cooling: for changing the operation
mode between heating and cooling
Sets the regulation ventilation speed between
a minimum and maximum value to an entirely
automatic mode
Night-time operation: limits ventilation speed
to a contained level and the set temperature
is adjusted automatically.
Maximum speed operation: Allows for the
maximum ventilation speed to be set
ON/Stand-By: for activating the device or for
putting it in stand-by.
Silent: limits ventilation speed to a more
contained value
Display
Wall-mounted SMART TOUCH electronic control panel with room probe
Key function

12
S
U
I
3.4
3.5
3.6
3.7
3.8
In order to manage the device via the control panel, this
must be connected to the mains electricity.
If a general switch is installed on the power line, this must
also be switched on.
- Turn the device on by activating the general switch
When the control is in this operating mode, anti freezing is
in any case guaranteed. If the ambient temperature drops
below 5°C, the solenoid valves on the hot water output
and the boiler are opened.
The adjustment range is from 16 to 28°C in intervals of
0.5°C, but out-of-range values are also accepted, from
5°C to 40°C (unless in auto mode).
Only set these values for brief periods, and then set a
intermediate value.
The controller is very precise - set it to the required value
and wait for the controller to regulate itself according to the
actual room temperature detected.
To activate the device
Key Operation Display
Keep the Heating / Cooling key pressed for approx. 2 seconds to change the mode
between heating and cooling, which is indicated by the 2 symbols that appear if heating
or cooling is active.
When heating, the symbol displays when the set point is higher than ambient
temperature, both are off when the set point is lower.
When cooling, the symbol displays when the set point is lower than ambient temperature,
both are off when the set point is higher.
In the 4 tube version, with the automatic cooling/heating regulation system, when both
symbols are displayed it signifies the set point having been reached (neutral band).
Key Operation Display
Press and hold the ON Stand-By key for approx. 2 seconds. No illuminated signals on
the display at all means that the system is in stand-by (no operation). Off
Key Operation Display
Press the ON Stand-by key From off to on
Select one of the 4 operating modes by pressing the relative key.
Key Operation Display
Set the required room temperature using the two increase/decrease keys to set the
temperature value on the 3-digit display.
20.5
General On Switch
Activation
Heating/cooling operation modes setting
Stand By
Temperature selection

13
S
U
I
3.9
3.10
3.11
3.12
3.13
3.14
EN
Automatic operation
Night-time operation
Operation at maximum ventilation speed
Key lock
Ventilation speed adjustment is carried out automatically
between the minimum and maximum values, according to
the distance of the actual room temperature from the set
point, according to a PI-type algorithm.
Ventilation speed is limited to a contained maximum value.
By selecting this mode, ventilation speed is limited to a
very contained level and the set temperature is adjusted
automatically, as follows:
- decreases by 1°C after one hour and by another degree
after two hours in heating mode;
- increases by 1°C after one hour and by another degree
after two hours in cooling mode;
In this operation mode, the maximum possible power level
is activated whether heating or cooling.
Once the desired room temperature is reached, we
recommend selecting one of the other 3 operation modes
for increased comfort and sound levels.
Key Operation Display
By pressing both the + and - keys for 3 seconds, all keys are locked locally, and this is
indicated by "bL" appearing on the display.
All actions are disabled to the user and whenever any key is pressed, "LOC" will appear.
To unlock the keys, repeat the sequence.
bL
Key Operation Display
Press and hold the Max Operation key. The function being activated is indicated by the
relevant symbol appearing on the display.
Key Operation Display
Press and hold the Night-time operation key. The function being activated is indicated
by the relevant symbol appearing on the display.
Key Operation Display
Press and hold the Silent key. The function being activated is indicated by the relevant
symbol appearing on the display.
Key Operation Display
Press and hold the AUTO key. The function being activated is indicated by the relevant
symbol appearing on the display.
Reduce brightness to minimum
After 20 seconds from the last action, the panel brightness
will be reduced for improved night-time comfort, and the
room temperature will appear on the display.
If this brightness is still disturbing, the display can be
switched off completely.
Key Operation Display
With the display off, press and hold the + key for 5 seconds until "01" is displayed.
Use the - key to change the value to 00 and wait 20 seconds to check the setting has
been accepted. 00
Silent operation

14
S
U
I
3.15
3.16
3.17
3.18
When switching off for a season or for holidays, proceed
as follows:
- Deactivate the device
- Turn the general unit switch to off.
The antifreeze function is not active.
As the detection probe is towards the bottom of the
device, the temperature detected may at times differ from
the actual room temperature.
By using this function, the value displayed can be adjusted
in a range from -9 to +12 K in intervals of 0.1°C.
Use this adjustment with care, and only after having
actually detected a discrepancy compared with the actual
room temperature using a reliable device!
Key Operation Display
With the display off, press and hold the - key for 5 seconds to access the menu which
allows adjustment (using the + and - keys) of the AIR probe offset displayed, from -9
to +12 K in 0.1 K intervals.
After 20 seconds from the last action, the panel switches off and the setting is stored.
00.0
Error Display
Room temperature probe fault (on the thermostat). E1
Fault or connection of a double remote room probe on board one of the fan coil units connected. E2
The controller also ensures anti freezing when in stand-by.
Key Operation Display
Press and hold the ON Stand-By key for approx. 2 seconds. No illuminated signals on
the display at all means that the system is in stand-by (no operation). Off
Deactivation
Room temperature probe regulation offset
Switching off for long periods
Error signals

15
S
U
I
4.1
AB
4.2
4.3
EN
These controls make room temperature adjustment (with
offset settable from the keyboard) completely autonomous
through the four speeds by means of a probe located in
the lower part of the device, ensuring anti-freeze safety
even when set to stand-by.
The control panel has a memory, so settings will not be
lost if the appliance is switched off or in the power supply
is cut.
Controls cannot be installed on the SLI and RSI
versions.
After 20 seconds from the last action the panel
brightness will be reduced for improved night-time
comfort, and the room temperature will appear on the
display. Press any key to restore maximum brightness.
The 10 kΩ water temperature probe positioned in the
device battery regulations the minimum level when heating
(30°C) and the maximum level when cooling (20°C).
The various functions are set using 8 backlit keys:
Any statuses and alarms are also shown on the display by
using 8 specific symbols:
E4T643
Automatic operation in steps
Minimum operation
Maximum ventilation speed
Super silent operation
Heating on
Cooling on
Supervision active (flashing light)
Alarm indicator (solid light)
Panel off indicator
Resistance active indicator
Temp + is for increasing the set temperature
by 1 K
Temp - is for decreasing the set temperature
by 1 K
Heating / Cooling: for changing the operation
mode between heating and cooling
In automatic mode, the fan carries out a
"stepped" adjustment to move the room
temperature closer to the set point.
The super silent setting activates powerful
dehumidifying when cooling and only radiation
when heating.
Maximum speed operation: Allows for the
maximum ventilation speed to be set
ON/Stand-By: for activating the device or for
putting it in stand-by.
Minimum: limits ventilation speed to a very
contained value
A Display
B Keys
SMART TOUCH electronic control panel with fixed speed modulation
Display
Key function

16
S
U
I
4.4
4.5
4.6
4.7
4.8
General On Switch
Activation
Heating/cooling operation modes setting
Stand By
Temperature selection
In order to manage the device via the control panel, this
must be connected to the mains electricity.
If a general switch is installed on the power line, this must
also be switched on.
- Turn the device on by activating the general switch
One of the two symbols flashing means that the water
temperature (hot or cold) is not sufficient, and stops
the fan until the temperature reaches a level suitable for
reaching the required temperature.
If after switching the power on the board detects the
H2 probe, start-up occurs in normal conditions with the
minimum and maximum thresholds.
The board also has a function when there is no H2 probe,
in such cases the fan stop thresholds are ignored.
When the control is in this operating mode, anti freezing is
in any case guaranteed. If the ambient temperature drops
below 5°C, the solinoid output is opened.
The adjustment range is from 16 to 28°C in intervals of 1
°C, but out-of-range values are also accepted, from 5°C
to 40°C (unless in auto mode).
Only set these values for brief periods, and then set a
intermediate value.
To activate the device
Key Operation Display
Keep the Heating / Cooling key pressed for approx. 2 seconds to change the mode
between heating and cooling, which is indicated by the 2 symbols that appear if heating
or cooling is active.
When heating, the symbol displays when the set point is higher than ambient
temperature, both are off when the set point is lower.
When cooling, the symbol displays when the set point is lower than ambient temperature,
both are off when the set point is higher.
In the 4 tube version, with the automatic cooling/heating regulation system, when both
symbols are displayed it signifies the set point having been reached (neutral band).
Key Operation Display
Press and hold the ON Stand-By key for approx. 2 seconds. No illuminated signals on
the display at all means that the system is in stand-by (no operation). From on to off
Key Operation Display
Press the ON Stand-by key From off to on
Select one of the four speeds by pressing the relevant key.
Key Operation Display
Set the required room temperature using the two increase/decrease keys to set the
temperature value on the 3-digit display.
20

17
S
U
I
4.9
4.10
4.11
4.12
EN
Deactivation
The controller also ensures anti freezing when in stand-by.
Key Operation Display
Press and hold the ON Stand-By key for approx. 2 seconds. No illuminated signals on
the display at all means that the system is in stand-by (no operation). From on to off
Key Operation Display
The fan speed is selected by using one of the 4 keys (automatic, minimum, super silent
and maximum). The activation of the function is indicated by
the relevant symbol on the display.
In automatic mode, the fan carries out a "stepped"
adjustment to move the room temperature closer to the
set point.
The super silent setting activates powerful dehumidifying
when cooling and only radiation (with the fan off, solenoid
valve, and in the RS version, microfans activated) when
heating.
By setting the highest speed, the maximum possible
power level is activated immediately whether heating or
cooling.
Once the desired room temperature is reached, we
recommend selecting one of the other 3 operation modes
for increased comfort and sound levels.
In "minimum" mode, the number of fan revolutions is
limited both when heating and cooling.
Key Operation Display
By pressing both the + and - keys for 3 seconds, all keys are locked locally, and this is
indicated by "bL" appearing on the display.
All actions are disabled to the user and whenever any key is pressed, "LOC" will appear.
To unlock the keys, repeat the sequence.
bL
Key lock
Reduce brightness to minimum
After 20 seconds from the last action, the panel brightness
will be reduced for improved night-time comfort, and the
room temperature will appear on the display.
If this brightness is still disturbing, the display can be
switched off completely.
Key Operation Display
With the display off, press and hold the + key for 5 seconds until "01" is displayed.
Use the - key to change the value to 00 and wait 20 seconds to check the setting has
been accepted. 00
Ventilation speed regulation

18
S
U
I
4.13
4.14
4.15
Room temperature probe regulation offset
Switching off for long periods
When switching off for a season or for holidays, proceed
as follows:
- Deactivate the device
- Turn the general unit switch to off.
The antifreeze function is not active.
As the detection probe is towards the bottom of the
device, the temperature detected may at times differ from
the actual room temperature.
By using this function, the value displayed can be adjusted
in a range from -9 to +12 K in intervals of 1°C.
Use this adjustment with care, and only after having
actually detected a discrepancy compared with the actual
room temperature using a reliable device!
Key Operation Display
With the display off, press and hold the - key for 5 seconds to access the menu which
allows adjustment (using the + and - keys) of the AIR probe offset displayed, from -9
to +12 K in 1 K intervals.
After 20 seconds from the last action, the panel switches off and the setting is stored.
00
Error Display
Faulty room temperature (AIR) probe E1
Problem with fan motor (e.g. blockage caused by foreign objects, faulty rotation sensor). E2
Water temperature probe fault for 2-tube versions (H2).
In this case, ensure that the probe installed is 10 kΩ. E3
Engaging of grille microswitch S1 due to filter cleaning operation Gr
Error signals

19
S
U
I
5.1
5.2
5.3
5.4
AB
A
B
EN
LED indications
Key function
The controller makes the regulation of room temperature
entirely automatic using the set point setting which can be
adjusted between 5°C and 40°C, to one of the 4 speeds
and the summer/winter setting.
As it is connected to the water temperature probe, in
the battery it has the function of detecting the minimum
temperature in winter (30°C) and maximum temperature
in summer (20°C).
The control panel has a memory, so settings will not be lost
if the appliance is switched off or in the power supply is cut.
Controls cannot be installed on the SLI and RSI versions.
After 20 seconds from the last action, the panel
brightness will be reduced for improved night-time
comfort, and the room temperature will appear on the
display. Press any key to restore maximum brightness.
The various functions are set using 4 keys:
The 6 LEDs display the operational states:
Green symbol minimum speed
Green symbol medium speed
Green symbol maximum speed
Green symbol Super silent function
Red symbol heating
Blue symbol cooling
Display
Keys and LEDs
Temp + is for increasing the set temperature
Temp - is for decreasing the set temperature
Heating / Cooling: for changing the operation
mode between heating and cooling (2
seconds)
For activating the device, for selecting one
of the 4 speeds or for placing in stand-by (2
seconds).
E2T543
General On Switch
In order to manage the fan coil via the control panel, this
must be connected to the mains electricity.
If a general switch is installed on the power line, this must
also be switched on.
- Turn the device on by activating the general switch
5.1
4-speed on board LCD electronic control panel

20
S
U
I
5.5
5.6
5.7
5.8
5.9
Activation
Heating/cooling operation modes setting
Stand By
Temperature selection
One of the two symbols flashing means that the water
temperature (hot or cold) is not sufficient, and stops
the fan until the temperature reaches a level suitable for
reaching the required temperature.
The adjustment range is from 15 to 30°C in intervals of
1°C, but out-of-range values are also accepted, from 5°C
(Lo) to 40°C (Hi).
Only set these values for brief periods, and then set a
intermediate value.
The controller is very precise - set it to the required value
and wait for the controller to regulate itself according to the
actual room temperature detected.
To activate the device
Key Operation Display
Press the mode/off key Off →On
Select one of the 4 operating speeds by pressing the relative mode/off key. When
heating, the symbol displays when the set point is higher than ambient temperature,
both are off when the set point is lower. When cooling, the symbol displays when the
set point is lower than ambient temperature, both are off when the set point is higher.
Key Operation Display
Keep the Heating / Cooling key pressed for approx. 2 seconds to change the mode
between heating and cooling, which is indicated by the 2 symbols that appear if heating
or cooling is active.
Key Operation Display
Press and hold the mode/off key for approx. 2 seconds. No illuminated signals on the
display at all means that the system is in stand-by (no operation). On →Off
Key Operation Display
Set the required room temperature using the two increase/decrease keys to set the
temperature value on the 2-digit display.
Ventilation speed regulation
The super silent setting activates powerful dehumidifying
when cooling and only radiation (with the fan off, and
solenoid valve activated) when heating.
By setting the highest speed, the maximum possible
power level is activated immediately whether heating or
cooling.
Once the desired room temperature is reached, we
recommend selecting one of the other 3 operation modes
for increased comfort and sound levels.
Key Operation Display
Each time the mode/off button is pressed the fan speed moves between supersilent,
minimum, medium and maximum.
The function being activated is indicated by the relevant symbol appearing on the
display.
Other manuals for AirLeaf ECA644
2
This manual suits for next models
13
Table of contents
Other Innova Inverter manuals

Innova
Innova EB0644 User manual

Innova
Innova AirLeaf ECA644 User manual

Innova
Innova SL User manual

Innova
Innova 10 HP DC User manual

Innova
Innova Air Leaf ECA644 User manual

Innova
Innova Filomuro SLW 400 User manual

Innova
Innova Air Compact 4M User manual

Innova
Innova AirLeaf ECB649 User manual

Innova
Innova 2.0 User manual

Innova
Innova 2.0 15HP User guide