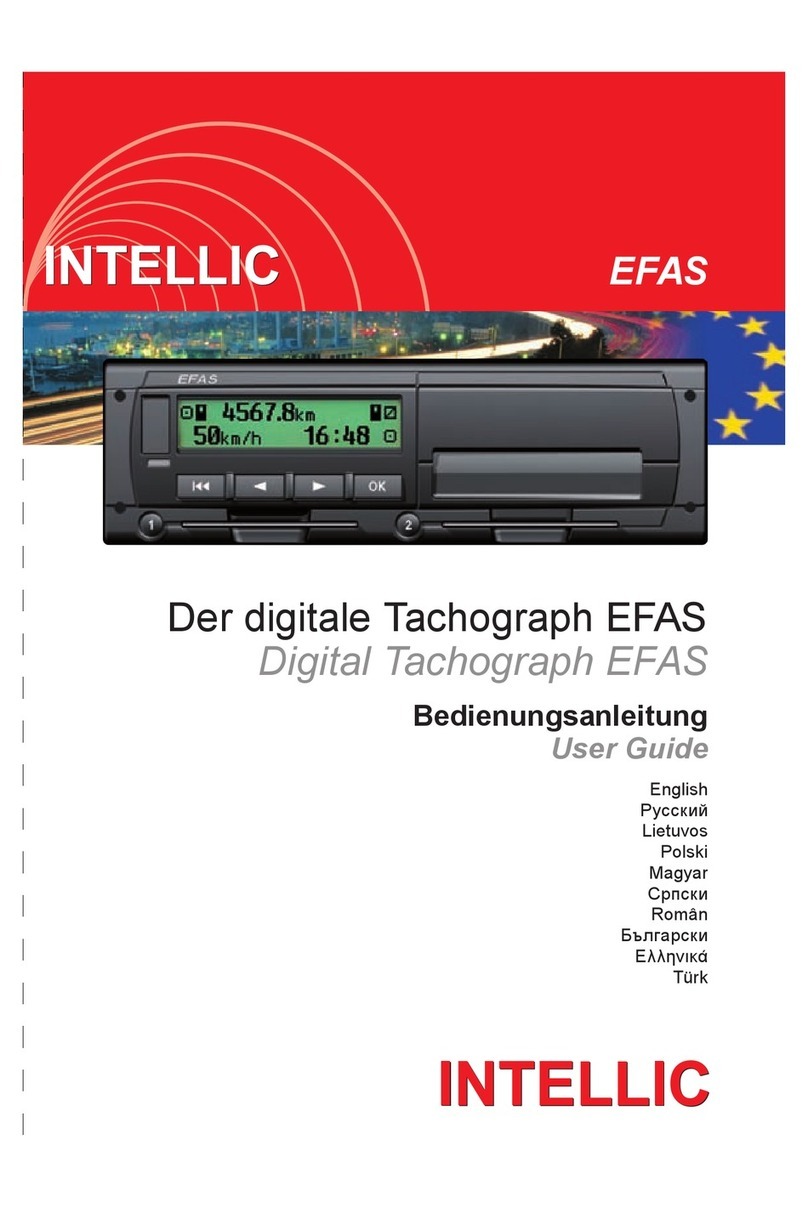
intellic EFAS-4.8 User manual

Digital Tachograph EFAS-4.8
User Guide (EN)


1
English
Copyright
No specications in this user guide may be changed without the written permission of Intellic GmbH. Intellic
GmbH does not assume liability for this user guide. Use and reproduction are only permitted in accordance with
the contractual stipulations. No part of this guide may be reproduced, stored in a retrieval system or translated
into another language without the express written permission of Intellic GmbH.
Technical details of descriptions, specications and illustrations contained in this guide are subject to change
without notice.
© Copyright 2017 Intellic GmbH, Hausmannstätten, Austria
The terms and names used are registered trademarks and trade names are the property of their respective holders.
Intellic GmbH document number: 1030-130-SEC-EN05
Manufacturer:
Intellic GmbH
Fernitzer Straße 5
8071 Hausmannstätten
Austria
www.intellic.com
User Guide
Digital Tachograph EFAS-4.8

2
English
Table of content
1 Introduction ....................................................................................................................................................... 3
1.1 General........................................................................................................................................................................................3
1.2 Legal Requirements................................................................................................................................................................3
2 Operation............................................................................................................................................................ 4
2.1 Display and Controls..............................................................................................................................................................4
2.2 Working with menus..............................................................................................................................................................4
3 Display Symbols and Combinations.............................................................................................................. 5
4 Menu Structure.................................................................................................................................................. 6
5 Operation of EFAS – Driver and Co-Driver.................................................................................................... 8
5.1 Before Starting..........................................................................................................................................................................8
5.2 Automatic Settings .................................................................................................................................................................8
5.3 Time Zones ................................................................................................................................................................................8
5.4 Display settings........................................................................................................................................................................8
5.5 Manual Entries of Activities .............................................................................................................................................. 10
5.6 Acknowledge Events or Faults......................................................................................................................................... 10
5.7 Setting a Ferry/Train Crossing.......................................................................................................................................... 10
5.8 Digital Tachograph not required (OUT)........................................................................................................................ 11
5.9 Speed Monitoring ( Warning).................................................................................................................................. 11
5.10 Remaining Times ( iCounter ) ........................................................................................................................................... 11
6 Operation of EFAS – Company Representatives........................................................................................ 12
6.1 Registration and De-registration of Company........................................................................................................... 12
6.2 Automatic Setting of Activity after Ignition ON/OFF (Option).............................................................................13
6.3 Downloading Stored Data ................................................................................................................................................ 13
7 Operation of EFAS – Controlling Bodies .....................................................................................................13
7.1 Displaying Data..................................................................................................................................................................... 13
7.2 Downloading Stored Data ................................................................................................................................................ 13
7.3 Quick selection of displayed language ....................................................................................................................... 14
8 Operation of EFAS – Workshop.....................................................................................................................14
8.1 Entering the PIN.................................................................................................................................................................... 14
8.2 Performing a Test Run......................................................................................................................................................... 14
8.3 Output of Warnings in CALIBRATION Mode ............................................................................................................... 14
9 Printing Data ....................................................................................................................................................15
9.1 Driver’s times summary ( iCounter ) .............................................................................................................................. 16
9.2 Service Identier................................................................................................................................................................... 17
10 General Settings.............................................................................................................................................. 17
10.1 Printouts .................................................................................................................................................................................. 17
10.2 Display...................................................................................................................................................................................... 17
10.3 Acoustic Signals (Tones) .................................................................................................................................................... 18
10.4 Time and Date ....................................................................................................................................................................... 19
10.5 Company Lock (COMPANY mode only)....................................................................................................................... 19
10.6 Automatic Setting of Activity after Ignition ON/OFF .............................................................................................. 19
10.7 Overspeeding pre-warning (>>Pre-Alarm)................................................................................................................. 19
10.8 Displaying Card Information............................................................................................................................................ 19
10.9 Displaying the Device Data...............................................................................................................................................20
11 Messages and Warnings.................................................................................................................................20
11.1 Display of additional information...................................................................................................................................21
11.2 Repeated Display of events and faults ......................................................................................................................... 22
11.3 Event„Card conict“............................................................................................................................................................ 22
11.4 Event„Driving without an appropriate card“............................................................................................................. 22
11.5 iCounter ................................................................................................................................................................................... 22
12 Important Pictogram Combinations ........................................................................................................... 24

3
English
1 Introduction
1.1 General
The digital tachograph EFAS-4.8 (hereinafter abbreviated as EFAS) logs the work periods, driving times, rest
periods and availability periods of the driver and co-driver. Furthermore, EFAS logs automatically the speed and
distance covered by the vehicle. The protocols logged by the digital tachograph serve as proof for controlling
bodies (e.g. police).The digital tachograph EFAS complies with the technical specications set out in the Commis-
sion regulation (EC) No. 1360/2002 of 13 July 2002, the 7th adaptation of Council regulation (EEC) No. 3821/85
to the technical progress of Recording Equipment in Road Transport and with Commission regulation (EC) No.
1266/2009 of 16 December 2009.
This user guide is for all EFAS users (drivers, workshop sta, company representatives, controlling sta). The user
guide describes the proper use of the digital tachograph EFAS as set out in the regulation. Read the corresponding
sections thoroughly and familiarise yourself with the operation of the digital tachograph EFAS.
1.2 Legal Requirements
The use of analogue tachographs or digital tachographs is governed by EC regulation 3821/85 Annex I B or
3820/85. This regulation assigns a number of obligations to the driver and the owner of the vehicle.
It is prohibited to falsify, disable or delete recordings of the digital tachographs and the tachograph cards. Also
it is prohibited to falsify printouts. Modications of the digital tachograph or its electronic signals or data links,
especially if made with the intention of deceit, shall be punishable.
Any disconnection of the vehicle’s battery from the vehicle electrical system without prior insertion of a workshop
card will be logged as interruption by the digital tachograph. Always have your battery disconnected by an
authorised workshop and make sure the workshop card is inserted.
A regular inspection of the digital tachograph EFAS must be performed at least once within a 24 month period
by an authorised workshop.
The EFAS must be additionally inspected, when
ythe EFAS was repaired,
ythe tyre circumference has changed,
ythe revolution ratio has changed,
ythe registration number of the vehicle has changed,
ythe UTC time of the EFAS deviates by more than 20 minutes from the correct UTC time.
Please observe the instructions for using the digital tachograph for hazardous material transportation.
As the driver, you must ensure correct use of the digital tachograph and the driver card. If the digital tachograph
malfunctions, you must report the incorrectly recorded activities on a separate sheet or on the reverse side of
the printout. The notes must be accompanied by your personal data (name, number of driver card, signature).
If your driver card is lost or damaged, or if it malfunctions, you must create a daily report after your journey
(see chapter9). This report is to be accompanied by your data and signature. If your driver card is damaged or
malfunctions, submit it to the responsible authorities immediately. Always notify the responsible authorities of
the loss of your driver card immediately.
As company representative, monitor the digital tachograph and the tachograph card to ensure that it functions
properly, ensure that the vehicle and calibration data is entered in the digital tachograph by an authorised
workshop, ensure that your drivers use the digital tachograph and the drivers’cards properly, instruct your drivers
to comply with the driving times and the rest periods.

4
English
2 Operation
2.1 Display and Controls
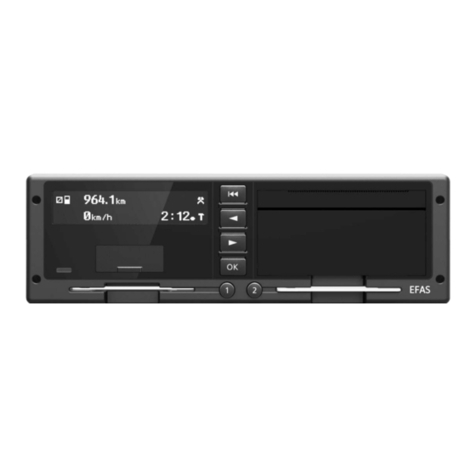
The digital tachograph EFAS features the following display elements and controls:
1. Service interface cover (cap)
2. Red warning light to display the operating mode
Display Meaning
Red The warning light ashes upon activation (functional check).
O EFAS is ready for operation.
Permanently red yIf an FE warning is displayed EFAS awaiting the acknowledgment of this warning.
The LED switches o when no more EF-warning appears.
yIf no FE warning appears, there is a system error. Have your EFAS checked by a
workshop
Flashing red Warning. Acknowledge the warning with OK.
Flashing red 2x Incorrect entry. Correct your entry.
3. Alphanumeric display
4. Key ufor the driver (driver 1)
short push = adjusting of the activity, push longer = card withdrawal
5. Backspace 9(backspace & clear, cancel)
6. Card slot for the driver’s tachograph card
7. Control key (backward / previous entry)
8. Control key (forward / next entry)
9. Key OK (invoke menu, conrm)
10. Key vfor the co-driver (driver 2)
short push = adjusting of the activity, push longer = card withdrawal
11. Card slot for the co-driver’s tachograph card (vehicle operated in team mode)
12. Integrated printer module (for inserting a new reel of paper see„EFAS Quickstart Guide“)
2.2 Working with menus
1. Press OK. The main menu is displayed.
2. Use control keys and to select the required menu.
3. Press OK to acknowledge your choice.
The next sub-menu is displayed.
4. Repeat step 2 and 3 until you reach the required setting.
5. Key 9is used to return to the next higher menu level.
The following instructions use an abbreviated description of menu selection with arrows (g). An arrow
(e.g.gSettings) indicates selection of the respective menu (i.e. Settings) using control keys and conrmation
of the selection by pressing OK. Chapter 4 provides you with an overview of the menu structure.

5
English
3 Display Symbols and Combinations
Symbol Meaning
Availability, current availability period
Driver, driving, mode: OPERATIONAL, continuous driving time
Rest, current rest period
Work, current work period
Break, cumulative break time
? Unknown
Company, mode: COMPANY
Controller, mode: CONTROL
Workshop/test station, mode: CALIBRATION
Manufacturer, tachograph not activated
1 Driver slot
2 Co-driver slot
Valid tachograph card inserted
Invalid tachograph card inserted
Card cannot be ejected because ignition is o
Clock
Display
Data download to external memory
Power supply
Printer, printout
Sensor
Tyre size
Vehicle, vehicle unit (Tachograph)
OUT Digital tachograph not required (=„OUT OF SCOPE“)
OUTStart of digital tachograph not required
OUT End of digital tachograph not required
Ferry/train crossing
!Event
Fault
Start of working day
End of working day
Place, local time for time entries
M Manual entry of driver activities
Security
Speed
Total, summary
24h Daily
I Weekly
II Two-weekly
From or to
Current setting (menu)

6
English
Symbol Meaning
DST Daylight saving time activated
Speed monitoring
Register company on digital tachograph
De-register company from digital tachograph
--- No card
Card valid to
Driver card
Company card
Control card
Workshop card
! rest needed
Driving period until the next driving break
45‘ Driving break duration of 45 minutes
Further combinations of symbols can be found at the end of this manual.
4 Menu Structure
The following gure shows the EFAS menu structure. Which of the menu items can be accessed depends on the
mode of the tachograph, which is set when certain tachograph cards are inserted. The remarks in the following
representation denote:
*1) Only available with inserted workshop card (mode CALIBRATION)
*2) Only available for the currently registered company
*3) Optionally available (depends on the device settings)
*4) Only available in the modes COMPANY or CALIBRATION
*5) Only with driver or workshop card inserted
*6) Only in the mode COMPANY and only if the inserted company card belongs to the company which acti-
vated the last company lock
*7) Only available with inserted company card

7
English

8
English
5 Operation of EFAS – Driver and Co-Driver
5.1 Before Starting
Before starting your trip, you must insert your driver card into the left-hand slot (with chip side up). Your card will
be read. Your name, the date and the time of your last card withdrawal will be displayed.
Next, the display shows the question “Complete manual inputs?” If so, select YES with the control keys,
press OK and follow the instructions in section 5.5. If you do not want to complete your activities, select NO with
the control keys and press OK. Subsequently, select the country where your working day begins. Use the control
keys to select the country code and press OK.
If a co-driver is present, he must insert his driver card into the right-hand slot and conduct the same procedure.
When the co-driver takes over the vehicle, the cards must be exchanged so that the driver-card of the person
operating the vehicle is always in the left-hand slot.
5.2 Automatic Settings
The digital tachograph EFAS makes a number of automatic settings.
yWhenever the vehicle starts driving, the digital tachograph automatically changes to driving time for the
driver and to availability for the co-driver.
yWhenever the vehicle stops, the digital tachograph EFAS automatically changes to work period for the
driver. If less than 2 minutes pass between stopping and re-starting, the digital tachograph cancels the
automatic change from driving time to work period.
yWhenever the ignition is turned o, EFAS is able to change automatically to a programmed driver activity,
see also chapter 6.
5.3 Time Zones
Since your vehicle may move within dierent time zones, all logs and entries are in UTC time. UTC time is a
standardised world time without daylight saving time. Printouts can be based either on UTC time or local time.
However, only printouts in UTC-time are compliant with legal requirements. For the sake of simplicity, times are
often entered in local time.
If you have set the time zone correctly for EFAS, the digital tachograph displays the local time on all standard
displays during the journey. This is shown by the so called“time dot”(e.g. 17:23) which is displayed after the time
(contrastingly, with UTC time no such“time dot”is displayed). Whenever a time entry is required, please check
whether the system requires UTC time or local time.
In most central European countries, UTC time during the winter is one hour earlier than local time. In the winter,
one hour has to be deducted from local time to calculate UTC time. In the summer, two hours have to be deducted
from local time to calculate UTC time.
5.4 Display settings
If there is no need to display warnings and no menu has been selected, you may use the control keys or to
display one of the following screens:
1. Odometer odometer and speed
2. Trip meter trip meter and speed
3. Current times (default screen) Current work periods and activities for driver and co-driver
4. Times driver (1) Driving times driver 1
5. Remaining times (1) Remaining time (1)
6. Times codriver (2) Driving times driver 2
7. Remaining times (2) Remaining time (2)
8. UTC time UTC-time
While the vehicle is travelling, only displays no. 1, 2, 5 and 7 are available for selection.

9
English
5.4.1 Odometer
The rst line displays the following information from left to right:
ySymbol for driver activity (in this case, driving).
yThe card symbol indicates that there is a card in the driver slot. The card symbol is hidden when no card is
inserted.
yCurrent reading of odometer.
yThe card symbol indicates that there is a card in the co-driver slot. The card symbol is hidden when no card
is inserted.
ySymbol for co-driver activity (in this case availability).
The second line displays the following information:
yCurrent speed in km/h (mph option available).
yCurrent local time (see section 5.3).
ySymbol for the current mode (in this case OPERATIONAL)
5.4.2 Speed and Trip Meter
The rst line displays the following information from left to right:
ySymbol for driver activity.
yThe card symbol indicates that there is a card in the driver slot. The card symbol is hidden when no card is
inserted.
yTrip meter reading of the digital tachograph EFAS.
yThe card symbol indicates that there is a card in the co-driver slot. The card symbol is hidden when no card
is inserted.
ySymbol for co-driver activity.
The second line displays the following information:
yCurrent speed in km/h (mph option available).
yCurrent local time.
ySymbol for the current mode.
5.4.3 Current Activities for Driver and Co-Driver
The rst line displays the following information from left to right:
yNumber of card slot for driver.
ySymbol for current activity of driver and current activity time (here: driving time).
yInterruption of driving time (according to regulation (EC) No. 561/2006).
The second line displays the following information for the co-driver:
yNumber of card slot for co-driver.
ySymbol for current activity of co-driver and current activity time (here: availability).
yCurrent local time.
ySymbol for current mode (in this case OPERATIONAL).
5.4.4 Driving Times Driver 1
The rst line displays the following information from left to right:
yNumber of card slot for driver, the display refers to:
1 = Driver (2 = Co-driver)
ySymbol for driving time and duration of driver‘s driving time.
yTotal driving time interruptions (according to regulation (EC) No. 561/2006).
The second line displays the following information:
yTotal driving time on current day.
yTotal driving time in the last two weeks.

10
English
5.4.5 Remaining Times ( iCounter )
The screen provides important times to organize further trip activities. Most important information is always
shown in row 1. The screen shown above is an example and may dier from EFAS. For further information
seesection 5.10.
5.4.6 Driving Times Driver 2
Information is displayed in the same way as described for driver 1 in section 5.4.4 and 5.4.5.
5.4.7 UTC-Time
The rst line displays the following information from left to right:
yPictogram for UTC time
yCurrent UTC date
yThe eld DST indicates that the digital tachograph was set for daylight saving time. A hidden DST indicates
that the current setting is standard time.
The second line displays the following information:
yCurrent UTC time
yCurrently set time zone (time dierence to UTC)
ySymbol for current VU mode
5.5 Manual Entries of Activities
If after inserting your driver card you want to manually add your activities, use the
control keys to select YES and press OK.
EFAS will then guide you through the dialog for manual entry of activities. Firstly, the
date and the time (UTC) of the last card withdrawal are displayed and the question
“End prev.work periode?” occurs, if you did not enter the end of shift at card
withdrawel. Otherwise you are prompted for the beginning of the shift.
The following dialogs allow the entry of time periods for certain activities WORK , AVAILABILITY , BREAK/REST
(except DRIVING ). The dialog ends with the question “Conrm activities?“. Here you may conrm the
entered activities (press OK) or use the control keys to select another option (conrm, cancel, print).
5.6 Acknowledge Events or Faults
When certain events or faults occur, EFAS displays a warning (see chapter 11) in that a signal tone sounds and a
warning lamp ashes for 30seconds. The warnings will be displayed until they are conrmed by OK. Use control
keys or to display additional information about the warning.
5.7 Setting a Ferry/Train Crossing
When using a ferry or a train with your vehicle, you have to set the condition“Ferry/Train Crossing”.
1. Select OK gInputs g Begin
2. Press OK.
The condition“Ferry/Train Crossing”is deactivated automatically when EFAS recognizes for the previous calendar
minute DRIVING.

11
English
5.8 Digital Tachograph not required (OUT)
For trips which are excluded from the provisions of EC Regulation or the driving sta
regulations, you may activate the specic condition“out of scope”(OUT).
1. Select OK gInputs gOUTBegin
2. Press OK.
In order to switch-o the condition “out of scope”(OUT).
1. Select OK gInputs gOUT End
2. Press OK.
5.9 Speed Monitoring ( Warning)
Besides the legally prescribed monitoring of the maximum permissible speed of the vehicle, EFAS allows for sur-
veillance of an individually programmable speed limit. Once the vehicle has been parameterized accordingly, this
speed limit can be adjusted in two dierent ways.
Setting via menu (when the vehicle is stationary):
1. Select OK gSettings g Warning
2. Use control keys or to adjust the desired speed which shall trigger your
individual warning.
3. Select “off“ to switch-o speed warnings.
Setting when the vehicle is moving:
1. Use control keys to switch to a display where speed is shown.
2. Press OK to x the shown speed to be monitored.
3. In order to switch-o speed monitoring when the vehicle is moving, press 9
and then OK.
5.10 Remaining Times ( iCounter )
The screen provides important times to organize further trip activities. Most impor-
tant information is always shown in row 1.
hhhmm Remaining time (‚hh‘ in hours; ‚mm‘ in minutes) after the daily/
weekly rest period must be started.
hhhmm Driving time left before the driver must start a driving time interruption.
hhhmm Driving time left before the driver must start the daily/weekly rest period.
The duration (hhhmm) of cumulative break time is increased every minute if activity REST or
AVAILABILITY is active.
Display Meaning
start of 4½h
driving period
1 minute later:
reaming driving time until next driving break
Remaining driving period until next driving break
1of
45‘ 45 minutes driving break.
14h15 Remaining time after the driver has start daily rest period
of
9h 9 hours (REST).
after 4 ½h driving ;
stop vehicle
reaming driving time until next driving break
Remaining driving period until next driving break
1of (now)
45‘ driving break of 45 minutes.
09h46 Remaining time after the driver has start daily rest period
of
9h 9 hours (REST).

12
English
Display Meaning
auto. switching to Driver has to switch to REST
manual switching to driving break
Remaining driving period until next driving break
1of (now)
45‘ driving break of 45 minutes.
00h01 1 minute of 45 minutes driving break are over.
daily rest period
00h00 No more remaining time available
1until (now)
9h daily rest period.
01h08 1 hour and 8 minutes of daily rest period are over.
weekly rest period
00h00 No more remaining time available
1until (now)
24h weekly rest period.
09h01 9 hours and 1 minute of weekly rest period are over.
6 Operation of EFAS – Company Representatives
The company card is used for downloads or printouts of the data that is stored in the digital tachograph. Further-
more, the activity for driver and co-driver after the ignition is turned on/o can be dened to be set automatically.
It is possible to print or download the data that was stored while your company was registered on the digital tach-
ograph. When registering your company on the digital tachograph, a company lock is activated. This company
lock prevents other companies from reading out or displaying the data stored for your drivers.
6.1 Registration and De-registration of Company
If no other company is registered on the digital tachograph, your company will be
registered automatically, when you insert the company card into the digital
tachograph.
If your company was registered before, the following information is displayed.
If another company is registered, the display shows the following screen “Company
Lock Request?”.
If you select YES, the other company is de-registered and your company is registered. If you select NO, you have
access only to data that had already been allocated to your company.
If you rejected the automatic registration after insertion of the company card, you may switch on the company
lock as follows:
OK gSettings gCompany Locks gLock-in, conrm with OK.
In order to deactivate the company lock, select OK gSettings gCompany Locks gLock-out and
conrm the lock-out dialog with OK.
1 There is no warning.
(blinking) A warning has occurs; Driver has to do a driving break.
NOTE: A warning will be displayed only on the rst line of the screen.
Recent resulting activity after a switch of activity. A change in the display may be due to the calculation procedure of
activities thus after maximum time of 1½ minutes.

13
English
6.2 Automatic Setting of Activity after Ignition ON/OFF (Option)
In the modes COMPANY and CALIBRATION, by using the function “Activity Ignition”, the activity can be
selected which will be automatically set for the driver and/or co-driver after the ignition is turned on/o. This
function can also be switched o, so that after switch over the ignition, the current activity is maintained.
Select OK gSettings gActivity Ignition ON/OFF
The current setting for the driver at Ignition ON is displayed. Use control keys to change into one of the following
settings:
– Maintain driver activity
Rest
Work
Availability
Having pressed OK, you may enter the settings for the driver at “Ignition OFF”, and thereafter the settings
for the co-driver.
6.3 Downloading Stored Data
The data that is stored in the digital tachograph can be downloaded by using a suitable external device. You can
only download the data for drivers from your company. However it is important that your company was or is
registered on the digital tachograph (see section 6.1).
Proceed as follows:
1. Turn on the ignition.
2. Insert your company card into one of the card slots. The second slot must either be empty or contain a
driver card.
3. Open the cover of the interface on the front side. To do so, stick your ngernail into the groove above the
cover, pull out the ap and fold it down.
4. Connect the external device to the interface.
5. Start the download at the external device.
While data is being downloaded from the digital tachograph, a ashing twin arrow is displayed. Do not discon-
nect the data connection to the digital tachograph EFAS before the download is completed.
7 Operation of EFAS – Controlling Bodies
Inserting your control card enables you to display, print, or download all data that is stored in EFAS and on a driver
card, independently of any company locks. At this time, the other card slot should be occupied either by no other
card or by a driver card only.
7.1 Displaying Data
1. Select OK gPrint preview and conrm with OK.
The menu for the stored data is displayed.
2. Select the required data and conrm with OK.
3. Use control keys or to select the character size and conrm with OK.
4. Use control keys or to select the required date and conrm with OK.
The stored data is displayed.
5. Press to display the next line or to display the previous line.
6. Press 9to close the print preview. The display shows Start “Printout?”.
7. Use control keys to select the desired answer and acknowledge with OK.
7.2 Downloading Stored Data
1. Turn on the ignition.
2. Make sure your control card is inserted into one of the card slots. The second card slot must be empty or
contain a driver card.
3. Open the cap of the service-interface at the front of the device and connect the external device for data
download to the interface.
4. Start the download at the external device.

14
English
While data is being downloaded from the digital tachograph, a ashing twin arrow is displayed. If you insert a
tachograph card into a card reader slot during a download, the card will only be read by EFAS, after the download
has completed. Do not disconnect the data connection to the digital tachograph before the download is
complete.
7.3 Quick selection of displayed language
If driver information like speed or odometer (see section 5.4.1) are displayed, the dialog for setting display
language can be invoked by pressing the button 9for more than 5 seconds.
8 Operation of EFAS – Workshop
By inserting a workshop card and entering the respective PIN, the digital tachograph EFAS enters the mode
CALIBRATION. This section describes how to enter the PIN, and also some aspects specic to the CALIBRATION
mode. Please refer to the workshop manual of the digital tachograph EFAS for further information.
8.1 Entering the PIN
After the insertion of a workshop card, EFAS requests the entry of the respective PIN. The PIN consists of 4 to 8
characters. The characters may be digits, upper-case letters, lower-case letters or special characters; EFAS there-
fore divides all the possible characters in 4 groups.
The selection of each of the 4 to 8 characters of a PIN consists of the following steps:
1. Select a character group
The rst available group consists of the digits [1-0]. With key vyou switch to the following character
groups„ABC“, „ abc“, „ @$#“, and with key uyou return to the previous character groups.
2. Select a character
With the control keys you may select the next or previous character from a repeating series of characters;
the currently selected character is always shown in plain text in the rst line.
3. Assign the character by pressing OK
The assigned character is represented by a “*“ and the input control moves to the next PIN character
position.
The key 9allows you to step back to previous character positions in the PIN; the respective character is displayed
briey. The character may then be changed as described above. If the key 9is pressed while positioned on the
rst PIN character, a question is displayed as to whether the card should be ejected.
Having assigned the last character of the PIN, conrm the whole PIN with a second OK. The card data will be read
and the PIN is checked.
If PIN validation fails, the number of remaining attempts at entering the PIN is displayed. Subsequently, the PIN
entry procedure starts again.
8.2 Performing a Test Run
It is also possible to perform test runs of the vehicle with your workshop card. Make sure that the workshop
card is in the left-hand card slot. Before and after a test run, the same entries are required as for a driver card
(seechapter5).
8.3 Output of Warnings in CALIBRATION Mode
In CALIBRATION mode, storage of some EFAS warnings is suppressed. However,
these warnings are displayed briey as EF-Info (EventFault-Info) on the EFAS display:
For the list of displayable faults (“SrvIDs”) and for further information on causes and solutions, refer to the EFAS
Service Manual.

15
English
9 Printing Data
The built-in printer allows you to print data stored within EFAS and on tachograph cards:
Select OK gPrintout and, on the following menu level select among:
yDaily report from your driver/workshop card (stored on the inserted card)
yDaily report from the vehicle unit (stored within the digital tachograph)
yEvents and faults from the driver/workshop card (stored on the inserted card)
yEvents and faults from the vehicle unit (stored within the digital tachograph)
yOver speeding
yTechnical data
ySpeed prole
yEngine speed prole
yD1/D2 status changes
yDriver’s times summary (iCounter) see section 9.1
yList of service IDs see section 9.2
Conrm your choice with OK, then use the control keys to select the desired date, and conrm with OK. The
stored data is printed. Pull the paper o (transversely/upwards) in order to get a clean tear.
If two driver cards or a driver card and a workshop card are inserted, you have to specify from which card the data
has to be printed.
Use key 9to cancel printing at any time.
Data cannot be printed when driving. Any printout is cancelled when the vehicle starts moving. Leave the ignition
on when printing. The printout is halted when the ignition is turned o. If the ignition is switched o for more
than 30 seconds, the print job is cancelled.
Printing is interrupted when the printer runs out of paper, the following message appears:
The end of printing is marked. When you insert a new reel of paper, printing continues automatically and is
marked as a continuation of the interrupted printout.
For inserting a new reel of paper, please see the accompanying„EFAS Quickstart Guide“.

16
English
9.1 Driver’s times summary ( iCounter )
The print out of current driving times can be done using the print function„ Driver’s times summary“.
dd/mm/yyyy hh:mm
(UTC ± hh:mm)
-----------------------
-----------------------
Last_Name ____________
First_Name ___________
Card_Identication _____
dd/mm/yyyy
---------------------
dd/mm/yy hh:mm[?]
[!]1 hhhmm[?]
[!]1 hhhmm[?]
[!] hhhmm[?] (>9h:N)
[!] hhhmm[?] []
[!]| hhhmm[?]
[!]|| hhhmm[?]
---------------------
[!] dd/mm/yyyy
[!] dd/mm/yyyy
---------------------
[!] dd/mm/yyyy
[!] dd/mm/yyyy
------------------------
- printing time
- block identier2
- Type of printout
- block identier3
- card-holder name
- card-holder rst name(s)
- card-ID
- card expiration date
- driving times (overview)
-4
-5
-6
-7
-8
-9
-10
-11
-12
-13
-14
-15
-16
end of printout
Remarks:
yA question mark (“?”) is printed after a
value when periods of unknown activity
were consulted in order to calculate
breaks an d rest periods.
yAn exclamation mark (“!”) is only printed
in the rst columns when the associated
warning is active (and is not suppressed
by an „EU-Reg. not applied“-condition).
It will be printed no exclamation mark
if associates warning is active. Also
no exclamation mark is printed when
warning or pre-warning “Daily driving
time over 9 hours” is active, because
there is no associated time violation.
ySquare brackets (“[ ]”) in the example
indicate that the sign inside the brackets
may be absent. The brackets themselves
are not printed.
Specically applies to warnings con-
cerning the driver card expiry date, the
next mandatory driver card download
date, the next mandatory VU download
date and the next mandatory calibration
date: An exclamation mark (“!”) will be
printed if the current VU-time is within the
(adjustable) period in which this warning
will be triggered.
2 Type of print out (same format as block 2 in Annex 1B requirement PRT_006 in Appendix 4)
3 Identity of driver
4 End of the last daily / weekly rest period
5 Drivers ongoing driver time
6 Drivers accumulated break time
7 Daily driving time, number (N) of days of the current week, where the daily driving time was greater than or equal to
9 hours. N appears only if there were such days.
8 Remaining time until the driver has to start his daily / weekly rest period. The “Multiple drivers” pictogram is printed
only if the driver was together with another driver on board since the end of the last daily/weekly rest period. If the
driver’s rest period would already have to start, “00h00” appears.
9 Weekly driving time
10 Two-weekly driving time
11 Driver card overview (this line is only printed if one of the following lines is available)
12 Driver card expiration date (this line is printed only if the corresponding warning was activated)
13 Date of the next mandatory driver card downloads (this line is printed only if the corresponding warning was
activated)
14 Overview of the VU-hours (this line is printed only if one of the following lines is available)
15 Date of the next mandatory VU Downloads (this line is printed only if the corresponding warning was activated)
16 Date of the next mandatory VU calibration (this line is printed only if the corresponding warning was activated)

17
English
9.2 Service Identier
The printout of the last max. 100 Service-IDs (events/faults) can be shown via the print menu“SrvId“. The printout
is in reverse chronological order, latest events/faults are printed in the list above. Faults that are still pending, are
marked with of time “--h--”.
Because the list of SrvIDs in EFAS cannot be reset, the user can cancel the printout of SrvIDs by pressing the 9key
at any point.
Note: The marker helps to cancel the printout with the button 9.
EFAS remembers the last time of the printout and displays it via the marker (last printout time; see example).
26/04/2015 15:15 (UTC)
-----------------------
SrvId
------------------------
17/02/2015 10:34
31 S41 00h01
--------------------
########################
17/02/2015 10:33
########################
--------------------
! 17/02/2015 10:32
31 S41 00h02
--------------------
! 17/02/2015 10:04
!11 S124 --h--
--------------------
! 17/02/2015 09:02
!03 S10 --h--
- type of printout
- Symbol of event/fault; start time/-date of event/fault
- EU error number; SrvID; duration
- Marker of last printout time of SrvId
- If there is printout time available, marker is skipped.
- Fault SrvId: S41 duration of 0 hours and 2 minutes
- Event SrvId: S124 is still active (--h--)
10 General Settings
10.1 Printouts
According to EU regulations, the times specied on the printout and in the print preview are output in UTC time.
For easier inspection, the times can also be output in local time by using the setting“Local time”.
1. Select OK gPrintout gLocal time
The current setting is displayed.
2. Use control keys and to select the required setting. Press OK.
10.2 Display
10.2.1 Language
EFAS supports a multitude of languages. The language which is used for the digital tachograph display depends
on the tachograph card which is inserted in the left-hand card slot. The language is automatically set upon card
insertion or withdrawal. However, you can select the language manually.
1. Select OK gSettings gDisplay gLanguage
The current language is displayed.
2. Use control keys and to select the required language. Press OK.
If a driver information screen like speed or odometer are displayed, the dialog for setting display language can be
invoked by pressing 9for at least 5 seconds.

18
English
10.2.2 Display Brightness
If your EFAS is not connected to the central brightness control for the dashboard lighting of your vehicle, the
display brightness for day and night can be set via the menu. The day mode is stored when the vehicle lights are
o. The night mode is stored when the vehicle lights are on.
1. Select OK gSettings gDisplay gBrightness
The current brightness setting is displayed.
2. Use control keys and to select the required brightness. Press OK.
Day setting: Night setting:
10.2.3 Display Contrast
1. Select OK gSettings gDisplay gContrast
The current display contrast setting is displayed.
2. Use control keys and to select the required contrast. Press OK.
10.2.4 Keyboard Back-light Brightness
1. Select OK gSettings gDisplay gKeyb.brightness
The current brightness setting of the keyboard backlight is displayed.
2. Use control keys and to select the required brightness. Press OK.
Day setting: Night setting:
10.2.5 Distance and Speed Unit Display
This function is used to determine the unit that shall be used for displaying the distance. You can select either
kilometres or miles. The unit for displaying the speed (km/h or mph) changes automatically.
1. Select OK gSettings gDisplay gDistance unit
The current distance unit setting is displayed.
2. Use control keys and to select the required unit. Conrm your choice
withOK.
10.3 Acoustic Signals (Tones)
You can use these menu functions to change the settings for key click, notication tone, warning tone.
10.3.1 Key click
1. Select OK gSettings gTones gKey click
The current key click setting is displayed.
2. Use control keys and to select the required setting. Conrm your choice
with OK.
Set the notication tone and warning tone accordingly.
10.3.2 Signal for the end of a driving break time
At the end of a driving break time of 45 minutes in total (45 or 15+30) EFAS may
show the following screen together with an acoustic signal, which reminds you to
continue driving.
This signal may be switched on and o via menu ( 45‘ ).
1. Choose OK gSettings gTones g45’.
The current setting will be shown.
2. Use control keys and to select the required setting. Conrm your choice with OK.
HINT: If the function mute is active, only the screen is shown, no acoustic signal will occur.
Table of contents
Other intellic Measuring Instrument manuals
Popular Measuring Instrument manuals by other brands
BridgeTech
BridgeTech VB20 user manual
Michell Instruments
Michell Instruments Condumax II user manual
CohuHD Costar
CohuHD Costar 3212-2000 quick start guide
Vega
Vega VEGAFLEX 62 Product information
Endress+Hauser
Endress+Hauser Micropilot NMR84 operating instructions
LaserLiner
LaserLiner LaserRange-Master i2 manual
