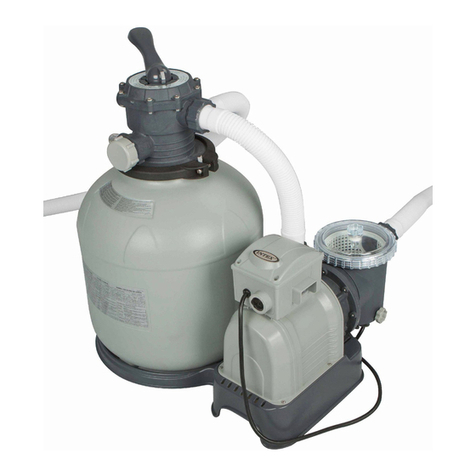
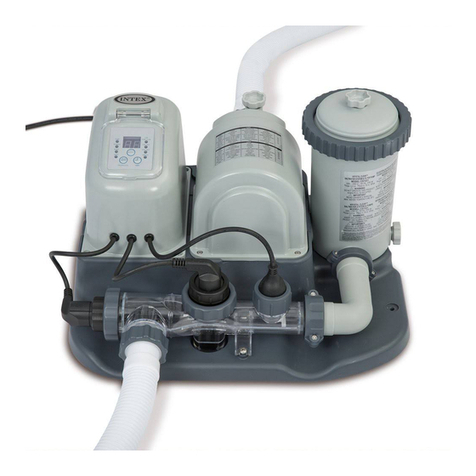
Intex CS7111 User manual

189
PO
(189PO) MODEL CS7111 SALTWATER SYSTEM & FILTER PUMP ENGLISH 7.5” X 10.3” PANTONE 295U 06/28/2013
English
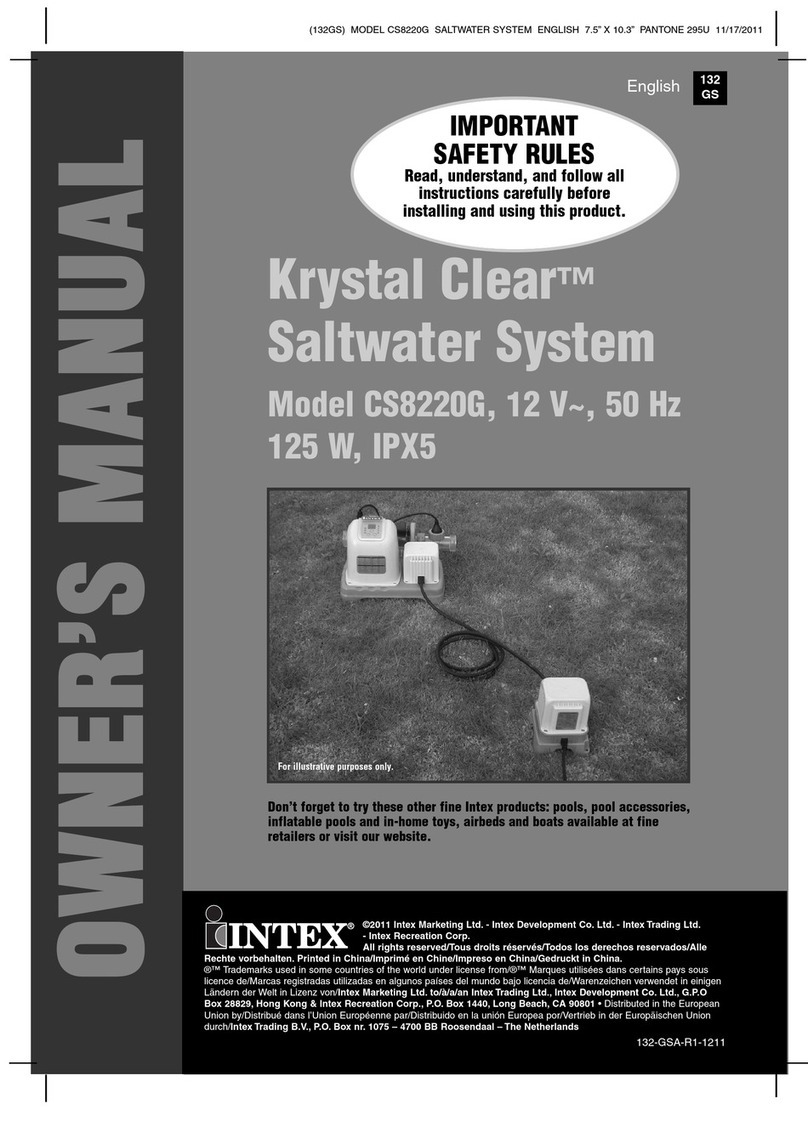
OWNER’S MANUAL
Krystal Clear Saltwater
System®& Filter Pump
Model CS7111
IMPORTANT
SAFETY RULES
Read, understand, and follow
all instructions carefully before
installing and using this product.
IMPORTANT!
DO NOT RETURN PRODUCT TO STORE
To purchase parts and accessories or to obtain non-technical assistance, Visit
www.intexcorp.com
For technical assistance and missing parts call us toll-free (for U.S. and Canadian Residents):
1-800-234-6839
Monday through Friday, 8:30am to 5:00pm Pacific Time
Don’t forget to try these other fine Intex products: Pools, Pool
Accessories, Inflatable Pools and In-Home Toys, Airbeds and
Boats available at fine retailers or visit our website listed below.
Due to a policy of continuous product improvement, Intex
reserves the right to change specifications and appearance,
which may result in updates to the instruction manual without
notice.
189-*PO-R0-1406
For illustrative purposes only.

SAVE THESE INSTRUCTIONS Page 2
(189PO) MODEL CS7111 SALTWATER SYSTEM & FILTER PUMP ENGLISH 7.5” X 10.3” PANTONE 295U 06/28/2013
English 189
PO
SAVE THESE INSTRUCTIONS
English
Page 2
Warnings......................................................................... 3
Parts References............................................................ 4-5
Product Information & Specifications.......................... 6
Setup Instructions.......................................................... 7-10
Salt & Pool Water Volumes............................................ 11
Intex Pools Salt Table..................................................... 12
Intex Pools Cyanuric Acid Table................................... 13
Intex Pools Operating Time Table................................. 14
Non-Intex Pools Salt Table............................................. 15
Non-Intex Pools Cyanuric Acid Table........................... 15
Non-Intex Pools Operating Time Table......................... 15
Operating Instructions................................................... 16-18
LED Code Chart............................................................. 19
Maintenance................................................................... 20-22
Long Term Storage......................................................... 23
Pool Maintenance and Chemical Definitions.............. 24
Troubleshooting Guide.................................................. 25-27
General Aquatic Safety.................................................. 28
Limited Warranty............................................................ 29
TABLE OF CONTENTS

SAVE THESE INSTRUCTIONS Page 2
(189PO) MODEL CS7111 SALTWATER SYSTEM & FILTER PUMP ENGLISH 7.5” X 10.3” PANTONE 295U 06/28/2013
English 189
PO
SAVE THESE INSTRUCTIONS
English
Page 3
This product is for use with storable pools only. Do not use with permanently-installed pools. A
storable pool is constructed so that it is capable of being readily disassembled for storage and
reassembled to its original integrity. A permanently-installed pool is constructed in or on the ground
or in a building such that it cannot be readily disassembled for storage.
CAUTION
WARNING
These product warnings, instructions and safety rules provided with the product represent some common risks
of water recreation devices and do not cover all instances of risk and danger. Please use common sense and
good judgement when enjoying any water activity.
IMPORTANT SAFETY RULES
Read, Understand and Follow All Instructions Carefully Before Installing and Using this Product.
READ AND FOLLOW ALL INSTRUCTIONS
•To reduce the risk of injury, do not permit children to use this product. Always supervise children
and those with disabilities.
•Children must stay away from this product and electrical cord(s).
•Assembly and disassembly by adults only.
•Risk of electric shock. Connect only to a grounding type receptacle, this product is provided with
a ground-fault circuit interrupter. If replacement of the plug or cord is needed, use only identical
replacement parts.
•Always unplug this product from the electrical outlet before removing, cleaning, servicing or
making any adjustment to the product.
•Theunitisprovidedwithaground-faultcircuitinterrupter(GFCI).TotesttheGFCI,pushthetest
button. TheGFCIshouldinterruptpower.Push the reset button, power should be restored. If the
GFCIfailstooperateinthismanner.TheGFCIisdefective.IftheGFCIinterruptspowertothe
pump without the test button being pushed, a ground current is flowing, indicating the possibility
of an electric shock. Do not use this pump. Disconnect the pump and have the problem
corrected by a qualified service representative before using.
•Do not bury the electrical cord. Locate the cord where it will not be damaged by lawn mowers,
hedge trimmers and other equipment.
•To reduce the risk of electric shock, replace damaged cord immediately. Use a qualified
electrician to replace the cord.
•To reduce the risk of electric shock, do not use extension cords, timers, plug adaptors or
converter plugs to connect unit to electric supply; provide a properly located outlet.
•Do not attempt to plug in or unplug this product while standing in water or when your hands are
wet.
•Donotuseanapplianceleakagecurrentinterrupter(ALCI)inplaceofaGFCIsincetheALCIwill
not protect people.
•Positionthisproductawayfromthepool,soastopreventchildrenfromclimbingonand
accessing the pool.
•Do not operate this product when the pool is occupied.
•Neverusethepoolifindicatedchlorinelevelismorethan3ppm.
•Thisproductisintendedtobeusedonlyforthepurposesdescribedinthemanual!
•Operatingthisproductwithoutwaterflowingthroughthesystemcancauseabuildupof
flammablegaseswhichcanresultinFIREOREXPLOSION.
FAILURE TO FOLLOW THESE WARNINGS MAY RESULT IN PROPERTY
DAMAGE, ELECTRIC SHOCK, ENTANGLEMENT OR OTHER SERIOUS
INJURY OR DEATH.

SAVE THESE INSTRUCTIONS Page 2
(189PO) MODEL CS7111 SALTWATER SYSTEM & FILTER PUMP ENGLISH 7.5” X 10.3” PANTONE 295U 06/28/2013
English 189
PO
SAVE THESE INSTRUCTIONS
English
Page 4
PARTS REFERENCE
Before assembling your product, please take a few minutes to check the contents and become familiar
with all the parts.
" * ": Optional.
NOTE:Drawingsforillustrationpurposeonly.Actualproductmayvary.Nottoscale.
1
2
3
4
6
5
8
8
7
1
2
10
9
39
13
14
15
12
16 17 30
40
18
11
31
32 37 38
19
20
21 22 23 24 25
35
19
20
21 26 27 29
35
19
21 26
35
19
20
22 23 24
35 21
28
27
20
* *
* *

SAVE THESE INSTRUCTIONS Page 2
(189PO) MODEL CS7111 SALTWATER SYSTEM & FILTER PUMP ENGLISH 7.5” X 10.3” PANTONE 295U 06/28/2013
English 189
PO
SAVE THESE INSTRUCTIONS
English
Page 5
PARTS REFERENCE (continued)
Before assembling your product, please take a few minutes to check the contents and become familiar
with all the parts.
" * ": Optional.
When ordering parts, be sure to quote the model number and part numbers.
REF. NO. DESCRIPTION QTY. SPARE
PART NO.
SMALL AGP LARGE AGP
COMMON PARTS
1AIRRELEASEVALVE/SEDIMENTRELEASEVALVE 2 10460
2VALVEO-RING 2 10264
3 THREADEDFILTERHOUSINGCOLLAR 1 10749
4FILTERHOUSINGCOVER 1 10750
5FILTERHOUSINGO-RING 110325
6FILTERCARTRIDGE(59900) 1
7AIRRELEASEVALVEB(WITHO-RING) 1 10725
8PUMPHOSEWITHNUTS 2 11009
9
WATERTRANSFERHOSE(WITHCOLLARAND2HOSECLAMPS)
111583
10 SCREW 2 11519
11 FLOWSENSOR 1 11460
12 ELECTROLYTICCELLNUT 1 11582
13 ELECTROLYTICCELL(O-RINGCINCLUDED) 1 11578
14 COPPER ELECTRODE 1 11579
15 L-SHAPEO-RING 1 11228
16 O-RINGC 1 10717
17 ANGLEJOINT(O-RINGDINCLUDED) 1 11584
18 O-RINGA 1 11587
19*
PLUNGERVALVE(HOSEO-RING&STEPWASHERINCLUDED)
2 10747E
20* HOSEO-RING 2 10262
21* STEP WASHER 2 10745
22* STRAINERNUT 2 10256
23* FLATSTRAINERRUBBERWASHER 2 10255
24* THREADEDSTRAINERCONNECTOR 211235
25* ADJUSTABLEPOOLINLETNOZZLE 1 11074
26* ADAPTOR B 2 10722
27* STRAINERCONNECTOR 2 11070
28* POOLINLETNOZZLE 1 11071
29* STRAINERGRID 1 11072
30 CELL COVER 111131
31 COPPERELECTRODENUT 1 11580
32 TITANIUMELECTRODE 1 11581
33 CHLORINETESTSTRIPS 119635
34 COPPER TEST STRIPS 1 11254
35* VACUUM RELEASE VALVE 211437
36* VACUUMRELEASEVALVECAP(NOTSHOWN) 2 11576
37 TITANIUMELECTRODEO-RING 1 11585
38 COPPERELECTRODEO-RING 1 11586
39 CONTROLSTATION 1 11590
40 COLLARNUT 1 11604

SAVE THESE INSTRUCTIONS Page 2
(189PO) MODEL CS7111 SALTWATER SYSTEM & FILTER PUMP ENGLISH 7.5” X 10.3” PANTONE 295U 06/28/2013
English 189
PO
SAVE THESE INSTRUCTIONS
English
Page 6
This product is specially designed for above ground pools. It will destroy the bacteria, oxidize
bather organics and control algae, which provide a safe, clean and comfortable swimming pool.
Common salt (sodium chloride) is made up of two elements, sodium and chlorine. During the
installation of your Saltwater System/Filter Pump, a measured quantity of salt is dissolved in the
pool water to make it slightly salty. The pool water flows through the saltwater system’s
electrolytic cell to produce HCLO. The HCLO dissolves in the water and instantly starts
destroying bacteria and algae. It also oxidizes all other organic materials.
Low voltage direct current is applied to the copper electrode, and copper ions are generated
and dissolved instantly in the water. Copper is an effective algaecide, which will prevent algae
from growing in the pool.
HOW SANITIZER IS GENERATED
Power: 110 - 120 Volt
Amperage: Saltwater System - 0.6 A; Filter Pump - 1.5 A
IdealSaltLevel: 3000ppm(partspermillion)
Maximum Sanitizer Output/hour: 5 grams/hour
Copper Ionizer Output Current: 175 mA
Limited Warranty: see “Limited Warranty”
HOW COPPER IONS ARE GENERATED
PRODUCT SPECIFICATIONS
Flow Sensor
Electrolytic Cell
Water Outlet
Electronic
Control Station

SAVE THESE INSTRUCTIONS Page 2
(189PO) MODEL CS7111 SALTWATER SYSTEM & FILTER PUMP ENGLISH 7.5” X 10.3” PANTONE 295U 06/28/2013
English 189
PO
SAVE THESE INSTRUCTIONS
English
Page 7
STRAINER & PLUNGER VALVE SETUP
Strainer & Plunger Valve Setup (small AGP)
The strainer grid prevents large objects from jamming and/or damaging the filter pump.
The plunger valve assembly prevents water from flowing into the filter pump while the
filter cartridge is being placed or cleaned. If your pool has an inflatable top ring, install the
strainer, nozzle and plunger valve before inflating the pool liner top ring. The parts
numbers here onward, refer to the parts depicted in the Parts List section of this manual.
To install, do the following:
1. Graspthestrainerandplungervalvemechanism.
2. In a counter-clockwise motion unscrew plunger valve union from the threaded strainer
connector (24). Be careful not to lose the step rubber washer (21).
3. Grasptheplungervalveassembly.Makesurethestepwasher(21) is in place. Connect
adaptor B (26) to plunger valve union.
4. Repeatsteps1through3fornozzleandplungervalvemechanism.
5. Remove wall plug and then insert the strainer (27 & 29) into the lower position of protruding
hose connection, and the nozzle (27 & 28) into the upper position of protruding hose
connection. Adaptor B (26) fits over the strainer connection (27) inserted into the connection.
6. Turn both plunger valve handles fully clockwise until they stop. This closes the valve,
prevents the water from flowing out of the pool.
7. The pool liner is now ready to fill with water. Consult the above-ground-pool owner's manual
for filling instructions.
IMPORTANT
The Saltwater System/Filter Pump must be installed as the last piece of pool equipment
in the water return line to the pool. This location extends the life of the titanium plates.
19
20
21 26 27 28
19
20
21 26 27 29
35
35

SAVE THESE INSTRUCTIONS Page 2
(189PO) MODEL CS7111 SALTWATER SYSTEM & FILTER PUMP ENGLISH 7.5” X 10.3” PANTONE 295U 06/28/2013
English 189
PO
SAVE THESE INSTRUCTIONS
English
Page 8
The strainer grid prevents large objects from jamming and/or damaging the filter pump. If
your pool has an inflatable top ring, install the strainer, nozzle and plunger valve before
inflating the pool liner top ring. The part numbers here onward refer to the parts depicted in
the Parts List section of this manual. To install, do the following:
POOL OUTLET - STRAINER & PLUNGER VALVE SETUP (OPTIONAL)
1. In a counter-clockwise motion unscrew plunger valve union
from the threaded strainer connector (24) (see drawing 1).
Be careful not to lose the step rubber washer (21). Place the
plunger valve on the ground in a safe place.
2. In a counter-clockwise motion unscrew the strainer nut (22)
from the threaded connector (24). Leave the flat washer (23)
on the connector (24).
3. Install the strainer and plunger valve at the lower position of
pool outlet (marked "+"). From the inside of the pool liner
insert the connector (24) into one of the pre-cut holes with
the washer remaining on the connector to be placed against
the inside of the liner wall.
4. Before assembly, lubricate the threads with a petroleum
jelly. Then, with the flat side of the strainer nut (22) facing
the outside wall of the liner in a clockwise motion screw the
strainer nut (22) back onto the threaded connector (24) (see
drawing 2).
5. Finger tighten the strainer nut (22) onto the threaded
connector (24).
6. Grasptheplungervalveassembly.Makesurethestep
washer (21) is in place.
7. In a clockwise motion screw the plunger valve union back
onto the threaded connector (24) (see drawing 3).
8. In a clockwise motion turn the plunger valve handle to close
position. Ensure the plunger valve is securely closed.
This will prevent water from flowing out during filling of
the pool (see drawing 4.1).
9. NOTE: Nevercoverthevacuumreleasevalve(35) unless it
is damaged or leaking. Replace the vacuum release valve
immediately.
2
23 24
INSIDE
LINER WALL
22
1
2
1
3
1
2
4.2
WATER
FLOW
POOL
35
4.1
INSIDE
LINER WALL

SAVE THESE INSTRUCTIONS Page 2
(189PO) MODEL CS7111 SALTWATER SYSTEM & FILTER PUMP ENGLISH 7.5” X 10.3” PANTONE 295U 06/28/2013
English 189
PO
SAVE THESE INSTRUCTIONS
English
Page 9
POOL INLET - NOZZLE & PLUNGER VALVE SETUP (OPTIONAL)
1. Graspthenozzleandplungervalvemechanism.
2. In a counter-clockwise motion unscrew plunger valve
union from the threaded strainer connector (24) (see
drawing 5). Be careful not to lose the step rubber
washer (21). Place the plunger valve on the ground in a
safe place.
3. In a counter-clockwise motion unscrew the strainer
nut (22) from the threaded connector (24). Leave the flat
washer (23) on the connector (24).
4. Install the nozzle and plunger valve at the upper position
of the pool inlet. From the inside of the pool liner insert
the connector (24) into one of the pre-cut holes with the
washer remaining on the connector to be placed against
the inside of the liner wall.
5. Before assembly, lubricate the threads with a petroleum
jelly. Then, with the flat side of the strainer nut (22)
facing the outside wall of the liner in a clockwise motion
screw the strainer nut (22) back onto the threaded
connector (24) (see drawing 6).
6. Finger tighten the adjustable pool inlet nozzle (25) and
the strainer nut (22) onto the threaded connector (24).
7. Grasptheplungervalveassembly.Makesurethestep
washer (21) is in place.
8. In a clockwise motion turn the plunger valve handle to
close position. Ensure the plunger valve is securely
closed. This will prevent water from flowing out during
filling of the pool (see drawing 8).
9. NOTE: Nevercoverthevacuumreleasevalve(35)
unless it is damaged or leaking. Replace the vacuum
release valve immediately.
10. Adjust the direction of the nozzle head pointing away
from the pool outlet for a better circulation result (see
drawing 9).
11. The pool liner is now ready to be filled with water.
Consult the above-ground-pool owner’s manual for filling
instructions.
5
2
1
7
1
2
6
23 24 25
INSIDE
LINER WALL
22
9
WATER
FLOW
POOL
8
INSIDE
LINER WALL
35

SAVE THESE INSTRUCTIONS Page 2
(189PO) MODEL CS7111 SALTWATER SYSTEM & FILTER PUMP ENGLISH 7.5” X 10.3” PANTONE 295U 06/28/2013
English 189
PO
SAVE THESE INSTRUCTIONS
English
Page 10
SALTWATER SYSTEM/FILTER PUMP
Saltwater System/Filter Pump
1. Remove the Saltwater System/Filter Pump and hoses from the packaging.
2. Place the Saltwater System/Filter Pump in a location for hose (8) connections to the plunger
valve assemblies.
NOTE: Some regional regulations may require the filter pump to be mounted on a
stationary platform. There are two mounting holes located in the pump base for this
reason. Consult your local authorities for filter pump mounting requirements.
3. Graspthetwopumphoses(8) and connect the hose nuts to the Saltwater System/Filter
Pump.
4. In a counter-clockwise motion unscrew the threaded filter housing collar (3) from the filter
housing. Place it in a safe place.
5. The Saltwater System/Filter Pump is an airtight system. In a counter-clockwise motion turn
both air release valves (1 & 7) 1 - 2 turns to open. DO NOT remove air release valves as
water will expel with force if the motor is turned on and injury may occur.
6. Graspandremovethefilterhousingcover(4). Check to see if a cartridge is inside the
housing. If yes, replace the cover, finger tighten the housing collar (3) back onto the filter
housing.
7. Gentlyfingertightenthesedimentreleasevalvelocatedatthebottomofthehousingtobe
sure that water does not leak out.
8. When the pool is filled connect the hose from the electrolytic cell outlet to the highest strainer
assembly. You will find the hose connection at the bottom of the plunger valve assembly. Use
the hose nut to attach the hose.
9. Connect the second hose to the middle of the motor housing and to the remaining liner
connection.
IMPORTANT
To prevent air lock, open the lower plunger valve (connected inlet hose) first and
then the upper plunger valve (connected outlet hose). Open air release valves, lift
and lower the inlet hose until water starts to flow out of the air release valves, close
air release valves.

SAVE THESE INSTRUCTIONS Page 2
(189PO) MODEL CS7111 SALTWATER SYSTEM & FILTER PUMP ENGLISH 7.5” X 10.3” PANTONE 295U 06/28/2013
English 189
PO
SAVE THESE INSTRUCTIONS
English
Page 11
SALT & POOL WATER VOLUMES
• Whichkindofsalttouse:
Use only Sodium Chloride Salts
Useonlysodiumchloride(NaCl)saltthatisatleast99.8%pure.Itisalsoacceptabletouse
water conditioning salt pellets (the compressed forms of evaporated salt). However, it will take
a longer time for them to dissolve. Do not use iodized or yellow (yellow prussiate of soda)
colored salt. Salt is added to the pool water and the electrolytic cell uses this salt to create the
sanitizer. The purer the salt the better the performance of the electrolytic cell.
• OptimumSaltLevels
Theidealsaltlevelinthepoolwaterisbetween2500-3500ppm(partspermillion).Theoptimal
levelis3000ppm.
A too low salt level will reduce the efficiency of the saltwater system and result in low sanitizer
production. A high salt level may generate a salty taste to the pool water (this may occur at a salt
levelabove3500-4000ppm).Toohighofasaltlevelmaydamagethepowersupplyandcause
corrosion to pool metal fixtures and accessories. The Salt Table page of this manual, shows the
correct dosage of salt needed. The salt in the pool is constantly recycled. Salt loss occurs only
when pool water is physically removed from the pool. Salt is not lost due to evaporation.
• AddingSalt
1. Switch on the unit, then press and hold both and button for 5 seconds, the LED
flashes “FP”. The unit is now in a Filter pump working mode and switch the filter pump on to
start the water circulation.
2. Keep the saltwater system turned off.
3. Determine the amount of salt to be added (see “Salt Table”).
4. Evenly spread the proper amount of salt around the inside perimeter of the pool.
5. Avoid clogging the filter by not adding salt through the skimmer.
6. Brush the pool bottom to speed up the dissolving process. Do not allow salt to pile up on the
bottom of the pool. Run the filter pump 24 consecutive hours to thoroughly dissolve the salt.
7. After 24 hours and if all the salt is dissolved, turn on the Saltwater System, press button
until you hear a “beep”, code “00” flashing (see “System Operation” section steps 2 to 4) and
set the saltwater system to desired operating time (see “Operating Time Table”).
• RemovingSalt
If too much salt has been added, the unit will beep and display “code 92” (see “Alarm Codes”).
You will need to lower the salt concentration. The only way to do so, is to partially drain the pool
andrefillitwithfreshwater.Drainandrefillapproximately20%ofthepool’swateruntilthe“Code
92” disappears.
• PoolVolumeCalculation
Rectangular
Length x Width x Average Depth x 7.5 Length x Width x Average Depth
Circular
Length x Width x Average Depth x 5.9 Length x Width x Average Depth x 0.79
Oval
Length x Width x Average Depth x 6.0 Length x Width x Average Depth x 0.80
Types of Pool Gallons
(pool size in feet)
Cubic Meters
(pool size in meters)

SAVE THESE INSTRUCTIONS Page 2
(189PO) MODEL CS7111 SALTWATER SYSTEM & FILTER PUMP ENGLISH 7.5” X 10.3” PANTONE 295U 06/28/2013
English 189
PO
SAVE THESE INSTRUCTIONS
English
Page 12
INTEX POOLS SALT TABLE
This table shows the amount of salt needed to achieve and maintain the optimal 3000 ppm
salt level.
Pool Size
Water Capacity
(Calculated at 90% for
Frame Pool and 80% for
Easy Set & Oval Pool)
Salt Needed for
Startup
3.0g/L (3000ppm)
Salt Needed when
Low Salt Detected
(CODE “91”)
(Gals) (Liters) (Lbs) (Kgs) (Lbs) (Kgs)
INTEX ABOVE GROUND POOLS (AGP’s)
EASY SET®
POOL
457cmx84cm(15'x33") 2587 9792 65 30 20 10
457cmx91cm(15'x36") 2822 10681 65 30 20 10
457cmx107cm(15'x42") 3284 12430 80 35 20 10
457cmx122cm(15'x48") 3736 14141 95 45 25 10
488cmx107cm(16'x42") 3754 14209 95 45 25 10
488cmx122cm(16'x48") 4273 16173 110 50 30 15
488cmx132cm(16'x52") 4614 17464 115 50 30 15
549cmx107cm(18'x42") 4786 18115 120 55 30 15
549cmx122cm(18'x48") 5455 20647 135 60 35 15
CIRCULAR
METAL
FRAME POOL
457cmx91cm(15'x36") 3282 12422 80 35 20 10
457cmx107cm(15'x42") 3861 14614 100 45 25 10
457cmx122cm(15'x48") 4440 16805 110 50 30 15
488cmx122cm(16'x48") 5061 19156 125 55 35 15
549cmx122cm(18'x48") 6423 24311 160 75 40 20
ULTRA FRAME®
POOL
488cmx122cm(16'x48") 5061 19156 125 55 35 15
549cmx122cm(18'x48") 6423 24311 160 75 40 20
SEQUOIA SPIRIT®
POOL SET
478cmx124cm(15'8"x49") 4440 16805 110 50 30 15
508cmx124cm(16'8"x49") 5061 19156 125 55 35 15
OVAL FRAME
POOL
305cmx549cmx107cm(10'x18'x42")
2885 10920 70 30 20 10
366cmx610cmx122cm(12'x20'x48")
4393 16628 110 50 30 15
RECT. ULTRA
FRAME POOL
274cmx457cmx122cm(9'x15'x48")
3484 13187 90 40 25 10
274cmx549cmx132cm(9'x18'x52")
4545 17203 115 50 30 15
305cmx610cmx132cm(10'x20'x52")
5835 22085 145 65 40 20

SAVE THESE INSTRUCTIONS Page 2
(189PO) MODEL CS7111 SALTWATER SYSTEM & FILTER PUMP ENGLISH 7.5” X 10.3” PANTONE 295U 06/28/2013
English 189
PO
SAVE THESE INSTRUCTIONS
English
Page 13
INTEX POOLS CYANURIC ACID TABLE
Cyanuric acid is a chemical that reduces the loss of chlorine in water due to ultraviolet rays.
To maintain the pool water clear and clean, and to maximize the performance of the device,
add cyanuric acid to the pool. We recommend that the cyanuric acid level be
maintained at approximately 1% of the salt, i.e. 100 Lbs (45 Kgs) salt x1% = 1 Lbs (0.45 Kgs)
cyanuric acid.
If the pool water is dirty, filthy or grimy, DO NOT add chlorine stabilizer (cyanuric acid) as
this will slowdown the sanitation time of the device. Under this condition you must BOOST
your pool water, refer to BOOST cycle steps. Once the pool water has been restored to clear
and clean conditions you may add cyanuric acid.
Pool Size
Water Capacity (Calculated at
90% for Frame Pool and 80%
for Easy Set & Oval Pool)
Cyanuric Acid Needed for
Startup
0.03g/L (30ppm)
(Gals) (Liters) (Lbs) (Kgs)
INTEX ABOVE GROUND POOLS (AGP’s)
EASY SET®
POOL
457cmx84cm(15'x33") 2587 9792 0.6 0.3
457cmx91cm(15'x36") 2822 10681 0.7 0.3
457cmx107cm(15'x42") 3284 12430 0.8 0.4
457cmx122cm(15'x48") 3736 14141 0.9 0.4
488cmx107cm(16'x42") 3754 14209 0.9 0.4
488cmx122cm(16'x48") 4273 16173 1.1 0.5
488cmx132cm(16'x52") 4614 17464 1.2 0.5
549cmx107cm(18'x42") 4786 18115 1.2 0.5
549cmx122cm(18'x48") 5455 20647 1.4 0.6
CIRCULAR
METAL
FRAME POOL
457cmx91cm(15'x36") 3282 12422 0.8 0.4
457cmx107cm(15'x42") 3861 14614 1.0 0.4
457cmx122cm(15'x48") 4440 16805 1.1 0.5
488cmx122cm(16'x48") 5061 19156 1.3 0.6
549cmx122cm(18'x48") 6423 24311 1.6 0.7
ULTRA FRAME®
POOL
488cmx122cm(16'x48") 5061 19156 1.3 0.6
549cmx122cm(18'x48") 6423 24311 1.6 0.7
SEQUOIA SPIRIT®
POOL SET
478cmx124cm(15'8"x49") 4440 16805 1.1 0.5
508cmx124cm(16'8"x49") 5061 19156 1.3 0.6
OVAL FRAME
POOL
305cmx549cmx107cm(10'x18'x42")
2885 10920 0.7 0.3
366cmx610cmx122cm(12'x20'x48")
4393 16628 1.1 0.5
RECT. ULTRA
FRAME POOL
274cmx457cmx122cm(9'x15'x48")
3484 13187 0.9 0.4
274cmx549cmx132cm(9'x18'x52")
4545 17203 1.1 0.5
305cmx610cmx132cm(10'x20'x52")
5835 22085 1.5 0.7

SAVE THESE INSTRUCTIONS Page 2
(189PO) MODEL CS7111 SALTWATER SYSTEM & FILTER PUMP ENGLISH 7.5” X 10.3” PANTONE 295U 06/28/2013
English 189
PO
SAVE THESE INSTRUCTIONS
English
Page 14
INTEX POOLS OPERATING TIME TABLE (WITH CYANURIC ACID)
Pool Size
Water Capacity (Calculated at
90% for Frame Pool and 80%
for Easy Set & Oval Pool)
Operating Time (hours)
at different ambient/air
temperatures
(Gals) (Liters)
10 - 19°C
(50 - 66°F)
20 - 28°C
(68 - 82°F)
29 - 36°C
(84 - 97°F)
INTEX ABOVE GROUND POOLS (AGP’s)
EASY SET®
POOL
457cmx84cm(15'x33") 2587 9792 2 3 4
457cmx91cm(15'x36") 2822 10681 3 3 4
457cmx107cm(15'x42") 3284 12430 3 4 5
457cmx122cm(15'x48") 3736 14141 4 4 5
488cmx107cm(16'x42") 3754 14209 4 4 5
488cmx122cm(16'x48") 4273 16173 4 5 6
488cmx132cm(16'x52") 4614 17464 5 5 6
549cmx107cm(18'x42") 4786 18115 5 5 6
549cmx122cm(18'x48") 5455 20647 6 6 7
CIRCULAR
METAL
FRAME POOL
457cmx91cm(15'x36") 3282 12422 3 4 5
457cmx107cm(15'x42") 3861 14614 4 4 5
457cmx122cm(15'x48") 4440 16805 5 5 6
488cmx122cm(16'x48") 5061 19156 5 6 7
549cmx122cm(18'x48") 6423 24311 7 7 8
ULTRA FRAME®
POOL
488cmx122cm(16'x48") 5061 19156 5 6 7
549cmx122cm(18'x48") 6423 24311 7 7 8
SEQUOIA SPIRIT®
POOL SET
478cmx124cm(15'8"x49") 4440 16805 5 5 6
508cmx124cm(16'8"x49") 5061 19156 5 6 7
OVAL FRAME
POOL
305cmx549cmx107cm(10'x18'x42")
2885 10920 3 3 4
366cmx610cmx122cm(12'x20'x48")
4393 16628 4 5 6
RECT. ULTRA
FRAME POOL
274cmx457cmx122cm(9'x15'x48")
3484 13187 3 4 5
274cmx549cmx132cm(9'x18'x52")
4545 17203 5 5 6
305cmx610cmx132cm(10'x20'x52")
5835 22085 6 7 8

SAVE THESE INSTRUCTIONS Page 2
(189PO) MODEL CS7111 SALTWATER SYSTEM & FILTER PUMP ENGLISH 7.5” X 10.3” PANTONE 295U 06/28/2013
English 189
PO
SAVE THESE INSTRUCTIONS
English
Page 15
SALT TABLE FOR COMMON NON-INTEX POOLS
OPERATING TIME TABLE FOR COMMON NON-INTEX POOLS (WITH CYANURIC ACID)
SALT CALCULATION FORMULA FOR ALL POOLS
Salt Needed for Startup
(Lbs)
Salt Needed for Startup
(Kgs)
Salt Needed when
Low Salt Detected (Lbs)
Salt Needed when
Low Salt Detected (Kgs)
WaterCapacity(Gals)x0.025
WaterCapacity(Liters)x0.003 WaterCapacity(Gals)x0.0067 Water Capacity (Liters) x 0.0008
CYANURIC ACID TABLE FOR COMMON NON-INTEX POOLS
Water Capacity Salt Needed for Startup
Salt Needed when
Low Salt Detected
(CODE “91”)
(Gals) (Liters) (Lbs) (Kgs) (Lbs) (Kgs)
2000 7500 50 20 10 5
4000 15000 100 45 25 10
6000 22500 150 65 40 20
7000 26500 175 80 55 20
Water Capacity
Operating Time (hours)
at different ambient/air temperatures
(Gals) (Liters) 10 - 19°C
(50 - 66°F)
20 - 28°C
(68 - 82°F)
29 - 36°C
(84 - 97°F)
2000 7500 2 2 3
4000 15000 4 5 6
6000 22500 7 7 8
7000 26500 7 8 9
Water Capacity
Cyanuric Acid Needed for Startup
0.03g/L (30ppm)
(Gals) (Liters) (Lbs) (Kgs)
2000 7500 0.50 0.23
4000 15000 1.00 0.45
6000 22500 1.50 0.68
7000 26500 1.75 0.80

SAVE THESE INSTRUCTIONS Page 2
(189PO) MODEL CS7111 SALTWATER SYSTEM & FILTER PUMP ENGLISH 7.5” X 10.3” PANTONE 295U 06/28/2013
English 189
PO
SAVE THESE INSTRUCTIONS
English
Page 16
FILTER PUMP OPERATION
1. Make sure the unit is switched off. The switch is located on the control station.
2. ConnectthepowercordtoaGFCIprotectedelectricaloutlet.
3. Turn both plunger valve handles fully counter-clockwise until they stop. This opens the valve,
allowing water to flow into the filter pump.
4. With water flowing into unit, the water pressure will allow the air trapped inside to escape
from the air release valves (1 & 7). When all the air has escaped water will flow out of the
valves (1 & 7). When this occurs gently finger tighten the valves in a clockwise direction.
NOTE: The plunger valve is equipped with a vacuum release valve that will automatically
activate to minimize the suction at the pool outlet if the outlet is blocked. This is an additional
safety feature to prevent suction entrapment. The vacuum release valve will reset once
the blockage is removed and the pump is switched off. To restart the system the air must be
removed from the filter pump per previous step.
5. Turn on the switch. The filter pump is now filtering the water.
6. The green "Pump" light on the control panel will light up, that indicates the filter pump is
running.
To prevent air lock, open the lower plunger valve (connected inlet hose) first and then
the upper plunger valve (connected outlet hose). Open air release valves, lift and lower
the inlet hose until water starts to flow out of the air release valves, close air release
valves.
IMPORTANT
WARNING
Risk of electric shock. Connect this product only to a grounding type receptacle
protected by a ground-fault circuit interrupter (GFCI). Contact a qualified electrician if
you cannot verify that the receptacle is protected by a GFCI.
71

SAVE THESE INSTRUCTIONS Page 2
(189PO) MODEL CS7111 SALTWATER SYSTEM & FILTER PUMP ENGLISH 7.5” X 10.3” PANTONE 295U 06/28/2013
English 189
PO
SAVE THESE INSTRUCTIONS
English
Page 17
SALTWATER SYSTEM OPERATION
1. Start up the unit:
PlugthepowercordintotheelectricaloutletandtesttheGFCI/RCD
(circuitbreaker).Switchontheunit.WiththeFilterPumpturned“ON”
and operating. The green "Pump" light on the control panel will be on
and flashing code “00” appears on the electronic control station’s
LED, indicating that the unit is ready to be programmed. This is
normal.
2. Set operating hours for Saltwater System:
With code “00” flashing, press button to set the
desired operating hours. See the “Operating Time Table”
for the required operating hours related to each pool
size. Pressing will increase the time from 01 to 12
hours maximum. If you have selected too many hours
keep pressing to repeat the cycle. The built-in timer
will now activate your Saltwater System, at the same
time each day, for the number of hours you have set.
NOTE: The Saltwater System will not operate if the filter
pump is not operating.
3. Lock keypad controls:
With the desired hour value showing, press button until you hear a
“beep”.Thegreen“WORKING”indicatoronthecontrolpanelwilllight
up within a few seconds to indicate that the saltwater system has started
sanitizer production. Locking the control buttons into this setting pre
vents unauthorized changing of the operating cycle.
NOTE: If you forget to lock the keypad controls, the system will
automatically lock it and start working 1 minute later.
4. Unlock & Readjust operating time if necessary:
The operating hours can be re-adjusted if necessary. Press button
until you hear a “beep” to unlock the keypad and the current
programmedtimewillflash.Repeatsteps2to3.
5. Test the copper concentration in the pool water.
The Saltwater System recommends a copper level
of 0.1 to 0.2 ppm. This is easily tested by the copper ion
test strips provided. If the test result is 0.1~0.2ppm, go
directly to step 7.
(1 to 12 hours max per cycle)
OK
0
Copper (ppm)
0.1 0.2 0.5 0.9 1.3

SAVE THESE INSTRUCTIONS Page 2
(189PO) MODEL CS7111 SALTWATER SYSTEM & FILTER PUMP ENGLISH 7.5” X 10.3” PANTONE 295U 06/28/2013
English 189
PO
SAVE THESE INSTRUCTIONS
English
Page 18
SALTWATER SYSTEM OPERATION (continued)
6. Boost cycle
•If the test result is below 0.1ppm, press and hold “BOOST” button for 5
seconds until the indicator lights up and the LED display display “80”. This
indicates that the saltwater system has started copper ion and more chlorine
sanitizer production. You can press and hold the “BOOST” button for another
5 seconds until the indicator is off, which will cancel the Boost cycle.
Note: Once the system has started copper ion and more chlorine sanitizer
production, the boost button can’t be re-set until the power switch is off.
•The boost operating hours is 8 times the amount of time programmed into the system, i.e. if your
saltwater system operating time is 2 hours, the boost procedure will run 8 x 2 = 16 hours. After
boost procedure has been completed, the system will automatically switch to the normal
working mode.
•After a heavy rain or if the pool is dirty, press the “BOOST” button to shock the pool again.
7. Test pool water regularly:
Once the copper level appears to be balanced, test the pool water every week to maintain the
propersanitizerlevel.It’sveryimportantthatthefreechlorineisbetween0.5-3ppmand
copper ion concentration is between 0.1~0.2 ppm. When the copper level is below 0.1 ppm,
repeat step 6.
NOTE: A High copper ion concentration may cause blonde hair to exhibit a green hair. To
prevent this, wear a swimming cap during swimming, and wash hair with special shampoo
afterusingthepool.See“TroubleshootingGuide”.
8. Stand-by/power saving mode:
•When the cycle ends, the green “SLEEP” indicator on the control panel lights
upandtheLEDdisplayflashes“93”.ThesystemisnowinStand-Bymode.
After a while, it shuts down and sets itself in a Power Saving mode. The
system will automatically turn itself back on in 24 hours, starting its daily cycle
of chlorine production.
•The “SLEEP” indicator stays on, while the system is in the Power Saving
mode. The LED display however, goes blank after 5 minutes. Press any
button ( or ) to view the last LED code.
9. Running the pump alone without the Saltwater System:
To run the pump alone without the Saltwater System function, press and hold
both and buttons until you hear a “beep”, the LED display will show
“FP”.Thepumpisnowoperatingalone.NOTE:Thepumpcannotbe
operated alone under an automatic timer mode. To stop the pump, manually
turn the switch OFF.
IMPORTANT: To keep the initial automatic operating cycle setting of the
SaltwaterSystem,turntheswitchON,theLEDdisplaywillshow“FP”,and
then press until you hear a “beep”. The LED display will now show the
initial input hours and the Saltwater System cycle will repeat again.

SAVE THESE INSTRUCTIONS Page 2
(189PO) MODEL CS7111 SALTWATER SYSTEM & FILTER PUMP ENGLISH 7.5” X 10.3” PANTONE 295U 06/28/2013
English 189
PO
SAVE THESE INSTRUCTIONS
English
Page 19
LED CODE CHART
LED Reading Definitions
FP Filter Pump Working Mode
80 Boost Mode
00 Stand-By Mode (Start-up)
01 Minimum Operating Hour (1 hour remaining)
02 Operating Hours (2 hours remaining)
03 OperatingHours(3hoursremaining)
04 Operating Hours (4 hours remaining)
05 Operating Hours (5 hours remaining)
06 Operating Hours (6 hours remaining)
07 Operating Hours (7 hours remaining)
08 Operating Hours (8 hours remaining)
09 Operating Hours (9 hours remaining)
10 Operating Hours (10 hours remaining)
11 Operating Hours (11 hours remaining)
12 Maximum Operating Hours (12 hours remaining)
90 AlarmCode(LowPumpFlow/NoPumpFlow)
91 Alarm Code (Low Salt Level)
92 Alarm Code (High Salt Level)
93 Stand-ByMode(OperatingProcessfinished)
“BLANK” NoPoweror“PowerSavingMode”waitingtostartnext
Saltwater System cycle.
Operation is subject to the following two conditions: (1) this device may not cause interference,
and (2) this device must accept any interference, including interference that may cause undesired
operation of the device.
Changes or modifications not expressly approved by the party responsible for compliance could
void the user’s authority to operate the equipment.
This equipment has been tested and found to comply with the limits for Class B digital device,
pursuant to part 15 of the FCC Rules. These limits are designed to provide reasonable protection
against harmful interference in a residential installation. This equipment generates, uses and can
radiate radio frequency energy and, if not installed and used in accordance with the instructions,
may cause harmful interference to radio communications. However, there is no guarantee that
interference will not occur in a particular installation. If this equipment does cause harmful
interference to radio or television reception, which can be determined by turning the equipment off
and on, the user is encouraged to try to correct the interference by one or more of the following
measures:
•Reorient or relocate the receiving antenna.
•Increase the separation between the equipment and the receiver.
•Connect the equipment into an outlet on a circuit different from that to which the receiver is
connected.
•Consult the dealer or an experienced radio/TV technician for help.

SAVE THESE INSTRUCTIONS Page 2
(189PO) MODEL CS7111 SALTWATER SYSTEM & FILTER PUMP ENGLISH 7.5” X 10.3” PANTONE 295U 06/28/2013
English 189
PO
SAVE THESE INSTRUCTIONS
English
Page 20
FLOW SENSOR CLEANING
ELECTROLYTIC CELL CLEANING
IMPORTANT
Close plunger valves on your pool or insert black hat-like plugs in strainer opening to
prevent water spillage. Open plunger valves or remove plugs when maintenance is
completed.
WARNING
Always unplug this product from the electrical outlet before removing, cleaning,
servicing or making any adjustment to the product.
1. In a counter-clockwise motion unscrew the collar of the flow sensor (11) and remove it from
the electrolytic cell conduit.See “Part Reference”.
2. If deposits and debris are seen on the surface of the flow sensor, then use a garden hose to
wash it off.
3. If flushing with water does not remove the deposits, use a plastic brush to clean the surface
and the hinge if necessary. Do not use a metal brush.
4. After the flow sensor has been inspected and cleaned, align the locator notch on the flow
sensortotheconnectionridgeintheconduit.Nowturnthecollarinaclockwisemotion,
tightening the sensor back into its position. Do not over tighten.
Connection Ridge
LocatorNotch
Hinge
The electrolytic cell has a self cleaning function incorporated into the electronic control's
programming. In most cases this self cleaning action will keep the cell working at optimum
efficiency. If the pool water is hard (high mineral content) the cell may require periodic manual
cleaning. To maintain maximum performance, we recommend that you open and visually inspect
the electrolytic cell once every month.
The following steps provide instructions on how to clean your cell.
MAINTENANCE
Table of contents
Other Intex Swimming Pool Filter manuals
Popular Swimming Pool Filter manuals by other brands

Pulsar
Pulsar PS-1HCE Operation and installation manual

Zodiac Pool Systems
Zodiac Pool Systems JANDY TRUCLEAR XL Installation and operation manual

Procopi
Procopi Aquareva RTM SIDE S-610-A Instructions for installation and use

BIO-LAB CANADA
BIO-LAB CANADA Mineral Springs Pool Pilot Soft Touch 840C Installation and operation manual

Messner
Messner Skimmer 200 operating instructions

Oase
Oase SwimSkim operating instructions