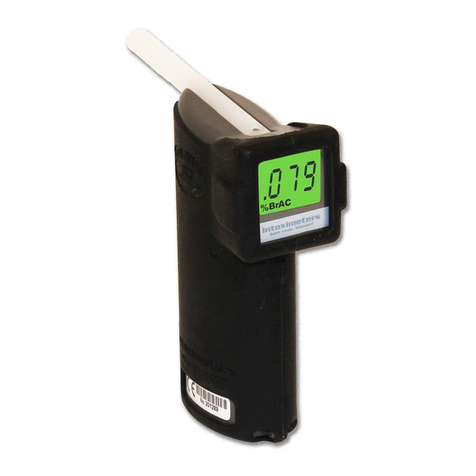
Intoximeters Alco-Sensor FST User manual

Alco-Sensor FST®
Canadian Version
Calibrator’s
Manual
Parts of this Manual have been adapted from the following:
Intoximeters, Inc. - Supervisor’s Manual (with permission)
Produced by:
Forensic Science and Identification Services
National Centre for Forensic Services - Alberta
May 2012

-2-
ALCO-SENSOR FST® CALIBRATOR’S MANUAL
1.0 TABLE OF CONTENTS
1.0 Table of Contents ............................................................... -2-
2.0 Introduction .................................................................... -3-
3.0 Policy and Legal Requirements ..................................................... -3-
4.0 Theoretical Concepts of the Calibration Procedure ...................................... -3-
5.0 Procedure for Simulator Operation .................................................. -4-
6.0 Alco-Sensor FST® ............................................................... -5-
6.1 Performing an Accuracy Check .............................................. -5-
6.2 Performing a Calibration ................................................... -6-
6.3 Calibration Tag ........................................................... -8-
6.4 Calibration Procedure .................................................... -8/9-
6.5 Calibration Log ........................................................ -8/10-
7.0 Care and Maintenance ........................................................... -11-
7.1 Policy on Maintenance .................................................... -11-
7.2 Battery Replacement ...................................................... -11-
8.0 Trouble Shooting ............................................................... -12-
8.1 Aborting a Test .......................................................... -12-
8.2 Blank Test not Successful .................................................. -12-
8.3 Insufficient Breath Sample ................................................. -12-
8.4 Improper Breath Sample ................................................... -12-
8.5 Low Battery ............................................................ -12-
8.6 Radio Frequency Sensor ................................................... -12-
8.7 Temperature out of Range ................................................. -13-
8.8 Incorrect Pass Code ...................................................... -13-
8.9 Time Outs .............................................................. -13-
8.10 Status Messages ........................................................ -13-

-3-
ALCO-SENSOR FST® CALIBRATOR’S MANUAL
2.0 INTRODUCTION
Enforcement of impaired driving remains as a high priority in policing operations. Much of this
enforcement is dependant on scientific instruments both for screening of alcohol and in evidentiary
results. Technology in breath alcohol testing is constantly evolving and improving. The Alco-Sensor
FST® is one of the new generation of screening devices and appeared on the approved screening device
order in 2009. In spite of the advanced technology in this screening device, its calibration must still be
monitored on a regular basis.
3.0 POLICY AND LEGAL REQUIREMENTS
The calibration of approved screening devices shall be checked with an alcohol standard at least every 31
days by a Screening Device Calibration Technician. In order to be eligible to become a Screening
Device Calibration Technician, the person must be trained in the operation of the Approved Screening
Device and also be a current Qualified Technician in the operation of an approved instrument. There is
no Criminal Code designation for the calibration of screening devices. Additionally the Criminal Code
does not establish any requirements or restrictions on the calibration of such devices.
Requirements for calibration are established in policy, and through the “Recommended Standards and
Procedures” of the Canadian Society of Forensic Science - Alcohol Test Committee. For screening
devices the policy on calibration check intervals are based on scientific testing which determined the
stability of screening devices.
While the Criminal Code does not mandate calibration requirements, it is imperative that calibration
checks and procedures be conducted as set out in this manual. It must be kept in mind that the results
from approved screening devices are the basis upon which a demand for an evidentiary test is made. If
doubt can be cast on the proper functioning of the screening device, it is possible that the subsequent
evidentiary test results may be excluded as evidence and result in dismissal of the charge.
4.0 THEORETICAL CONCEPTS OF THE
CALIBRATION PROCEDURE
The calibration of the instrument is checked using the vapours of an alcohol standard of known value as
introduced through a simulator. This procedure is based on Henry’s Law which states that the
concentration of alcohol in the vapour above a solution is dependent on the temperature and the
concentration of alcohol in the solution. For this reason it is important that the temperature of the
simulator be closely observed during the procedure. It is also important that the Alcohol Standard is one
that is approved by the Forensic Laboratory and is within the specified expiry date.

-4-
ALCO-SENSOR FST® CALIBRATOR’S MANUAL
Checking the calibration of screening devices can be expressed by the following:
Properly Approved Properly Expected
Operating + Alcohol + Calibrated = Reading
Simulator Standard Alco-Sensor FST® 100 +/- 5 mg%
The above equation indicates that in order to obtain the expected result, it is important that the simulator
and alcohol standard are also correct prior to performing the test. Only then can the expected reading be
obtained and the proper assessment as to the calibration of the Alco-Sensor FST®.
It is important to understand the terminology, specifically the terms accuracy check (also referred to as
calibration check) and calibration. Accuracy Check merely means performing a test with the Alco-
Sensor FST® using the known alcohol standard and observing the result. For these purposes when using
a “100" solution a perfect result is 100 mg%, but results between 95 to 105 mg% are acceptable. The
accuracy check represents obtaining a number, whether it is 99 mg% or 107 mg%. Regardless of the
result obtained, at this point we have performed an accuracy check. If the accuracy check reveals a result
of 99 mg%, the device is said to be within acceptable limits and no calibration adjustment is necessary.
Note that two consecutive readings in the range of 95 to 105 mg% must be obtained for the device to be
in proper calibration.
For example, if a result of 107 mg% was obtained, it is obvious that this device is not achieving proper
accuracy and calibration is required. Calibration is the process by which a unit out of calibration is
physically adjusted so that it is in calibration, i.e. adjusted so that the alcohol standard provides a result
of 100 mg% when analyzing a known vapour with a target result of 100 mg%. While the above concepts
may be simple the terminology is often misused, and must be understood.
The procedures that follow discuss the various steps shown in the above equation:
1. Proper use of the simulator with alcohol standard
2. Accuracy check
3. Calibration
5.0 PROCEDURE FOR SIMULATOR OPERATION
1. Ensure simulator jar and tubing are clean and dry. Pour 500 mL of appropriate ethyl alcohol standard
(“100" solution) into the simulator jar. Record the name of the manufacturer, lot number and expiry date,
of the simulator solution on the Alco-Sensor FST® calibration log. DO NOT USE THE SIMULATOR
SOLUTION AFTER THE EXPIRY DATE.
2. Tightly screw the top of the simulator on to the jar.
3. Leak check the simulator by attempting to blow into inlet while blocking the outlet with a finger. It
should be difficult to blow into the simulator in this manner with little or no bubbles produced.

-5-
ALCO-SENSOR FST® CALIBRATOR’S MANUAL
If you were able to readily blow air into the simulator while blocking the outlet tube with a
finger, then the jar was not sealed tightly against the top of the simulator. Check to ensure that
the rubber gasket is seated properly, re-tighten the jar on to the top of the simulator, and leak
check again. If leaking persists, maintenance of the simulator may be required (contact the
service provider).
NOTE : If a simulator leaks air when tested as above, it will not provide a satisfactory sample of
alcohol vapour for analysis.
4. Turn the simulator on and ensure that the propeller is turning. Wait a minimum of 20 minutes for the
simulator to reach the operating temperature. Check the thermometer after that time to ensure that
simulator has heated to 33.8 to 34.2°C. Do not use the simulator while it is heating.
NOTE : The simulator solution can be used to calibrate more than one unit. It must be discarded
after 16 tests or at the end of a calibration session.
6.0 ALCO-SENSOR FST®
To obtain accurate test results, the device must be properly calibrated.
The accuracy of a device is verified by running a known alcohol concentration (standard) through the
Alco-Sensor FST® sampling system and verifying that the result is within an acceptable tolerance of the
expected or target value of the standard. This is called an accuracy check or calibration check. The
terms are used interchangeably, however, the term accuracy check with be used in this manual.
When performing an accuracy check, if the result of the accuracy check is within an acceptable tolerance
of the stated value of the standard, the Alco-Sensor FST® is considered to be calibrated. If the reading is
not within the acceptable tolerance, then the Alco-Sensor FST® must have its calibration adjusted.
6.1 Performing an Accuracy Check
The Alco-Sensor FST® will only allow an Accuracy Check to be performed when the temperature of the
device is between 00- 400C.
Prepare the simulator for use. Ensure that the jar and tubing are clean and dry. Pour in the “100" solution
into the simulator and secure the top. Test simulator for leaks. Turn the simulator on and ensure the
propeller is turning. Warm the simulator for at least 20 minutes and ensure the thermometer indicates
33.80- 34.20C.
1. Attach a new clean mouthpiece to the Alco-Sensor FST® and power the device ON by first pressing
and holding the OFF button and then simultaneously pressing ON button.

-6-
ALCO-SENSOR FST® CALIBRATOR’S MANUAL
2. The display should show the rcL message, which is the first option in the function Menu. Momentarily
depress the ON button, the displayed message should change to PAS, press the ON button again, the
displayed message should change to rbL. Press the ON button one more time and ACC should appear on
the display.
3. With ACC on the display, press the OFF button to select the Accuracy Check option. The temperature
will be displayed followed by bLN (blank check) and the result of the blank test before a flashing ACC
message will appear.
4. While the display shows a flashing ACC, make an airtight connection between the outlet port of the
simulator and the open end of the mouthpiece. Blow into the inlet port of the simulator. If there is
adequate and consistent flow, after several seconds, the device should capture a sample automatically.
Make certain that you continue to provide a sample for at least one or two seconds following the point in
time where the sample has been captured (sample collection is identified by a clicking sound).
5. Detach the device from the simulator and wait until the analysis is complete.
6. The device will display a result in digital format and then power down. Record the result in your
calibration log.
a. If the result is 95 to 105 mg%, repeat the procedure by returning to Step 1.
b. If the result is less than 95 mg% or greater than 105 mg%, the device will require a calibration
adjustment. Go to Step 1 of the Calibration procedure.
NOTE: The Accuracy Check is not complete until there are two consecutive results in the range of
95 to 105 mg%.
6.2 Performing a Calibration
To calibrate an Alco-Sensor FST®, the temperature of the device must be between 150- 350C. If the
temperature is not within this range, the device will display E09 or E10 and block the calibration
procedure.
1. Attach a new clean mouthpiece to the Alco-Sensor FST® and power the device ON by first pressing
and holding the OFF button and then simultaneously pressing ON button.
2. The display should show the rcL message, which is the first option in the function Menu. Momentarily
depress the ON button, the displayed message should change to PAS, press the ON button again, the
displayed message should change to rbL, press the ON button again, the displayed message should
change to ACC. Press the ON button one more time and CAL should appear on the display.
3. With CAL on the display, press the OFF button to select the Calibration option. This will initiate the
Calibration sequence (pass code protected*). The temperature will be displayed followed by bLN (blank
check) and the result of the blank test before a flashing CAL message will appear.

-7-
ALCO-SENSOR FST® CALIBRATOR’S MANUAL
*Pass Code: A pass code will have to be entered in order to access the calibration function of this
device. Contact your program administrator for further details.
4. While the display shows a flashing CAL, make an airtight connection between the outlet port of the
simulator and the open end of the mouthpiece. Blow into the inlet port of the simulator. If there is
adequate and consistent flow, after several seconds, the device should capture a sample automatically.
Make certain that you continue to provide a sample for at least one or two seconds following the point in
time where the sample has been captured (sample collection is identified by a clicking sound).
5. Detach the device from the simulator and wait until the analysis is complete.
6. The device will display a result in digital format. Record “CAL” on your calibration log.
a) If the result equals the expected value of the alcohol standard (100), then depress the OFF
Button. You will see that each time you depress the OFF Button, the flashing digit moves from
the left most digit of the number to the right. After depressing the button three times, the value
displayed will be accepted as the Calibration Value and will flash three times before the device
will power down.
b) If the result does not match the expected value of the alcohol standard (100), you will
need to adjust the displayed result to the proper value. The result displayed will have the digit
furthest to the left flashing. If the flashing digit is incorrect, press and release the ON button as
many times as it is necessary to cycle the displayed digit to the correct number. When the digit is
correct, press the OFF button to move the flashing highlight to a digit to the right. After you have
adjusted the furthest to the right digit and the OFF Button is depressed, the new calibration value
will be flashed on the display three times before the device will power down.
If you need to adjust this number further, pressing the OFF Button again, while the entire
calibration number is flashing, will provide you this option by displaying the most recently
entered number with the digit furthest to the left flashing. If the calibration value is correct and
you have not pressed the OFF button a second time, after the third flash the new Calibration
value will be accepted.
7. Perform the Accuracy Check procedure to verify the calibration adjustment.
It is essential to verify the calibration. THE RESULTS SHOULD BE WITHIN ± 5mg% OF THE
EXPECTED VALUE OF THE ALCOHOL STANDARD READING.
If the Accuracy Check does not produce 2 consecutive results within +/- 5 mg% of the target value of 100
mg% (95 to 105 mg%), repeat the calibration procedure after waiting several minutes.
6.3 Calibration Tag
According to the Recommended Standards and Procedures of the Canadian Society of Forensic Science
Alcohol Test Committee, the calibration of the Alco-Sensor FST® shall be checked by a qualified Alco-
Sensor FST® calibrator with an alcohol standard at least every 31 days.

-8-
ALCO-SENSOR FST® CALIBRATOR’S MANUAL
A tag should be placed on the device so that it is clearly visible to all users. This tag can be locally
produced with markings similar to those shown below.
In order to make a demand for the screening device, the investigator should have knowledge of the
calibration status of the device. As a result, Alco-Sensor FST® operators are trained to check the
calibration tag on the device before any intended use. If the current date is beyond the Calibration Expiry
Date, the screening device is not to be used. Annual Maintenance Inspection information is also found
on the tag and is the responsibility of authorized service personnel only. Each operator must confirm the
next annual inspection date of the Alco-Sensor FST® prior to use. An ASD must not be used after the
next inspection date that is listed on the tag.
Sample Tag:
Alco-Sensor FST® Serial Number 061588
Next Annual Inspection Date: 2012 May 17
(For Authorized Service Personnel Only)
Calibration Date: 2011 May 18
Calibration Expiry Date: 2011 June 15
DO NOT USE AFTER EXPIRED
Calibrators Name & Reg. No.______________
6.4 Calibration Procedure
The steps involved in the calibration procedure, including preparing the simulator, conducting an
accuracy check and adjusting the calibration of the Alco-Sensor FST® are outlined in section 6.4 on page
9 of this manual.
6.5 Calibration Log
To show the frequency and history of calibration for the device, make sure that the Alco-Sensor FST®
Calibration Log is correctly completed. These logs are subject to disclosure and inspection of such logs
should indicate compliance with the 31 day requirement for calibration checks.
The calibration log must contain the serial number of the Alco-Sensor FST®, the name of the calibrator,
the alcohol standard information (manufacturer, lot number and expiry date) and the results of the tests
conducted. A sample log is outlined in section 6.5 on page 10 of this manual.

-9-
ALCO-SENSOR FST® CALIBRATOR’S MANUAL
6.4 Alco-Sensor FST® CALIBRATION PROCEDURE
NOTE: Record alcohol standard information and test results on corresponding log sheet.
PREPARATION OF SIMULATOR
Ensure jar and tubing are clean and dry. Pour in “100" solution. Test simulator for leaks. Ensure
propeller is turning. Warm simulator for 20 minutes. Ensure temperature indicates 33.80C to 34.20C.
NOTE: Simulator solution can be used to calibrate more than one unit. It must be discarded after 16
tests or at the end of calibration session.
Record alcohol standard information on the Alco-Sensor FST® calibration log.
ACCURACY CHECK:
1. Attach a new clean mouthpiece and power the
device ON by first pressing and holding the OFF
button and then simultaneously pressing ON button.
2. Press the ON button until ACC appears on the
display.
3. Press the OFF button to select the Accuracy Check
option. The temperature will be displayed followed
by a blank check.
4. While the display shows a flashing ACC, connect
the device to the simulator and introduce simulator
vapour.
5. Detach the device from simulator and wait until the
analysis is complete.
6. Observe the result given on the display and record
result on log sheet.
a) If the result is 95 to 105 mg%, return to Step 1.
b) If the result is less than 95 mg% or greater than
105 mg%, go to Step 1 of the Calibration
procedure.
NOTE:Repeat procedure until two consecutive
responses are in the range of 95 to 105 mg%.
CALIBRATION:
1. Attach a new clean mouthpiece and power the
device ON by first pressing and holding the OFF
button and then simultaneously pressing the ON
button.
2. Press the ON button until CAL appears on the
display.
3. Press the OFF button to select the Calibration
option. This will initiate the calibration sequence
(pass code protected). The temperature will be
displayed followed by a blank check.
4. While the display shows a flashing CAL, connect
the device to the simulator and introduce simulator
vapour.
5. Detach the device from simulator and wait until the
analysis is complete.
6. Observe the result given on the display and record
“CAL” on log sheet.
a) If the result displayed is “100", depress the OFF
button three times to accept the calibration value.
The calibration value will flash three times before
the device will power down.
b) If the result displayed is not “100", use the ON
button to adjust each digit so that “100"is displayed
and confirm each digit by pressing the OFF button.
The calibration value will flash three times before
the device will power down.
7. Return to Step 1 of the Accuracy Check
procedure.
Record results on Alco-Sensor FST® calibration log.

-10-
ALCO-SENSOR FST® CALIBRATOR’S MANUAL
6.5 Alco-Sensor FST® Calibration Log
Serial Number: Police Agency:
Alcohol Standard Information TRIALS Calibrated by
Date Manufacturer: Lot Number: Expiry Date: 1234 Name Reg

-11-
ALCO-SENSOR FST® CALIBRATOR’S MANUAL
7.0 CARE AND MAINTENANCE
7.1 Policy on Maintenance
Once a year, all Approved Screening Devices in active use in the program shall be inspected by
authorized service personnel to ensure that they continue to meet the manufacturer’s specifications. This
annual maintenance is considered a preventative measure and is essential to the integrity of the breath
test program. However, this is not necessary to defend the proper functioning of the Approved Screening
Device, as it is the proper calibration and/or calibration check procedures that are the primary means of
assuring accuracy of the Approved Screening Device at the time of use.
Upon return of an ASD from the service provider, an accuracy check must be conducted before returning
the unit to operation.
7.2 Battery Replacement
The batteries will need to be replaced when the displayed battery icon indicates the battery is
out of power. The display shows bAt or there is not enough power to power the device ON.
To replace the batteries follow these instructions:
Remove the optional rubberized grip.
Slide BATTERY DOOR open.
Remove both BATTERIES.
Insert two new AA size Alkaline BATTERIES.
(Note the + and – labels within the battery compartment to insert the batteries properly)
Close BATTERY DOOR.
Replace rubberized grip.
Caution
X When changing batteries always replace both batteries and never mix battery types.
X When installing batteries, the proper polarity, or orientation, must be observed. (On both the inside
of the case and on the circuit board in the battery compartment there is a guide for proper polarity
orientation).
X In addition, the Alco-Sensor FST® has a battery cover with the proper polarity displayed on the
outside of the battery cover. You can also use this to verify that the batteries have been installed
correctly.
X After replacing the batteries, always power the device ON to verify proper installation – if the Alco-
Sensor FST® does not power ON immediately remove the batteries. Check orientation and reinstall
correctly or replace with a new set.

-12-
ALCO-SENSOR FST® CALIBRATOR’S MANUAL
8.0 TROUBLE SHOOTING
8.1 Aborting a Test
To abort a test, depress the OFF button to turn the device OFF.
8.2 Blank Test not Successful (E11)
Before an Accuracy Check or Calibration procedure can continue the device automatically performs a
blank test to ensure that the device is free of alcohol. If this test does not result in a zero reading the test
will display E11. Remove and replace the mouthpiece. Make certain that you are using a new, clean
mouthpiece. Wait a few moments before initiating another test. If repeated attempts at a blank test do not
result in a zero reading contact your service provider.
8.3 Insufficient Breath Sample (E06)
The device will allow the subject 3 attempts to provide a sample before it will display the status message
E06 and power off.
8.4 Improper Breath Sample
An Improper Breath Sample was detected by the device and is indicated by the FLo message flashing
several times along with one of the following descriptors: Lo, Hi, InS or Cut.
FLo Lo - indicates subject breath flow fell below the device?s minimum flow requirements;
FLo Hi - indicates subject breath flow exceeded maximum allowable flow rate;
FLo InS - indicates subject breath flow was not consistent;
FLo Cut - indicates subject provided enough sample to capture a sample, but breath flow stopped too
abruptly
8.5 Low Battery
The battery level indicator is displayed on power up and will give the user an indication of current
battery strength. If the battery strength is lower than the device's requirement for performing a test, then
bAt will flash on the display and the device will power off. Battery replacement is required. (see Battery
Replacement Procedure, page 11)
8.6 Radio Frequency Interference (RFI) Sensor (E12/rF1)
RFI detection is built into the Alco-Sensor FST®. The casing of the device is designed to provide RFI
shielding for the electronics. If an interference signal is detected by the RF sensor, the test will be voided
and E12/rF2will be displayed on the Alco-Sensor FST®. No result will be available. The test will stop
and the device will power down.
The source of the RFI should be located and removed from the testing site before the test is initiated
again. Some common sources of RFI may include walkie-talkies, cell phones and other radio transmitting
sources.

-13-
ALCO-SENSOR FST® CALIBRATOR’S MANUAL
8.7 Temperature out of Range (E09 or E10)
The device temperature is displayed after the device is turned on. If the device temperature is below 0/C
or above 40/C (outside the Alco-Sensor FST® operating temperature range), then the test cannot be
initiated. Place the device in an environment that will bring it to proper operating temperature. The
device should come to an acceptable operating temperature within several minutes if placed in a pocket
close to the body.
8.8 Incorrect Pass Code (E20)
This error message applies if the pass code entered before a calibration is not correct.
NOTE: Accessing Pass Code Features
The Alco-Sensor FST® as approved for use in Canada has a pass code security feature enabled on the
Calibration menu function. This ensures that only those persons trained in the operation of the pass code
function and Calibration procedure can access this function. Any questions on this pass code and the
Calibration procedure function should be addressed to the Program Administrator/Supervisor.
If you access a menu function and the device does not operate according to the standard instructions in
this manual, contact your supervisor.
8.9 Time Outs
If no breath sample is blown into the device, bLo will be displayed for 3 minutes (180 seconds) before
the test is automatically aborted and the device powers down.
8.10 Status Messages
Contact your authorized service personnel if any status messages are displayed, other than those
referenced in this manual.
Other manuals for Alco-Sensor FST
5
Table of contents
Other Intoximeters Test Equipment manuals