6
Instrucciones de Ensamble, Instalación, y Operación
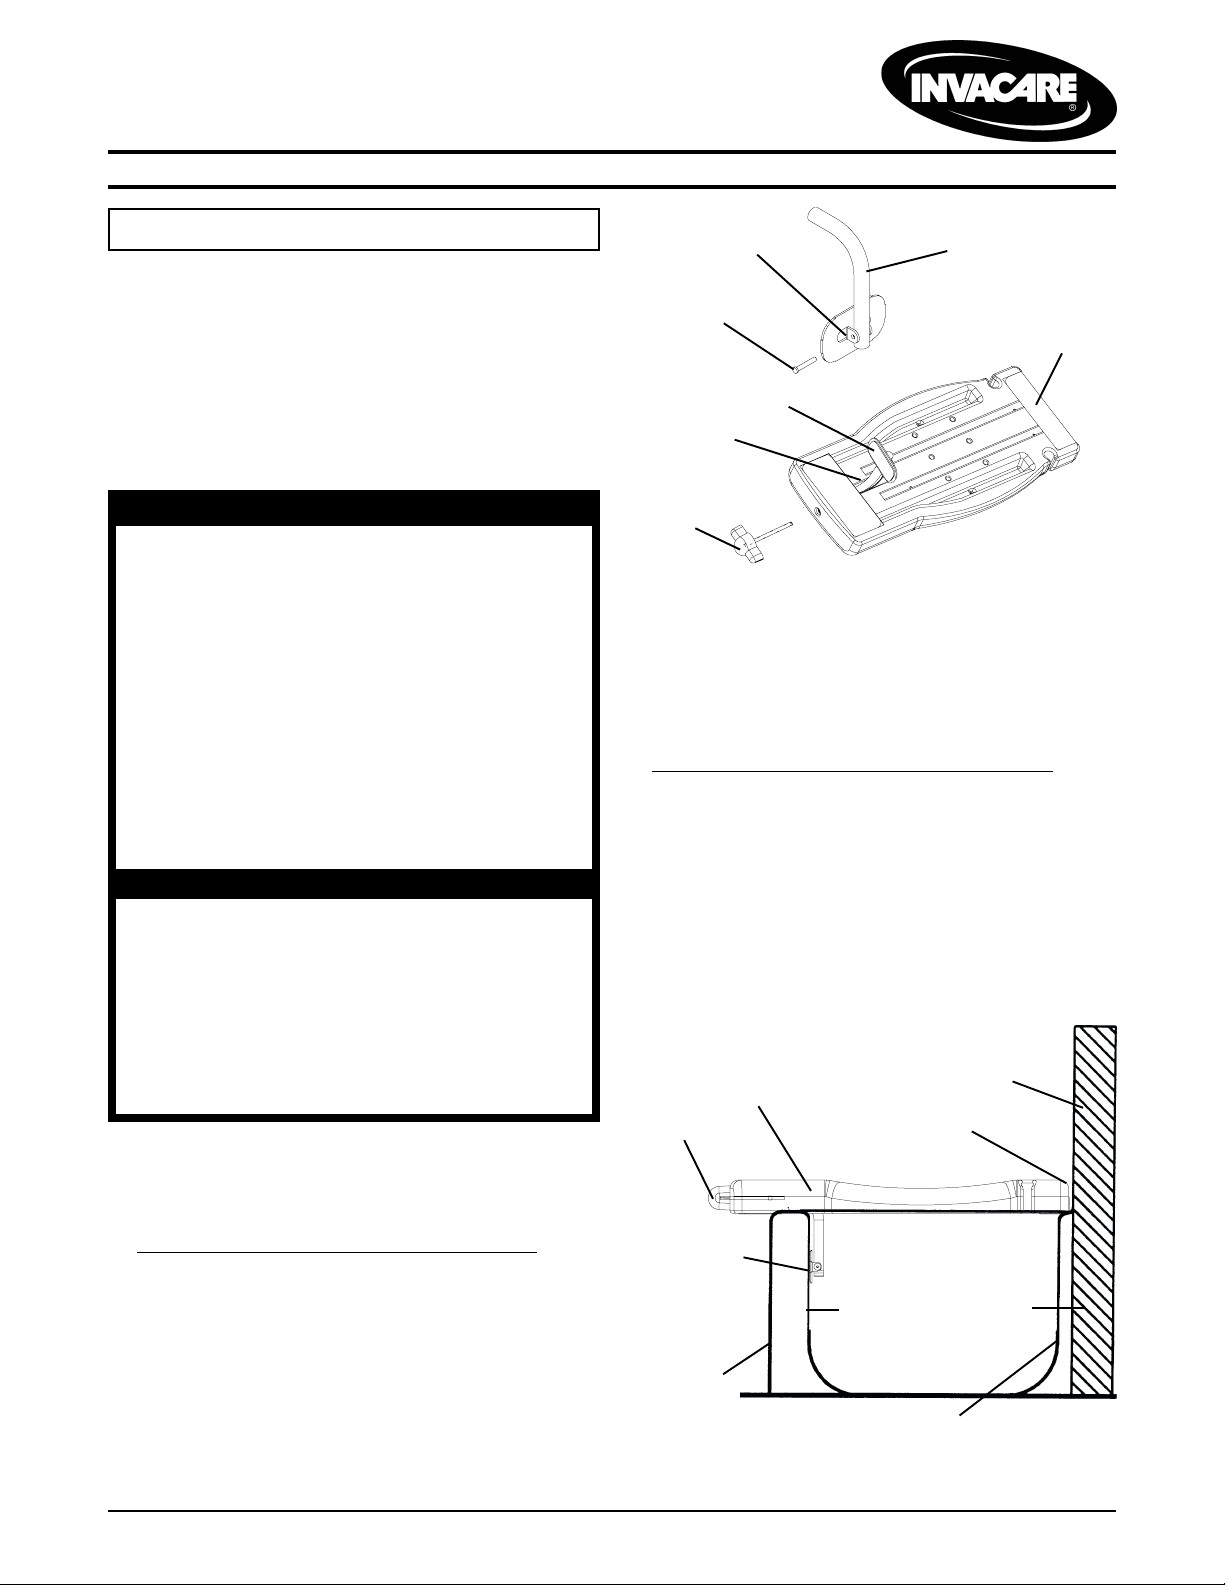
Soporte
Tubo
Pin
Abertura
Botón Con
Rosca
FIGURA 1 - ENSAMBLANDO LA PLATAFORMA
PARA BAÑERA
Tubo y su
ensamble
Plataforma
para Bañera
PLATAFORMA PARA BAÑERA
MODELO No. 9664
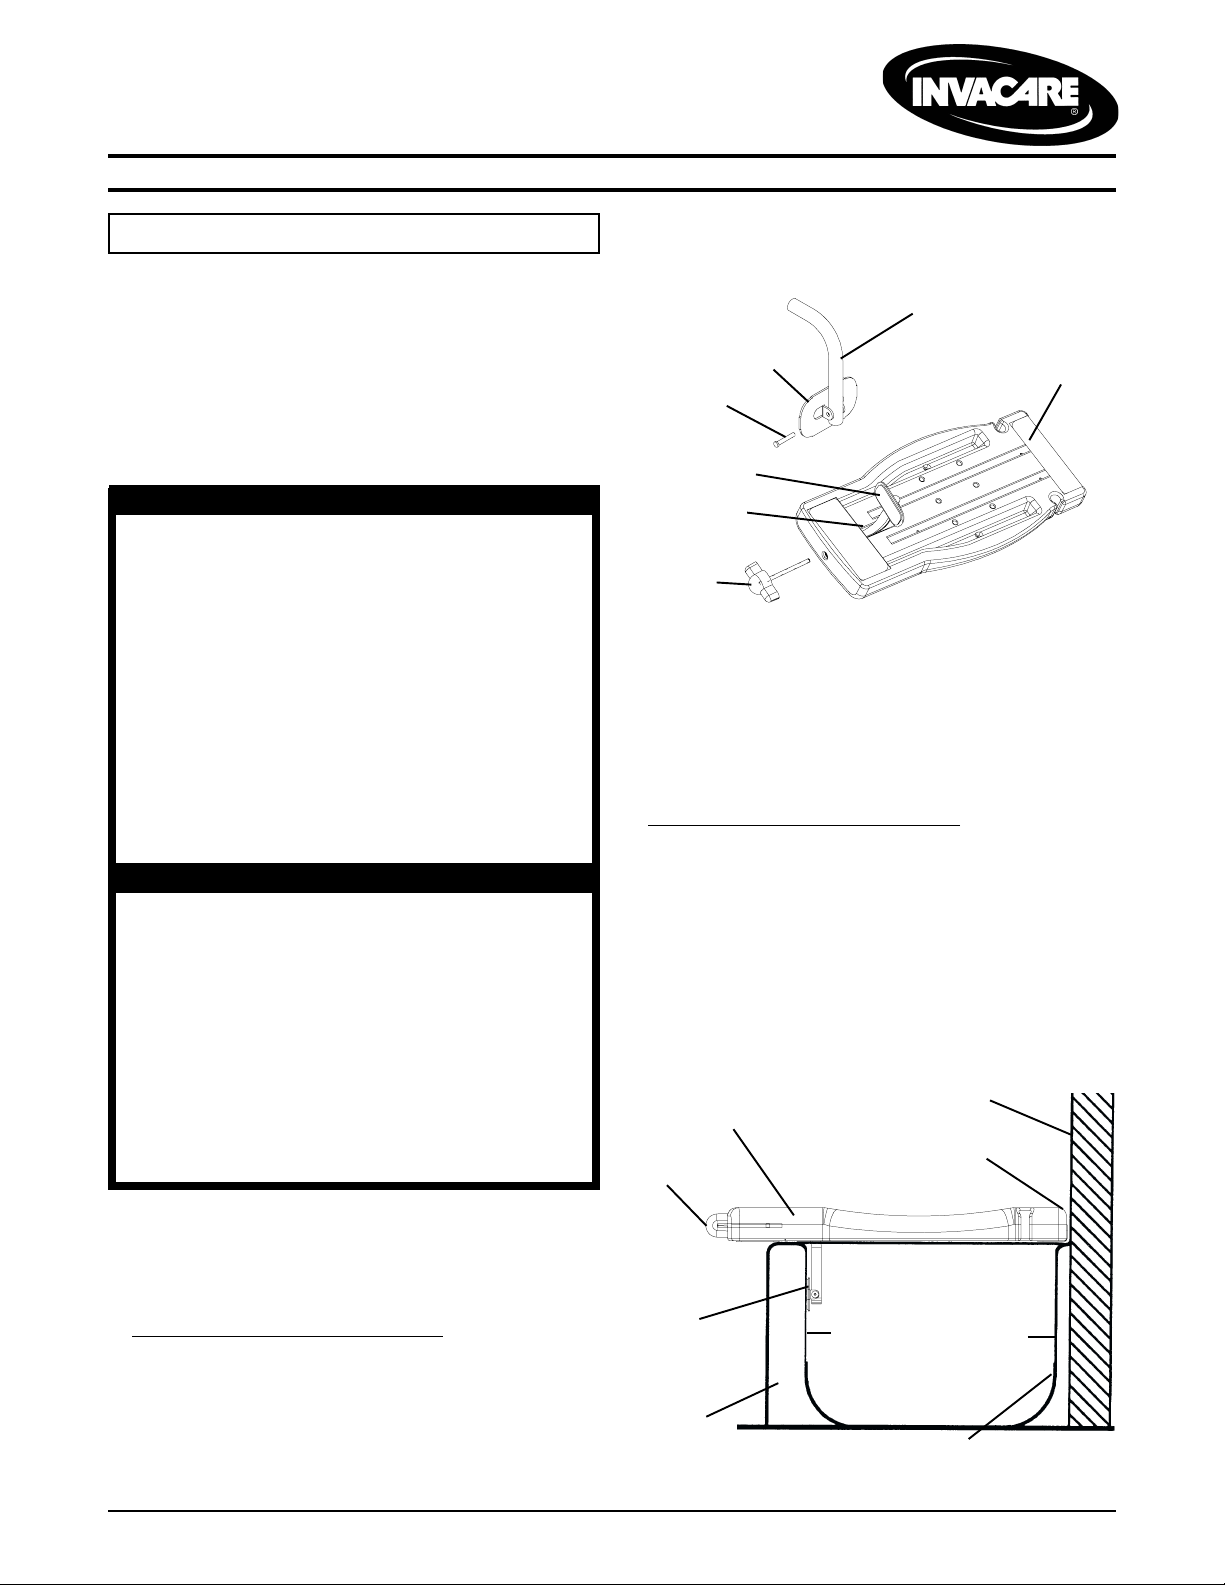
USANDO LA PLATAFORMA PARA
BAÑERA (FIGURA 2)
NOTA: Refiérase a ADVERTENCIAS ESPECIFICAS en
el SUMARIO DE PRECAUCIONES en esta hoja de
instrucciones.
1. Asegúrese de que la orilla de atrás de la plataforma
queda bien pegada a la pared del cuarto del baño.
2. Aprete bien el botón con orejas asegurándose de
que la plataforma queda bien pegada a la pared del
cuarto del baño.
3. Verifique que la plataforma está bien asegurada en
su lugar sobre la bañera antes de usarla.
Botón con
rosca
Soporte que
se ajusta
Pared del Baño
Orilla trasera
Bañera
Min. 23 1/4 pulgadas
Max. 26 1/2 pulgadas
Pared de adentro
FIGURA 2 - USANDO LA PLATAFORMA
PARA BAÑERA
Plataforma para
Bañera
4. Coloque el botón mariposa que tiene rosca, en el
hoyo localizado en una punta de la plataforma, y
aprete el tubo del soporte.
GUARDEESTASINSTRUCCIONES
NOTA: Inspeccione TODAS las partes por cualquier daño
durante el envío. Si algún daño es descubierto, NO LO USE.
Póngase en cantacto con el agente de la entrega o su
proveedor, para futuras instrucciones.
SUMARIO DE PRECAUCIONES
Lasrecomendacionessiguientessehacenconelfinde
asegurarelusocorrectodelaplataformaparalabañera:
ADVERTENCIA
NOInstaleesteequiposinantesleeryentenderesta
hojadeinstrucciones.Sitienedificultadenentender
estas advertencias, precauciones e instrucciones,
póngase en contacto con un profesional de la
salud, su proveedor o personal técnico, si aplica,
antes de intentar la instalación de este equipo. De
otromodo,heridasodañopersonalpuedenocurrir.
Usuarios con limitaciones físicas deben ser
supervisadosyasistidoscuandousenlaPlataforma
para Bañera.
La Plataforma para Bañera tiene una capacidad
de peso de 250 libras. (114 kilogramos).
ADVERTENCIAS ESPECIFICAS
El grueso de la pared de adentro de la bañera
debe de ser de un mínimo de una (1) pulgada a
dos(2) pulgadasmáximo. NOUSE estaplataforma
parabañeraenbañerasqueestánasentadaslibres,
sin ningún soporte, o que no tienen dos paredes.
Siempre,antesdeusarla,inspeccionelaplataforma
para asegurarse de que está en una pósicion
apropiada y estable.
Asegúresedequetodaslaspiezas,tornillosytuercas
están debidamente apretadas todo el tiempo.
ENSAMBLANDO LA PLATAFORMA
PARA BAÑERA (FIGURA 1)
NOTA: Refierase a ADVERTENCIAS ESPECIFICAS rn
el SUMARIO DE PRECAUCIONES en esta hoja de
instrucciones.
1. Asegure el soporte al tubo con el pin provisto.
2. Ponga la plataforma para bañera al revés.
3. Coloque el ensamble del tubo soporte en la abertura
que está debajo de la plataforma para bañera.