manuals.online logo
Brands
  1. Home
  2. •
  3. Brands
  4. •
  5. Invacare
  6. •
  7. Medical Equipment
  8. •
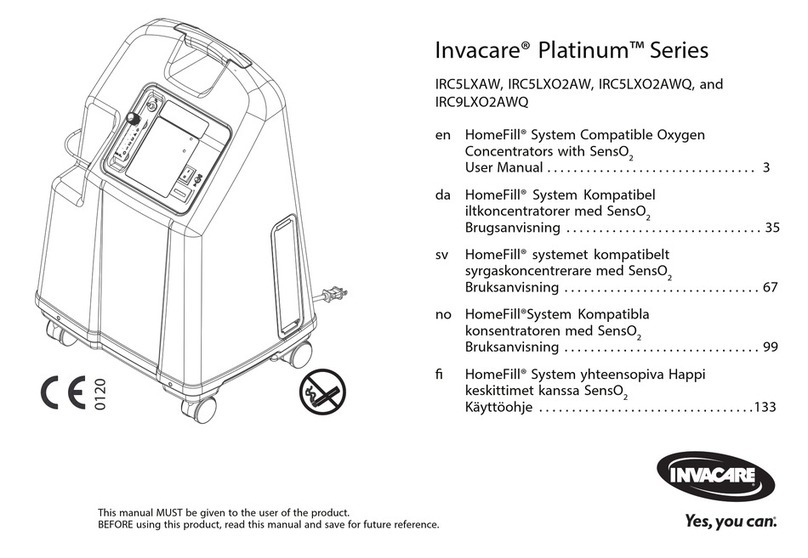
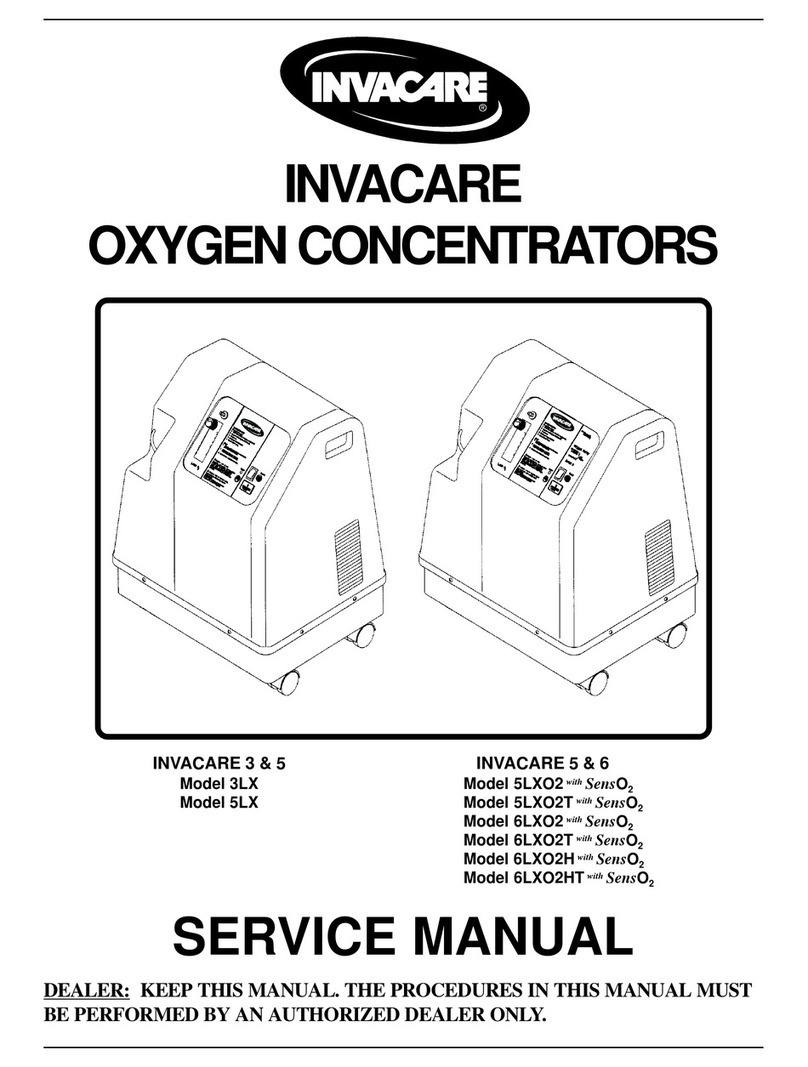
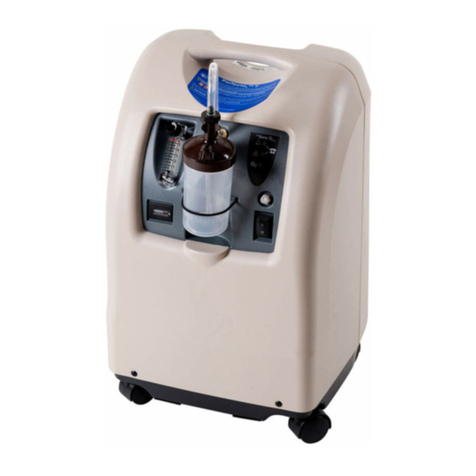
  9. Invacare Invacare 5 with/SensO2 User manual

Invacare Invacare 5 with/SensO2 User manual

OPERATOR'S MANUAL - ENGLISH
MANUAL DE INSTRUCCIONES -
DOMESTIC SPANISH
INVACARE 3
INVACARE 5
INVACARE 6
OXYGEN CONCENTRATORS STANDARD,
WITH/SENSO2®,
TELEMETRY AND HOMEFILL II
CONCENTRADORES DE OXIGENO
STANDARD, CON/SENSO2®, TELEMETRIA Y
HOMEFILL II
DEALER: THIS MANUAL MUST BE GIVEN
TO THE END USER.
USER: BEFORE USING THIS
CONCENTRATOR,
READ THIS MANUAL AND SAVE FOR
FUTURE REFERENCE.
Invacare 5 with/SensO2®
Model IRC5LXO2
Invacare 5 con/SensO2®
Modelo IRC5LXO2
Invacare 5
Model IRC5LX
Invacare 5
Modelo IRC5LX
2
SPECIAL NOTES
SAVE THESE INSTRUCTIONS
WARNING
DO NOT OPERATE THIS E UIPMENT
WITHOUT FIRST READING AND UNDER-
STANDING THIS MANUAL. IF YOU ARE
UNABLE TO UNDERSTAND THE
WARNINGS, CAUTIONS, AND INSTRUC-
TIONS, CONTACT INVACARE TECHNICAL
SERVICES BEFORE ATTEMPTING TO USE
THIS E UIPMENT - OTHERWISE INJURY OR
DAMAGE MAY RESULT.
SPECIAL NOTES
WARNING/CAUTION notices used in this manual apply to
hazards or unsafe practices which could result in personal
injury or property damage.
NOTICE
THE INFORMATION CONTAINED IN THIS DOCUMENT
IS SUBJECT TO CHANGE WITHOUT NOTICE.
3
SPECIAL NOTES........................................... 2
SAFETY SUMMARY ...................................... 4
FEATURES ..................................................... 8
SPECIFICATIONS ......................................... 9
HANDLING .................................................. 12
Unpacking .................................................................... 12
In pection .................................................................... 12
Storage ......................................................................... 12
INTRODUCTION........................................ 13
OPERATING INSTRUCTIONS ................. 13
Select a Location .......................................................... 13
Recommended End-U er Guideline
for Optimum Performance ..................................... 14
Plug in Power Cord ..................................................... 14
Connect Humidifier (if o pre cribed) .................... 14
Oxygen Tubing .............................................................. 15
Power Switch ................................................................ 16
Flowrate.......................................................................... 16
Sen O2® Oxygen Purity Indicator- If your
Unit Feature the O2 Sen or Feature ........................... 16
Initial Startup of the Concentrator ....................... 17
Explanation of Indicator Light ............................... 17
MAINTENANCE ......................................... 18
Cleaning the Cabinet Filter ...................................... 18
Cabinet............................................................................ 19
Humidifier ...................................................................... 19
TROUBLESHOOTING GUIDE................... 20
TABLE OF CONTENTS
TA LE OF CONTENTS
PREVENTIVE MAINTENANCE
RECORD ....................................................21
WARRANTY .................................................. 22
SPANISH OWNER'S MANUAL
(MANUAL DEL USARIO) ........................... 24
4
SAFETY SUMMARY
SAFETY SUMMARY
CAUTION
Caution: Federal law restricts this device to sale by or on
order of a physician, or any other practitioner licensed by
the law of the State in which he practices to use or order
the use of this device.
Risk of electric shock. DO NOT disassemble. Refer servicing
to qualified service personnel.
READ THE FOLLOWING INFORMATION BEFORE
OPERATING THIS PRODUCT.
WARNING
The use of oxygen therapy requires that special care be
taken to reduce the risk of fire. Any materials that will
burn in air, and some that will not, are easily ignited and
burn rapidly in high concentrations of oxygen. For safety
concerns, it is necessary that all sources of ignition be kept
away from the product and preferably out of the room in
which it is being used. NO SMOKING signs should be
prominently displayed.
A spontaneous and violent ignition may occur if oil, grease or
greasy substances come in contact with oxygen under pres-
sure. These substances MUST be kept away from the oxygen
concentrator, tubing and connections, and all other oxygen
equipment. DO NOT use any lubricants unless recom-
mended by Invacare.
For optimum performance, Invacare recommends that each
concentrator be on and running for a minimum of 30 min-
utes at a time. Shorter periods of operation may be harmful
for maximum product life. If it has a damaged cord or plug, if it is
not working properly, if it has been dropped or damaged, or
dropped into water, call ualified Service Personnel for examina-
tion and repair.
Keep the cord away from HEATED or HOT surfaces.
NEVER drop or insert any object into any opening.
5
SAFETY SUMMARY
WARNING (CONTINUED)
NEVER block the air openings of the product or place it on a
soft surface, such as a bed or couch, where the air opening
may be blocked. Keep the openings free from lint, hair and
the like. Fill humidifier with water to the level shown by the
manufacturer. DO NOT overfill.
Invacare recommends that Crush-Proof oxygen tubing
(supplied by Invacare) be used with this product and NOT
exceed 50 ft. (15.2m) in length.
MAINTENANCE
The Invacare Oxygen Concentrator was specifically designed
to minimize routine preventative maintenance at intervals of
once per year. Only professionals of the healthcare field or
persons fully conversant with this process such as authorized
or factory trained personnel should perform preventative
maintenance or performance adjustments on the oxygen
concentrator.
RADIO FRE UENCY INTERFERENCE
Most electronic equipment is influenced by Radio Frequency
Interference (RFI). CAUTION should be exercised with
regard to the use of portable communications equipment in
the area around such equipment.
TO REDUCE THE RISK OF ELECTROCUTION.
WARNING
ALWAYS unplug this product IMMEDIATELY after using.
Avoid using while bathing. If continuous usage is required by the
physicians prescription:
The concentrator must be located in another room at least
seven (7) feet from the bath.
DO NOT come in contact with the concentrator while wet.
DO NOT place or store product where it can drop into
water or other liquid.
DO NOT reach for product that has fallen into water. UN-
PLUG IMMEDIATELY.
6
TO REDUCE THE RISK OF BURNS, ELECTROCU-
TION, FIRE OR INJURY TO PERSONS.
WARNING
This device is to be used only in accordance with the prescription
of a physician and this Owners Manual. If at any time the patient
or attendant conclude that the patient is receiving an insufficient
amount of oxygen, the supplier and/or physician should be
contacted immediately. No adjustments should be made to the
flowrate unless prescribed by a physician.
A product should NEVER be left unattended when plugged in.
Close supervision is necessary when this product is used by, on
or near children or bed confined individuals.
Use this product for only intended use as described in this
manual.
DO NOT use parts, accessories or adapters other than those
authorized by Invacare or warranty will be voided.
DO NOT connect the concentrator in parallel or series with
other oxygen concentrators or oxygen therapy devices, or
warranty will be void.
Use of some administration accessories or certain humidifiers
not specified for use with oxygen concentrator may impair the
performance.
In certain circumstances oxygen therapy can be hazardous.
Invacare recommends that you seek medical advice before using
this machine.
This equipment is to be used as an oxygen supplement and is not
considered life supporting or life sustaining.
Avoid creation of any spark near medical oxygen equipment.
This includes sparks from static electricity created by any type of
friction.
SAFETY SUMMARY
7
SAFETY SUMMARY
GROUNDING INSTRUCTIONS
A. This product should be grounded. In the event of an
electrical short circuit, grounding reduces the risk of
electric shock by providing an escape wire for the
electrical current. This product is equipped with a
cord having a grounding wire with a grounding plug.
The plug must be plugged into an outlet that is
properly installed and grounded.
DANGER
Improper use of the grounding plug can result in a risk of
electrical shock.
If repair or replacement of the cord or plug is necessary, do
not connect the grounding wire to either flat blade terminal.
The wire with insulation having an outer surface that is green
with or without yellow stripes is the grounding wire. Check
with a qualified electrician or serviceman if the grounding
instructions are not completely understood, or if doubt exists
as to whether the product is properly grounded.
B. This product is for use on a normal 120 V circuit and has a
grounding plug that looks like the plug illustrated in sketch
A shown at the bottom of the page. A temporary adapter,
which looks like the adaptor illustrated in sketches B and
C, may be used to connect this plug to a 2-pole outlet as
shown in sketch C if a properly grounded outlet is not
available. The temporary adaptor should be used only until
a properly grounded outlet (sketch D) can be installed by a
qualified electrician. The green colored rigid ear, lug and
the like extending from the adapter must be connected to
a permanent ground such as properly grounded outlet box
cover. Whenever the adapter is used, it must be held in
place by the screw.
Grounding
Pin
Adapter
Grounded
Outlet Box
Metal Screw
Grounded
Outlet
A B C D
Tab for
Grounding Screw
8
FEATURES
Power Indicator Light
FEATURES
FRONT VIEW
Circuit Breaker
Cabinet ilter
Cabinet ilter
NOTE: 5LXO2 SHOWN
Power Switch
lowmeter
Elapsed Time Meter
Oxygen Purity Indicator
Lights (ALL 5LXO2 and
6LXO2 MODELS)
Oxygen Outlet
ault Indicator
(LX MODEL ONLY)
ACCESSORIES (NOT SHOWN):
Remote Humidifier/Flowmeter
Acce ory - RF5
Preci eRX Pediatric Humidifier/
Flowmeter Acce ory - PF16
Venture® Homefill II home oxygen
compre or - IOH200
Power
Cord
Outlet
itting
NOTE: This outlet fitting is to be used only for
filling oxygen cylinders with the o tional Venture
HomeFill II home oxygen com ressor. The outlet
fitting does not affect concentrator erformance.
Refer to the HomeFill II owner's manual, art
number 1100873, for connection and o erating
instructions. When not in use, the lug rovided
with the concentrator should be inserted into the
outlet fitting. For more information about the
HomeFill II, contact your Invacare dealer.
REAR VIEW
9
SPECIFICATIONS
Electrical Requirements:
Rated Current Input:
Sound Level:
Altitude:
*Oxygen Output
Concentration Levels:
Maximum Outlet Pressure:
120 VAC +10% (132 VAC/108 VAC),
60 Hz
4.0 A
52 dB Average (3LX)
53 dB Average (ALL 5LX/5LXO2/
6LXO2)
Up to 6,000 ft. (1828 meter ) above
ea level without degradation of
performance. From 6,000 ft. (1828
meter ) to 13,129 ft. (4000 meter )
below 90% efficiency.
ALL 6LXO2 / 5LXO2 / 3LX MODELS
95.6% to 87% at all flowrate
95.6% to 93% O2 @ 2L/min.
95.6% to 87% O2 @ 3L/min.
(3LX - Maximum recommended flow)
95.6% to 87% O2 @ 5L/min.
(5LX - Maximum recommended flow)
95.6% to 87% O2 @ 6L/min.
(6LX - Maximum recommended flow)
* Stated performance maximum
achieved after 30 min. of run time.
(ALL 6LXO2)
5 + 0.5 p i.
(34.5 + 3.45 kPa.)
(ALL 5LX/5LXO2)
5 + 0.5 p i.
(34.5 + 3.45 kPa.)
(3LX)
5 + 0.5 p i.
(34.5 + 3.45 kPa.)
SPECIFICATIONS
10
Flow Range:
Average Power
Consumption:
Pressure Relief Mecha-
nism Operational at:
Change in maximum
recommended flow when
back pressure of 7kPa is
applied:
Filters:
SensO2® Alarm Thresholds:
O2 Purity
Over 85% (+ 2%)
73% (+ 3%) to
85% (+2%)
Below 73% (+ 3%)
Internal Switch
(If Present)
*Set at 73%
GREEN Indicator Light
YELLOW Indicator Light
RED Indicator Light -
Continuou Audible Alarm
Sieve-GARDTM Compre or
Shutdown
Internal Switch
(If Present)
Set at 85%
GREEN Indicator Light
RED Indicator Light -
Continuou Audible Alarm
Sieve-GARDTM Compre or
Shutdown
N/A
* Factory Pre et at 73%
INDICATORS
Label
Symbol
O2
1/2 - 6 L/min. (ALL 6LXO2)
1/2 - 5 L/min. (ALL 5LX/5LXO2)
1/2 - 3 L/min. (3LX)
For flowrate le than 1 L/min., we
recommend the u e of the
Invacare Pediatric Flowmeter IRCPF16.
400W (ALL 3LX/5LX/5LXO2)
460W (ALL 6LXO2)
35 p i + 3.5 p i (241 kPa + 24.1 kPa)
0.7 L/m
Cabinet, Outlet HEPA Filter and Com-
pre or Inlet.
SPECIFICATIONS
SPECIFICATIONS (CONTINUED)
11
SPECIFICATIONS (CONTINUED)
Safety System:
Width:
Height:
Depth:
Weight:
Shipping Weight:
Operating Ambient
Temperature:
Exhaust:
Oxygen Output:
Cabinet:
Regulatory Listing:
Electrical:
Placement:
Tubing:
Current overload or line urge hutdown.
High temperature compre or hutdown.
High Pre ure Alarm w/compre or hutdown.
Low Pre ure Alarm w/compre or hutdown.
Battery FreeTM Power Lo Alarm.
SensO2® Oxygen Sy tem (ALL 5LXO2 and
6LXO2 Models).
18-inche (45.7 cm).
23.75-inche (60.3 cm).
14-inche (35.6 cm).
54 lb . (24.5 kg) (5LX and ALL LXO2
Models)
53 lb . (23.9 kg) (3LX)
59 lb . (27 kg) (5LX and ALL LXO2
Models)
58 lb . (26.1 kg) (3LX)
50° F - 95° F (10° C - 35° C).
Le than Ambient + 35° F (+16°C).
Le than Ambient + 4° F (+2° C).
Impact Re i tant flame-retardant pla tic cabinet.
ETL certified complying with UL 1431 (U.S.
Model ).
CSA certified to C22.2 No. 125-M1984
(Canadian Model ).
No exten ion cord .
No clo er than 3-inche from any wall.
Cru h-Proof Tubing - 7 ft. (2.1m) cannula
with a maximum 50 ft. (15.2m) exten ion
(DO NOT PINCH).
SPECIFICATIONS
Relative Humidity:
Time of Operation:
Recommended Storage and
Shipping Temperature:
20 to 60%
Up to 24 hour per day.
-20oF to 150oF ( -29oC to 65oC )
12
HANDLING
The concentrator hould alway be kept in the upright po ition to prevent
cabinet damage while being tran ported. The hipping container ha been
de igned to a ure maximum protection of the concentrator. If the
concentrator i to be re hipped by common carrier, additional carton are
available from Invacare.
UNPACKING
1. Check for any obviou damage to the carton or it content . If
damage i evident, notify the Carrier, or your local dealer.
2. Remove all loo e packing from the carton.
3. Carefully remove all the component from the carton.
Relief for Line Cord
to face Back of Unit.
Relief for
lowmeter to
face ront of
Unit.
FIGURE 1 - PACKAGING
SPECIFICATIONS
NOTE: Unless the Oxygen Concentrator is to be used immediately, retain
containers and acking materials for storage until use of the concentrator is required.
INSPECTION
1. Examine exterior of the Oxygen Concentrator for nick , dent ,
cratche or other damage . In pect all component .
STORAGE
1. Store the repackaged Oxygen Concentrator in a dry area.
2. DO NOT place other object on top of the repackaged concentrator.
13
INTRODUCTION
Your Oxygen Concentrator i intended for u e in the home. It i an
electronically operated device that eparate oxygen from room air. It
provide high concentration of oxygen directly to you through a na al
cannula or ma k. Clinical tudie have documented that oxygen
concentrator are therapeutically equivalent to other type of oxygen
delivery y tem .
Your Dealer will how you how to u e your oxygen concentrator. He/She
hould be contacted with any que tion or problem regarding your
Oxygen Concentrator. Thi Owner Manual will tell you about your
concentrator and will erve a a reference a you u e your concentrator.
OPERATING INSTRUCTIONS
SELECT A LOCATION
You may elect a room in your hou e where u ing your oxygen
concentrator would be mo t convenient. Your concentrator can be
ea ily rolled from room to room on it ca ter .
Your Oxygen Concentrator will perform be t when operated under
the following condition . U age in environment other than tho e
de cribed may re ult in the need for increa ed equipment maintenance.
The air intake of the unit hould be located in a well ventilated area to
avoid airborne pollutant and/or fume .
Recommended End-User Guidelines for Optimum Performance:
Temperature: 50°F - 95°F (10°C - 35°C)
Electrical: No exten ion cord .
Placement: No clo er than 3-inche
from the wall.
Tubing and Cannula: 57 feet maximum (17.3m)
of Crush-Proof Tubing
(do NOT pinch).
Environment: Smoke and oot-free.
No confined pace
(Example: no closets).
Relative Humidity: 20 to 60 %
Time of Operation: Up to 24 hour per day.
Flow Rate - 3LX: From 1/2 L/min. to 3 L/min.
All 5LX/5LXO2 Models: From 1/2 L/min. to 5 L/min.
HANDLING (CONTINUED)
HANDLING
14
WARNING
DO NOT overfill humidifier.
Replace the humidifier cap and securely tighten.
DO NOT reverse the oxygen input and output connections.
Water from the humidifier bottle WILL travel through the
cannula back to the patient.
FIGURE 2 - HUMIDIFIER COMPARTMENT
Humidifier
Bottle
All 6LXO2 Models: From 1/2 L/min. to 6 L/min.
For flow rate le than 1 L/min., u e
the Pediatric Flowmeter.
Minimum OperatingTime: 20 Minute
NOTE: Ensure that your concentrator is at least three (3) inches away from
walls, dra eries or furniture to assure sufficient air flow. Avoid dee ile car ets
and heaters, radiators or hot air registers.
PLUG IN POWER CORD
1. Plug in power cord to a properly grounded outlet.
CONNECT HUMIDIFIER (IF SO PRESCRI ED)
1. Fill humidifier with di tilled water to the level indicated by the
manufacturer.
HANDLING (CONTINUED)
HANDLING
Humidifier
Bottle
FIGURE 1 - FILLING THE HUMIDIFIER
2. Place the humidifier in the humidifier compartment.
15
3. Attach the humidifier adapter by turning the wing nut on the humidi-
fier bottle counterclockwi e until it i ecurely fa tened.
Humidifier Bottle
Adapter
FIGURE 3 - ATTACHING THE HUMIDIFIER ADAPTER
OPERATION / MAINTENANCE
4. If u ing the Remote Humidifier/Flowmeter Acce ory, refer to the
Operating In truction which accompany the acce ory.
5. After a embly, en ure that oxygen i flowing through the cannula.
OXYGEN TU ING
1. Attach oxygen tubing from the humidifier bottle to oxygen outlet connector on
the oxygen concentrator.
2. Attach the patient upply tubing to the humidifier bottle.
FIGURE 4 - ATTACHING THE OXYGEN TUBING
Oxygen
Tubing
Oxygen Outlet
Connector
Humidifier Outlet
WARNING
For optimum performance, Invacare recommends that
concentrator be operated a minimum of 20 minutes during
any use. Shorter periods of operation may adversely affect
the life of the product.
16
WARNING
DO NOT change the L/min. setting on the flowmeter
unless a change has been prescribed by your physician or
therapist.
NOTE: To ro erly read the flowmeter, locate the rescribed flowrate line on
the flowmeter. Next, turn the flow knob to until the ball rises to the line. Now,
center the ball on the L/min. line rescribed.
FIGURE 5 - ADJUSTING THE FLOWRATE
SENSO2® OXYGEN PURITY INDICATOR-IF YOUR
UNIT FEATURES THE O2 SENSOR FEATURE
Thi feature monitor the purity of oxygen generated by the oxygen
concentrator. If purity fall below factory pre et tandard , indicator
light on the control panel will illuminate.
Ball
Flow knob
POWER SWITCH
1. Pre power witch to the ON po ition. The power light (I/O),
located on the control panel, will illuminate a GREEN light. The
alarm will "beep" three (3) time indicating that the y tem i
functioning properly.
FLOWRATE
1. Turn the flowrate knob to the etting pre cribed by your phy ician
or therapi t.
OPERATION / MAINTENANCE
17
INITIAL STARTUP OF THE CONCENTRATOR
NOTE: Concentrator may be used during initial warm-u time (a roximately
30 min.) while waiting for the GREEN light to illuminate.
When the unit is initially turned on, the GREEN ower LED (I/O) will illumi-
nate. Within 5 to 30 minutes after initial startu , a GREEN light will illuminate
in the Oxygen Purity section of the Control Panel (FIGURE 6) if concen-
tration is within s ecification. Any other Sen O2® indicator lights illuminating
will signal a condition that requires a call to the su lier.
OPERATION / MAINTENANCE
EXPLANATION OF INDICATOR LIGHTS:
GREEN LIGHT ( ) - Normal Operation
YELLOW LIGHT ( ) - You may continue to u e the concentrator
unle in tructed otherwi e by your upplier. Call Supplier IMMEDI-
ATELY. Be certain that BACKUP OXYGEN i nearby.
RED LIGHT ( )- Total unit hutdown. Switch IMMEDIATELY
to BACKUP OXYGEN upply. Call Supplier IMMEDIATELY.
GREEN LIGHT - with YELLOW LIGHT FLASHING - Oxygen
en or malfunctioning; you may continue to u e the concentrator. Call
Supplier IMMEDIATELY.
O2
Auto Shut - Down
Use Backup Call
Supplier
Normal
Below Normal
Oxygen Purity
RED
YELLOW
GREEN
FIGURE 6 - O2 DISPLAY CONTROL PANEL
O
2
NOTE: LX models built AFTER 12/2000 include a red "fault" indicator
( ) on the control anel. Switch immediately to a back-u oxygen su ly
and call su lier when illuminated.
18
FIGURE 7 - CABINET FILTER LOCATION
MAINTENANCE
CLEANING THE CA INET FILTERS
Cabinet
ilter
Cabinet
ilter
NOTE: All concentrator Models have two (2) cabinet filters located on each
side of the cabinet (FIGURE ).
1. Remove each filter and CLEAN AT LEAST ONCE A
WEEK depending on environmental condition (FIGURE 8).
2. Clean the cabinet filter with a vacuum cleaner or wa h in
warm oapy water and rin e thoroughly (FIGURE 8).
3. Dry the filter thoroughly before rein tallation.
CAUTION
DO NOT operate the concentrator without the filters
installed.
FIGURE 8 - CLEANING THE CABINET FILTERS
OPERATION / MAINTENANCE
19
CA INET
WARNING
UNPLUG the concentrator when cleaning. To avoid
electrical shock, DO NOT remove cabinet.
1. Clean the cabinet with a mild hou ehold cleaner and
non-abra ive cloth or ponge.
HUMIDIFIER
NOTE: To clean the oxygen humidifier, follow the instructions rovided by the
manufacturer. If none are rovided, follow these ste s:
1. Clean the humidifier every day.
2. Wa h it in oapy water and rin e it with a olution of 10 part
water and 1 part vinegar.
3. Rin e again with hot water and refill with di tilled water to the
level hown on the humidifier.
WARNING
DO NOT overfill Humidifier Bottle.
OPERATION / MAINTENANCE
20
SYMPTOM: PROBABLE CAUSE: SOLUTION:
TROU LESHOOTING GUIDE
TROUBLESHOOTING
1. Internal repair required. 1. Call Dealer for Service.
GREEN LIGHT with
YELLOW Light
Flashing.
Alarm:
SHORT BEEPS,
LONG PAUSE
Concentrator NOT
operating,
power witch ON.
Beep...... Beep......
Main Power Lo :
1. Power cord NOT
plugged In.
2. No power at outlet.
3. Tripped circuit
breaker.
1. In ert plug into
outlet.
2. In pect hou e circuit
breaker or fu e . If
problem recur , u e a
different outlet.
3. Call Dealer for
Service.
Alarm:
CONTINUOUS
Power Switch ON,
Concentrator NOT
OPERATING.
Beeeeeeeep....
Sy tem Failure:
1. Unit overheating due
to blocked air intake.
2. In ufficient power at
outlet.
3. Internal repair required.
1a. Remove and clean
cabinet filter .
1b. Move oxygen concentrator
at lea t 3-inche away
from wall , draperie
or furniture.
2. Don't u e exten ion
cord . Move to
another electrical
outlet or circuit.
3. Call Dealer for
Service.
YELLOW or RED
LIGHT Illuminated.
1. Low oxygen purity.
2a. Kinked or blocked
tubing, cannula or
humidifier.
2b. Flowmeter et at
1/2 L/min.or le .
3. Unit overheating
due to blocked air intake.
4. In ufficient power
at outlet.
5. Internal repair
required.
1. Clean or Replace filter .
2a. In pect for kink or
blockage . Correct,
clean or replace item.
Once corrected, turn
power OFF for 60
econd and then turn
powerback ON.
3a. Remove and clean cabinet
filter .
3b. Move concentrator at
lea t 3-inche from wall ,
draperie or furniture.
4. Don't u e exten ion
cord . Move to another
electrical outlet or circuit.
5. Call Dealer for Service.

This manual suits for next models

7

Other Invacare Medical Equipment manuals

Invacare Accent User manual

Invacare

Invacare Accent User manual

Invacare SB 755 User manual

Invacare

Invacare SB 755 User manual

Invacare IRC5PO2 User manual

Invacare

Invacare IRC5PO2 User manual

Invacare Robin User manual

Invacare

Invacare Robin User manual

Invacare SOLO2 TPO100 User manual

Invacare

Invacare SOLO2 TPO100 User manual

Invacare MicroAIR MA50 User manual

Invacare

Invacare MicroAIR MA50 User manual

Invacare Rectangular Pan Holder and Pan 9610-1 User manual

Invacare

Invacare Rectangular Pan Holder and Pan 9610-1 User manual

Invacare Platinum Series User manual

Invacare

Invacare Platinum Series User manual

Invacare Perfecto 2 SeriesIRC5PO2AW User manual

Invacare

Invacare Perfecto 2 SeriesIRC5PO2AW User manual

Invacare Platinum IRC5LXAW User manual

Invacare

Invacare Platinum IRC5LXAW User manual

Invacare IVC Series Manual

Invacare

Invacare IVC Series Manual

Invacare Platinum IRC10LX User guide

Invacare

Invacare Platinum IRC10LX User guide

Invacare Aquatec Ocean User manual

Invacare

Invacare Aquatec Ocean User manual

Invacare Propad Original User manual

Invacare

Invacare Propad Original User manual

Invacare Perfecto2 V IRC5PO2V User manual

Invacare

Invacare Perfecto2 V IRC5PO2V User manual

Invacare Alegio NG User manual

Invacare

Invacare Alegio NG User manual

Invacare TPO100B User guide

Invacare

Invacare TPO100B User guide

Invacare 9630E Styxo User manual

Invacare

Invacare 9630E Styxo User manual

Invacare Carroll Assist Bar User manual

Invacare

Invacare Carroll Assist Bar User manual

Invacare Classic Visco User manual

Invacare

Invacare Classic Visco User manual

Invacare Stratos IRC 1720 User manual

Invacare

Invacare Stratos IRC 1720 User manual

Invacare Medley Ergo User manual

Invacare

Invacare Medley Ergo User manual

Invacare H430A/2 User manual

Invacare

Invacare H430A/2 User manual

Invacare 5143B User manual

Invacare

Invacare 5143B User manual

Popular Medical Equipment manuals by other brands

Cattani ASPI-JET 6 Operator's handbook

Cattani

Cattani ASPI-JET 6 Operator's handbook

Stream DX Uroflowmeter user manual

Stream DX

Stream DX Uroflowmeter user manual

bort medical ManuCarpal-SOFT quick guide

bort medical

bort medical ManuCarpal-SOFT quick guide

aidapt VA121S Usage and maintenance instructions

aidapt

aidapt VA121S Usage and maintenance instructions

LivaNova CP5 Service manual

LivaNova

LivaNova CP5 Service manual

laerdal SimNewB Anomaly Set Setup guide

laerdal

laerdal SimNewB Anomaly Set Setup guide

Seers Medical SM8583D operating instructions

Seers Medical

Seers Medical SM8583D operating instructions

DeVilbiss iGo Equipment manual

DeVilbiss

DeVilbiss iGo Equipment manual

Rotaid SOLID PLUS installation manual

Rotaid

Rotaid SOLID PLUS installation manual

mychway YH-6505 user manual

mychway

mychway YH-6505 user manual

Kartsana TG-241 Series instruction manual

Kartsana

Kartsana TG-241 Series instruction manual

Welch Allyn CP 200 Directions for use

Welch Allyn

Welch Allyn CP 200 Directions for use

Winco 8550 CUSTOMER INSTRUCTIONS

Winco

Winco 8550 CUSTOMER INSTRUCTIONS

Nouvag THP 3000 operating instructions

Nouvag

Nouvag THP 3000 operating instructions

Fukuda Denshi FCP-7101 Service manual

Fukuda Denshi

Fukuda Denshi FCP-7101 Service manual

GE Vivid S60N Basic service manual

GE

GE Vivid S60N Basic service manual

Covidien Force FX-C user guide

Covidien

Covidien Force FX-C user guide

EyeQue Insight product manual

EyeQue

EyeQue Insight product manual

manuals.online logo
manuals.online logoBrands
  • About & Mission
  • Contact us
  • Privacy Policy
  • Terms and Conditions

Copyright 2025 Manuals.Online. All Rights Reserved.