10
SEAT/BACKPROCEDURE 4
S
E
A
T
/
B
A
C
K
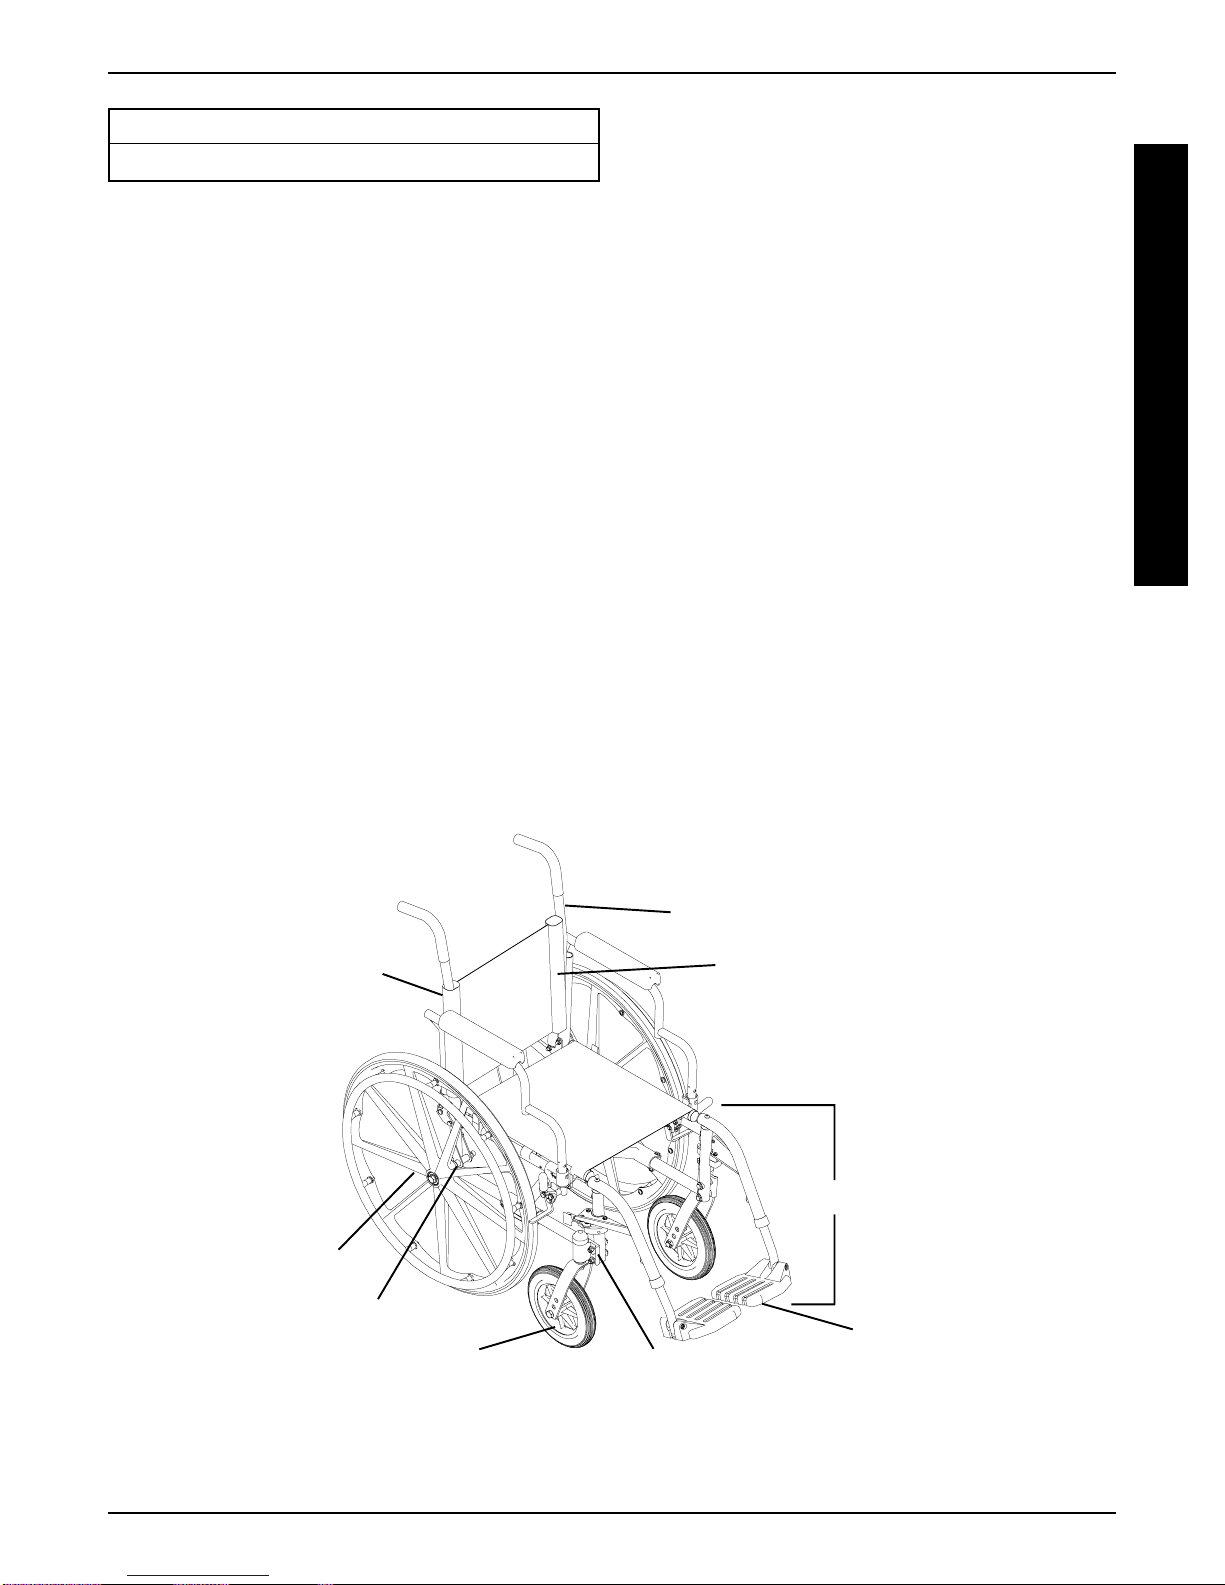
PATRIOT (FIGURE 3).
1. Remove the one (1) mounting screw and locknut that
secure the back cane to the wheelchair.
2. Do one (1) of the following:
A. 20-inch Back Cane - Position the back cane in
the second hole from the bottom on the wheel-
chair frame as shown in FIGURE 3.
B. Adjustable Back Cane - Reposition the back
cane to one (1) of the five (5) adjustment posi-
tions:
Back Height (in inches)
KHOLE # 12345
HEIGHT 15 16 17 18 19
KHoles numbered from bottom to top for refer-
ence only. (There are no numbers on the back
canes.)
3. Reinstall the one (1) mounting screw and locknut that
secure the back cane to the wheelchair frame. and
securely tighten.
4. Repeat STEPS 1-3 for the opposite back cane.
Back
Cane
Locknut
Wheelchair Frame
Height
Adjustment
Positions
Wheelchair
Frame
HOLE
5
4
3
2
1
FIGURE 3- ADJUSTING THE BACK CANES
- PATRIOT
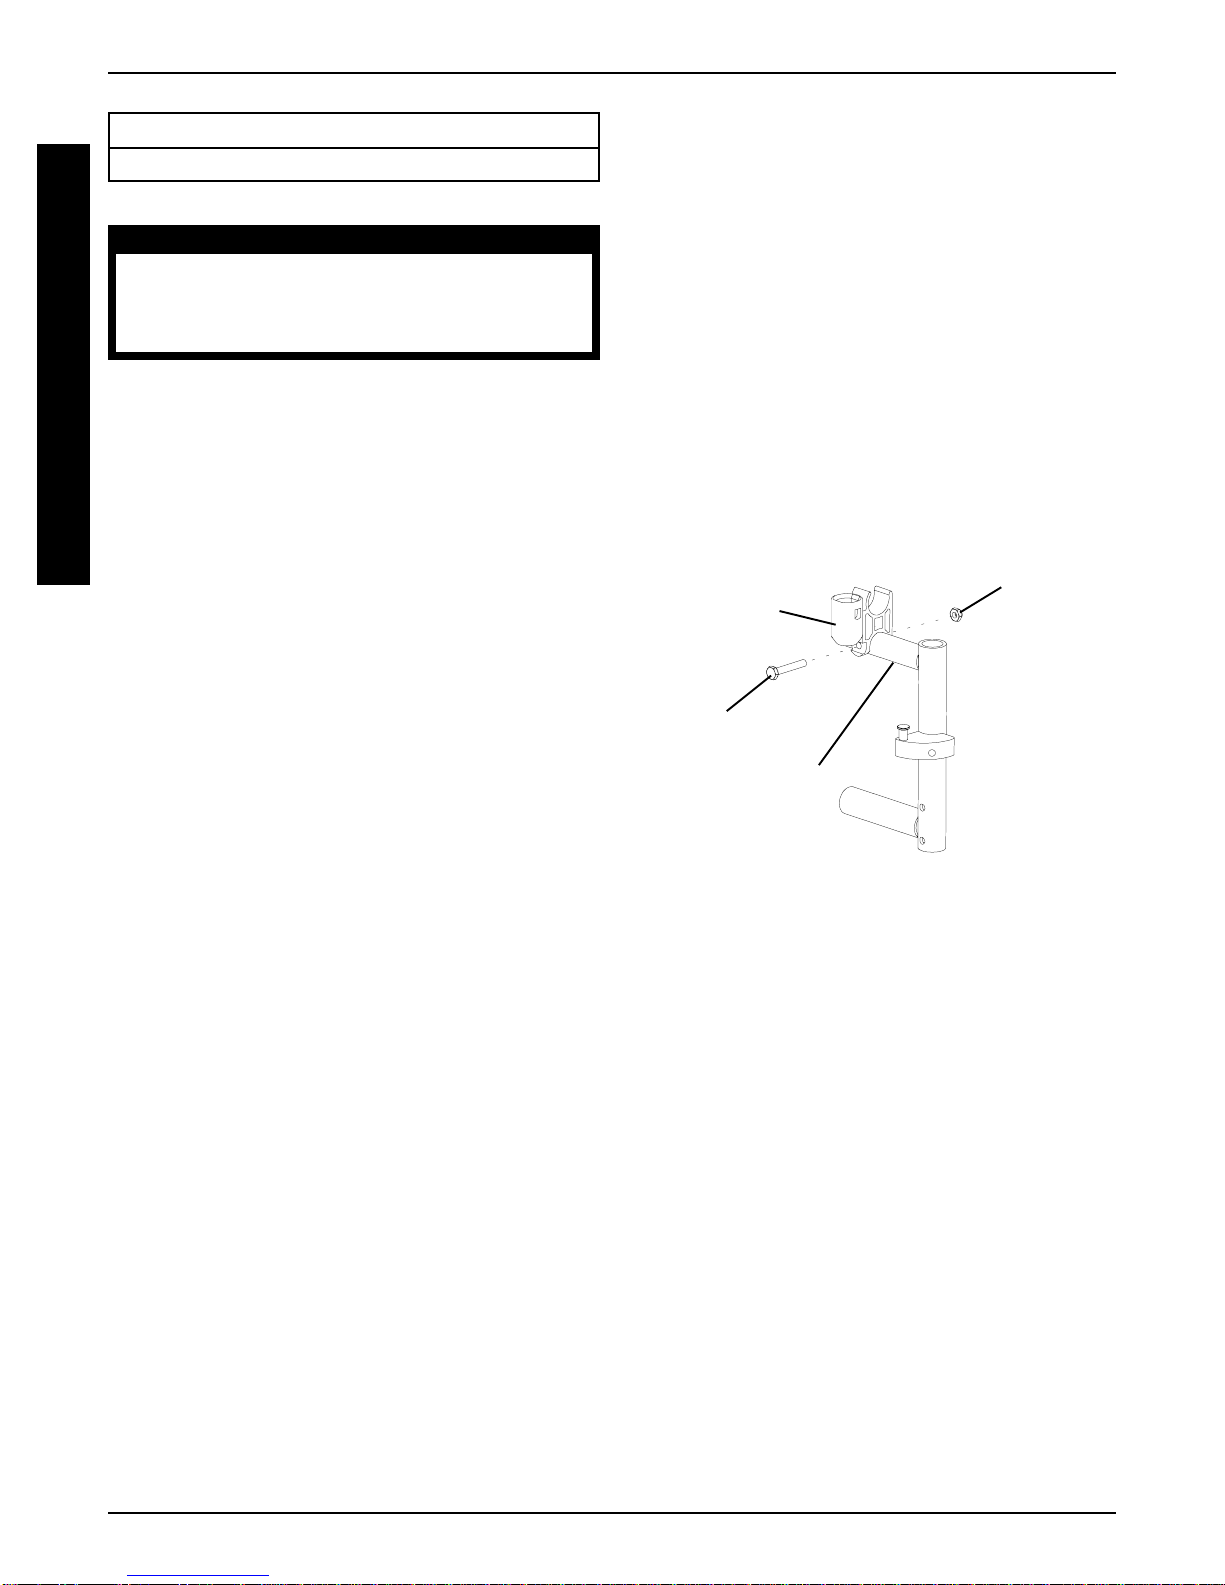
REPLACING THE SECTOR BLOCK
(FIGURE 4)
1. Remove the front rigging from the wheelchair. Refer to
INSTALLING/REMOVING SWINGAWAY FOOT-
REST or INSTALLING/REMOVING ELEVATING
LEGREST/CALFPAD ASSEMBLY in PROCE-
DURE3of the Owner's Manual, part number 1088909.
2. Remove the hex screw and washer that secure the
EXISTING sector block to the wheelchair frame.
3. Remove EXISTING sector block from wheelchair.
4. Position the NEW sector block on the wheelchair frame
with the locking pin facing UP as shown in FIGURE 4.
5. Apply Loctite 242®to threads of EXISTING hex screw.
6. Securely tighten the NEW sector block to the wheel-
chair frame with the EXISTING hex screw and washer.
7. Repeat STEPS 1-6 for opposite side, if necessary.
8. Install the front rigging onto the wheelchair. Refer to
INSTALLING/REMOVING SWINGAWAY FOOT-
REST or INSTALLING/REMOVING ELEVATING
LEGREST/CALFPAD ASSEMBLY in PROCE-
DURE3of the Owner's Manual, part number 1088909.
Replacing (FIGURES 2 AND 3)
1. Cut the tie wraps that secure the EXISTING back up-
holstery to the wheelchair frame.
2. Remove the EXISTING back upholstery from the
wheelchair. Refer to REMOVING/INSTALLINGTHE
BACK UPHOLSTERY in PROCEDURE 5 of the
Owner's Manual, part number 1088909.
3. Do one (1) of the following:
A. Patriot SL - Remove the two (2) mounting
screws and locknuts that secure the back cane
to the wheelchair frame.
B. Patriot - Remove the one (1) mounting screw
and locknut that secures the back cane to the
wheelchair frame.
4. Repeat STEP 3 for the opposite side, if necessary.
5. Install the NEW/EXISTING back upholstery onto the
NEW back cane(s). Refer to REMOVING/INSTALL-
ING THE BACK UPHOLSTERY in PROCEDURE
5of the Owner's Manual, part number 1088909.
6. Secure the NEW back cane(s) to the wheelchair
frame with the EXISTING hardware.
7. Secure the NEW/EXISTING back upholstery to the
wheelchair frame with the NEW tie wraps.
20-inch Back Cane
Wheelchair Frame
Back
Cane
Locknut
Mounting
Screw
Mounting
Screw
Adjustable Back Cane
Loctite®- Registered Trademark of Loctite Corporation.