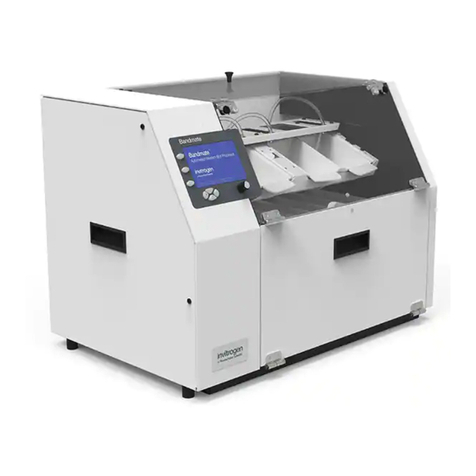
Invitrogen iPrep User manual

User Manual
Corporate Headquarters
Invitrogen Corporation
1600 Faraday Avenue
Carlsbad, CA 92008
T: 1 760 603 7200
F: 1 760 602 6500
E: tech.service@invitrogen.com
For country-specific contact information visit our web site at www.invitrogen.com
iPrep™Purification Instrument
For automated purification of nucleic acids using
magnetic beads
Catalog no. IS-10000
Version B
12 January 2007
25-0927

ii

iii
Table of Contents
Table of Contents........................................................................................................................................ iii
iPrep™Experienced Users Procedure ....................................................................................................... v
Product Contents....................................................................................................................................... vii
Safety Information....................................................................................................................................viii
Product Specifications................................................................................................................................ ix
Unpacking the iPrep™Purification Instrument...................................................................................... xi
iPrep™Purification Instrument............................................................................................................... xiii
Accessory Products .................................................................................................................................. xvi
Introduction ................................................................................................................... 1
Overview .......................................................................................................................................................1
Description of Parts......................................................................................................................................5
Experimental Overview.............................................................................................................................12
Methods ....................................................................................................................... 13
General Guidelines.....................................................................................................................................13
Getting Started............................................................................................................................................15
Using the iPrep™Purification Instrument...............................................................................................24
Performing Instrument Tests....................................................................................................................34
Cleaning and Maintaining the iPrep™Instrument.................................................................................37
Troubleshooting..........................................................................................................................................39
iPrep™Instrument Error Codes ................................................................................................................42
Appendix...................................................................................................................... 44
Replacing the Fuse .....................................................................................................................................44
Technical Support.......................................................................................................................................45
Purchaser Notification...............................................................................................................................46

iv

v
iPrep™Experienced Users Procedure
Introduction This quick reference protocol is included for experienced users of the iPrep™
Instrument. If you are using the iPrep™Instrument for the first time, refer to the
detailed protocol in this manual.
Step Procedure
Installation 1. Place the iPrep™Purification Instrument on a level laboratory bench such that the
power switch and the AC inlet on the rear of the unit (page xiii) are easily accessible.
2. Ensure the AC power switch is in the OFF position (page xiii).
3. Attach the power cord to the AC inlet and then to the electrical outlet. Use only
properly grounded AC outlets and power cords.
Insert the
iPrep™Card
1. Ensure the power switch is on the OFF position.
2. Open the iPrep™Card Slot.
3. Insert the iPrep™Protocol Card in the slot in the correct orientation (arrow on the
card is at the top and card label is facing your left side). Close the iPrep™Card Slot.
4. Using the Power Switch located on the left side of the instrument, turn ON the
instrument.
If the card is fully inserted in the correct orientation, the display shows the Main
screen and all axes return to their original positions automatically.
Purification
Protocol
From the Main screen, you can run a protocol, setup the date/time (page 17), or perform
instrument tests (page 34).
For sample preparation, see the iPrep™Kit manual.
1. Press Start to run a protocol. Select the desired purification protocol.
2. Open the iPrep™door. Remove the iPrep™Cartridge Rack and iPrep™Tip and Tube
Rack to set up the platform.
3. Remove the iPrep™Cartridges from the box. To collect any solution from the foil, tap
the cartridge to deposit the solution at the bottom of the tube.
4. Load the desired number of cartridges on the iPrep™Cartridge Rack. Slide the
cartridge in the direction of the arrow along the groove on the rack until the
cartridge reaches the end of the groove. Push down the cartridge under the
overhang part of the rack. Insert the loaded iPrep™rack on the iPrep™Platform.
5. Load the iPrep™Tip and Tube Rack as follows:
•Load the first row (labeled as E) with 1-13 elution tubes without caps
•Keep the second row (labeled as T1) is empty
•Load the third row (labeled as T2) with iPrep™Tips in the iPrep™Tip Holders
•Load the fourth row (labeled as S) with sample tubes without caps containing
the sample.
6. If you wish to record the barcodes, read the sample and elution tube barcodes using
the barcode reader included with the instrument as described on page 27.
7. Place the iPrep™Tip and Tube Rack on the iPrep™Platform.
8. Press 1to continue. Close the iPrep™Door.
9. Select the appropriate elution volume on the display.
10. Press Start to begin the automated purification protocol. Various steps of the protocol
including the approximate time remaining are displayed on the digital display.
Continued on next page

vi
iPrep™Experienced Users Procedure, Continued
Step Procedure
Purification
Protocol,
continued
Protocol continued from previous page
11. At the end of the run, the instrument beeps briefly and the digital display shows
Protocol Finished for 10 seconds. The Main menu appears after 10 seconds.
12. Open the instrument door.
13. Remove and cap the elution tubes containing the purified nucleic acid. Store the
purified DNA as described in the iPrep™Kit manual.
14. Discard the used cartridges, tips, and tubes into biohazard waste. Do not reuse the
cartridges.
15. To purify more samples using the same iPrep™Card, load the racks with new
cartridges, tips, tubes, and samples, and start the protocol as described above.
16. If you are not using the instrument, close the instrument door and turn the power
switch to OFF.
Remove the
iPrep™Card
1. Open the iPrep™Card Slot.
2. Push the button located below the card slot to eject the card from the slot.
3. Pull out the card from the slot and place the card in the box. Store the card protected
from light.

vii
Product Contents
iPrep™Purification
Instrument
The contents of the iPrep™Purification Instrument are listed below:
Component Quantity
iPrep™Purification Instrument 1
Specific Power Cord based on the type of unit ordered 1
(for U.S./Canada/Taiwan/Japan, Europe, or UK)
iPrep™Cartridge Rack 1
iPrep™Tip and Tube Rack 1
Bottom Tray 1
Barcode reader box (see below for contents) 1
iPrep™Starter Set (see below for contents) 1 set
Silicon Grease 1
D-rings 13
Fuse (6.3 A and 3.15 A) 1 each
Instruction Manual 1
See page 5 for specifications and description of the iPrep™Purification
Instrument, and page 15 to install the instrument.
Upon Receiving
the Instrument
Examine the unit carefully for any damage incurred during transit. Any damage
claims must be filed with the carrier. The warranty does not cover in-transit
damage.
iPrep™Starter Set The iPrep™Starter Set includes plastic disposables set (see below for contents)
that is used for test runs or training purposes.
Note: The Reaction Cartridges with the Starter Set are supplied empty. Do not fill the
Reaction Cartridges with any buffers or solutions during use as a Starter Set with the
instrument. Sample or elution tubes are not supplied with the Starter Set.
Product Quantity
iPrep™Tips
iPrep™Tip Holders
Reaction Cartridges
52
52
13
Barcode Reader
Box
The Barcode Reader Box includes a barcode reader, a CD-ROM containing the
CommViewer Barcode software for installation, and a RS232C serial cable.

viii
Safety Information
Safety Follow the instructions in this section to ensure safe operation of the iPrep™
Purification Instrument. The iPrep™Purification Instrument is designed to meet
EN61010-1 Safety Standards. To ensure safe, reliable operation, always operate
the iPrep™Purification Instrument according to the instructions in this manual.
Failure to comply with the instructions in this manual may create a potential
safety hazard, and will void the manufacturer’s warranty and void the EN61010-
1 safety standard certification. Invitrogen is not responsible for any injury or
damage caused by use of this instrument when operated for purposes which it is
not intended. All repairs and service should be performed by Invitrogen.
In an emergency, immediately turn the Power Switch Off and unplug the
instrument.
Informational
Symbols
The symbols used on the iPrep™Purification Instrument and in the manual are
explained below:
High
Temperature
Caution
Used near the heat block to indicate a warning resulting due to high
temperature.
Biohazard
Used near the area of the tip waste to indicate that the area may be
contaminated with biohazard materials. Do not touch this area without
laboratory gloves.
Used to indicate that water or chemicals should not come into contact with any
part of the instrument. Water or chemicals may cause damage and void the
warranty.
Hazard
Touching the left side of the instrument with wet hands may result in an
electric shock.
Do not touch the surface of the heat block. The temperature of the heat block
may be very high (up to 95ºC) and can cause burns.
Unplug the instrument, if not used for extended periods of time.
When using the instrument, follow standard procedures for quality control and
method development.
Used near the pistons to indicate a crush warning resulting from placing the
hand under the piercing unit which may cause injury.

ix
Product Specifications
iPrep™Purification
Instrument
Specifications
Environmental Conditions
Input Power: AC 100-240 V, 240 VA, 50/60 HzGrounding
is necessary
Installation site: Indoor use only
Altitude: Up to 2,000 meters
Operating Temperature: 5-40°C
Maximum Relative Humidity: 80% for temperatures up to 31ºC decreasing
linearly to 50% relative humidity at 40ºC
Transient Category: Installation categories II
Pollution Degree: 2
Specifications
Instrument Type: Benchtop dispenser instrument with 13
nozzles
Sample Processing: 1 to 13 samples/batch
Processing Time: Variable (see purification kit manual for
details)
Dispensing Volume: 5-1000 µl
Dispensing Accuracy: Blue Tips
5-20 µl: Less than 15% (CV%)
21-200 µl: Less than 2% (CV%)
DN100N Tips
25-50 µl: Less than 5% (CV%)
50-1000 µl: Less than 2% (CV%)
Heat Block Temperature Control*: 30ºC to 80ºC (assuming a room temperature
of ~25ºC)
Software: iPrep™Card
Instrument Dimensions: 20 inches (w) x 22 inches (d) x 22.5 inches (h)
Weight: 121 pounds (55 kg)
Built-in Features: Digital display, alarm, light LED
The iPrep™Purification Instrument including the Bottom Tray, Cartridge Rack,
Tip and Tube Rack is compatible with the iPrep™reagents and standard
nonhazardous laboratory reagents.
*The listed temperature is for the heating block and may not reflect the actual
temperature of the sample/solution in a tube.
Continued on next page

x
Product Specifications, Continued
The CE mark symbolizes that the product conforms to all applicable European
Community provisions for which this marking is required. Operation of the
iPrep™Purification Instrument is subject to the conditions described in this
manual.
The protection provided by the instrument may be impaired if the instrument is
used in a manner not specified by Invitrogen.
The UL mark indicates certification by Underwriters Laboratories, Inc and
certification by Underwriters Laboratories for Canada—a testing facility
recognized by the Standards Council of Canada (SCC)

xi
Unpacking the iPrep™Purification Instrument
Unpacking
Instructions
Follow the instructions below to unpack the iPrep™Purification Instrument. The
weight of the instrument is 113 pounds (51 kg).
1. Cut plastic tapes and remove and outer top cardboard.
2. Remove the packages containing the plastic disposables and instrument
accessories. Remove the cardboard tray.
3. Pull out the shock absorbers from the four corners and remove the outer
cardboard box by pulling up on the box.
4. Remove the wrapped instrument box from the outer bottom cardboard.
Remove the aluminum sheet wrapping the instrument box.
5. Remove the instrument from the inner cardboard box. The instrument is now
in a plastic wrap without any cover. Handle the instrument carefully from
this point to avoid any damage to the unit.
6. Remove the plastic sheet. Proceed to the next page to remove the protectors
from the instrument.
Inner Bottom Cardboard
Corner Shock
Absorbers
Outer Bottom
Wrapped
Instrument
Aluminum
Sheet
Se
p
arator Cardboard
Cardboard Box: Dis
p
osable
and Accessories inside
To
p
Wooden board
Inner Top
Cardboard
Inner Cardboard Box
Plastic Tapes Outer Box
Continued on next page

xii
Unpacking the iPrep™Purification Instrument, Continued
Removing
Protectors
Follow the instructions below to remove the protectors added to the instrument
to prevent any damage to the instrument components during transportation.
1. Remove the adhesive tapes near the door (see figure below) and the iPrep™
Card Slot.
2. Open the iPrep™Door as described on page 6 to remove the platform stopper
by removing the 3 screws using a small Philips head screwdriver.
3. To remove the Styrofoam protector under the Syringe unit inside the iPrep™
Platform, turn ON the iPrep™Instrument after installation as described on
page 15. Once the instrument is turned ON, the Syringe unit automatically
moves up to release the styrofoam protector. Do not attempt to manually
remove the styrofoam protector under the Syringe unit.
4. See page 15 for instructions to install the instrument.

xiii
iPrep™Purification Instrument
Front View of
iPrep™Instrument
The front view showing various parts of the iPrep™Purification Instrument is
shown below.
Rear and Side
View of iPrep™
Instrument
The rear and side view showing various parts of the iPrep™Purification
Instrument are shown below.
Rear View Side View
Continued on next page
iPrep
™
Door
Digital
Display
Card
Inlet
Power
Switch
For Barcode
Reader
For computer
Power
Cable
Fuse

xiv
iPrep™Purification Instrument, Continued
User Interface of
iPrep™Instrument
The user interface of the iPrep™Purification Instrument is used to operate the
instrument and perform maintenance/service by a service engineer, and consists of:
•The Digital Display that shows the protocol that is in use and various steps of
the protocol (see next page for details).
•Two LEDs; Power LED green indicates the power is ON and Alarm LED to
indicate errors (blinking red)
•The Keypad to enter parameters and operate the instrument. The keys described
in the table below are for routine use.
Key Description
0 to 9 To choose menu
ESC To previous menu
START To run protocol
STOP To stop/pause protocol
Return (to confirm or enter the next menu)
BS Backspace key to delete the last
digit/character
Shift Shift + Up/Down arrow keys allow you to
move the cursor right or left during time/date
setup
Continued on next page
Digital
Display
Power
Alarm

xv
iPrep™Purification Instrument, Continued
Digital Display The digital display consists of 4 lines with 20 columns of each line.
For the Main menu, Test menu, and Manual menu:
•The first line shows the current level
•The second and third line show the executable commands on this level
•The fourth line describes the keys to use for executing the commands
For the protocols screen, the display provides current information on the
protocol step and allows you to choose some options.

xvi
Accessory Products
iPrep™Spare Parts The following iPrep™Spare Parts are available separately from Invitrogen.
For more information, visit www.invitrogen.com or contact Technical Support
(page 45).
Product Quantity Catalog no.
iPrep™Tip and Tube Rack 1 IS-10101
iPrep™Cartridge Rack 1 IS-10102
iPrep™Kits and
Cards
The following iPrep™Cards and iPrep™Kits for use with the iPrep™Instrument
are available separately from Invitrogen.
For more information, visit www.invitrogen.com or contact Technical Support
(page 45).
Product Quantity Catalog no.
iPrep™Forensic Card (includes buccal
protocol)
1 card IS-10011
iPrep™gDNA Blood and Tissue Card 1 card IS-10010
iPrep™GeneCatcher™gDNA Blood Kit 1 kit
(52 purifications)
IS-10001
iPrep™ChargeSwitch®Forensic Kit 1 kit
(52 purifications)
IS-10002
iPrep™ChargeSwitch®Buccal Cell Kit 1 kit
(52 purifications)
IS-10003
iPrep™ChargeSwitch®gDNA Tissue Kit 1 kit
(52 purifications)
IS-10004

1
Introduction
Overview
Introduction The iPrep™Purification System consists of the iPrep™Purification Instrument,
iPrep™Protocol Cards, and iPrep™Kits that allow automated, fast, and reliable
nucleic acid purification from various samples within 20-30 minutes
(depending on the type of iPrep™Kit used).
The iPrep™Purification Instrument is based on the patented Magtration®
(magnetic filtration) technology from PSS (Precision System Science) which
traps magnetic beads against the sidewall of the pipetting tip. This improves
the washing of beads and DNA recovery compared to other magnetic based
purification systems that trap magnetic beads on the bottom of the reaction
well.
The iPrep™Purification System eliminates filtration and centrifugation from
nucleic acid purification. The purified DNA is suitable for use in various
downstream applications including PCR, STR (short-tandem repeat analysis),
and restriction enzyme digestion.
See page 5 for details on various parts of the system.
System
Components
The iPrep™Purification system consists of:
•iPrep™Purification Instrument
The iPrep™Purification Instrument allows automated purification of
nucleic acids from up to 13 samples (12 samples + 1 positive control) at a
time using magnetic bead based technology. The instrument is a simple,
user friendly unit with small footprint and is controlled by the iPrep™
Protocol Card. See page 5 for details.
•iPrep™Kits
The iPrep™Kits contain the sample preparation reagents as well as
reagents (buffers for the purification protocol and magnetic beads) and
plastic disposables for nucleic acid purification from a variety of samples
using magnetic bead based technology. See the manual supplied with each
kit for details.
•iPrep™Protocol Card
To use each iPrep™Kit with the iPrep™Instrument, you need to purchase a
protocol specific iPrep™Protocol Card from Invitrogen. Each iPrep™
Protocol Card is pre-programmed with the purification protocol that
directs the volume of reagents used and incubation time.
Continued on next page

2
Overview, Continued
System Overview The iPrep™Purification System performs magnetic bead based nucleic acid
purification using ChargeSwitch® or GeneCatcher™Technology developed by
Invitrogen. See pages 3-4 for details on each technology.
To use the iPrep™Purification System for nucleic acid purification, you will:
1. Prepare the sample lysate, if needed, using the sample preparation
reagents included with the iPrep™Kits.
2. Insert the appropriate iPrep™Protocol Card into the card slot on the iPrep™
Instrument to start the purification protocol.
3. Assemble the reaction cartridges containing the purification reagents, and
the iPrep™Tips and Tubes on the racks. Place the assembled racks on the
iPrep™Platform.
4. Select the purification parameters from the display to start the automated
purification protocol.
The iPrep™Purification Instrument utilizes a simple bind–wash-elute
procedure (page 12) to purify high-quality DNA avoiding the use of centrifuges
or vacuum manifolds.
During the automated purification protocol, the sample lysate is mixed with
magnetic beads for subsequent DNA binding to magnetic beads in tips. The
DNA-bound magnetic beads are separated from the lysate using magnetic
separation on the tips. The beads are thoroughly washed with Wash Buffers to
remove contaminants. The purified DNA is then eluted in Elution Buffer.
Continued on next page

3
Overview, Continued
Features Important features of the iPrep™Purification System are listed below:
•User-friendly iPrep™Instrument design with an integrated heat block and
magnetic unit for fast, automated nucleic acid purification within 20-30
minutes
•Ability to perform simultaneous purification from up to 12 samples and
1 positive control
•Minimal cross contamination between samples due to less handling
•Pre-programmed iPrep™Protocol Card contains the purification protocol
allowing hands-free purification
•Provides consistent, reliable results due to the simultaneous rapid and
accurate dispensing of reagents by 13 nozzles in the Syringe Unit
•Very low carry-over of magnetic beads into the purified DNA
•Built-in safety features in the instrument enhance user safety
The
ChargeSwitch®
Technology
The ChargeSwitch®Technology (CST®) is a novel magnetic bead-based
technology that provides a switchable surface charge dependent on the pH of
the surrounding buffer to facilitate nucleic acid purification. In low pH
conditions, the CST®beads have a positive charge that binds the negatively
charged nucleic acid backbone (see figure below). Proteins and other
contaminants are not bound and are simply washed away in an aqueous wash
buffer. To elute nucleic acids, the charge on the surface of the bead is
neutralized by raising the pH to 8.5 using a low salt elution buffer (see figure
below). Purified nucleic acid elutes instantly into this elution buffer, and is
ready for use in downstream applications.
Low pH High pH
Continued on next page

4
Overview, Continued
The
GeneCatcher™
Technology
The GeneCatcher™Technology is a novel magnetic bead-based technology that
is designed to work on a wide range of blood samples including archived or
poorly stored blood samples to facilitate genomic DNA purification.
See figure below for details.
Step 1–DNA Capture–
Cells are lysed and
crude DNA is captured
on magnetic beads
leaving most of the cell
debris and protein
behind in solution.
Step 2–DNA
Purification–Any
residual protein is
digested using the
protease and then
washed away to leave
pure intact DNA.
Step 3–Elution–The pure
DNA is then eluted into
a small volume ready for
use in any downstream
applications.
Purpose of the
Manual
This manual provides the following information:
•Details and specifications on the iPrep™Purification Instrument and
iPrep™Kits
•Unpacking and installing the iPrep™Purification Instrument
•Operating the iPrep™Instrument
•Cleaning and maintaining the iPrep™Instrument
•Troubleshooting
Specific purification protocols are included in the manuals supplied with
iPrep™Kits.
Table of contents
Other Invitrogen Medical Equipment manuals