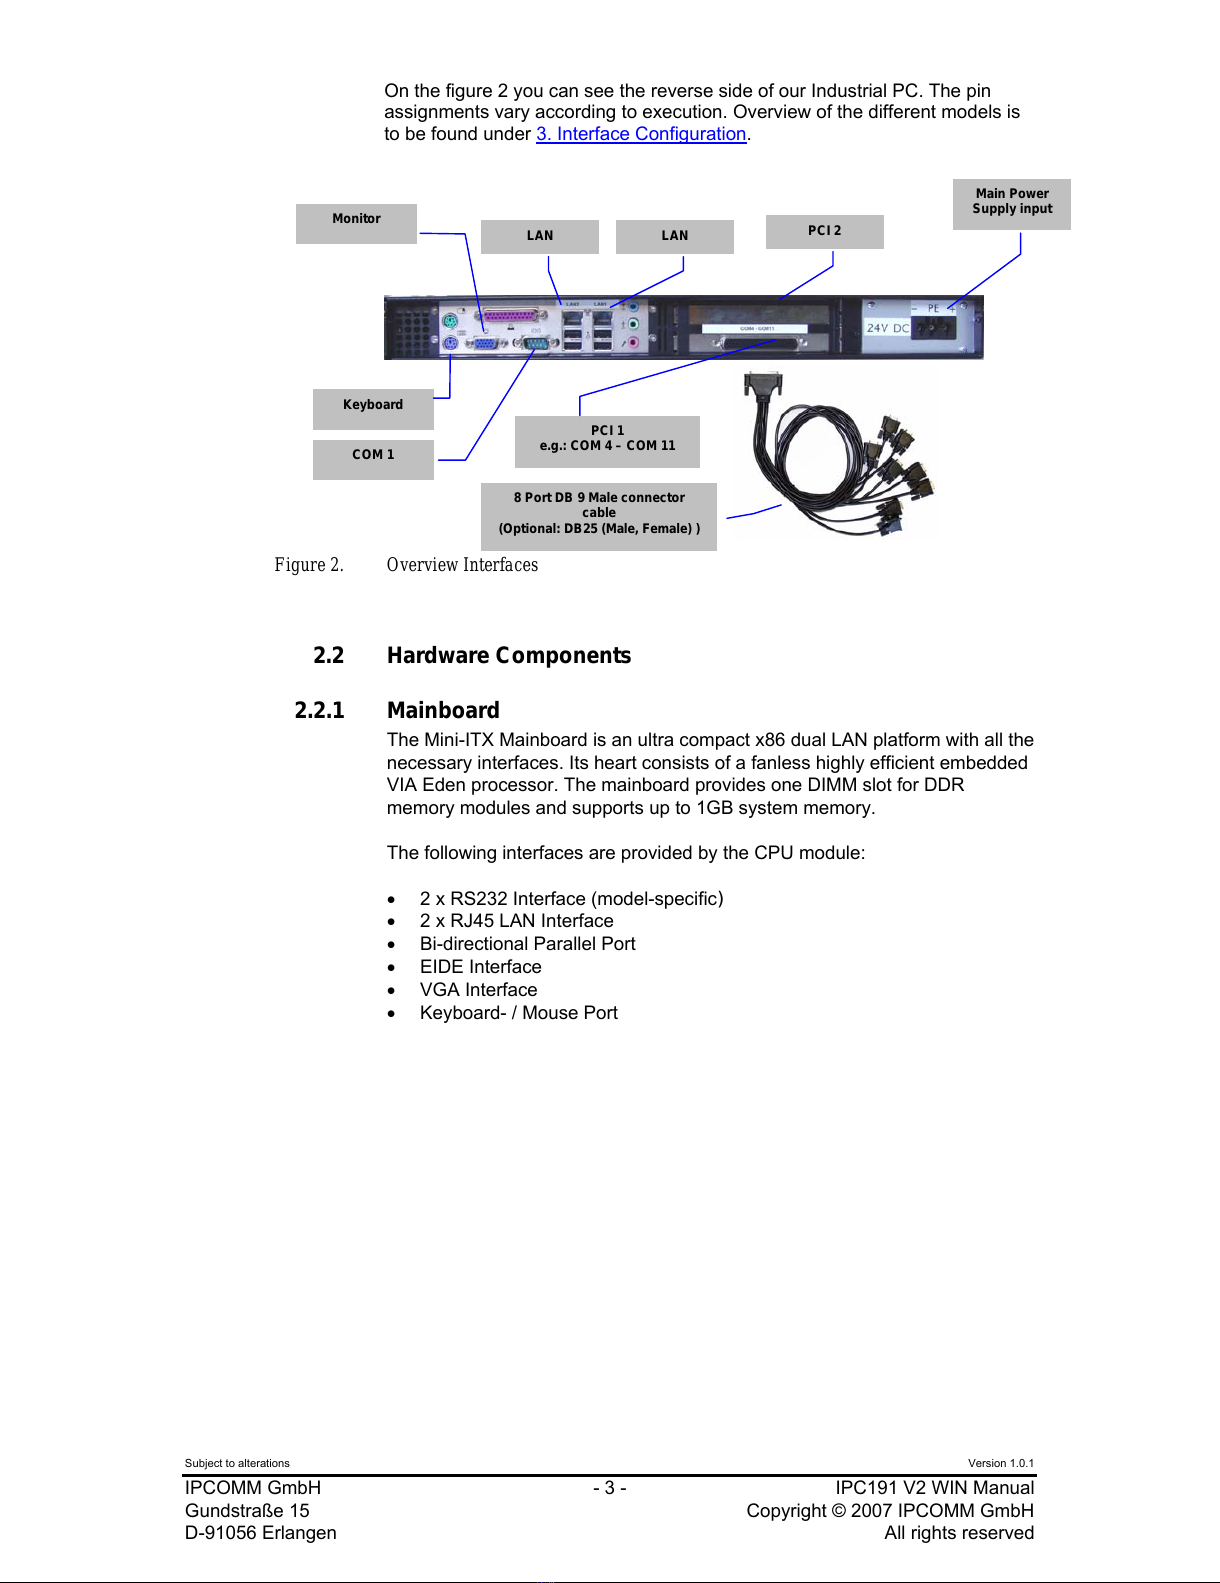
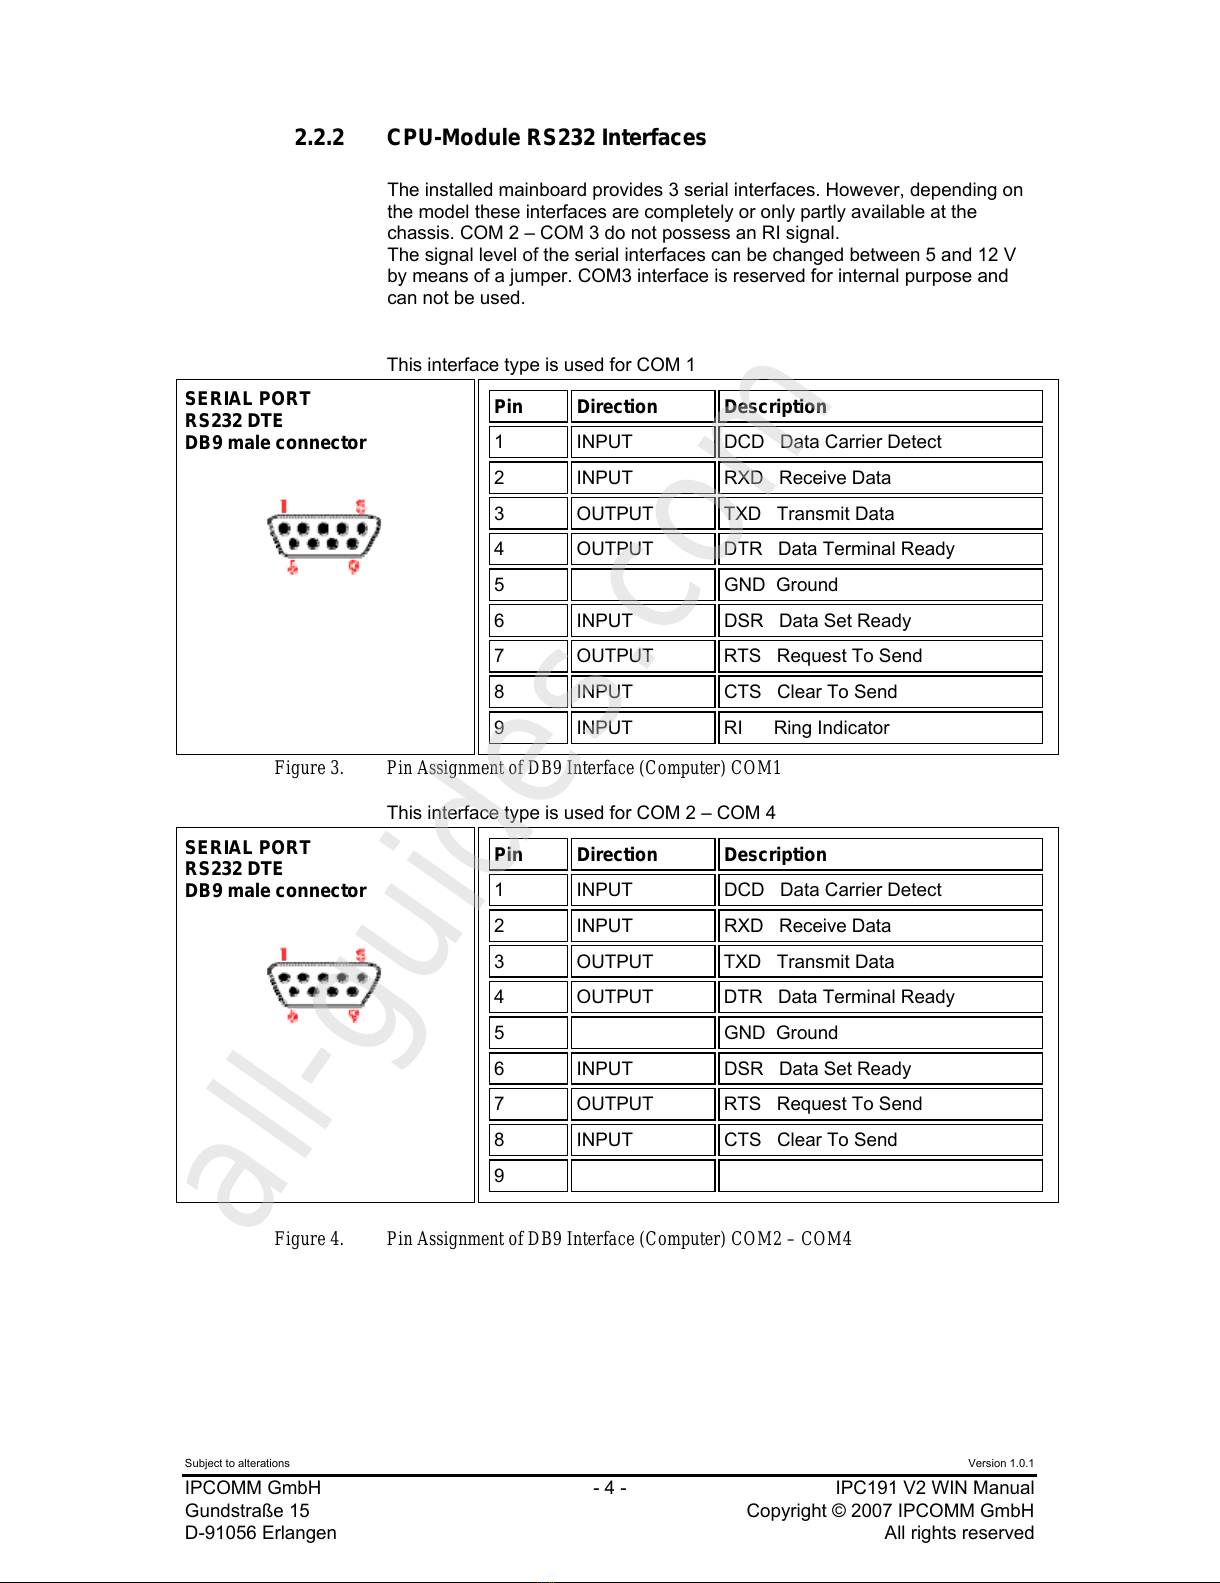
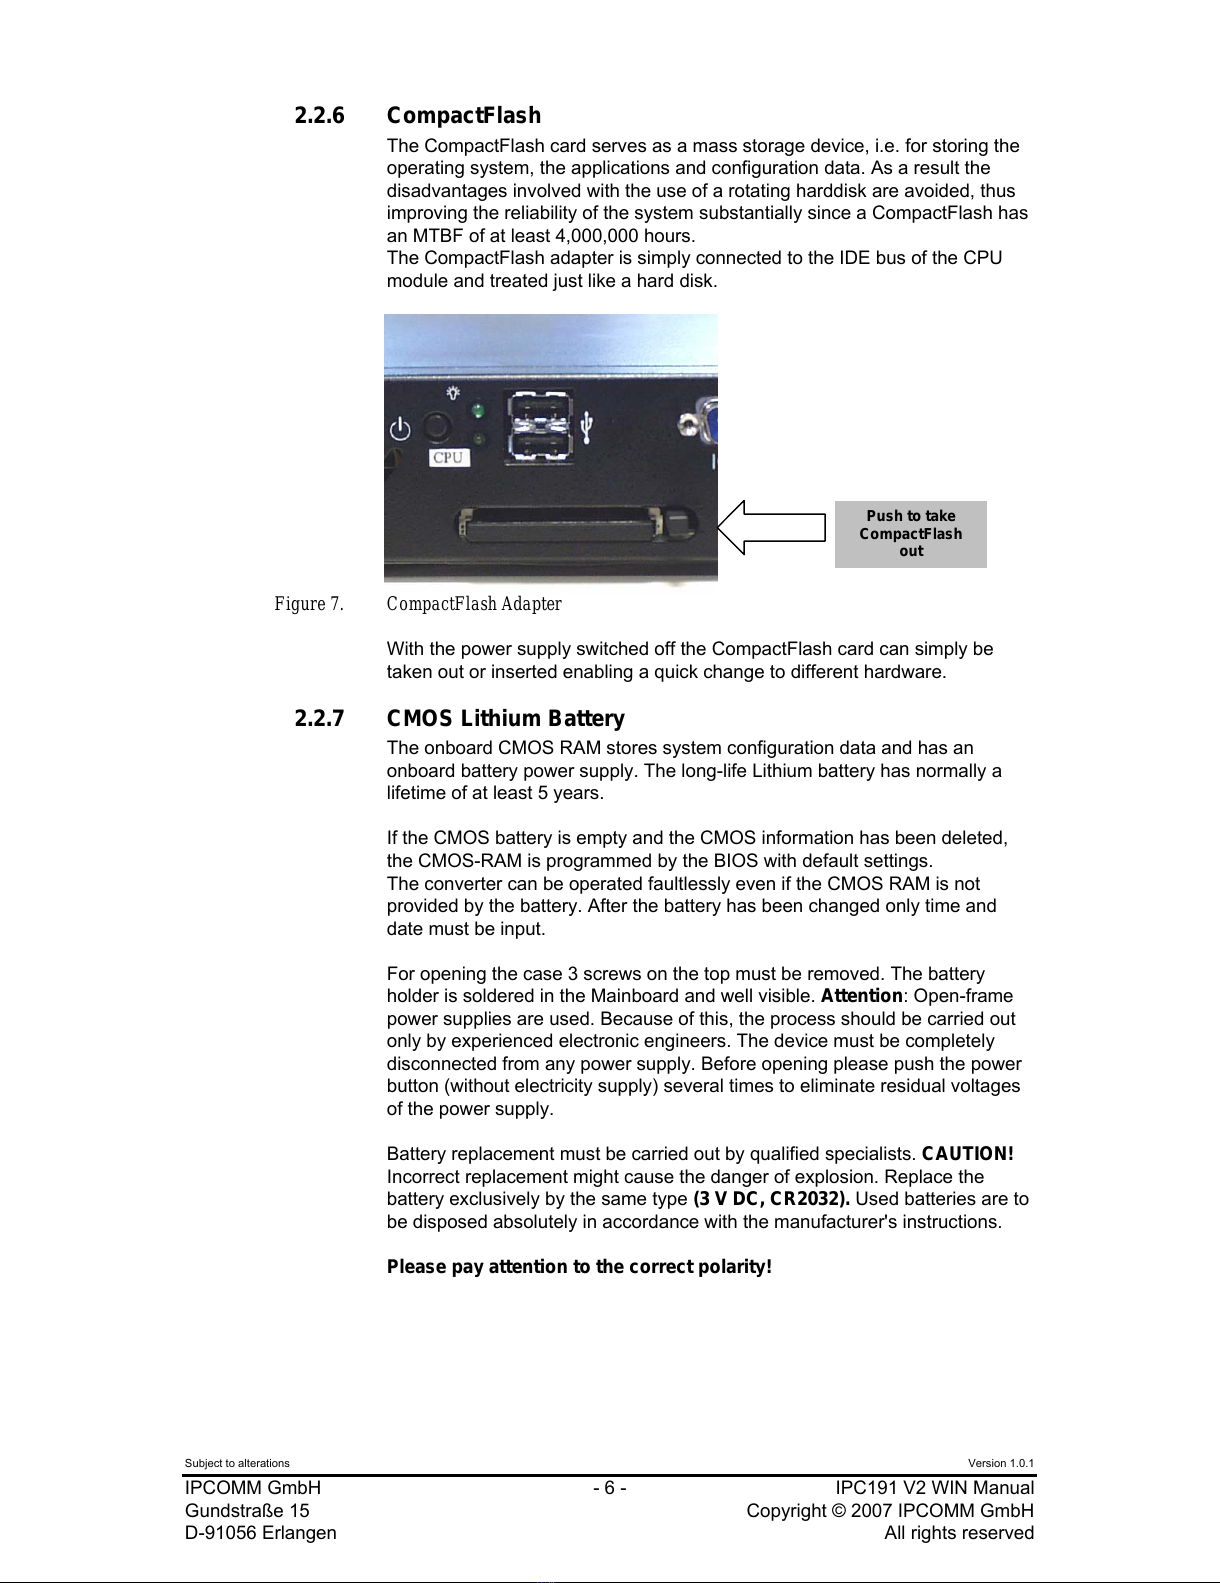
Subject to alterations Version 1.0.1
IPCOMM GmbH - 1 - IPC191 V2 WIN Manual
Gundstraße 15 Copyright © 2007 IPCOMM GmbH
D-91056 Erlangen All rights reserved
1 Introduction
All technical information, descriptions and illustrations contained in this Operating, Maintenance and
Installation Manual remain our property and shall not be used otherwise than for operating this
System, nor shall they be copied, reproduced or passed on to third parties or brought to their notice
without our prior written consent.
The information represented in this manual is in keeping with current standards and is subject to later
alterations.
This manual contains important instructions referring to safe installation, commissioning, operation
and maintenance.
Read this manual carefully before starting up the protocol converter and observe the instructions.
In order to comply with the guidelines for electro-magnetic compatibility in industrial PCs (or other
variants) only CE-certified components are used in compliance with project-specific requirements.
It is to be noted that the Protocol Converter (IPC191) has not been protected against lightning and the
operator should, if desired, take appropriate protective precautions.
All trademarks and brand names contained in this user manual are for identification purposes only and
can be owned by their respective holders.
Finally we want to draw your attention to the fact that any warranties with respect to delivered goods
will be invalid in the event that:
•Operation, servicing and maintenance are not carried out accurately according to the
instructions, repairs are not carried out by our personnel or without our prior written consent.
•Commissioning is not carried out by our personnel or we have not given our approval for the
commissioning or the commissioning is carried out by untrained personnel.
•The unit is used inadequately, incorrectly, negligently or inappropriately or for a purpose other
than that originally intended.
•The serial number is removed from the product.
For your protection, observe the following safety precautions when setting up your equipment:
•Follow all cautions and instructions marked on the equipment.
•Ensure that the voltage and frequency of your power source match the voltage and frequency
inscribed on the equipment's electrical rating label.
•Never push objects of any kind through openings in the equipment. Dangerous voltages may
be present. Conductive foreign objects could produce a short circuit that could cause fire,
electric shock, or damage to your equipment.
All in this Document used Trade marks are stated for identification purposes and may be the
property of the various holders.