Audio Keypad Setup
To configure your Audio Keypad to work with your Sonos devices,
download the iPort app from the app store and follow the steps within the App.
Requires an iPhone, iPad or iPod touch.
For troubleshooting and questions on device setup with Sonos, visit iPortProducts.com/xpress.
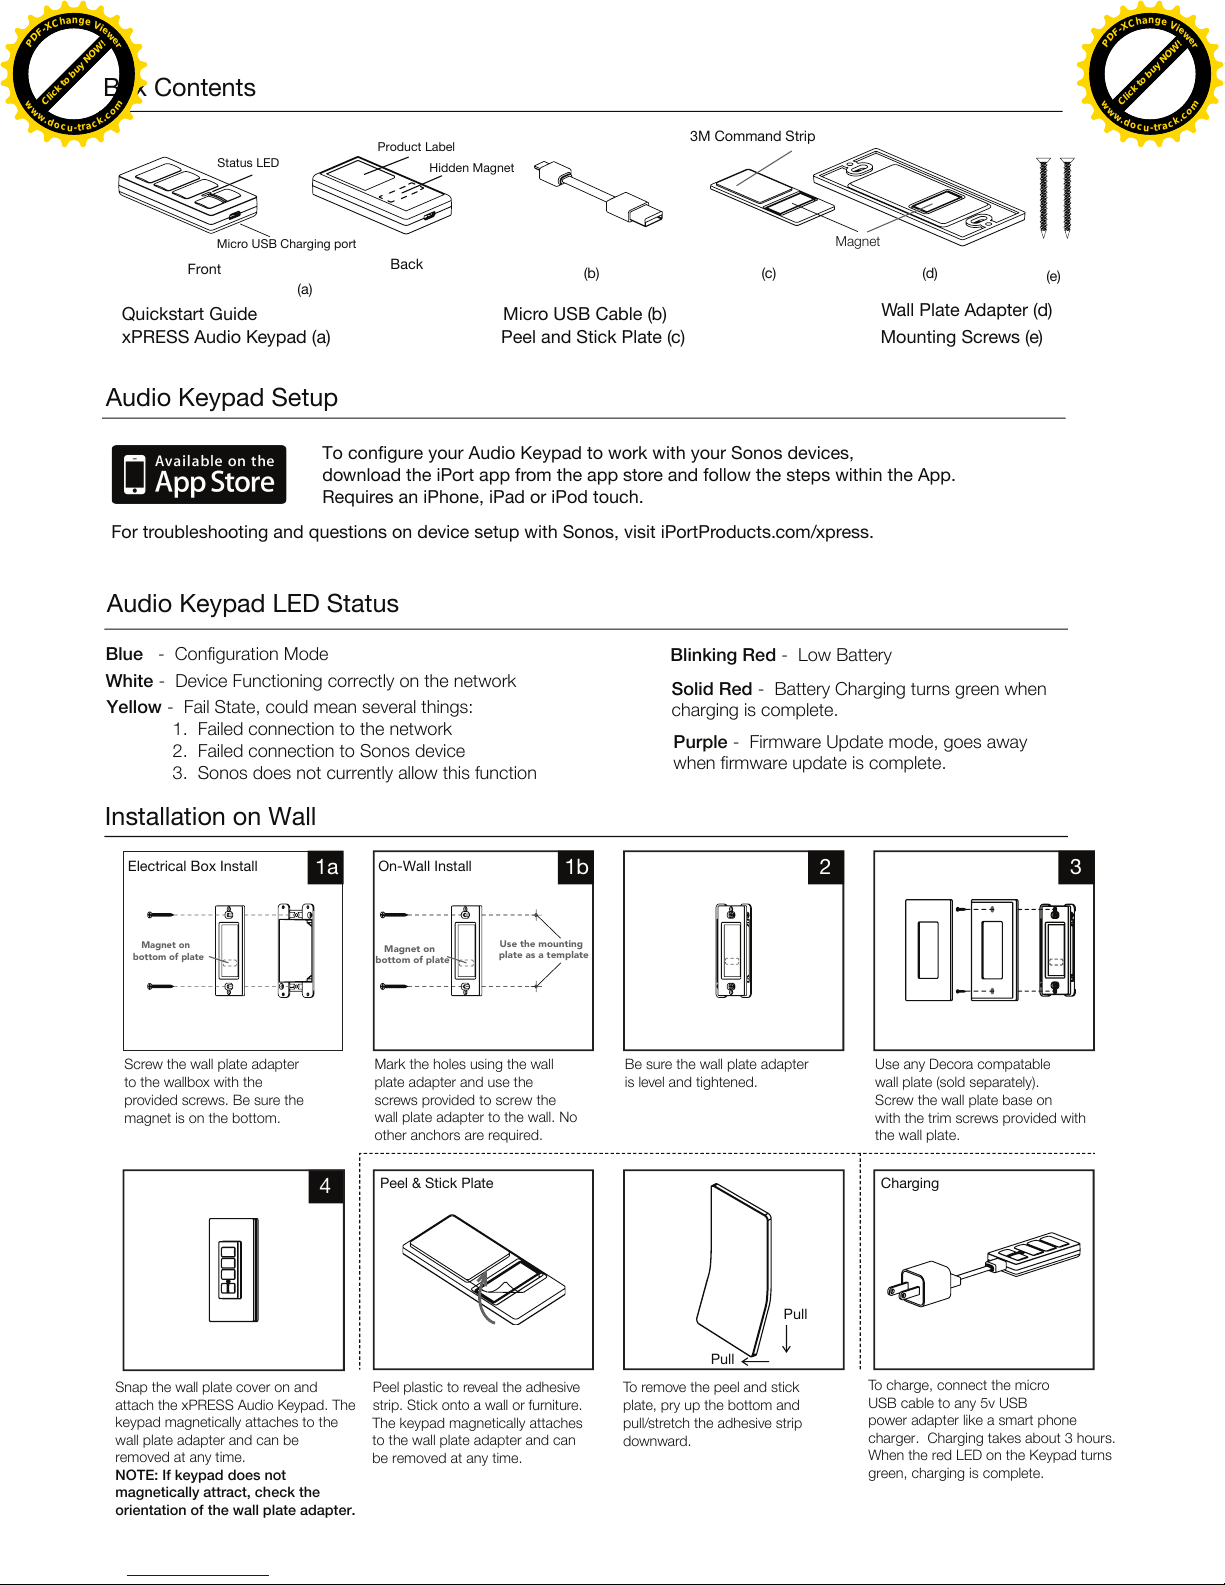
Installation on Wall
Screw the wall plate adapter
Blue - Configuration Mode Blinking Red - Low Battery
Solid Red - Battery Charging turns green when
charging is complete.
Purple - Firmware Update mode, goes away
when firmware update is complete.
White - Device Functioning correctly on the network
Yellow - Fail State, could mean several things:
1. Failed connection to the network
2. Failed connection to Sonos device
3. Sonos does not currently allow this function
to the wallbox with the
provided screws. Be sure the
magnet is on the bottom.
Snap the wall plate cover on and
attach the xPRESS Audio Keypad. The
keypad magnetically attaches to the
wall plate adapter and can be
removed at any time.
NOTE: If keypad does not
magnetically attract, check the
orientation of the wall plate adapter.
The keypad magnetically attaches
to the wall plate adapter and can
be removed at any time.
Peel plastic to reveal the adhesive
strip. Stick onto a wall or furniture.
Electrical Box Install On-Wall Install
Mark the holes using the wall
plate adapter and use the
screws provided to screw the
wall plate adapter to the wall. No
other anchors are required.
Peel & Stick Plate Charging
Be sure the wall plate adapter
is level and tightened.
Use any Decora compatable
wall plate (sold separately).
Screw the wall plate base on
with the trim screws provided with
the wall plate.
Box Contents
Quickstart Guide
xPRESS Audio Keypad (a)
Status LED
Product Label
Hidden Magnet
Front
(a)
Back
Micro USB Charging port
Wall Plate Adapter (d)
Peel and Stick Plate (c)
Micro USB Cable (b)
Mounting Screws (e)
1a
4
1b 2 3
Magnet on
bottom of plate
Magnet on
bottom of plate
Use the mounting
plate as a template
Magnet
To charge, connect the micro
USB cable to any 5v USB
power adapter like a smart phone
charger. Charging takes about 3 hours.
When the red LED on the Keypad turns
green, charging is complete.
To remove the peel and stick
plate, pry up the bottom and
pull/stretch the adhesive strip
downward.
Pull
Pull
3M Command Strip
(b) (c) (d) (e)
Audio Keypad LED Status