IP0051 User Guide ver. 1.1
5 SIP + 1 IAX page 3 of 20
© IPshop ApS 2009 C:\I_drev_tmp\IP0051\IP0051_user_guide.doc Ver. 1.1
1. Technical Parameter and Hardware Specifications
1.1 Technical Parameter
Support Protocol:
Support SIP (RFC3261, RFC2543)
Support IAX2
Support Voice codec: G711A/u, G729, and G723.1
Support G.168 echo cancellation standard, compliant 96ms with speaker mode.
Support Jitter Buffer, VAD, CNG, SIP Domain name register, point-to-point Call
Support RTP and RTCP voice communication
Support the Inbound/Outbound transmission; SIP info, DTMF Relay, RFC2833
Support many countries' standard ring
NAT transversal: Support STUN, CITRON, AVS Mode
Support SIP domain, SIPAuthentication (none, basic, MD5), Domain Name parse
Support 5 SIP servers and 1 IAX2 account synchronously, can call in and out by either proxy
Support SIP application, including SIP call forward/transfer/holding/waiting
Network Features:
Support two models: Bridge and Router, integrate two ports router function.
Support basic NAT and NAPT.
Support PPPoE for xDSL, and support off hook auto dial.
Support DHCP Client for WAN;
Support DHCP server for LAN;
Support DNS relay on LAN port and can provide DNS service for LAN Network equipment.
Support DNS SRV on WAN port
Support SNTP Client, can auto-obtain time from internet
Use advanced DSP tech to insure high quality voice
Use advanced jitter buffer tech to prevent the delaying and losing for package information
Support Network Tools, including ping, race route, and telnet client.
Support three modes to configure WAN port IP, they are: static, DHCP, and PPPoE.
Provide firewall control for small LAN.
Provide optional communication priority level for small LAN.
Support VPN—L2TP and Openvpn(SSL) protocol
Support Secondly Layer QoS (802.1p)
Advanced Function:
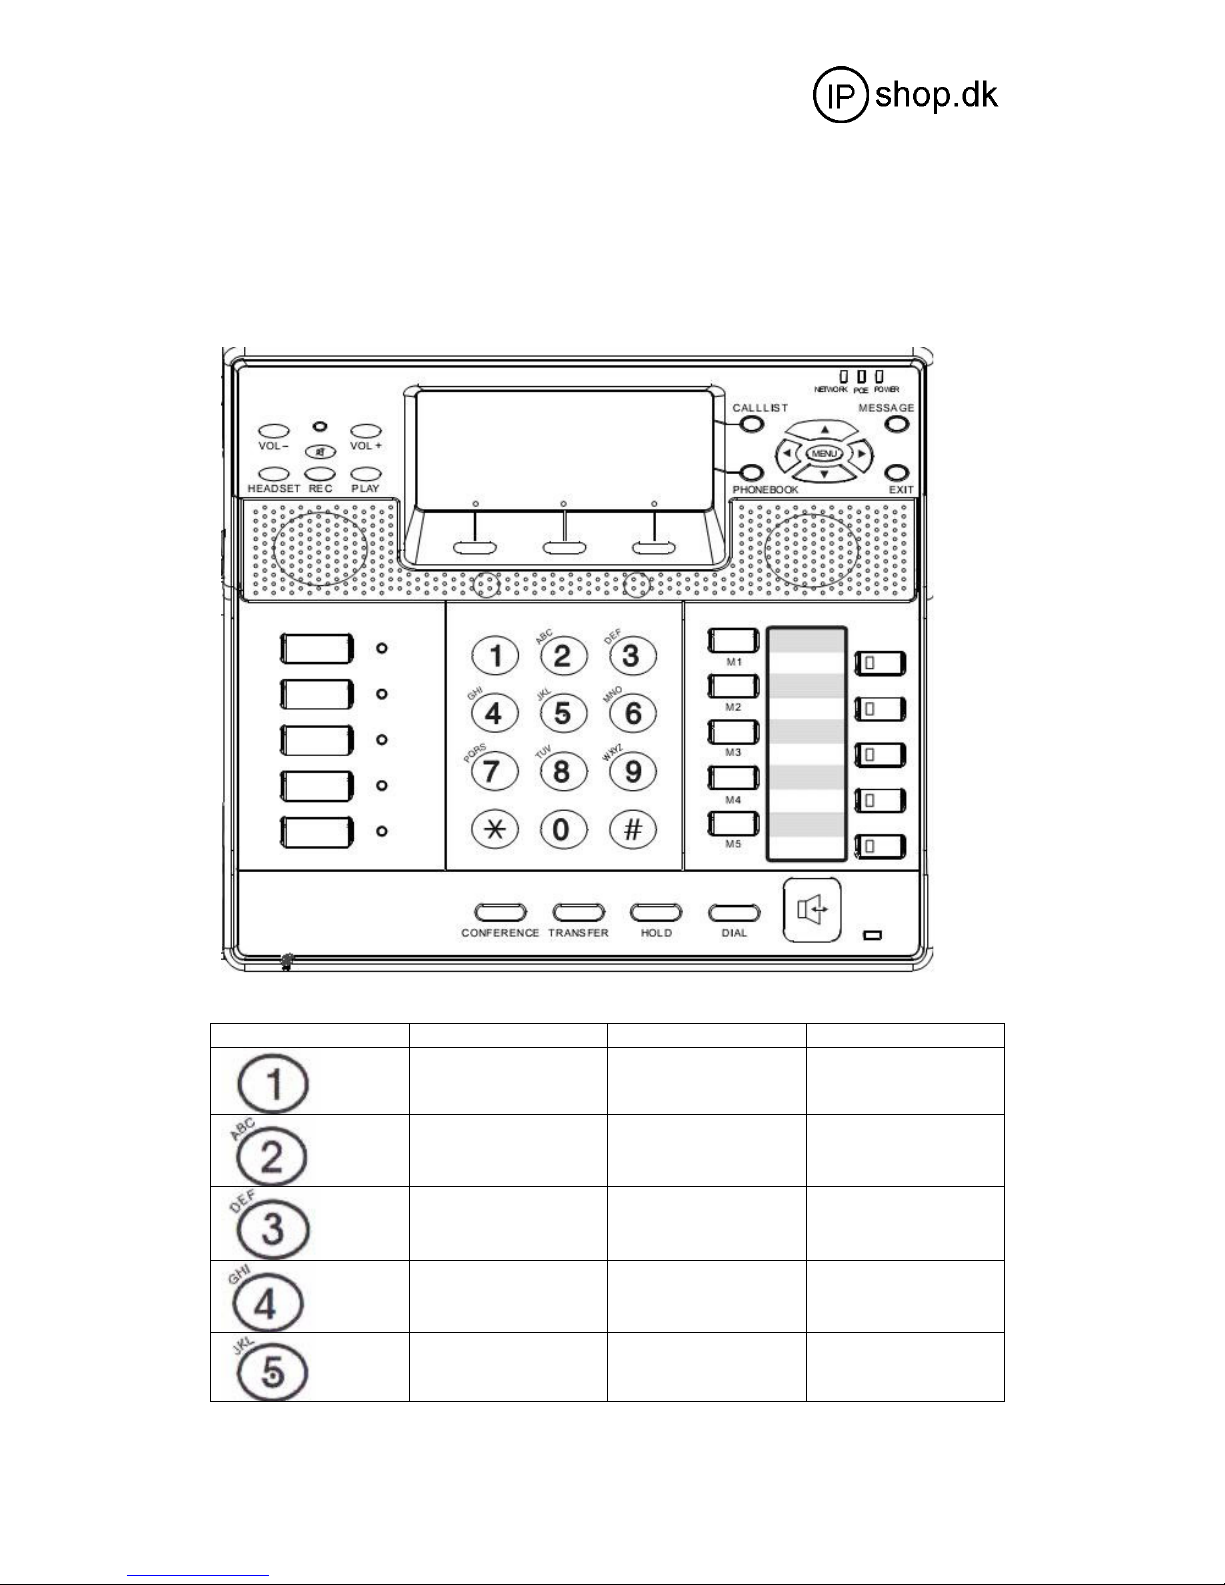
Support headset
Support 128*64 LCD
Support Power over Ethernet (POE) function
3 Interactive soft key, with more humanized operating prompt.
Support 5 SIP servers synchronously.
Support local voice record, message and server message.
Support sending and receiving short message
Support message wait indication.
Support user defined ring tone.
Support L2TP client.
Support call pickup, join call, auto-redial.
Support 5 programmable keys, 5 PSTN keys and 5 SIP keys, and it can be connected with the
expansion board
which can display more numbers' online status.
Support presence, BLF, Pust to talk
Support dial switchboard and extension number at one time, directly get through the ext. later.
Support phone book, and can set different rings according to different incoming callers.