IrriGreen Irrigreen2 User manual

Irrigreen2 Installation Manual
Irrigreen® Digital Sprinklers
Wi-Fi Cloud Connected Controller Waterproof Plug-n-Play Cabling
16 Digital Zones 12 Valve Zones
Installation Video
1.1.1
0921 1
Smart Irrigation Zone
Design Video - IOS

Irrigreen Products
Controller Cable
(50 ft w/end plug)
Digital Sprinkler
(1 per zone, ~2000 sq. ft.)
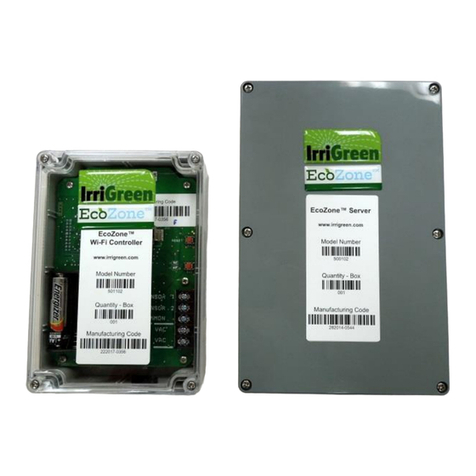
Irrigreen2 Wi-Fi / Cloud Controller
16/12: 16 Digital Zones, 12 Valve Zones
32/24: 32 Digital Zones, 24 Valve Zones
24 VAC Transformer
w/ 10’ wire (40VA, indoor)
1” Ultrasonic
Flow Sensor
(optional) 2
Cable Tee (w/end plug)
Sprinkler Cable (50ft)
CableLok
Secures water-proof
cable connectors
FlexPipe (15 in.)
Connects head to mainline
1” MPT to mainline tee

Other Items Needed
(Not supplied by Irrigreen)
1“ Mainline
PVC or poly
6” valve boxes
*One for each Digital Zone
Protects cable connections
Holds extra sprinkler cable length
*One for optional flow sensor
*As needed for valve zones
1” Tees with 1” female pipe thread
PVC or poly
For connecting Flex-Pipe to mainline
1” Elbows and connectors
PVC or poly
3

Irrigreen System Requirements
Good flow, Constant pressure, Clean Water
•8 gpm Lower flow = shorter throw)
•Important to check flow, some homes have 3/4” pipe inside the home,
which restricts flow to the irrigation system, lessening throw
•40 - 80 psi (Any constant pressure between 40 - 80 psi)
•Well systems require a constant pressure pump or regulated constant pressure supply, e.g. with
a pressure regulating valve (PRV) set below the lowest pump setting
•Filter required for any water source with particulates (sand, grit, lake water)
500 Micron filter (similar to drip systems)
4

System Design (1 of 2)
One Head per Zone
Place Head to Reach Farthest Corner, 25-35 Feet
Exact placement
not critical as you
can program the
head to the shape
of the zone
Don’t overlap
sprays or zones
Installation hint:
Walk in from the
corner with a wheel
and place a flag at
25-30’ for head
placement.
NOTE: The zone
start up point
(Position 1)
must be set at
least 10 feet so
the head has
enough
flow/pressure to
fully “pop up”.
After head is
fully popped up,
OK to set points
as short as 5
feet.
5

System Design (2 of 2)
One Head per Zone
Place head 5 feet or more from the nearest edge*
*For narrow
zones less than
10’ wide, place
head along edge
and program in
a ~180 degree
pattern
6

Irrigreen Throw Distances
Verify psi before placing heads
Low flow may affect throws
Maximum Throw
40 psi 25’
50 psi 27.5’
60 psi 30’
70 psi 32.5’
80 psi 35’
Minimum Throw
40 psi 5’
50 psi 5’
60 psi 5’
70 psi 5’
80 psi 5’
7
Total Area
At 60 psi, one Irrigreen head will evenly water up to ~2000 sq.ft.
Any line-of-sight shape within a 60 foot diameter circle

8
6” Valve box next to each head for
cable connectors and extra cable

Download the IG2 mobile app (raindrop logo)
Follow IOS App Instructions. Scan barcode with App
For Android, connect to Irrigreen Wi-Fi network and enter system password
(Calibration and Auto Water require IOS App)
Controller broadcasts an Irrigreen Wi-Fi signal
Wi-Fi Range: As a low-power radio signal;
range can be greatly affected by surroundings
Controller location, landscape elevations (soil,
hardscapes), house construction (stucco, steel, etc.)
can all lessen Wi-Fi range. A Wi-Fi extender may
needed to extend range while mapping zones.
IrriGreen has Wi-Fi extenders available.
9
Irrigreen2
App Icon
(The Green and
Blue Icon apps are
for legacy systems)

10
2 AAA
System Wiring

11
Digital Sprinklers are Connected with Cables
Daisy-chain up to eight Digital Sprinklers per run (#1-8 and #9-16)
Digital Zones 1-8
Red Controller cable lead to “IG Digital 1-8”
White Controller cable lead to “Common”
Digital Zones 1-8
Red Controller cable lead to “IG Digital 9-16”
White Controller cable lead to “Common”

Irrigreen Connector Orientation
Similar to electrical extension cords*
12
All of the smaller “male” connectors
point back to the Controller
Larger “female” connectors always
point away from the Controller
*Male points back to the outlet,
female points away from the outlet

Eight Sprinklers per Controller Cable
Connect sprinklers with Sprinkler Cables and Cable Tees
Digital Sprinklers #1-8 will run on one cable:
Wire Controller Cable to “iG 1-8” and “Common”
Locate Sprinklers #1-8 in the order you want them to run
Digital Sprinklers #9-16 will only run on a second
Controller cable:
Wire second Controller Cable to “iG 9-16” and “Common”
Locate Sprinklers #9-16 in the order you want them to run on the
landscape (they will run after #1-8)

Sprinklers are Pre-numbered for each Zone
Locate each sprinkler in the numerical order you want them to run*
Before burying heads: Plug all heads together and confirm they run
14
Digital Sprinklers have Zone Numbers
1-8, 9-16 assigned at the factory
Zone Number on Sprinkler box Zone Number on Sprinkler
*Head #1 runs first
Head #2 runs second
Head #3 runs third
Etc.

Installation Dos and Don’ts
•DO check flow to determine maximum throw before locating heads
•DO Plug all heads together with a all cables before burying to test sprinkler connections
•DO Install Cables in a trench or pull a run of 1 inch pipe as conduit
•DO loop excess Cable inside a valve box adjacent to the head
•DO use Cable Tees to branch out your Cables in different directions
•DO use supplied End Plug to seal the last Sprinkler connector
•DO add a second Controller Cable if branching off immediately from the Controller (NOTE: Heads must
be numbered accordingly; e.g. #1-4 on first controller cable and #9-12 on second controller cable)
•DO protect all Digital Sprinkler connections with small valve boxes, buried below turf
•DO use supplied Flex-Pipe for plumbing heads
•DON’T cut and splice IrriGreen Cables
•DON’T pull IrriGreen Cables with a vibra plow … DO pull 1” conduit for the cables if pulling pipe
•DON’T use Teflon tape inside of Irrigreen heads
•DON’T calibrate and program heads before flushing air from all digital AND valve zone piping

16
Install on all Cable
connections

Protect Cable Connections
All connections must be protected by a small valve box
Install next to Digital head below turf
Install box
below turf
17

18
Bury to here
Top of head
slightly above
grade Hand tighten head onto the elbow until it bottoms out
against the o-ring inside the head
Teflon tape use recommended
on the 1” mainline connection
to prevent leaks
Do not use teflon
tape on the
elbow fitting*
Use of Flex Pipe required for warranty*
*Use of teflon tape inside
head, or not mounting
head on Flex-Pipe, voids
the head warranty

Suggested Pre-assembly
The last head on the water lines (all directions) should be taken off of
Flex-Pipe when flushing dirt and debris from the lines
19
Helpful Hint:
When flushing the
lines, disconnect
the head and
point Flex-Pipe
out of hole to
keep the hole
from filling with
water

Digital Sprinkler Head Depth
Dig 15” hole
Position head so the top of the Digital Sprinkler cap
is about ½” above grade
20
Other manuals for Irrigreen2
2
Table of contents
Other IrriGreen Irrigation System manuals