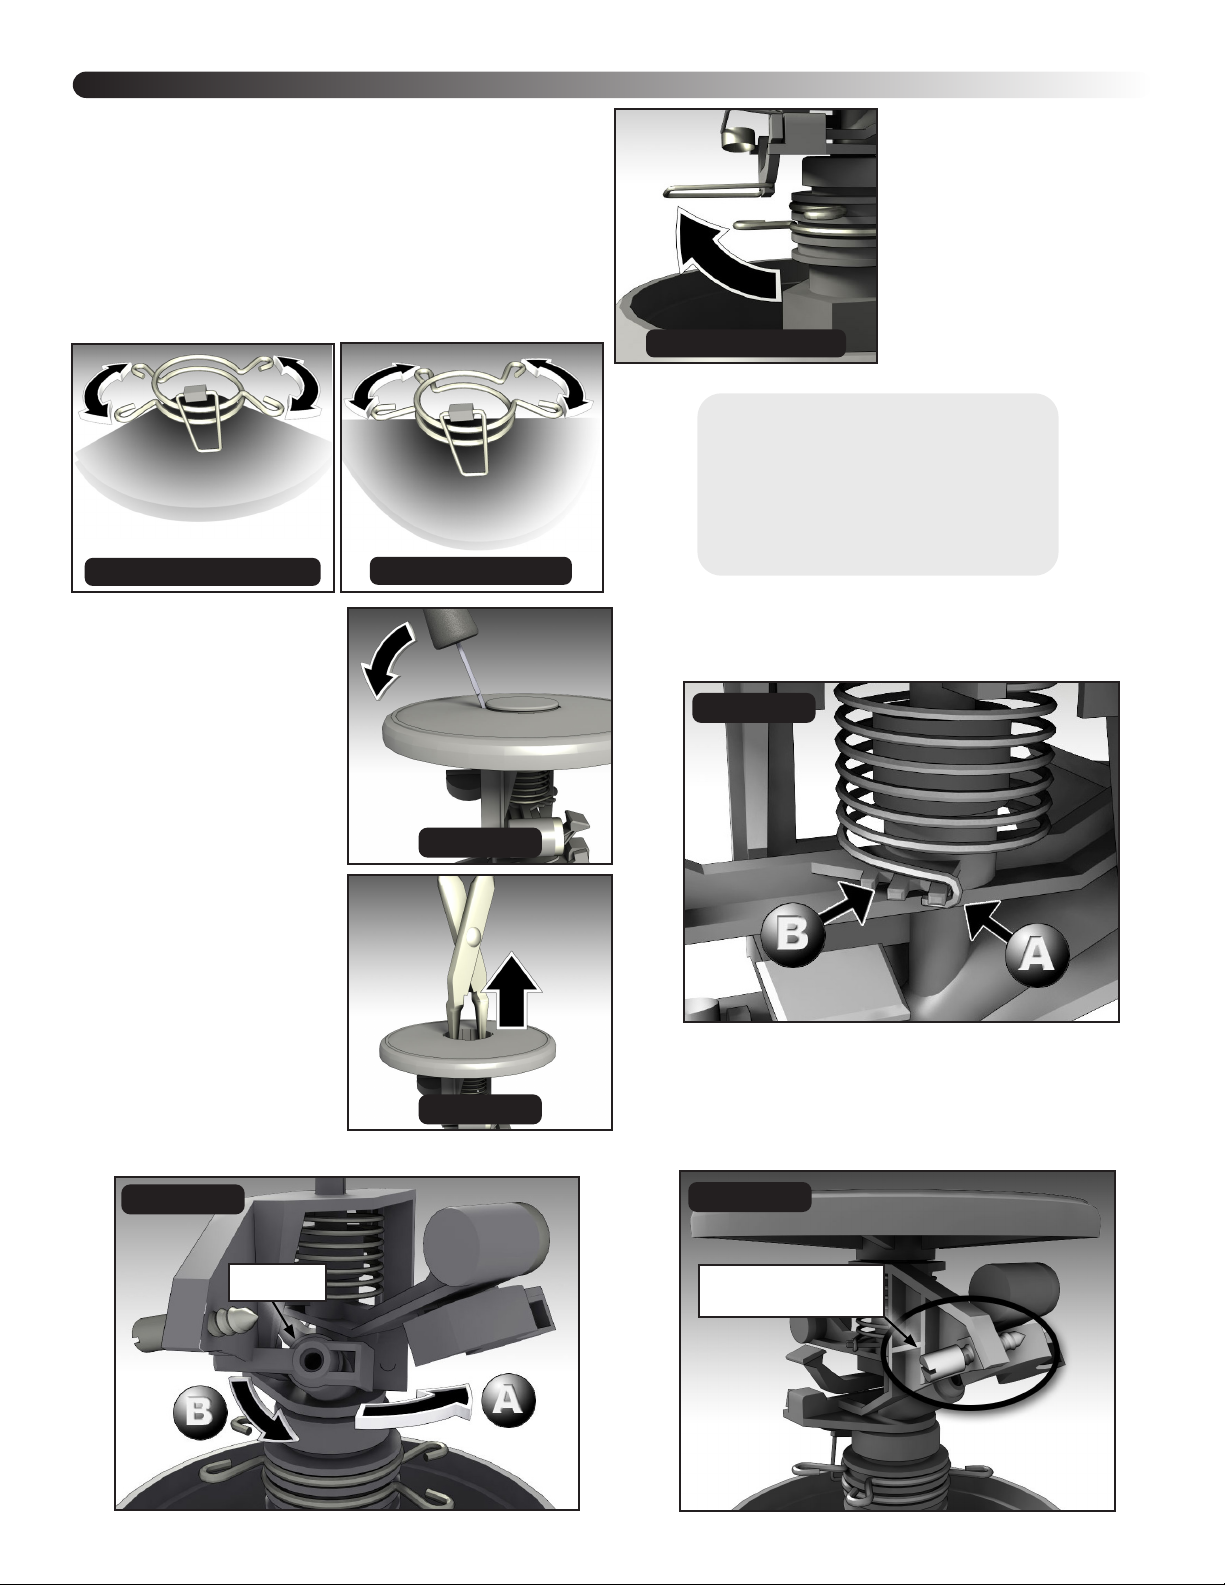
Replace a Nozzle
1. With a screwdriver,
remove the top cover cap
(Figure 4).
2. With needlenose pliers,
remove the top cover
(Figure 5).
3. Pull the rotor arm aside
to expose the nozzle
(Figure 6, A).
4. Rotate the nozzle tab
down to release the nozzle
(Figure 6, B).
5. Remove the nozzle and
replace with a new one.
6. Turn the nozzle tab
clockwise to lock the new
nozzle in place.
7. Push the top cover
back into place.
8. Install the top cover cap.
Operation
Figure 4
Figure 5
Figure 6
Nozzle
Figure 7
Figure 8
Radius reduction
screw
Trip lever up
Figure 1 - Full Circle
180°
Trip lever down
Figure 2 - Half Circle
Trip lever down
90°
Figure 3 - Quarter Circle
Match spray pattern to your layout
Adjust sprinkler to t your layout by selecting full or
part-circle spray patterns.
Full circle: Flip trip lever up to allow sprinkler to rotate
360° (see Figure 1).
Part circle: Flip trip lever down and adjust the sprinkler
collars. The angle between the collar handles determines
the arc the sprinkler will water (20° to 340°)
(see Figure 2 and 3).
Note: When using the orange or red low-ow nozzles,
move Adjustment Spring to the Figure 7, B position for
best operation.
Reduce Spray Distance
To reduce the spray distance (radius) up to 25%, with the
sprinkler running, turn the spray reduction screw clockwise
into the stream; turn counterclockwise to increase the
spray radius (see Figure 8).
Maintenance & Troubleshooting
• Do not use oil, grease, or
pipe dope on sprinkler.
• Check sprinkler nozzle for debris.
• Check valve function.
• Check timer function.


