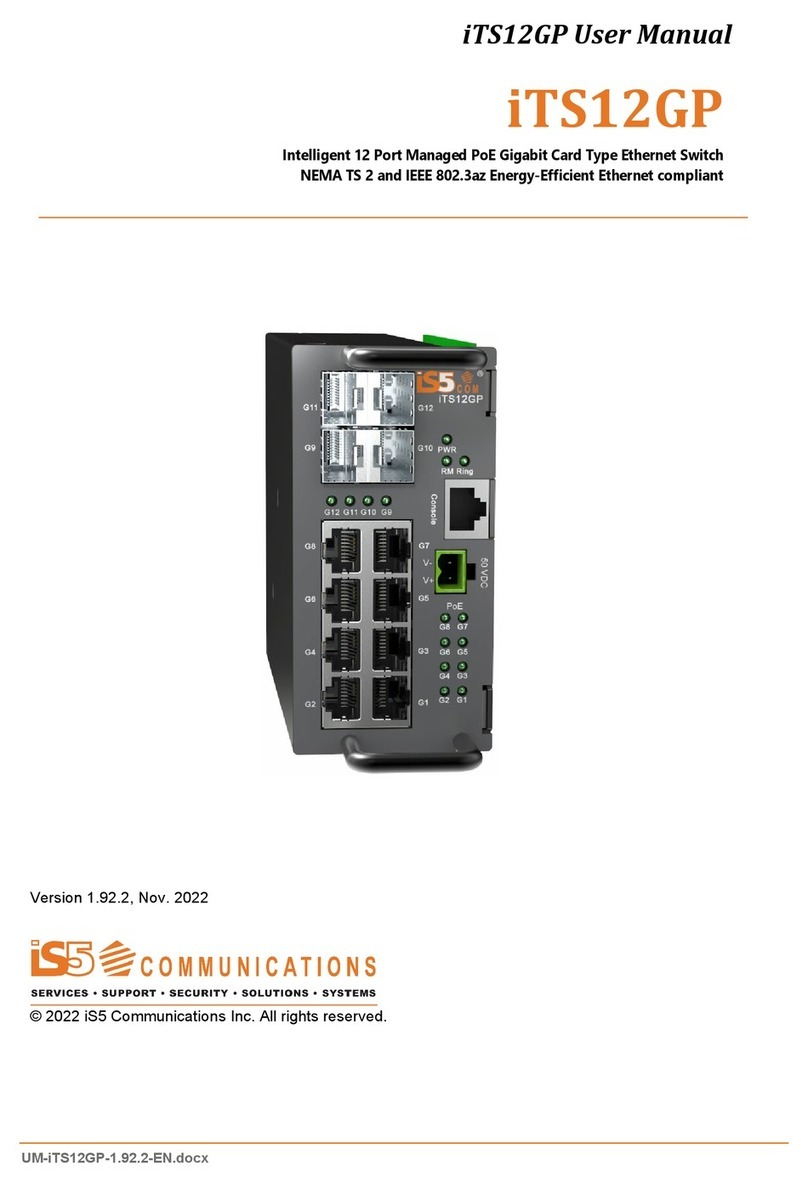
IS5 COMMUNICATIONS iES6 Series User manual

iES6 Series User’s Manual
iS5 Communications Inc.
2
Copyright © 2020 iS5 Communications Inc.
All rights reserved.
No part of this publication may be reproduced in any form without the prior written consent of
iS5 Communications Inc. (iS5).
TRADEMARKS
iS5Com is a registered trademark of iS5. All other trademarks belong to their respective owners.
REGULATORY COMPLIANCE STATEMENT
Product(s) associated with this publication complies/comply with all applicable regulations.
Please refer to the Technical Specifications section for more details.
WARRANTY
iS5 warrants that all products are free from defects in material and workmanship for a specified
warranty period from the invoice date (5 years for most products). iS5 will repair or replace
products found to be defective within this warranty period including shipping costs. This
warranty does not cover product modifications or repairs done by persons other than iS5-
approved personnel, and this warranty does not apply to products that are misused, abused,
improperly installed, or damaged by accident.
Please refer to the Technical Specifications section for the actual warranty period(s) of the
product(s) associated with this publication.
DISCLAIMER
Information in this publication is intended to be accurate. iS5 shall not be responsible for its use
or infringements on third-parties as a result of its use. There may occasionally be
unintentional errors on this publication. iS5 reserves the right to revise the contents of this
publication without notice.
CONTACT INFORMATION
iS5 Communications Inc.
5895 Ambler Dr. Mississauga, Ontario, L4W 5B7
Tel: 1+ 905–670–0004 // Fax: 1+ 289–401–5206
Website: www.iS5Com.com
Technical Support E-mail: support@iS5Com.com
Sales Contact E-mail: sales@iS5Com.com
Authorization
Name & Title
Signature
Date

iES6 Series User’s Manual
iS5 Communications Inc.
4
Table of Content
CAUTION: LASER
................................................................................................ 7
CAUTION: SERVICE
............................................................................................ 7
CAUTION: PHYSICAL ACCESS
............................................................................ 7
GETTING TO KNOW YOUR SWITCH ................................................................... 8
1.1 About the iES6 Series Intelligent Managed Switch ........................................................................8
1.2 Software Features .........................................................................................................................8
1.3 Hardware Features ........................................................................................................................8
HARDWARE OVERVIEW...................................................................................... 9
2.1 Front Panel ...................................................................................................................................9
2.2 Rear............................................................................................................................................ 10
2.3 Bottom........................................................................................................................................ 10
2.4 Side ............................................................................................................................................ 11
HARDWARE INSTALLATION ............................................................................. 12
3.1 DIN Rail Mounting ..................................................................................................................... 12
3.2 Panel Mounting Option ............................................................................................................... 13
3.3 Chassis Ground Connection ........................................................................................................ 13
3.4 Power Connections ..................................................................................................................... 14
3.5 Console Connection .................................................................................................................... 16
CABLES .............................................................................................................. 17
4.1 Ethernet Cables........................................................................................................................... 17
4.1.1 10Base-T/100Base-T(X) Pin Assignments ..................................................................................... 17
4.2 Fiber Optics ................................................................................................................................ 18
4.3 Console Cable............................................................................................................................. 19
WEB MANAGEMENT.......................................................................................... 20
5.1 Configuration by Web Browser ................................................................................................... 20
5.1.1 About Web-based Management ................................................................................................... 20
5.1.2 System Information..................................................................................................................... 22

iES6 Series User’s Manual
iS5 Communications Inc.
5
5.1.3 Front Panel.................................................................................................................................. 22
5.1.4 Basic setting................................................................................................................................. 23
5.1.4.1 Switch Setting........................................................................................................... 23
5.1.4.2 Admin Password....................................................................................................... 23
5.1.4.3 IP Setting.................................................................................................................. 24
5.1.4.4 SNTP (Time Setting)................................................................................................. 25
5.1.4.5 LLDP ....................................................................................................................... 27
5.1.4.6 Backup & Restore..................................................................................................... 27
5.1.4.7 Upgrade Firmware.................................................................................................... 28
5.1.5 Port Setting.................................................................................................................................. 28
5.1.5.1 Port Control.............................................................................................................. 28
5.1.5.2 Port Status ................................................................................................................ 29
5.1.5.3 Port Alias.................................................................................................................. 29
5.1.6 Redundancy................................................................................................................................. 30
5.1.6.1 Fast Recovery Mode ................................................................................................. 30
5.1.6.2 iRing ........................................................................................................................ 30
5.1.6.3 iChain ...................................................................................................................... 31
5.1.6.4 iBridge...................................................................................................................... 32
5.1.6.5 RSTP........................................................................................................................ 33
RSTP Setting .............................................................................................................................. 34
RSTP Information....................................................................................................................... 35
5.1.7 VLAN......................................................................................................................................... 37
5.1.7.1 VLAN Configuration – Port Based............................................................................ 37
5.1.8 SNMP......................................................................................................................................... 37
5.1.8.1 SNMP – Agent Setting.............................................................................................. 37
5.1.8.2 SNMP – Trap Setting ................................................................................................ 38
5.1.8.3 SNMP – SNMP-V3 Setting....................................................................................... 40
5.1.9 System Warning ........................................................................................................................... 41
5.1.9.1 System Warning - SYSLOG Setting .......................................................................... 42
5.1.9.2 System Warning - System Event Log......................................................................... 42
5.1.9.3 System Warning - SMTP Setting ............................................................................... 43
5.1.9.4 System Warning – Event Selection............................................................................ 44
5.1.9.5 System Warning – Fault Relay Alarm........................................................................ 45
5.1.10Save Configuration....................................................................................................................... 45
5.1.11Factory Default............................................................................................................................ 46
5.1.12System Reboot............................................................................................................................. 46
COMMAND LINE INTERFACE MANAGEMENT ................................................ 47
6.1 About CLI Management............................................................................................................... 47
iES6 Series User’s Manual
iS5 Communications Inc.
6
6.2 Commands Set List — System Commands Set............................................................................... 51
6.3 Commands Set List — Port Commands Set................................................................................... 52
6.4 Commands Set List — RSTP command set ................................................................................... 53
6.5 Commands Set List — SNMP command set.................................................................................. 55
6.6 Commands Set List — TFTP command set................................................................................... 56
6.7 Commands Set List — SYSLOG, SMTP, EVENT command set..................................................... 56
6.8 Commands Set List — SNTP command set................................................................................... 58
6.9 Commands Set List — iRing command set.................................................................................... 59
TECHNICAL SPECIFICATIONS – UPDATE BASE ON LATEST DATASHEET. 60

iES6 Series User’s Manual
iS5 Communications Inc.
7
FCC Statement and Cautions
Federal Communications Commission Radio Frequency Interference Statement
This equipment has been tested and found to comply with the limits for a Class A digital device
pursuant to Part 15 of the FCC Rules. These limits are designed to provide reasonable protection
against harmful interference when the equipment is operated in a commercial environment. This
equipment can generate, use, and radiate radio frequency energy. If not installed and used in
accordance with the instruction manual, may cause harmful interference to radiocommunications.
Operation of this equipment in a residential area is likely to cause harmful interference in which
case the user will at his/her own expense, be required to correct the interference.
Caution: L ASER
This product contains a laser system and is classified as a CLASS 1 LASER PRODUCT. Use of controls or
adjustments or performance of procedures other than those specified herein may result in hazardous
radiation exposure.
Caution: Service
This product contains no user-serviceable parts. Attempted service by unauthorized personnel shall
render all warranties null and void.
Changes or modificationsnotexpressly approved by iS5CommunicationsInc. could invalidate specifications,
test results, and agency approvals, and void the user's authority to operate the equipment.
Should this device require service, please contact support@iS5Com.com.
Caution: Physical Access
This product should be installed in a restricted access location. Access should only be gained by qualified
service personnel or users who have been instructed on the reasons for the restrictions applied at the
location,and any precautionsthathave been taken. Access must only be via the use of a tool or lock and
key, or other means of security, and is controlled by the authority responsible for the location.

iES6 Series User’s Manual
iS5 Communications Inc.
8
Getting to Know Your Switch
1.1 About the iES6 Series Intelligent Managed Switch
The iES6 series switches are powerful, managed industrial grade switches with numerous features.
These switches can operate under a wide temperature range, dusty environments, and in humid
conditions. The switches can be managed either by using the WEB, TELNET, directly using the
Console port on the switch, or any third-party SNMP software. The switch can also be managed by
our own Network Management Suite called “iManage”. iManage has a friendly and powerful
interface which can be easily used to configure multiple switches at the same time, and also monitor
their status.
1.2 Software Features
World’s fastest Redundant Ethernet Ring (Recovery time < 30ms with up to 250 units)
Supports Ring Linking, Dual Homing over iRing, and standard RSTP
Supports SNMPv1/v2c/v3 & Port base VLAN Network Management
Event notification by Email, SNMP trap and Relay Output
Web-based ,Telnet, Console, CLI configuration
Port Based VLAN to segregate and secure network traffic
SNMPv3 encrypted authentication and access security
RSTP (802.1w)
Port configuration, status presentation
Windows utility (iManage) for network management
1.3 Hardware Features
4 x 10/100Base-T(X) Ethernet ports
2x 100Base-X SC or ST Fiber ports
Console Port
Dual Input low-voltage (LV) DC (10-48VDC)
Dual Input medium-voltage (MV) DC (36-75VDC)
Single Input Hi-voltage (HV) AC/DC input (85-264VAC, 88-300VDC) with Single (10-48VDC) backup
Wide Operating Temperature: -40 to 85oC
Storage Temperature: -40 to 85oC
Operating Humidity: 5% to 95%, non-condensing
Chassis: IP-40 Galvanized Steel
Dimensions – iES6 (W x D x H) : 101.8(W) x 128.8(D) x 176.7(H) mm (4.01x5.07x6.92 inch.)
Dimensions – iES6-S (W x D x H) : 65.13(W) x 160.49(D) x 191.267(H) mm (2.56x6.32 x7.53inch.)

iES6 Series User’s Manual
iS5 Communications Inc.
9
Hardware Overview
2.1 Front Panel
The product description is as shown below.
Port Description
Ports 1-4 10/100 RJ45 fast
Ethernet ports (8)
6 x 10/100Base-T(X) RJ45 fast Ethernet ports support auto-negotiation.
Default Setting :
Speed: auto
Duplex: auto
Flow control : disable
Ports 5 -6 (10) 2 x 100Base-F(X) SC or ST ports (Optional)
Console (6) Use a RS232 to RJ45 cable to manage switch.
Reset (7) Push and hold the reset button for 2 to 3 seconds to reset the switch.
Push and hold the reset button for 5 seconds to reset the switch into
Factory Default.
Figure 1 - Product Descriptions
Note: Ports 5 and 6 (Ref 10) Fiber option shown for reference only. Ports are also available as RJ45.

iES6 Series User’s Manual
iS5 Communications Inc.
10
Front Panel LED’s are shown in the table below.
Item Description Color Status Function
1 PWR1 Green On Power supply 1 operational.
2 PWR2 Green On Power Supply 2 operational.
3 R.M Green On Switch operating as iRing Master.
4 iRing Green
On iRing enabled.
Slowly blinking iRing topology broken.
Fast blinking iRing working normally.
5 Fault Amber On Fault relay. Power failure or Port down/fail.
Ports 1 to 6 - 10/100Base-T(X) Fast Ethernet ports
8
LNK / ACT Green
On Port link up.
Blinking Data transmitted.
Full Duplex Amber On Port works under full duplex.
Ports 7 – 8 Optional 10/100Base-T(X) or 100Base-F(X) or 1000Base-X
9
ACT Green
On Port link up.
Blinking Data transmitted.
LNK Amber On Port link up.
2.2 Rear
The image below shows the DIN bracket on the back of the switch (suitable for iES6 and iES6-S).
On the full DIN version, the holes circled in red are the mounting holes for the Panel bracket mounting
option. (NOTE: this is for the full DIN version only and not the slim version- iES6-S).
iES6 iES6-S
Figure 2 - Rear Views

iES6 Series User’s Manual
iS5 Communications Inc.
11
2.3 Bottom
The image below shows the 10 position terminal block and ground lug of the iES6 and iES6-S switch.
Figure 3 - 10 Position Terminal Block and Ground Lug
2.4 Side
On the full DIN version, the holes circled in red are the side mounting holes for the Panel bracket mounting
option. (NOTE: this is for the full DIN version only and not the slim version – iES6-S).
Figure 4 - iES6 - Side View

iES6 Series User’s Manual
iS5 Communications Inc.
12
Hardware Installation
3.1 DIN Rail Mounting
Each switch has a DIN-Rail bracket on the rear panel that allows the switch to be mounted on a DIN Rail.
To mount the switch on a DIN Rail follow the steps below.
1. Slant the top of the switch back and hook the top of the DIN bracket onto the top of the DIN rail.
iES6 iES6-S
Figure 5 - DIN Rail Mounting
2. Push the bottom of the switch towards the DIN Rail until in clicks into place.
Note: To release the switch from the DIN Rail, pull the latch at the bottom of the switch down to release
the DIN bracket from the DIN Rail. While pulling the latch down, pull the bottom of the switch away from
the DIN Rail. The switch will now lift off of the DIN rail.

iES6 Series User’s Manual
iS5 Communications Inc.
13
3.2 Panel Mounting Option
The switch can also has an option to be panel or wall mounted. The following steps show how to mount the
switch on a panel or wall.
1. Install the Panel mounting hardware onto the switch. The user can choose rear mounting or side
mounting. Note: To avoid damage to the unit, use the 4 screws provided to install the panel mount
brackets onto the switch.
iES6 iES6-S
Figure 6 - Panel Mounting
2. Use the holes in the brackets to secure the switch to a wall or panel.
3.3 Chassis Ground Connection
The iES6/ iES6-S chassis ground connection uses a #6-32 Screw. We recommend terminating the ground
connection using a #6 ring lug and a torque setting of 15 in.lbs (1.7Nm). The red outline indicates the
location of the chassis ground.
Figure 7 - Chassis Ground Connection

iES6 Series User’s Manual
iS5 Communications Inc.
14
3.4 Power Connections
The iES6 and iES6-S Series Ethernet switch supports 3 different dual redundant power supplies (PWR1 and
PWR2):
1. LV: Dual Input 10-48VDC
2. MV: Dual Input 36-75VDC
3. HV: Single Input 85-264VAC or 88-370VDC with a Single 10-48VDC Backup.
Figure 8 - Power Connection
The label on the terminal block will indicate the accepted voltage range for PWR1 and PWR2. Positions 2,
4 and 6 are all for ground connections (connected via a removable jumper) and can be used for any ground
connection. The 3 tables below list the power connections for each type of input power.
The Phillips Screw Terminal Block has Phillips screws with compression plates, allowing either bare wire
connections or crimped terminal lugs. The use of #6 size ring lugs is recommended to ensure secure and
reliable connections under severe shock or vibration. The terminal block comes with a safety cover which
must be removed before connecting any wires. This cover must be re-attached after wiring to ensure
personnel safety.
1. LV: Dual Input 10-48VDC
Terminal
Number
Description Connection
1 PWR1 (+) : Positive Connected to the positive of the 1st 10-48VDC power
source.
2
PWR1 : Ground
Power supply 1 ground connection.
3 PWR1 (-) : Negative Connected to the negative of the 1st 10-48VDC power
source.
4
: Chassis Ground
Connected to the safety ground terminal for AC Units or
the ground bus for DC inputs. Chassis Ground connects to
both power supply surge grounds via a removable jumper.
5 PWR2 (+) : Positive Connected to the positive terminal of the 2nd 10-48VDC
power source.
6
PWR2 : Ground
Power supply 2 ground connection.

iES6 Series User’s Manual
iS5 Communications Inc.
15
Terminal
Number
Description Connection
7 PWR2 (-) : Negative Connected to the negative terminal of the 2nd 10-48VDC
power source.
8 RLY NO Failsafe relay, normally open contact.
9 RLY CM Failsafe relay, common contact.
10 N/C No connection
2. MV: Dual Input 36-75VDC
Terminal
Number
Description Connection
1 PWR1 (+): Positive Connected to the positive of the 1st 36-75VDC power
source.
2
PWR1 : Ground
Power supply 1 ground connection.
3 PWR1 (-) : Negative Connected to the negative of the 1st 36-75VDC power
source.
4
: Chassis Ground
Connected to the safety ground terminal for AC Units or
the ground bus for DC inputs. Chassis ground connects to
both power supply surge grounds via a removable jumper.
5 PWR2 (+) : Positive Connected to the positive terminal of the 2nd 36-75VDC
power source.
6
PWR2 : Ground
Power supply 2 ground connection.
7 PWR2 (-) : Negative Connected to the negative terminal of the 2nd 36-75VDC
power source.
8 RLY NO Failsafe relay, normally open contact.
9 RLY CM Failsafe relay, common contact.
10 N/C No connection
3. HV: Single Input 85-264VAC or 88-370VDC with a Single 10-48VDC Backup
Terminal
Number
Description Connection
1 PWR1 (+/L) – Line or Positive Connected to the line terminal of the 85-264VAC power
source or the positive terminal of the 88-370VDC power
source.
2
PWR1 – Ground
Power supply 1 ground connection.

iES6 Series User’s Manual
iS5 Communications Inc.
16
Terminal
Number
Description Connection
3 PWR1 (-/N) – Neutral or
Negative
Connected to the neutral terminal of the 85-264VAC
power source or the negative terminal of the 88-370VDC
power source.
4
– Chassis Ground
Connected to the safety ground terminal for AC units or
the ground bus for DC inputs. Chassis ground connects to
both power supply surge grounds via a removable jumper.
5 PWR2 (+) - Positive Connected to the positive terminal of the 10-48VDC
backup power source.
6
PWR2 – Ground
Power supply 2 ground connection.
7 PWR2 (-) – Negative Connected to the negative terminal of the 10-48VDC
backup power source.
8 RLY NO Failsafe relay, normally open contact.
9 RLY CM Failsafe relay, common contact.
10 N/C No connection
3.5 Console Connection
To manage the switch via console port, connect the console cable (provided with the switch) from a PC
serial port (DB9) to the Console port on the front of the switch (RJ45).
100-240VAC rated equipment: A 250VAC appropriately rated circuit
breaker must be installed.
Equipment must be installed according to the applicable country wiring
codes.
When equipped with a HI voltage power supply and DC backup,
88-300VDC rated equipment: A 300VDC appropriately rated circuit breaker
must be installed.
A circuit breaker is not required for DC power supply voltages of 10-48VDC.
For Dual DC power supplies, separate circuit breakers must be installed and
separately identified.
Equipment must be installed according to the applicable country wiring

iES6 Series User’s Manual
iS5 Communications Inc.
17
Cables
4.1 Ethernet Cables
The iES6 series switches have standard Ethernet ports. According to the link type, the switches use either CAT
3, 4, 5, 5e UTP cables to connect to any other network device (PCs, servers, switches, routers, or hubs). See
below for cable specifications.
The cable types and specifications are as shown below.
Cable Type Max. Length Connector
10Base-T Cat.3, 4, 5 100-ohm UTP 100 m (328 ft.) RJ45
100Base-T(X) Cat.5 100-ohm UTP UTP 100 m (328 ft.) RJ45
4.1.1 10Base-T/100Base-T(X) Pin Assignments
With 10Base-T/100Base-T(X) cable, pins 1 and 2 are used for transmitting data, and pins 3 and 6 are used
for receiving data.
The 10/100 Base-T RJ-45 Pin Assignments is as shown below:
Pin Number Assignment
1 TD+
2 TD-
3 RD+
4 Not used
5 Not used
6 RD-
7 Not used
8 Not used
The iES6 Series switches support auto MDI/MDI-X operation. You can use a straight-through cable to connect
a PC to the switch. The table below shows the 10Base-T/100Base-T(X) MDI and MDI-X port pin outs.

iES6 Series User’s Manual
iS5 Communications Inc.
18
The 10/100 Base-T MDI/MDI-X pins assignment is as shown below:
Pin Number MDI port MDI-X port
1 TD+(transmit) RD+(receive)
2 TD-(transmit) RD-(receive)
3 RD+(receive) TD+(transmit)
4 Not used Not used
5 Not used Not used
6 RD-(receive) TD-(transmit)
7 Not used Not used
8 Not used Not used
4.2 Fiber Optics
The iES6 Series are available with optional fiber ports. The fiber optical ports are available in either
Multimode or Singlemode, and with either SC or ST type connectors. The transceivers are also available for
longer distances as required.
Note: T(X) port of Switch A should be connected to the R(X) port of Switch B as shown below..
Switch A Switch B
igure 9 - Switch A to Switch B Connection
Fiber cord
TX RX
TX RX

iES6 Series User’s Manual
iS5 Communications Inc.
19
4.3 Console Cable
The iES6 Series switches can be managed via the console port on the front face using the RS-232 cable
provided, and a local PC.
The console cable pin assignment is as shown below.
PC pin out (male) assignment DB9 to RJ 45
Pin #2 RD Pin #2 TD
Pin #3 TD Pin #3 RD
Pin #5 GD Pin #5 GD
Figure 10 - Console Cable Pin Assignment

iES6 Series User’s Manual
iS5 Communications Inc.
20
WEB Management
5.1 Configuration by Web Browser
This section introduces the configuration by Web browser.
5.1.1 About Web-based Management
An embedded HTML web site resides in the flash memory of the CPU board. It contains advanced
management features which allow you to manage the switch from anywhere on the network via a
standard web browser such as Microsoft Internet Explorer.
The Web-Based Management function supports Internet Explorer 5.0 or later. It is based on Java Applets
with an aim at reducing network bandwidth consumption and enhances access speed in a viewing screen.
Note: By default, IE5.0 or later versions do not allow Java Applets to open sockets. The browser settings need to be explicitly
modified in order to enable Java Applets to use the network ports.
Preparing for Web Management
The default value is as below:
IP Address: 192.168.10.1
Subnet Mask: 255.255.255.0
Default Gateway: 192.168.10.254
User Name: admin
Password: admin
Note: admin password is the default password for the first login or after factory reset
System Login
1. Launch Internet Explorer.
2. Type http:// and the switches IP address. Press Enter.
Figure 11 - IP Address of the Switch

iES6 Series User’s Manual
iS5 Communications Inc.
21
Figure 12 - Login Screen
3. The login screen appears.
4. Key in the username and password. The default username and password are “admin”.
5. Click Enter or click OK.. The change default password screen of the Web UI appears.
Figure 13 - Change Default Password
6. Key in the new password as per the password complexity rules detailed in the picture.
This manual suits for next models
1
Table of contents
Other IS5 COMMUNICATIONS Switch manuals

IS5 COMMUNICATIONS
IS5 COMMUNICATIONS iES26GF User manual

IS5 COMMUNICATIONS
IS5 COMMUNICATIONS iES28TG User manual

IS5 COMMUNICATIONS
IS5 COMMUNICATIONS IEC61850 User manual

IS5 COMMUNICATIONS
IS5 COMMUNICATIONS iRBX6GF User manual

IS5 COMMUNICATIONS
IS5 COMMUNICATIONS iES22GF User manual

IS5 COMMUNICATIONS
IS5 COMMUNICATIONS iTS12GP User manual

IS5 COMMUNICATIONS
IS5 COMMUNICATIONS iES20G Series User manual

IS5 COMMUNICATIONS
IS5 COMMUNICATIONS MicroRAPTOR iMR920 User manual

IS5 COMMUNICATIONS
IS5 COMMUNICATIONS iSG18GFP User manual

IS5 COMMUNICATIONS
IS5 COMMUNICATIONS IES12G User manual