liffiB,
Safety Guidance
To maximize the effectiveness ofthe iT728 remote training system,and safety ofyour dog,check the fit ofthe
collar frequently and readjust the position ofthe electrodes on the animal's neck,checking for signs ofirritation or
discomfort.
If signs ofskin irritation are noticed,immediately discontinue use and apply antibiotic ointment to help heal and
sooth the area.Ifthe condition persists beyond 48 hours,please ask fdr advice ofa veterinarian.Such side effects are
extremely rare and are generally caused by a more serious condition.
The collar is not intended to be left on a dog for extended period oftime without superuision and doing so can lead to
health problems.The consenative recommended time limit without supervision is 12 hours.
Wash the dog's neck area and the correction poles as often as needed to keep the area and poles clean.Make sure the
straps are clean for best perfommce.The straps can be removed for cleaning but must be replaced in the same position.
From undesirable behavior by administering the stimulus during the actual behavior,using this device as a punishment
after the fact is not recommended and may serue to confuse or frustrate the animal.
-It is forbidden to open the shell in case ofbreakage ofthe machine or harm the waterprooffeature.Otherwise, it
will violate wananty rules.
-In order to guarantee submersible feature,the waterproofrubber charging lid should be plugged in tightly.
-Only use the supplied adaptor to charge the receiver,otherwise the receiver will probably be damaged.
-Users are not suggested to touch the shocking prongs,otheruise the receiver will ham human body in case of
shocking operation,for shocking test,please use the supplied test kit.
-Ifthere has water in the charging hole,please dry it before chatge the receiver.
- 10-
ffii"B,
Common Problem & F'ixes:
The receiver does not seem to be worklng propcrly:
No beep,vibration or shock
-Make sure the receiver is fully charged.Low chargc will couse thc rcceiver to work inconsistently.
-Follow the instruction,match the receiver to the transmitter.
-Make sure the transmitter battery is good.A low battery will disallow the remote to emit a strong signal every time.
-Make sure the thumb knob on transmitter is NOT pointing at a ZERO level.
-Make sure the receiver is turned on.Ifthe receiver is turned off,the transmitter will not be able to send out a signal
and the signal icon light will not flash accordingly.
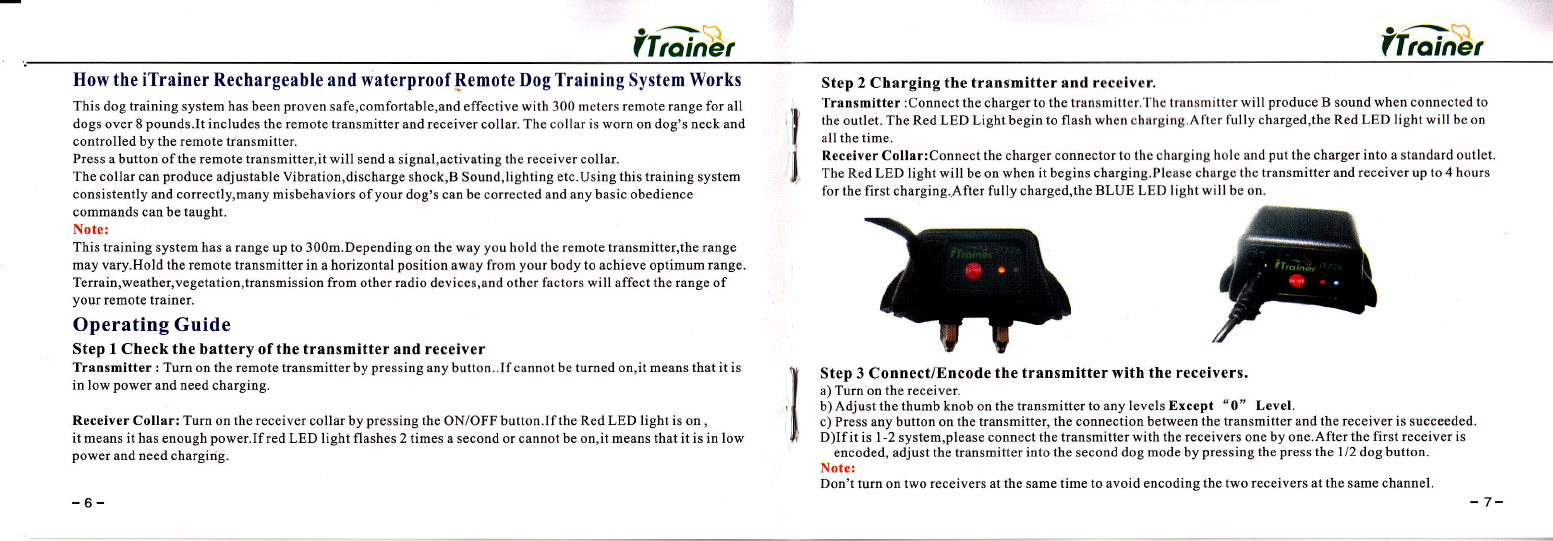
The receiver does not seem to take a charge:
-Make sure the charger had been plug into the main supply tightly,as well as the charging end had plug into the
charging hole tightly,in charging the red LED light inside receiver should come on.
My dog does not respond when I issue a correction:
-Test the receiver according to the instructions above to make sure each stimulus is functioning.
-Make sure the comection prongs are positioned properly and that both prongs are making contact with the dog's
skin and the collar is snug.
-Increase the intensity level ofthe correction.
Warranty,Term &Condition,Compliance
We guarantee the original retail purchaser that the iTrainer iT728 Remote Training System will be free from defects
in material and workmanship for a period ofone year from the date ofthe original retail purchase.Provided that the
damage is not caused by abnormal use or neglect.Wananty does not cover lost parts,cracked screen,physical damage
or water damage.Warranty may include repair or exchange.After expiration ofthe wananty,replacements and repairs
are available at an additional repair charge. - lt -