GB-1
ENGLISH
WARNING
• Do not pull or deform the power supply cord.
Pulling and misuse of the power supply cord can
result in damage to the unit and cause electrical
shock.
• Be careful not to expose your body directly to
the outlet air for a long time. It may affect your
physical conditions.
• When using the air conditioner for infants,
children, elderly, bedridden, or disabled people
make sure the room temperature is suitable for
those in the room.
• Never insert objects into the unit. Inserting objects
can result in injury due to the high speed rotation
of internal fans.
• Ground the air conditioner without fail. Do not
connect the grounding wire to gas pipe, water
pipe, lightning rod or telephone grounding wire.
Incomplete grounding may cause electric shock.
• If anything is abnormal with the air conditioner (ex.
a burning smell), stop the operation immediately
and turn the circuit breaker OFF.
• The appliance shall be installed in accordance
with national wiring regulations. Improper cable
connection can cause the power supply cord,
plug and the electrical outlet to overheat and
• If the supply cord is damaged, it must be replaced by
the manufacturer or its service agent or a similarly
• Do not splash or pour water directly on the unit. Water
can cause electrical shock or equipment damage.
• Do not attempt to install/remove/repair the unit by
yourself. Incorrect work will cause electric shock,
water leak, fire etc. Consult your dealer or other
repair of the unit.
CAUTION
• Open a window or door periodically to ventilate
the room, especially when using gas appliances.
• Do not operate the buttons with wet hand. It may
cause electric shock.
• For safety, turn the circuit breaker off when not using
the unit for an extended period of time.
• Check the outdoor unit mounting rack periodically for
• Do not put anything on the outdoor unit nor step on
it. The object or the person may fall down or drop,
causing injury.
• This unit is designed for residential use. Do not use for
other applications such as in a kennel or greenhouse
to raise animals or grow plants.
• Do not place a vessel with water on the unit. If water
penetrates into the unit, electrical insulations may
deteriorate and cause electric shock.
• Do not block the air inlets nor outlets of the unit. It
• Be sure to stop the operation and turn the circuit
breaker off before performing any maintenance or
cleaning. A fan is rotating inside the unit and you may
get injured.
• Make sure to connect the air conditioner to power
supply of the rated voltage and frequency. Use of a
power supply with improper voltage and frequency
Install the unit in a place with minimal dust, fumes and
moisture in the air.
• Arrange the drain hose to ensure smooth drainage.
furniture etc.
• Make sure a leak breaker or a circuit breaker is
installed, depending on the installation location, to
avoid electrical shock.
• SAFETY PRECAUTIONS .............................GB-1
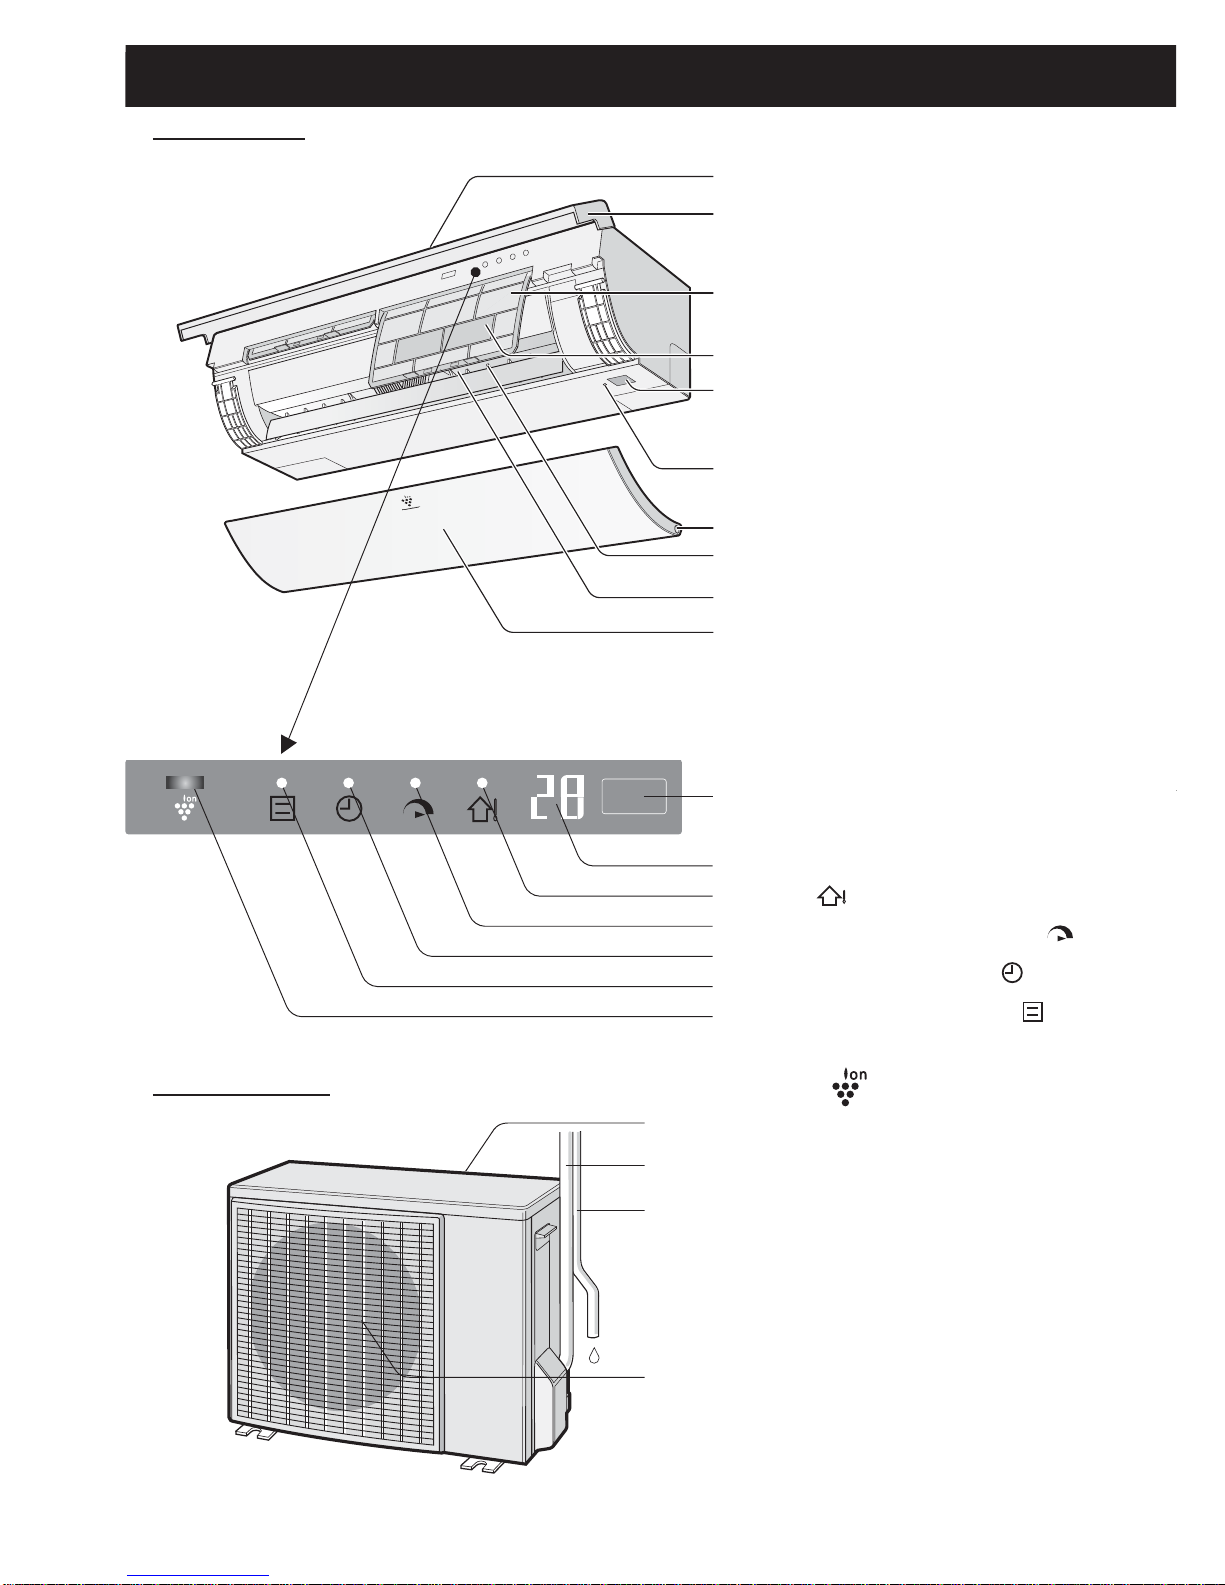
• PART NAMES...............................................GB-2
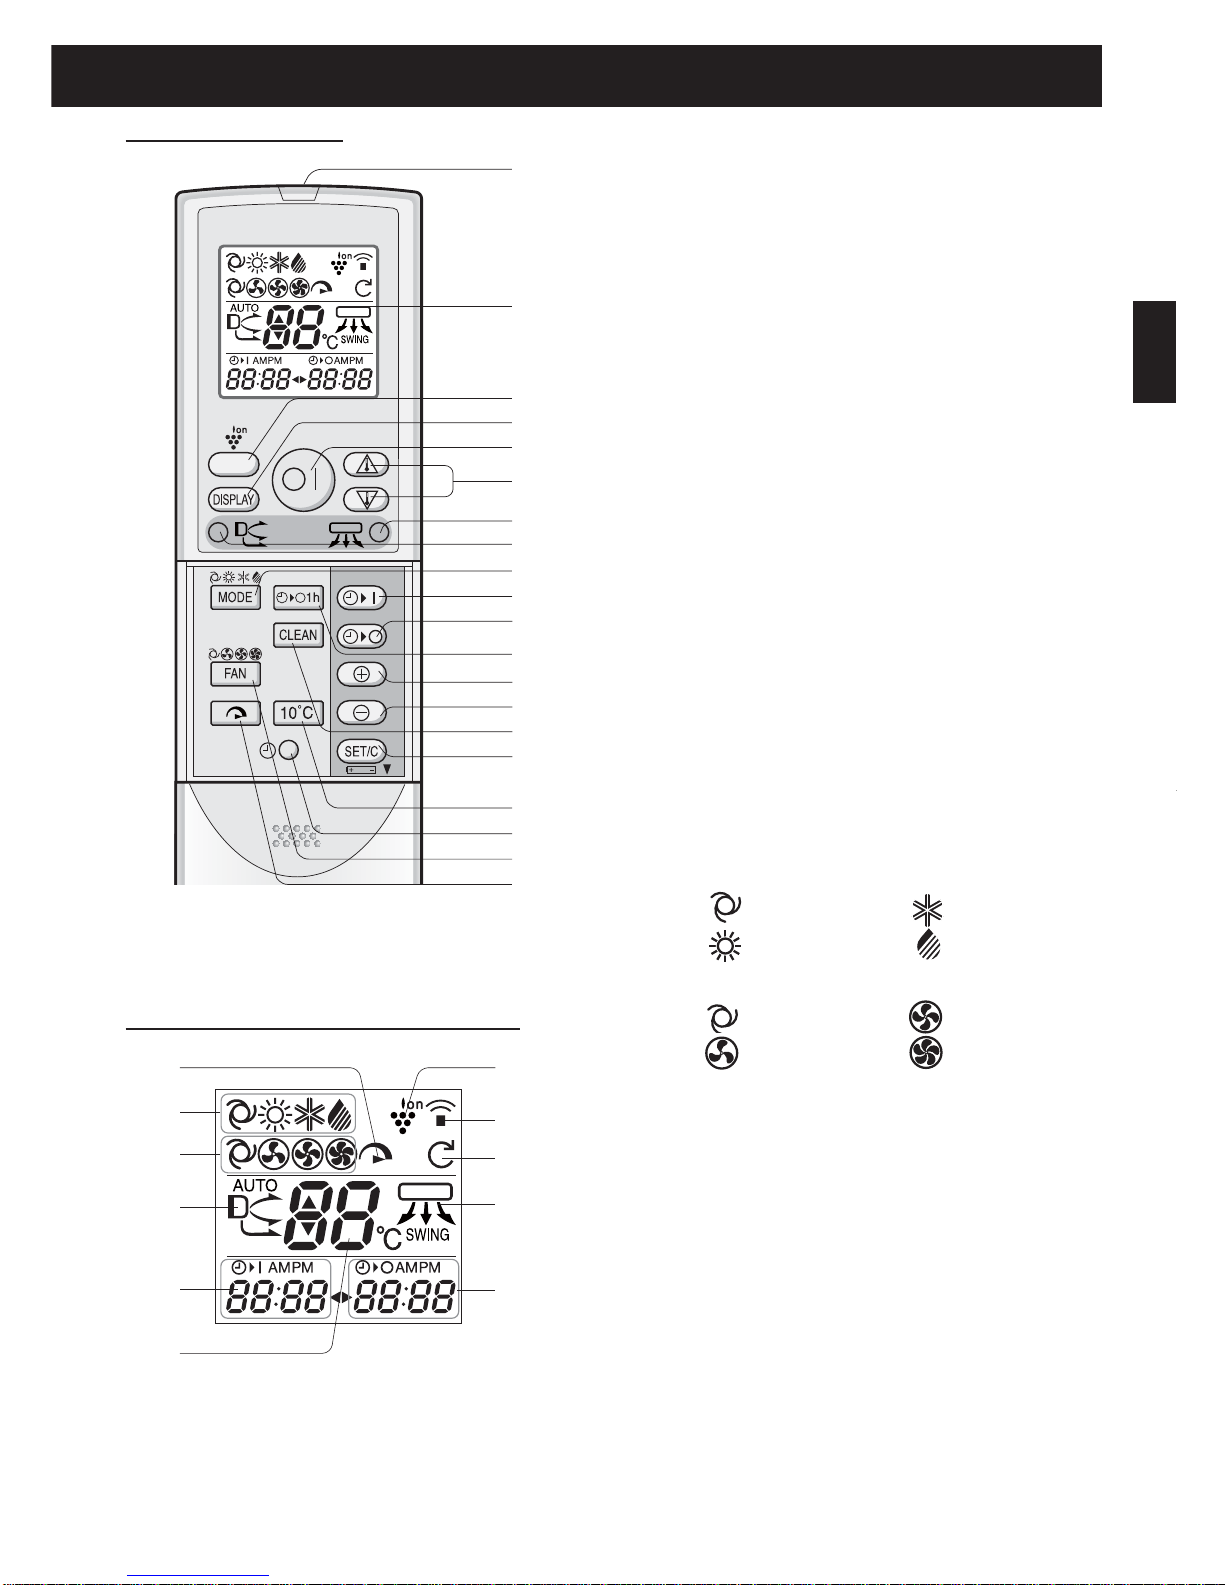
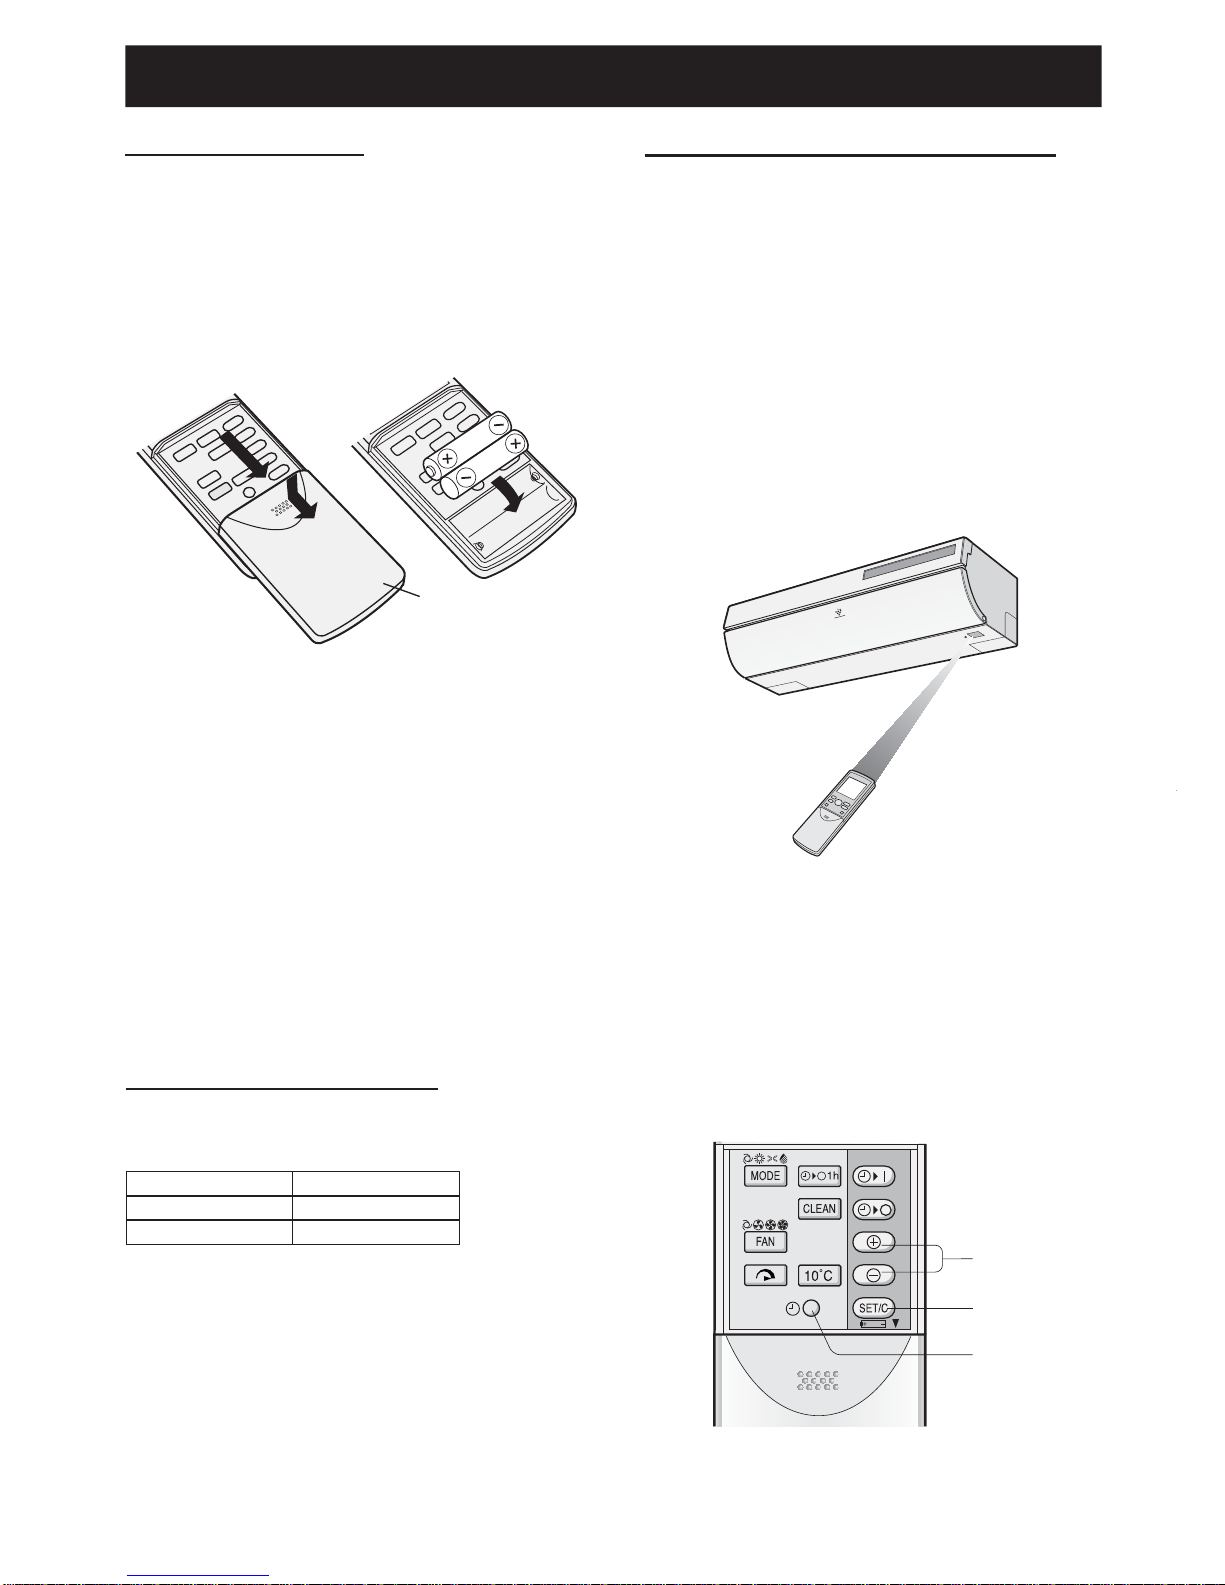
• USING THE REMOTE CONTROL................GB-4
• SETTING AIR PURIFYING FILTER .............GB-5
• TIPS ON SAVING ENERGY .........................GB-5
• BASIC OPERATION .....................................GB-6
• TIPS ABOUT INDICATOR PANEL................GB-7
• FULL POWER OPERATION.........................GB-7
•
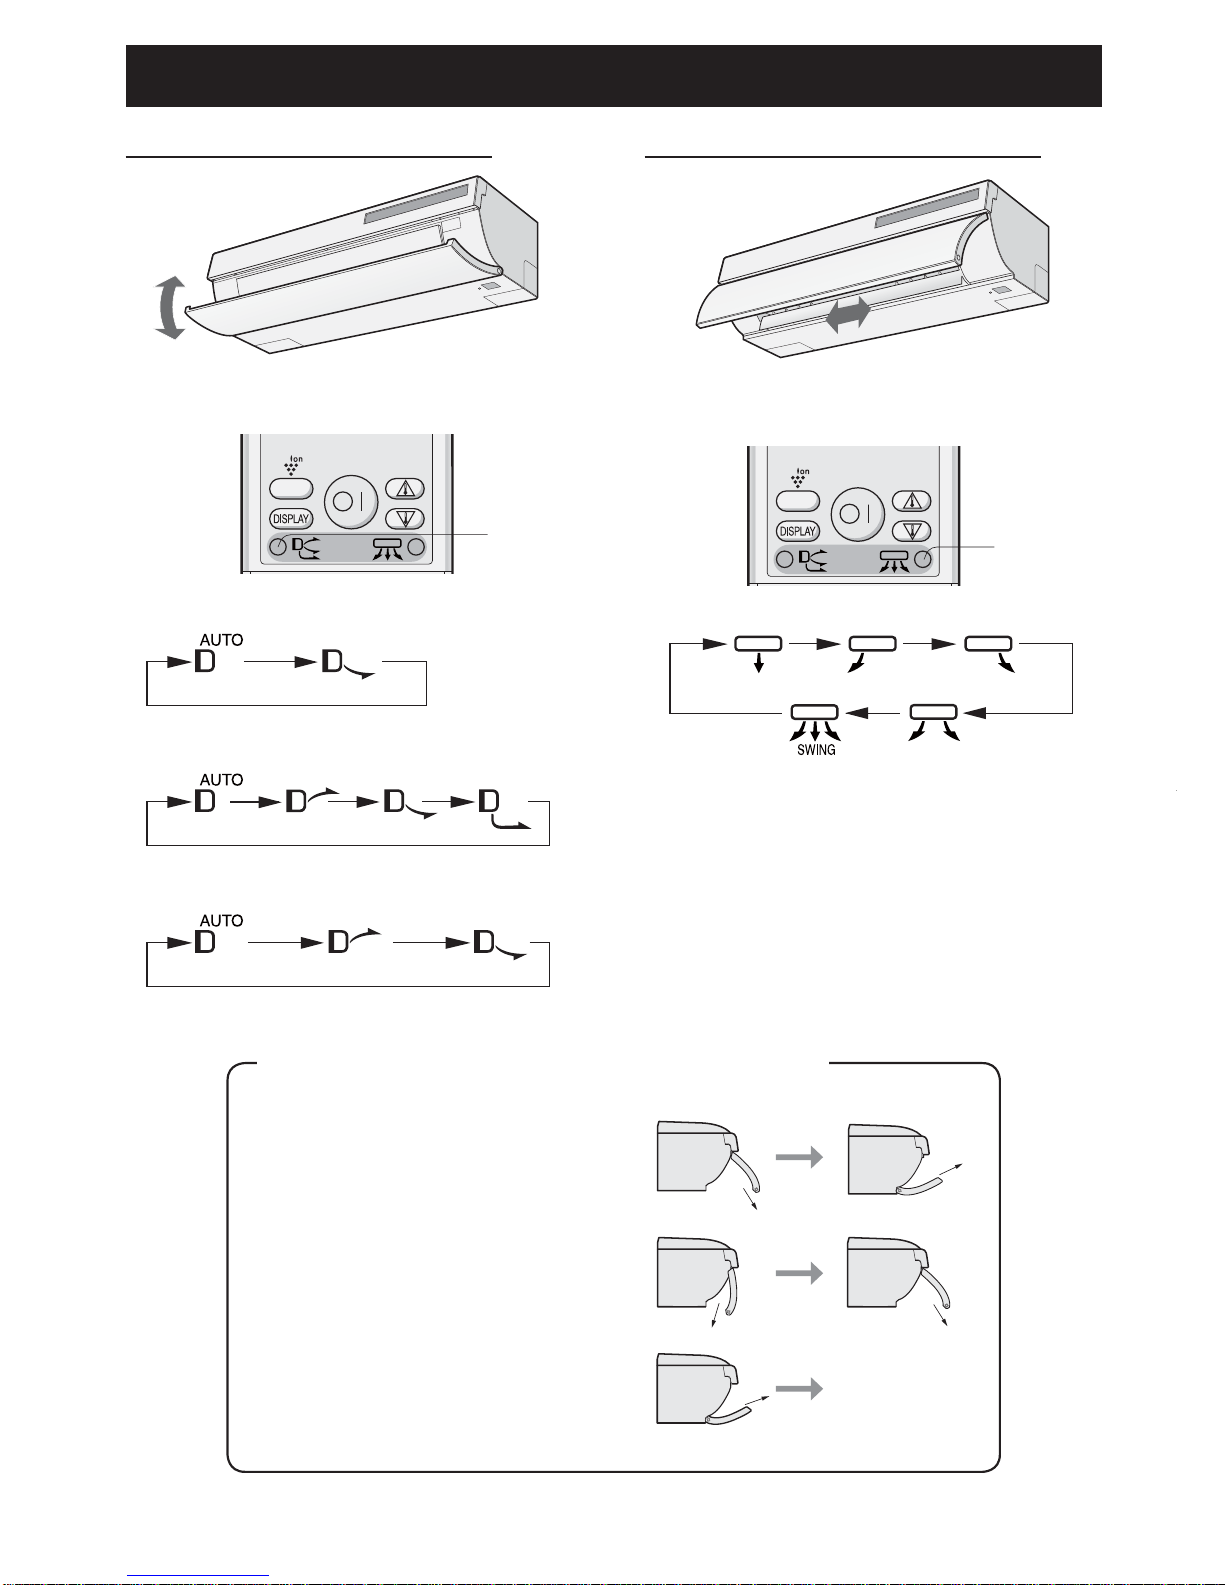
ADJUSTING THE AIR FLOW DIRECTION
.............GB-8
• PLASMACLUSTER OPERATION.................GB-9
• SELF CLEAN OPERATION ..........................GB-9
• ONE-HOUR OFF TIMER ............................GB-10
• TIMER OPERATION...................................GB-10
• 10°C OPERATION ......................................GB-12
• AUXILIARY MODE......................................GB-12
• MAINTENANCE..........................................GB-13
• ADDITIONAL NOTES ON OPERATION.....GB-14
• BEFORE CALLING FOR SERVICE ...........GB-15
ENGLISH Please read this manual carefully before using the product. This
manual should be kept in a safe place for handy reference.
CONTENTS
SAFETY PRECAUTIONS
This appliance can be used by children aged from 8 years and above and
persons with reduced physical, sensory or mental capabilities or lack of
experience and knowledge if they have been given supervision or instruction
concerning use of the appliance in a safe way and understand the hazards
involved. Children shall not play with the appliance. Cleaning and user
maintenance shall not be made by children without supervision.