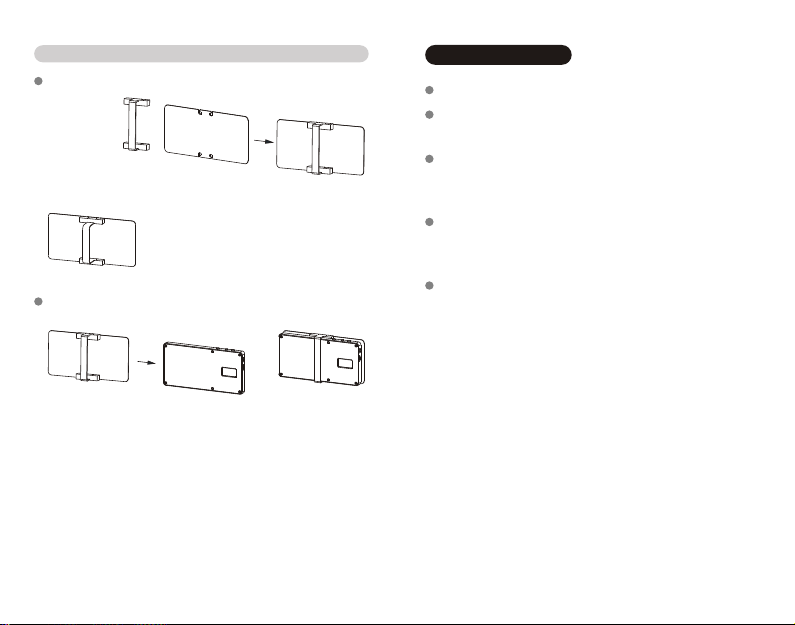
4. Using Light Diffuser
Combine the Light Diffuser to the Silicone Band as shown:
Wrong way of combining the Light
Diffuser and the Silicone Band:
Install the Light Diffuser with Silicone Band to GL-01
as shown:
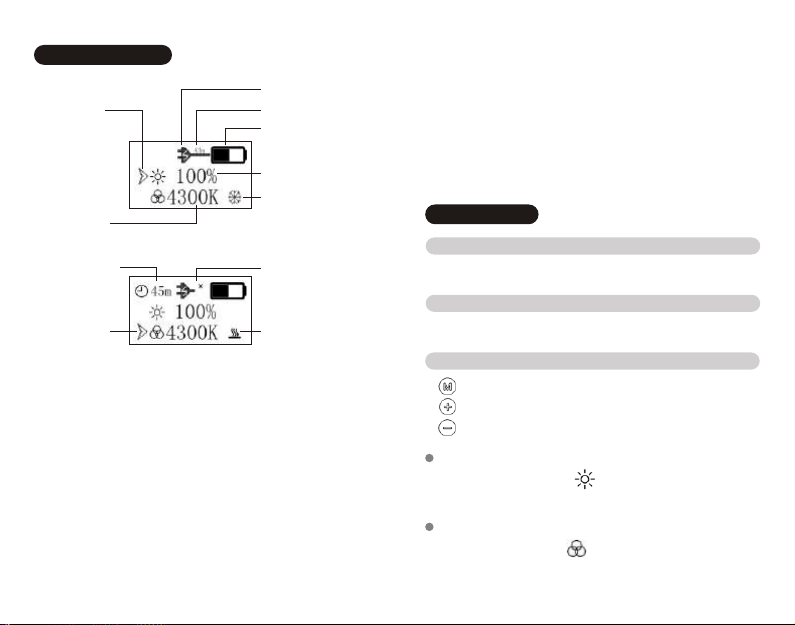
Press the Mode Switch Button until the pointer points at the
area, then use the Brightness Control up/down Button
to adjust the brightness. Press the button once to adjust up
or down 5% level of brightness.
Brightness Control (5%-100%)
Press the Mode Switch Button until the pointer points at the
area, then use the Color Temperature Control up/down
Button to adjust the color temperature. Press the button
once to increase or decrease 100K level of color
temperature.
Color Temperature Control (3000K-5500K)
Battery
When the battery of Genius Light is fully charged, please
detach Genius Light from the USB cable.
Please do not charge the battery, when the ambient
temperature is beyond the allowable range, otherwise
Genius Light can be damaged or battery life can be
shortened.
The battery may gradually run down and not be switched
on properly, if the product is long-term unused. Please
recharge the battery in this circumstance and recharge the
battery at least once three months.
If the battery capacity indicator has an error in displaying
the actual capacity, please fully discharge and recharge
the battery to correct it.
The rechargeable battery has a limited service life and
should only be replaced by the manufacturer. When the
performance of battery is obviously decreased after years,
please contact the local distributor.
05 06