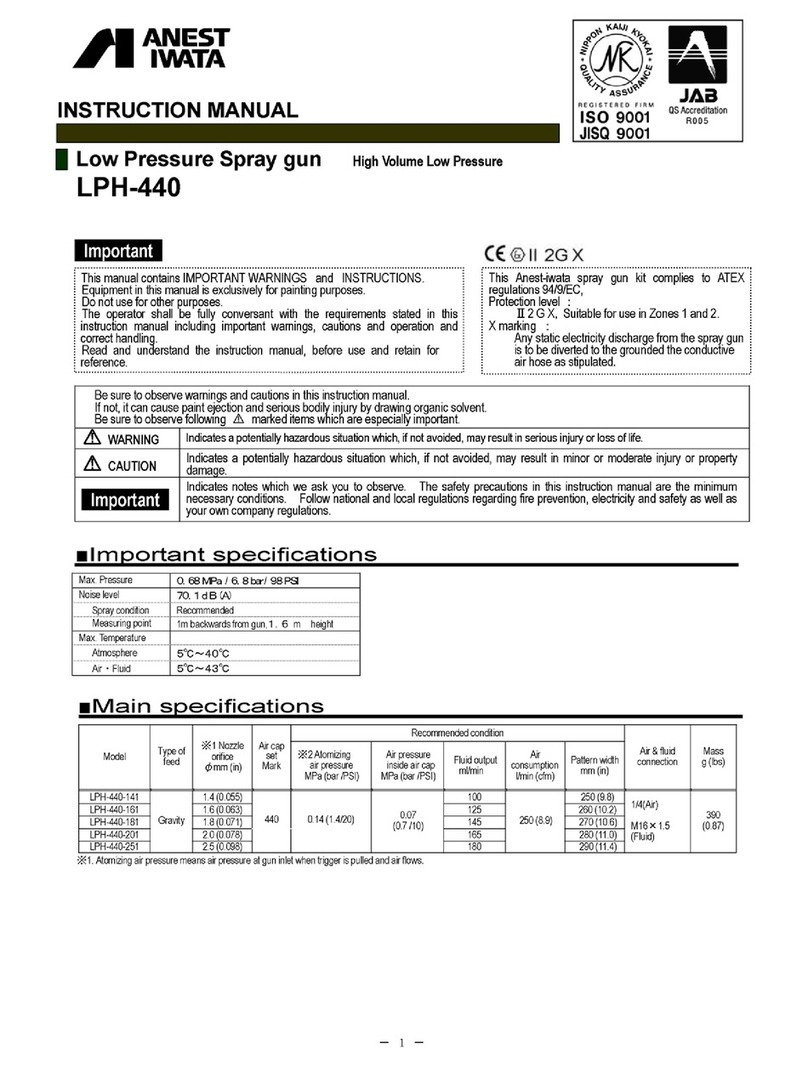
Iwata Airrex Katana Plus User manual

PRODUCT USER GUIDE English
French
Spanish
KAT9000 | Katana Plus HVLP Spray Gun
Manufactured for ANEST Iwata-Medea, Inc. by ANEST IWATA Industrial Machinery (Jiaxing) Co., Ltd.
Model Type of
Feed
Nozzle
Orifice
Ømm
(in)
Applied
Air Cap
Model
Recommended Conditions Air
Consumption
l/min (cfm)
2Pattern
Size
mm (in)
Air & Fluid
Connection
Gross
Weight
g (lbs.)
Cup/
Container
Capacity
mL
1Atomizing
Air Pressure
MPa (bar/PSI)
Fluid
Output
ml/min
KAT9000 Center
Cup
Gravity
1.3
(0.051)
KTN 13
HVLP
0.14
(1.40 / 20)
1550.069
(0.69 / 10)
240 (8.48) 140 (5.5) Air
G1/4 (NPS1/4)
Fluid
G1/4 (NPS1/4)
420 (0.93)
(Only
Spray Gun)
600
1Atomizing air pressure means air pressure (static pressure) at spray gun inlet when trigger is pulled and air flows. 2Spray distance: 150mm
This manual contains important instructions for operating this product. For your safety, and the
safety of others, be sure to read this entire manual thoroughly before operating the product.
Failure to properly follow all the instructions and precautions can cause you and others to be
seriously hurt or killed.
GENERAL HAZARD WARNING
www.Iwata-Airbrush.com/KatanaPlus.html
Customer Support 503-253-7308 M-F, 8am-4:30pm PST | iwata.support@iwata-medea.com | www.iwata-airbrush.com/blog/contact-us
KAT9000-OIPM-PJV
Internal Cap
Pressure
MPa (bar/PSI)

KAT9000 | Katana Plus HVLP Spray Gun
Creating start to finish solutions for over 90 years.
IMPORTANT SAFETY INFORMATION . . . . . . . . . . . . . . . . .3-4
SPRAY GUN COMPONENTS & ACCESSORIES . . . . . . . . . . 4
PRE-OPERATION SETUP . . . . . . . . . . . . . . . . . . . . . . . . . . . .5-6
SURFACE PREP & USE . . . . . . . . . . . . . . . . . . . . . . . . . . . . . .7-9
CLEANING AND MAINTENANCE . . . . . . . . . . . . . . . . . . . . .9-11
TROUBLESHOOTING . . . . . . . . . . . . . . . . . . . . . . . . . . . . . . .12
WARRANTY . . . . . . . . . . . . . . . . . . . . . . . . . . . . . . . . . . . . . . .13
www.Iwata-Airbrush.com/KatanaPlus.html
Customer Support 503-253-7308 M-F, 8am-4:30pm PST | iwata.support@iwata-medea.com | www.iwata-airbrush.com/blog/contact-us
2

Never operate the spray gun around sparks, open
flames or other ignition sources such as smoking,
electrical goods, etc. Paints and other coatings can
be highly flammable and cause fire.
Use caution when operating the spray gun near
flammable gases or vapor.
Securely ground spray gun by using an air hose
with a built-in ground wire with less than 1MΩ.
Periodically check ground for continuity.
Insucient grounding near flammable vapor or gases
can cause fire or explosion due to sparking from static
electric discharge.
WARNING
Paint and other coating materials can contain chemicals
that may be harmful to people and animals in confined,
poorly ventilated spaces.
Always spray in a well-ventilated area. Remove children
and pets.
Always wear a NIOSH / MSHA approved respirator
when painting.
WARNING
Air-powered equipment and power tools are capable of
propelling items (metal chips, fasteners and particulates)
at high speed into the air and could result in injury.
Always wear ANSI Z87.1 approved eye protection.
Never point the air stream at any part of your body,
or at another person or animal.
When operating the air compressor and spray gun,
make sure all other people and animals maintain a
safe distance.
Be sure to release all air pressure before cleaning,
disassembling or servicing the spray gun.
Never operate the spray gun over the max operating
pressure of 101 PSI (0.7Mpa).
Never operate the spray gun if the ambient temperature
is outside a range of 41° - 105°F (5° - 40°C).
Never operate the spray gun if the material liquid or air
temperature is outside a range of 41° - 109.4°F (5° - 43°C).
WARNING
EXPLOSION FIRE
RISK TO BREATHING
FLYING OBJECTS
www.Iwata-Airbrush.com/KatanaPlus.html
Customer Support 503-253-7308 M-F, 8am-4:30pm PST | iwata.support@iwata-medea.com | www.iwata-airbrush.com/blog/contact-us
IMPORTANT SAFETY INFORMATION
Safety messages & Signal Words:
Indicates an immediate hazardous situation which, if not
avoided, will result in death or serious injury to the operator
or to bystanders.
Indicates a potentially hazardous situation which, if not
avoided, could result in death or serious injury to the opera-
tor or to bystanders.
Indicates a potentially hazardous situation which, if not
avoided, may result in moderate or minor injury to the oper-
ator or to bystanders.
Indicates a situation which, if not avoided, may result in
damage to product components or other property.
AVERTISSEMENT
ADVERTENCIA
ATTENTION
PRECAUCIÓN
AVIS
AVISO
KAT9000 | Katana Plus HVLP Spray Gun
3

Paint and coatings can cause irritation to eyes and skin.
Always use gloves and eye protection marked to
comply with ANSI Z87.1. If skin or eye irritation occurs,
contact a doctor immediately.
Hearing protection should be used when the noise level
exposure equals or exceeds an 8 hour time-weighted
average sound level of 85dBA.
The tip of the fluid needle and nozzle have sharp points.
Avoid touching these during maintenance to prevent
injury.
Repeated pulling of the trigger may cause carpal tunnel
syndrome. Take breaks if you feel tired or experience
discomfort.
Not for use with food decoration or production.
If any damage or abnormality with the spray gun is
observed, immediately stop using the product until
the problem is resolved.
Do not customize or modify any original components of
the product. Use only genuine replacement components
provided by the manufacturer or an authorized dealer.
CAUTION
Not for use with Halogenated Hydrocarbon Solvents:
methyl chloride, dichloromethane, 1.2 dichloroethane,
carbon tetrachloride, trichloroethylene, 1.1.1-trichloroethane,
chloroethane. Use may cause cracks or degradation
of the spray gun.
Never exceed maximum operating pressure or temperature.
Altering the spray gun may result in poor performance
or failure.
NOTICE
www.Iwata-Airbrush.com/KatanaPlus.html
Customer Support 503-253-7308 M-F, 8am-4:30pm PST | iwata.support@iwata-medea.com | www.iwata-airbrush.com/blog/contact-us
CHECKING OF THE PRODUCT
WHEN RECEIVING THE SPRAY GUN, MAKE SURE THAT
IT HAS NOT BEEN DAMAGED DURING TRANSPORT
OR STORAGE AND ALSO CHECK THAT ALL THE
FOLLOWING CONTENTS ARE INSIDE THE BOX.
SPRAY GUN COMPONENTS
& ACCESSORIES
STANDARD SPRAY GUN SET INCLUDES:
Spray Gun and Cup Cleaning Brush
Thread Sealant Tape
Spray Guide Viscosity Cup
Paint Strainers, Quantity 5 Gun Wrench
KAT9000 | Katana Plus HVLP Spray Gun
4

2. Connecting Your Air Source
With the right size air source for your project selected, it’s time to get the Katana Plus connected
to the compressor so you can start spraying! You’ll need the following:
Thread sealant tape (A) prevents
air leaks. Wrap 2 inches of tape
clockwise around air inlet of
spray gun. Be sure the tape is
flat, not bunched, and pulled
just slightly taught.
Tighten your quick-disconnect
adaptor (B) snug onto the
spray gun’s air inlet using an
adjustable crescent wrench (C).
Firmly press the quick-disconnect
of the air hose (D) onto the
quick-disconnect adaptor (B)
you attached to the spray gun.
1/4 inch Female BSPP to Male
Industrial Quick-Disconnect
Adaptor (not included)
Thread Sealant
Tape (included)
Adjustable
Crescent Wrench
(not included)
Air Hose With Female Industrial
Quick-Disconnect on the Spray
Gun Side (not included)
Important Note: Compressor ratings will typically show how much volume (CFM) is produced at
40 and 90 PSI. If you set the compressor to deliver 20 PSI to the spray gun, it will provide about
double the CFM it would at 40 PSI.
COMPRESSOR RECOMMENDATIONS FOR YOUR PROJECT:
Project Scale
Small Medium Large Extra Large
Average Size 4 sq. ft. 8 sq. ft. 12 sq. ft. 12+ sq. ft.
Horse Power (HP) 1 HP 2 HP 2+ HP 3+ HP
Tank Size 1-2 Gallon 2-4 Gallon 4-10 Gallon 25+ Gallon
Minimum CFM* 2.2 CFM @ 90 PSI 5.3 CFM @ 90 PSI 5.3 CFM @ 90 PSI 10.3 CFM @ 90 PSI
*CFM means “Cubic Feet per Minute” and refers to the volume of air the compressor can produce.
A B C D
1 2 3
www.Iwata-Airbrush.com/KatanaPlus.html
Customer Support 503-253-7308 M-F, 8am-4:30pm PST | iwata.support@iwata-medea.com | www.iwata-airbrush.com/blog/contact-us
PRE-OPERATION SETUP
It is optimal to supply the spray gun with dry air. Use of a moisture trap or filter is recommended.
Before first use, flush spray gun by slightly filling cup and spraying an appropriate cleaner
until empty.
Be sure gravity cup is firmly attached to the spray gun body.
AVIS
AVISO
1. Sizing An Appropriate Air Compressor
A spray gun’s magic happens in the air cap. An air cap has a required amount of air volume and air
force needed to atomize a liquid correctly and eciently.
The Katana Plus’s air cap requires a minimum volume of 9.9 CFM (Cubic Feet per Minute) with an
air force anywhere between 10–30 PSI (Pounds per Square Inch). All this jargon can be confusing,
so we’ve included this helpful table to make things a little clearer.
KAT9000 | Katana Plus HVLP Spray Gun
5

4. Dial It In
Next, you’ll notice 2 round adjusting knobs on the rear of the spray gun; the top is your pattern
adjustment knob and the next one down your fluid adjustment knob.
To start, tighten both knobs by turning clockwise until they stop. Then, loosen both by turning
counter-clockwise 4 FULL rotations. Both adjusters are now considered to be wide open.
3. Setting Your Air Pressure
A. Wide Open Pattern Adjusting Knob
Sprays a large, 6–8 inch fan (oval) pattern ideal for covering
large areas. Tightening (clockwise) will reduce the pattern to
a round, directional pattern for smaller areas. Make minor
adjustments and test to find the right size.
B. Wide Open Fluid Adjusting Knob
Provides maximum amount of fluid output through the spray
gun, ideal for larger surfaces. Tightening (clockwise) will
reduce the fluid flow, spraying less material for smaller spaces.
Note: You can change fan pattern from vertical to horizontal by loosening (counter-clockwise)
the air cap ring, rotating the air cap 90° and re-tightening the air cap ring.
Next, you'll want to set the appropriate pressure.
First, turn the compressor on.
Pull the Katana Plus trigger slowly until air
begins to blow. While air is exiting the spray
gun, use the regulator on the compressor to
set your pressure (10-20 PSI). Turn clockwise
to increase and counter-clockwise to
decrease air pressure.
Depending on your spray material, 10–20 PSI is
an ideal working pressure range for your spray
gun. We recommend spray gun at 20 PSI for
soft atomization and minimal overspray.
A
B
AIR CAP RING
0
20
30
60
90
120
150
180
PSI
PRESSURE
GAUGE
0
20
30
60
90
120
150
180
PSI
PRESSURE
GAUGE
www.Iwata-Airbrush.com/KatanaPlus.html
Customer Support 503-253-7308 M-F, 8am-4:30pm PST | iwata.support@iwata-medea.com | www.iwata-airbrush.com/blog/contact-us
KAT9000 | Katana Plus HVLP Spray Gun
6

2. Prep Your Paint
You must always thin using the same substance found in the base of your material. Water for water-
based paints or white spirit for oil-based sealers for instance. If in doubt, check the label or contact
the material manufacturer to confirm proper thinning for use in a spray gun.
To thin, start with diluting the material using the appropriate substance by 10%. To do this, simply block
the hole of the viscosity cup and fill with your thinning agent, as the viscosity cup holds 1/10 of a liter.
Add the thinning agent to your liter of material, stir well to combineand re-test. If it needs further
thinning, add 5% more (about half a viscosity cup) of the thinning agent and repeat the above. Continue
to dilute in 5% increments and re-test until the desired viscosity (20 to 30 seconds) is achieved.
1. Prep Your Surface
Now that your surface is prepped and ready to paint, make sure your spray material is at the right
consistency before you make your first pass. We’ve included a handy viscosity cup to help you out.
Pour 1 liter of paint into the container and dip the viscosity cup fully into the material so it is
completely filled. (We recommend using a container that will hold at least 1 liter of paint.)
Raise the viscosity cup above and fully out of the material so the stream leaving the cup is visible
and start a timer or stopwatch. Stop the timer or stopwatch the instant you notice a break in the
stream (not waiting for the cup to completely empty) and note the result.
The Katana Plus will spray best when a noticeable break in the stream appears between 20 and 30
seconds after you start. If your result is at 40 seconds or higher you may need to thin the material.
The first step is always to prepare your surface for paint.
Scu the surface using fine grit sandpaper or sanding sponge. Clean the surface using isopropyl
alcohol or another household degreasing cleaner and a lint free cloth.Allow the surface to dry
completely before applying any spray material.
With your cup securely attached to the spray gun, pour your paint
into the cup through one of the provided paint strainers. Once
filled, be sure to tighten the cup lid and remove the breather cap
to maintain consistent paint flow and spray.
IMPORTANT: Spray gun passageways and nozzles are very small,
narrow and can clog easily from dried or used (contaminated)
spray material. We highly recommend pouring your material into
the Katana Plus's paint cup through a strainer. Included are 5
paint strainers to get you started.
3. Strain Your Paint For Less Clogging
stream
break at
20-30
seconds
www.Iwata-Airbrush.com/KatanaPlus.html
Customer Support 503-253-7308 M-F, 8am-4:30pm PST | iwata.support@iwata-medea.com | www.iwata-airbrush.com/blog/contact-us
KAT9000 | Katana Plus HVLP Spray Gun
SURFACE PREP & USE
7

4. Test Your Spray
If excessive paint is
floating around in the
air, you may need to
decrease pressure on
your compressor, or
the spray gun is too far
away from your surface
(more than 6 inches).
No more adjusting
needed to start
spraying!
If your paint seems
to be spraying out
in a spatter-type
texture, you may
need to increase
the air pressure on
your compressor.
If your paint seems
to be consistently
running, you may need
to move your spray
hand a little faster or
the spray gun is too
close to the surface
(closer than 6 inches).
5. One Coat at a Time
Remember to do test sprays on something like paper
or cardboard before moving over to your project so
you can get it right the first time!
To test your spray, pick up the spray gun with your
dominant hand. Grip the handle loosely while resting
your index and middle finger on the trigger. The trigger
should always be parallel to the surface, with your
thumb pointing in the direction you’re spraying. Always
keep the nozzle about 6 to 8 inches from the surface.
Pull the trigger to release air and paint in one spot to
see if your spray gun and spray material are adjusted
properly. You may need to adjust your spray pattern or
fluid output with the knobs on the back of the spray
gun if you don’t get a good test spray.
When spraying liquid, always apply in one
consistent direction (from left to right, for
instance).Hold the spray gun with the
trigger parallel to the surface and the nozzle
6 inches away. Start spraying just outside
of the area you want to coat and move the
gun across the length of the surface.
When applying the next pass of material,
overlap the first section by about 50%
to ensure even coverage.
Continue this practice until the area is fully
coated. Depending on the material used,
you may need multiple passes to achieve
full coverage of the area.
REMOVE
6-8"
PATTERN
ADJUST
FLUID
ADJUST
START
SPRAY
STROKE
OFF THE
SURFACE
END
SPRAY
STROKE
OFF THE
SURFACE
GOOD TEST SPRAY OVERSPRAY UNDER SPRAY DRIP MARKS
KAT9000 | Katana Plus HVLP Spray Gun
www.Iwata-Airbrush.com/KatanaPlus.html
Customer Support 503-253-7308 M-F, 8am-4:30pm PST | iwata.support@iwata-medea.com | www.iwata-airbrush.com/blog/contact-us
8

KAT9000 | Katana Plus HVLP Spray Gun
REMEMBER
• ALWAYS brush the air cap o periodically using the cleaning brush throughout the
painting process to keep it free of paint build up.
• NEVER remove the needle while there is paint in your cup as doing so will allow paint to
leak from the spray gun.
• ALWAYS have fun with it!
6. Wait
It is important to follow material’s manufacturer guidelines on dry times and applying additional
coats. Apply additional coats as directed until desired finish is achieved.
Just like any tool, you want to get familiar and comfortable with your spray gun. Once you do,
you’ll find this tool an essential addition to your arsenal and a great way to save time and materi-
als on all kinds of projects while getting a beautiful, smooth finish.
www.Iwata-Airbrush.com/KatanaPlus.html
Customer Support 503-253-7308 M-F, 8am-4:30pm PST | iwata.support@iwata-medea.com | www.iwata-airbrush.com/blog/contact-us
CLEANING AND MAINTENANCE
WARNING
Release all air pressure and disconnect spray gun from air source before disassembling, or
servicing the spray gun.
The tip of the fluid needle and nozzle have sharp points. Avoid touching these during
maintenance to prevent injury.
Never use a cleaner with a PH level below 6.0 or above 8.0.
Never use any cleaning products that contain the following chemicals:
• DICHLOROMETHANOL
• AMMONIUM BIFLORIDE
• HYDROGEN PEROXIDE 130 vol.
• NITRIC ACID
• TRIPOTASSIUM HEXACYANOFERRATE
Never submerge the spray gun body in any liquid or cleaning products.
Never submerge any spray gun components in an liquid or cleaner for longer than
a few seconds.
9

www.Iwata-Airbrush.com/KatanaPlus.html
Customer Support 503-253-7308 M-F, 8am-4:30pm PST | iwata.support@iwata-medea.com | www.iwata-airbrush.com/blog/contact-us
The best thing you can do for your spray gun is keep it clean. Dried paint build up can lead to
issues later, so take the time to make sure the material you used is fully expressed from the spray
gun each time you’re finished spraying.
1. When finished, pour out the remaining paint material
from your cup. Refer to paint manufacturer for storage
and re-usage information. Be sure to check your local
regulations for paint disposal and recycle or donate
when you can!
2. Add the manufacturer recommended cleaner or
thinning agent into the cup and use a clean cloth
to wipe the cup out well.
3. With your finger o the trigger, use your cleaning
brush and some of the same cleaner to brush o the
front cap on the spray gun. Any holes should be clean
and clear of paint material.
4. With the spray gun connected to the air source and in
a well-ventilated area, add a generous amount of cleaner
into the cup. Pull back on the trigger to spray the cleaner
through. Repeat this step until the spray gun is spraying
clear liquid. NEVER spray any material near sparks or
open flames.
1
2
3
4
www.Iwata-Airbrush.com/KatanaPlus.html
Customer Support 503-253-7308 M-F, 8am-4:30pm PST | iwata.support@iwata-medea.com | www.iwata-airbrush.com/blog/contact-us
KAT9000 | Katana Plus HVLP Spray Gun
After each use and prior to any cleaning or maintenance you MUST follow the below guidelines:
5. You MUST release all pressure from spray gun before continuing.
a. If using a quick-disconnect, slide the release on the hose fitting toward the
compressor to disconnect.
b. If no quick-disconnect is being used, switch compressor to o position. Depress the
trigger on the spray gun and hold until all air is drained from the tank. This may take
several minutes if using a larger capacity air tank.
10

www.Iwata-Airbrush.com/KatanaPlus.html
Customer Support 503-253-7308 M-F, 8am-4:30pm PST | iwata.support@iwata-medea.com | www.iwata-airbrush.com/blog/contact-us
KAT9000 | Katana Plus HVLP Spray Gun
11. Once loosened, continue to unscrew the nozzle (4) by hand until it is completely removed.
12. If necessary, immerse nozzle in appropriate cleaner to soften any residual paint in or around
the orifice. Blow compressed air through nozzle and orifice to remove any loosened material.
13. Re-attach nozzle (4) to spray gun body with the
trigger depressed and tighten with the 19 mm cut-out
on the included spanner. Re-install air cap (2) and
position so cap rating is below the nozzle. Tighten cap
ring (1) by hand to secure the air cap in place.
10. While keeping the trigger depressed, use the enclosed
19 mm cut-out on the spanner included with this spray gun
to loosen the nozzle (4) from the spray gun body by rotating
counter-clockwise.
Note: The nozzle is factory tightened and sealed and will be
very dicult to remove the first time. It is recommended to
wear gloves or wrap a towel around the spanner to protect
your hand.
6. Completely remove the air cap ring (1) by unscrewing count-
er-clockwise and then remove air cap (2) from the gun body. If
necessary, immerse it in appropriate cleaner to soften any
residual paint on cap or in air holes. Blow compressed air
through holes to remove any loosened material. Carefully use a
cleaning needle to remove any additional from air holes avoiding
scratching or creating divots in the air cap.
7. Inspect the needle (3) and nozzle (4) and remove any residual
material by lightly scrubbing use the brush provided. Scrub
lightly to not damage the nozzle or needle. TAKE CARE to not
touch needle or nozzle tip as they are very sharp.
9. Pull the trigger on spray gun to retract the needle (3)
from the nozzle (4).
8. On the rare occasion that the nozzle needs to be removed for additional cleaning please refer
to the following process for nozzle and air cap disassembly and reassembly.
NOTE: For continued optimal performance you must lubricate the nozzle threads, air cap
friction points and air cap ring threads with an appropriate sealer (such as a petroleum and
silicone-free lip balm) before reassembling.
10
6
7
13
2
1
3
4
9
3
4
11
90°

www.Iwata-Airbrush.com/KatanaPlus.html
Customer Support 503-253-7308 M-F, 8am-4:30pm PST | iwata.support@iwata-medea.com | www.iwata-airbrush.com/blog/contact-us
With anything new, there may be a couple bumps in the road. Be on the lookout for any of the
symptoms below and address as needed.
Split fan pattern
(fan pattern is hollow
in the center)
Reduce air pressure gradually and test
until you achieve desired results.
Paint buildup on the
center hole of the air
cap.
Paint buildup on the
nozzle.
Paint buildup on the
hole of the cup
restricting paint flow.
Restricted
or decreased
paint flow
Spray gun
clogged
Fan pattern not
centered/shooting
to one side
Dripping paint
Paint viscosity too
thick to flow properly
through spray gun.
Air pressure too low.
Paint may be clogging
up nozzle.
Dried up paint on nozzle
and air cap.
Compressor too small.
Paint build up on air
cap or nozzle.
Remove air cap and use cleaner and
scrubbing brush to remove any
paint buildup.
Use cleaner and scrubbing brush or
toothpick to remove any paint build up.
Inspect hole in the center of paint cup
lid for obstruction. Use cleaner and a
scrubbing brush or toothpick to remove
any paint build up.
Remove paint from spray gun and
dilute paint as needed. Spray gun may
need cleaning before you add newly
diluted paint.
Increase air pressure gradually and
test until paint flows properly.
Remove paint from spray gun and clean
thoroughly. Strain your paint before
adding it back in to spray gun to
remove any large particles.
Using a scrubbing brush and recom-
mended cleaning solution, clean o
all dried up paint on the front of the
spray gun.
Your compressor may not allow enough
CFM to run the spray gun properly.
A larger air source may be needed.
Make sure air cap and nozzle are free
from any paint build up. Use cleaner
and a scrubbing brush to loosen
and remove any buildup of paint
on these areas.
Loose needle packing.
PROBLEM SOLUTIONSYMPTOM
Hand tighten the needle packing.
If dripping continues, tighten with
appropriate sized wrench until dripping
stops. DO NOT OVER TIGHTEN.
Air pressure is too high
and might cause the fan
pattern to split.
PARTS & TROUBLESHOOTING
KAT9000 | Katana Plus HVLP Spray Gun
12

www.Iwata-Airbrush.com/KatanaPlus.html
Customer Support 503-253-7308 M-F, 8am-4:30pm PST | iwata.support@iwata-medea.com | www.iwata-airbrush.com/blog/contact-us
ANEST Iwata-Medea, Inc. LIMITED WARRANTY:
This limited warranty is extended to the original purchaser of the KATANA Plus Spray Gun from an
Authorized Iwata-Medea seller and warrants ONLY against defect in materials and/or workmanship
for a period of twelve (12) months from the date of purchase. ANEST Iwata-Medea, Inc., at its
option, will either provide replacement parts or replace the unit, when a valid claim is filed.
A valid claim includes proof of purchase from an Authorized Iwata-Medea Seller.
Duties of the Owner:
This KATANA Plus Spray Gun must be operated in accordance with the written instructions
furnished with this spray gun. This warranty shall not excuse the owner from properly maintaining
this spray in accordance with the written instructions furnished with this spray gun. A bill of sale
or payment record must be kept, to establish the purchase date and warranty period. The original
carton should be kept in case of warranty return of unit.
What is NOT covered in this LIMITED WARRANTY:
1. Damage resulting from improper cleaning or soaking of the spray gun.
2. Damage caused by misuse or use contrary to the owner’s manual and safety guidelines.
3. Damage caused by a lack of normal maintenance.
4. Needles, Nozzles, Internal Seal, Packings and O-Rings.
5. Use of non-standard Iwata-Medea replacement spray gun components.
This warranty does not cover claims which do not involve defective workmanship or materials.
FAILURE TO PERFORM GENERAL MAINTENANCE (INCLUDING CLEANING) WILL VOID THIS
WARRANTY.
THIS LIMITED WARRANTY IS GIVEN TO THE PURCHASER IN LIEU OF ALL OTHER WARRANTIES,
EXPRESSED OR IMPLIED, INCLUDING BUT NOT LIMITED TO THE WARRANTIES OF MERCHANT-
ABILITY OR FITNESS ARE LIMITED TO THE DURATION OF THIS WRITTEN WARRANTY. THE
REMEDY PROVIDED IN THIS WARRANTY IS EXCLUSIVE AND IS GRANTED IN LIEU OF ALL OTHER
REMEDIES. IN NO EVENT WILL ANEST IWATA-MEDEA, INC., BE LIABLE FOR INCIDENTAL OR
CONSEQUENTIAL DAMAGES.
WARRANTY
KAT9000 | Katana Plus HVLP Spray Gun
13
This manual suits for next models
1
Table of contents
Other Iwata Paint Sprayer manuals

Iwata
Iwata PT2S User manual

Iwata
Iwata Eclipse G6 User manual

Iwata
Iwata Hi-Line HP-AH User manual

Iwata
Iwata Super Nova WS-400-1301B User manual

Iwata
Iwata Eclipse G3 User manual

Iwata
Iwata Custom Micron CM-B User manual

Iwata
Iwata Custom Micron B User manual

Iwata
Iwata LPH-440-141 User manual

Iwata
Iwata Kustom K9200 User manual

Iwata
Iwata NEO BCN User manual