manuals.online logo
Brands
  1. Home
  2. •
  3. Brands
  4. •
  5. Jacuzzi
  6. •
  7. Bathtub
  8. •
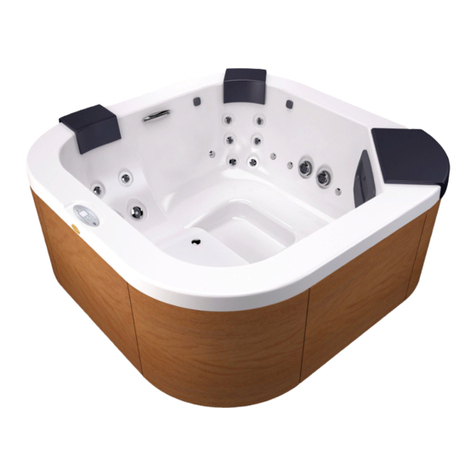
  9. Jacuzzi Energy User manual

Jacuzzi Energy User manual

Other manuals for Energy

1

Other Jacuzzi Bathtub manuals

Jacuzzi Oxia User manual

Jacuzzi

Jacuzzi Oxia User manual

Jacuzzi ARGA 175x85 User manual

Jacuzzi

Jacuzzi ARGA 175x85 User manual

Jacuzzi essential Series User manual

Jacuzzi

Jacuzzi essential Series User manual

Jacuzzi NOVA Free Standing User manual

Jacuzzi

Jacuzzi NOVA Free Standing User manual

Jacuzzi Luxury Bath User manual

Jacuzzi

Jacuzzi Luxury Bath User manual

Jacuzzi infinito Specification sheet

Jacuzzi

Jacuzzi infinito Specification sheet

Jacuzzi ALENA 5 Manual

Jacuzzi

Jacuzzi ALENA 5 Manual

Jacuzzi MyWay Quick start guide

Jacuzzi

Jacuzzi MyWay Quick start guide

Jacuzzi CAP6060 WCR User manual

Jacuzzi

Jacuzzi CAP6060 WCR User manual

Jacuzzi desire Maintenance and service guide

Jacuzzi

Jacuzzi desire Maintenance and service guide

Jacuzzi hydromassage Parts list manual

Jacuzzi

Jacuzzi hydromassage Parts list manual

Jacuzzi Projecta lagoon 2 Specification sheet

Jacuzzi

Jacuzzi Projecta lagoon 2 Specification sheet

Jacuzzi cloud Parts list manual

Jacuzzi

Jacuzzi cloud Parts list manual

Jacuzzi THE ESSENTIALS Series User manual

Jacuzzi

Jacuzzi THE ESSENTIALS Series User manual

Jacuzzi AMIGA PLUS User manual

Jacuzzi

Jacuzzi AMIGA PLUS User manual

Jacuzzi Delfi User manual

Jacuzzi

Jacuzzi Delfi User manual

Jacuzzi Arga User manual

Jacuzzi

Jacuzzi Arga User manual

Jacuzzi Z Builder Series Operating instructions

Jacuzzi

Jacuzzi Z Builder Series Operating instructions

Jacuzzi MORPHOSIS Infinito Guide

Jacuzzi

Jacuzzi MORPHOSIS Infinito Guide

Jacuzzi CASELLE User manual

Jacuzzi

Jacuzzi CASELLE User manual

Jacuzzi Delos Pro Parts list manual

Jacuzzi

Jacuzzi Delos Pro Parts list manual

Jacuzzi moove blower Series User manual

Jacuzzi

Jacuzzi moove blower Series User manual

Jacuzzi J-Sha Mi Corner User manual

Jacuzzi

Jacuzzi J-Sha Mi Corner User manual

Jacuzzi The ALARIS R145000 User manual

Jacuzzi

Jacuzzi The ALARIS R145000 User manual

Popular Bathtub manuals by other brands

Globo PAESTUM Vasca PA100 quick start guide

Globo

Globo PAESTUM Vasca PA100 quick start guide

Jacob Delafon LOVEE CE9287-00 Assembly instructions

Jacob Delafon

Jacob Delafon LOVEE CE9287-00 Assembly instructions

Crosswater US-N9CS installation instructions

Crosswater

Crosswater US-N9CS installation instructions

Clou CL/05.70020.20 installation instructions

Clou

Clou CL/05.70020.20 installation instructions

Agua BARTOLI-66 quick start guide

Agua

Agua BARTOLI-66 quick start guide

PAA PRELUDE owner's manual

PAA

PAA PRELUDE owner's manual

BETTE SILHOUETTE installation guide

BETTE

BETTE SILHOUETTE installation guide

agape MARSIGLIA AVAS1075 Assembly instructions

agape

agape MARSIGLIA AVAS1075 Assembly instructions

Kohler K-820-GC Roughing-In Guide

Kohler

Kohler K-820-GC Roughing-In Guide

Oliveri Naples installation instructions

Oliveri

Oliveri Naples installation instructions

Lyons Elite ETLxx663219 Series manual

Lyons

Lyons Elite ETLxx663219 Series manual

Woodbridge BJ500 Installation and care guide

Woodbridge

Woodbridge BJ500 Installation and care guide

Whirlpool Ariel ARL-702 installation manual

Whirlpool

Whirlpool Ariel ARL-702 installation manual

Kohler K-1151 Homeowner's guide

Kohler

Kohler K-1151 Homeowner's guide

American Standard 3052OD.X0X Installation instructions and owner's manual

American Standard

American Standard 3052OD.X0X Installation instructions and owner's manual

Kohler K-1111-H2 Roughing-In Guide

Kohler

Kohler K-1111-H2 Roughing-In Guide

Kohler K-1158 Roughing-In Guide

Kohler

Kohler K-1158 Roughing-In Guide

Kohler Hourglass K-1209-LA Roughing-In Guide

Kohler

Kohler Hourglass K-1209-LA Roughing-In Guide

manuals.online logo
manuals.online logoBrands
  • About & Mission
  • Contact us
  • Privacy Policy
  • Terms and Conditions

Copyright 2025 Manuals.Online. All Rights Reserved.

MRWXEPPE^MSRI
'327)6:%6)'32'96%
MRWXEPPEXMSR
/))4'%6)*900=
MRWXEPPEXMSR
'327)6:)6%:)'73-2
-RWXEPPEXMSR
736+*c08-+%9*&);%,6)2
MRWXEPEGMzR
'327f6:)7)'32'9-(%(3
установка
ТЩАТЕЛЬНО ХРАНИТЬ
IRIVK]
Indice
Importante ........................................................................... 4
Installazione ........................................................... 7
Sommaire
Important ................................................................ 5
Installation .............................................................. 7
Índice
Importante .............................................................. 6
Instalación ............................................................... 7
Index
Important ................................................................ 4
Installation .............................................................. 7
Inhaltsverzeichnis
Wichtig ..................................................................... 5
Installation .............................................................. 7
Указатель
Важно ....................................................................... 6
Установка ............................................................... 7
IRIVK]
44
Importante
Al ricevimento della vasca, controllarne l'integrità (in par-
ticolare in presenza di danni visibili sull'imballo) al ne di
poter inoltrare immediatamente un'eventuale contestazio-
ne al trasportatore, come previsto dalle leggi vigenti.
Vericare che le predisposizioni siano conformi alle indi-
cazioni riportate nel presente manuale.
Controllare l'eventuale presenza di difetti, togliendo la
pellicola protettiva. L'avvenuta installazione esclude la ga-
ranzia in caso di danni da urti o abrasioni.
Vericare il ssaggio di tutte le fascette (manicotti in
gomma e tubi della linea aria).
Si consiglia di installare la vasca a pareti e pavimento niti
(già rivestiti) applicando del silicone tra bordo-vasca e muro.
I pannelli Jacuzzi® consentono l’accesso agli organi elettro-
meccanici sotto-vasca ed un’adeguata aerazione, necessaria
anche per la miscela aria-acqua durante l’idromassaggio.
L’aerazione dev’essere garantita, anche se non si utiliz-
zano i pannelli Jacuzzi®.
I pannelli devono essere ssati stabilmente e la loro ri-
mozione deve richiedere l’uso di un apposito utensile.
Aperture, fori, grigliati usati per l’aerazione non devono
consentire l’introduzione di oggetti di diametro Ø 12 mm.

ATTENZIONE: (IEC 60335-1/A2) La pressione dell’im-
pianto idraulico che alimenta l’apparecchiatura non
deve superare i 600 kPa (6 bar).

Se è prevista una colonna di scarico con erogazione, è
necessario installare un’unità di protezione specica di
tipo DB (norma EN 1717), posizionata ad almeno 15 cm
sopra il bordo vasca. Per quanto riguarda le modalità
d’impianto, rivolgersi alla propria Azienda di fornitura
idrica e/o al proprio idraulico.
≥ 15 cm
EN 1717
DB
Important
Please ensure that you thoroughly check the product
upon receipt since we cannot accept responsibility for any
damage reported after installation. Should you nd any da-
mage, please immediately notify the forwarder.
Check that the arrangements comply with the instruc-
tions included in the present manual.
Check for any damage or defects by removing the protec-
tive plastic lm (damages from impact or scratches reported
after installation are not covered by our guarantee).
Check that the clamps holding the rubber couplings and
the air lines are tightly fastened.
The installation of the whirlpool baths can be made
against nished (tiled) walls and oor.
The panels allow access to electromechanical devices instal-
led under the bath rim, as well as proper aeration required
for water-air mixture during hydromassage.
Aeration must be guaranteed also if Jacuzzi® panels are not
used (see “Instruction for pre-installation”). Panels must be
rmly installed and proper tools must be used when being
removed. Openings, holes, grids, used for aeration, should
not allow the introduction of objects having a diameter of
12 mm or larger.

CAUTION: (IEC 60335-1/A2) The pressure of the wa-
ter system supplying water to the appliance must not
exceed 600 kPa (6 bar).

Where a distribution drainage column is present, a DB
type protective unit must be installed (Standard EN
1717), placed at least 15 cm above the tub edge. Con-
tact the Supplier Company and/or the hydraulics engi-
neer to determine the type of system required.
≥ 15 cm
EN 1717
DB
55
Wichtig
Beim Empfang der Wanne sollte sie sofort auf mögliche
Transportschäden untersucht werden; besonders wenn die
Verpackung sichtbare Schäden aufweist. Eventuelle Tran-
sportschäden sind dem Spediteur, gemäß der geltenden
Gesetzesvorschriften, unverzüglich mitzuteilen.
Prüfen, ob die bestehenden Anlagen mit den Anweisun-
gen des vorliegenden Handbuchs konform sind.
Die Schutzfolie abziehen und Wanne auf eventuelle De-
fekte prüfen. Für Stoß- bzw. Kratzschäden erlöschen nach
bereits installierter Wanne sämtliche Garantieansprüche.
Sämtliche Befestigungsschellen (Gummimuen und
Luftleitungen) auf einwandfreien Sitz prüfen.
Wir empfehlen, die Wanne möglichst in einem bereits fer-
tig veriesten Bad (Anstellwände und Boden) aufzustellen
und die Fugen zwischen Wannenrand und den Anstellwän-
den mit Silikonmasse abzudichten. Die Verkleidungspanee-
le erlauben den Zugri an der unter derWanne eingebauten
Whirl-Technik und gewähren außerdem eine ausreichende
Luftzufuhr, die auch zur Wasser-/Luftmischung während der
Hydromassagefunktion notwendig ist. Eine einwandfreie
Belüftung ist jedenfalls zu gewährleisten, auch wenn kei-
ne Jacuzzi®-Verkleidungen (siehe Merkblatt Vorinstalla-
tion) montiert werden. Die Verkleidungspaneele müssen
so montiert werden, daß sie nur mit einem entsprechenden
Werkzeug abmontiert werden können. Önungen, Bohrun-
gen und Gitter für die Belüftung müssen so gestaltet wer-
den, daß keine Gegenstände mit einem Durchmesser = 12
mm eingeführt werden können.

ACHTUNG: (IEC 60335-1/A2) Der Druck der das Gerät
versorgenden Hydraulikanlage darf 600 kPa (6 bar)
nicht überschreiten.

Wenn ein Ablaufrohr mit Auslass vorgesehen ist, muss
mindestens 15 cm über dem Wannenrand eine spezi-
elle Schutzvorrichtung vom Typ DB installiert werden
(Norm EN 1717). Für die Modalitäten der Anlage wen-
den Sie sich bitte das zuständige Wasserwerk und/oder
an einen Klempner.
≥ 15 cm
EN 1717
DB
Important
À la réception de la baignoire, il faudra contrôler si celle-ci
est intacte (en particulier en cas de dommages sur l’embal-
lage) an de pouvoir envoyer immédiatement une contesta-
tion au transporteur, comme prévu par les lois en vigueur.
Vérier que les pré-installations soient conformes aux
indications reportées dans le présent manuel.
Contrôler l’éventuelle présence de défauts, en enlevant le
lm protecteur. La garantie sera annulée en cas de domma-
ges causés par des chocs ou des abrasions après l’installa-
tion.
Vérier la xation de toutes les bagues (manchons en ca-
outchouc et tubes de la ligne d’air).
Il est conseillé d’installer la baignoire contre des parois et
sur un sol nis (déjà revêtus), en appliquant un cordon de
silicone entre le bord de la baignoire et le mur.
Les panneaux permettent d’accéder aux organes élec-
tromécaniques sous la baignoire et de fournir une aération
adéquate, nécessaire également au mélange air-eau pen-
dant l’hydromassage.
L’aération doit être assurée même si l’on n’utilise pas les
panneaux Jacuzzi® (voir che de pré-installation). Les pan-
neaux doivent être xés de manière stable. Pour les enlever,
il faudra utiliser un outil spécial. Les ouvertures, les trous,
les grilles utilisés pour l’aération ne doivent pas laisser pas-
ser des objets de diamètre Ø 12 mm.

ATTENTION : (IEC 60335-1/A2) la pression de l’instal-
lation hydraulique qui alimente l’appareil ne doit pas
dépasser 600 kPa (6 bar).

Si une colonne d’évacuation avec distribution est pré-
vue, il est nécessaire d’installer une unité de protection
spécique de type DB (norme EN 1717), positionnée à
au moins 15 cm au-dessus du bord de la baignoire. Pour
ce qui concerne les modalités d’installation, s’adresser
au fournisseur d’eau et/ou à son propre plombier.
≥ 15 cm
EN 1717
DB
66
Importante
Al recibir la bañera, se debe comprobar su integridad (so-
bre todo si el embalaje está visiblemente dañado) para po-
der presentar de inmediato una reclamación al transporti-
sta, si es necesario, según lo que disponen las leyes vigentes.
Comprobar que las obras de preinstalación se ajusten a
las indicaciones de este manual.
Quitar la película de protección para comprobar que no
haya defectos. Una vez realizada la instalación, caduca la
garantía en caso de daños debidos a choques o abrasiones.
Comprobar la jación de todas las abrazaderas (mangui-
tos de goma y tubos de la línea de aire).
Se aconseja instalar la bañera con las paredes y el suelo
acabados (ya revestidos), sellando con silicona la junta en-
tre la bañera y la pared.
Los paneles permiten el acceso a los órganos electromecáni-
cos situados debajo de la bañera y la ventilación adecuada,
necesaria para la mezcla de aire y agua durante el hidroma-
saje.
La ventilación debe estar garantizada, incluso si no se
utilizan los paneles Jacuzzi® (véase cha de preinstalación).
Los paneles se deben jar con rmeza y, para retirarlos, se
tiene que utilizar una herramienta adecuada. Las aperturas
u oricios con rejillas utilizados para la ventilación no deben
consentir la introducción de objetos de 12 mm de diámetro.

ATENCIÓN: IEC 603351/A2 La presión de la instala-
ción hidráulica que alimenta el equipo no debe supe-
rar los 600 kPa (6 bar).

Si está previsto un descargador con suministro, se debe
instalar una unidad de protección especíca de tipo DB
(norma EN 1717), situada a un mínimo de 15 cm por
encima del borde de la bañera. Para los referente a las
modalidades de instalación, se aconseja dirigirse a la
empresa abastecedora del agua o al fontanero de con-
anza.
≥ 15 cm
EN 1717
DB
ÇÌËχÌËÂ
èË ÔÓÎÛ˜ÂÌËË ‚‡ÌÌ˚ ‰ÓÎÊ̇ ÔÓ‚ÂflÚ¸Òfl ÂÂ
ÒÓı‡ÌÌÓÒÚ¸ (‚ ÓÒÓ·ÂÌÌÓÒÚË ÔË Ì‡Î˘ËË ‚ˉËÏ˚ı
ÔÓ‚ÂʉÂÌËÈ ÛÔ‡ÍÓ‚ÍË), ˜ÚÓ·˚ ÌÂωÎÂÌÌÓ
‚˚ÒÚ‡‚ËÚ¸ ÔÂÚÂÌÁ˲ „ÛÁÓÔÂ‚ÓÁ˜ËÍÛ, ͇Í
Ô‰ÛÒχÚË‚‡ÂÚÒfl ‰ÂÈÒÚ‚Û˛˘ËÏË ÌÓχÏË.
Проверить, что предрасположения соответствуют
указаниям, приведенным в настоящем руководстве.
èÓ‚Â¸Ú ÓÚÒÛÚÒÚ‚Ë ‰ÂÙÂÍÚÓ‚, ÒÌfl‚ Á‡˘ËÚÌÛ˛
ÔÎÂÌÍÛ. î‡ÍÚ ÛÒÚ‡ÌÓ‚ÍË ‚‡ÌÌ˚ ÓÚÏÂÌflÂÚ ‰ÂÈÒÚ‚ËÂ
„‡‡ÌÚËË ‚ ÒÎÛ˜‡Â Û˘Â·‡, ̇ÌÂÒÂÌÌÓ„Ó Û‰‡‡ÏË ËÎË
ÔÓÚÂÚÓÒÚflÏË.
èÓ‚Â¸Ú ÍÂÔÎÂÌË ‚ÒÂı ıÓÏÛÚÓ‚ (ÂÁËÌÓ‚˚ı
Ô‡ÚÛ·ÍÓ‚ Ë ‚ÓÁ‰Û¯Ì˚ı ÚÛ·).
êÂÍÓÏẨÛÂÚÒfl ÛÒڇ̇‚ÎË‚‡Ú¸ ‚‡ÌÌÛ Ì‡ „ÓÚÓ‚˚Â
ÒÚÂÌ˚ Ë ÔÓÎ (ÛÊ ӷÎˈӂ‡ÌÌ˚Â), ̇ÌÓÒfl ÒËÎËÍÓÌ
ÏÂÊ‰Û ·ÓÚÓÏ ‚‡ÌÌ˚ Ë ÒÚÂÌÓÈ.
è‡ÌÂÎËÓ·ÂÒÔ˜˂‡˛Ú‰ÓÒÚÛÔÍ˝ÎÂÍÚÓÏÂı‡Ì˘ÂÒÍËÏ
Ó„‡Ì‡Ï ÔÓ‰ ‚‡ÌÌÓÈ, ‡ Ú‡ÍÊ ‰ÓÎÊÌÛ˛ ‚ÂÌÚËÎflˆË˛,
ÌÂÓ·ıÓ‰ËÏÛ˛ Ú‡ÍÊ ‰Îfl ÔÓÎÛ˜ÂÌËfl ‚Ó‰Ó‚ÓÁ‰Û¯ÌÓÈ
ÒÏÂÒË ‚Ó ‚ÂÏfl ‡·ÓÚ˚ „ˉÓχÒ҇ʇ.
ÇÂÌÚËÎflˆËfl ‰ÓÎÊ̇ ·˚Ú¸ Ó·ÂÒÔ˜Â̇ Ú‡ÍÊÂ Ë ‚
ÚÓÏ ÒÎÛ˜‡Â, ÂÒÎË Ì ËÒÔÓθÁÛ˛ÚÒfl Ô‡ÌÂÎË Jacuz-
zi® (ÒÏ. ÛÍÓ‚Ó‰ÒÚ‚Ó ÔÓ ÔÓ‰„ÓÚÓ‚ÍÂ Í ÛÒÚ‡ÌÓ‚ÍÂ).
è‡ÌÂÎË ‰ÓÎÊÌ˚ ̇‰ÂÊÌÓ ÍÂÔËÚ¸Òfl, ‡ Ëı ‰ÂÏÓÌÚ‡Ê
‰ÓÎÊÂÌ Ú·ӂ‡Ú¸ ËÒÔÓθÁÓ‚‡ÌËfl ÒÔˆˇθÌÓ„Ó
ÔËÒÔÓÒÓ·ÎÂÌËfl. èÓÂÏ˚, ÓÚ‚ÂÒÚËfl, ¯ÂÚÍË,
ËÒÔÓθÁÛÂÏ˚ ‰Îfl ‚ÂÌÚËÎflˆËË, Ì ‰ÓÎÊÌ˚
‰ÓÔÛÒ͇ڸ ‚‚‰ÂÌË Ô‰ÏÂÚÓ‚ ‰Ë‡Ï. 12 ÏÏ.

ВНИМАНИЕ:(IEC60335-1/A2)Давлениегидравлической
системы, обеспечивающей питание оборудования,
не должно превышать 600 кПa (6 бар).

Если предусмотрена сливная колонна с подачей,
необходимо установить специальное защитное
устройство типа DB (норматив EN 1717), позицио-
нированное на расстоянии, по меньшей мере, 15 cм
над бортом ванны. В отношении того, что касается
режимов функционирования установки, обратить-
ся в компанию водоснабжения и/или к собственно-
му слесарю.
≥ 15 cm
EN 1717
DB
7
optional / option / opcionales / опция Jacuzzi®
tipologia d’installazione / installation type / type d’installation / Installationstyp / tipo de instalación / типология установки
A
A
A
A
57 cm
1

2

88
A
Ø 8 mm A
A
A
Ø 6x40 mm
A
1
AA
A
34
~ 60’ (1hour)
2
3

4

5

6

7

99
Schemi elettrici
vasche idromassaggio
whirlpool baths
baignoires d'hydromassage
Hydromassagewannen
bañeras de hidromasaje
ÉˉÓχÒÒ‡ÊÌ˚ ‚‡ÌÌ˚
Electrical diagrams
Schémas électriques
Schaltpläne
Esquemas eléctricos
˝ÎÂÍÚ˘ÂÒÍË ÒıÂÏ˚

IMPORTANTE: nei Paesi in cui il
valore di tensione 220-240V viene
fornito da un sistema bifase (L+L), il
collegamento va in ogni caso eet-
tuato sui morsetti L e N.

IMPORTANT: for Countries where
220-240V voltage is supplied by a
two-phase system (L+L), the con-
nection has to be made on terminals
L and N anyway.

IMPORTANT: dans les Pays où la va-
leur de tension 220-240V est fourni
par un système biphasé (L+L), le
branchement doit dans tous les case
être eectué sur les bornes L et N.

WICHTIG: In Ländern mit einer zwei-
phasigen Stromversorgung (L+L)
mit einer Spannung von 220-240V
erfolgt der Auschluss immer an den
Klemmen L und N.

IMPORTANTE: en aquellos Países
en los que el valor de tensión a 220-
240V es suministrado por un siste-
ma bifásico (L+L), la conexión debe
realizarse de todos modos en los
bornes L y N.

ВНИМАНИЕ: В странах, где напря-
жение 220-240В обеспечивается
двухфазной системой (L+L), под-
ключение, в любом случае, осу-
ществляется на клеммах Lи N.
1010
Ø 3,9x13
mm
B
B
B
B
B
B
B
B
B
B
A
A
A
A
Ø 3,9x13
mm
B
A
Ø 3,9x13
mm
B
A
8
