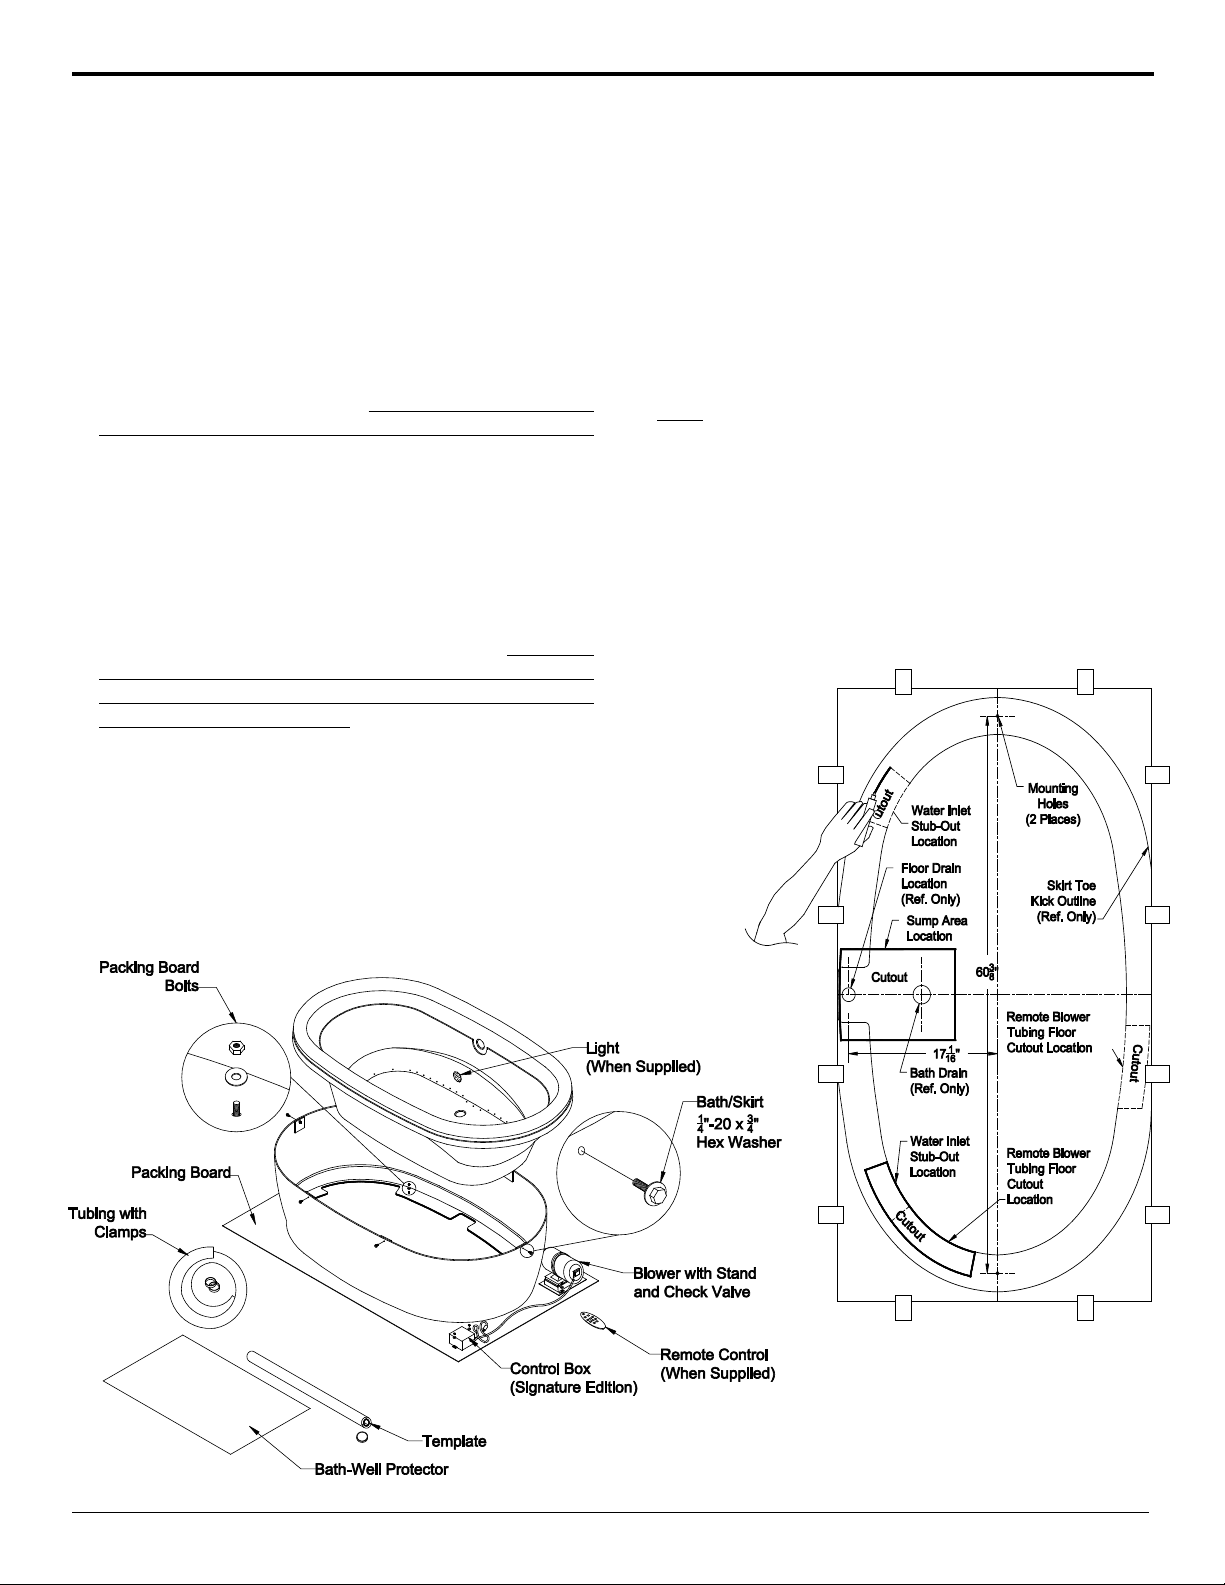
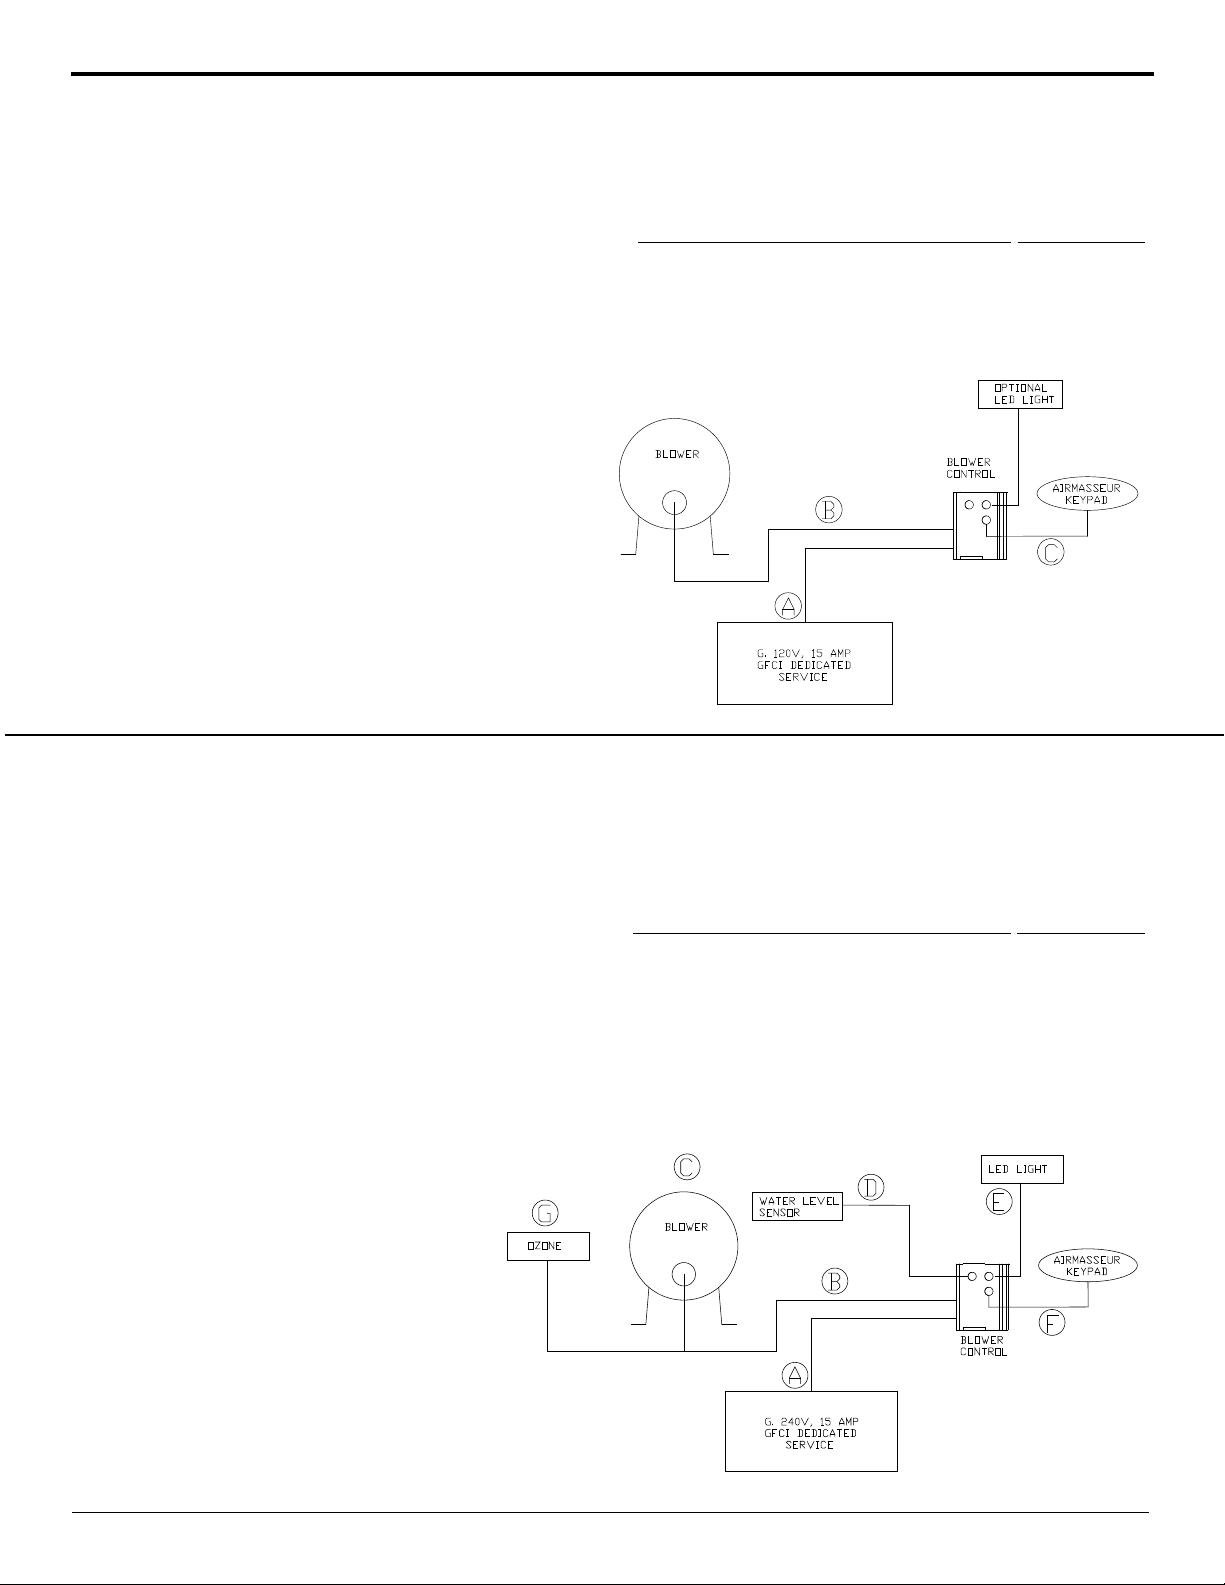
JASON Hydrotherapy Forma AirMasseur AC635P User manual
Other JASON Hydrotherapy Bathtub manuals

JASON Hydrotherapy
JASON Hydrotherapy Integrity B3260 TL User manual

JASON Hydrotherapy
JASON Hydrotherapy Carrera CB553P User manual

JASON Hydrotherapy
JASON Hydrotherapy BY630 User manual

JASON Hydrotherapy
JASON Hydrotherapy AC635PS User manual

JASON Hydrotherapy
JASON Hydrotherapy Designer AN-P Series User manual

JASON Hydrotherapy
JASON Hydrotherapy AirMasseur Madeline MA635P User manual

JASON Hydrotherapy
JASON Hydrotherapy AC635PS User manual

JASON Hydrotherapy
JASON Hydrotherapy forma AirMasseur RE630PS User manual

JASON Hydrotherapy
JASON Hydrotherapy forma Series Manual

JASON Hydrotherapy
JASON Hydrotherapy AirMasseur User manual

JASON Hydrotherapy
JASON Hydrotherapy Integrity A6060 User manual

JASON Hydrotherapy
JASON Hydrotherapy forma AirMasseur RC553PS User manual

JASON Hydrotherapy
JASON Hydrotherapy Integrity User manual

JASON Hydrotherapy
JASON Hydrotherapy Carrera 5184.00.00.01 Manual

JASON Hydrotherapy
JASON Hydrotherapy forma RC630P User manual

JASON Hydrotherapy
JASON Hydrotherapy Integrity User manual

JASON Hydrotherapy
JASON Hydrotherapy BY630 User manual

JASON Hydrotherapy
JASON Hydrotherapy forma AC553 User manual

JASON Hydrotherapy
JASON Hydrotherapy forma User manual

JASON Hydrotherapy
JASON Hydrotherapy Integrity K3060 SR User manual

JASON Hydrotherapy
JASON Hydrotherapy Integrity A6060 Installation and operating instructions

JASON Hydrotherapy
JASON Hydrotherapy Integrity AirMasseur B3260 User manual

JASON Hydrotherapy
JASON Hydrotherapy Vivere Series User manual

JASON Hydrotherapy
JASON Hydrotherapy Alexia SL Installation and operating instructions
Popular Bathtub manuals by other brands


Lyons
Lyons Elite ETLxx663219 Series manual

Woodbridge
Woodbridge BJ500 Installation and care guide

Whirlpool
Whirlpool Ariel ARL-702 installation manual

TEIKO
TEIKO EXCELLENT DUO user manual

American Standard
American Standard 3052OD.X0X Installation instructions and owner's manual

Kohler
Kohler K-1111-H2 Roughing-In Guide