manuals.online logo
Brands
  1. Home
  2. •
  3. Brands
  4. •
  5. Jason.L
  6. •
  7. Indoor Furnishing
  8. •
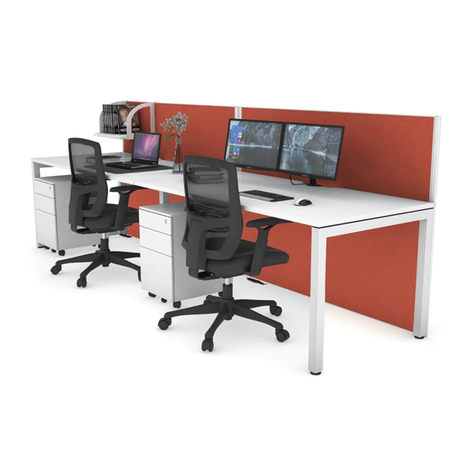
  9. Jason.L Just Right Corner Desk User manual

Jason.L Just Right Corner Desk User manual

Tools Required: Power screwdriver 2 persons required for installation
ASSEMBLY INSTRUCTIONS
Just Right
Corner Desk
Need help!
Call us on
1300 527 665
www.jasonl.com.au
Page 1 of 4
2
1
3
45
6
7
9
10
1
2
3
A
E
8
11
12
14
Cx6
AB
x1 D
x7
x18
F
x8 x1
Wrench
G
M6
5x5 2.5x2.5 M8
ST4.2
M4
4x4
Ex12
M6
Ex12
A
5 x 5 8
1A
4
F
3
2
2
x7
F
4 x 4
A
5 x 5
1
5
Right Column X1 Middle Column X1 Left Column X1 Long Supporting
Beam X1
Long Transmission
Rod X1
Short Transmission
RodX1
Table Leg X3
Short Supporting
Beam X1
Baffle X4 Control Box X1
6 7 8 11
9
1 2 3 4 5
11
10
11
13 14
Handset X1
Long Supporting
Plate X2
11
11
Short Supporting
Plate X1
11
12
Power Cable X1
13
A
4
15
Cable Tie X4
15
8
8
F
F
E
E
100KG
25mm/s
100-240V
710mm
1210mm
0~40°C
2
1020-1600mm
1075-1575mm
Technical data
Column Number
Maximum Load
Max Speed
Input Voltage
Lowest Position
Highest Position
Width Range
Duty Cycle
Applicable Temperature
10%(Pause 18 minutes for each
continuous 2-minute operation )
Accessory List
Attention: The drawings below are only for reference which might be slightly different from the physical objects, please refer to the actual product. If there are
any tools missing or installation problems, please contact customer service.
Part List
STEP1
STEP2
Installation Instruction
Assemble Table Legs
Connect the table legs (8) to the columns (1), (2), and (3), fix them with
screws (E), and tighten them with the 5 x 5 allen key (A).
Install Supporting Beam
Unscrew
Stretch
Loose screws on the long supporting beam (4) with the 4x4
allen key (A), then stretch supporting beam.
The operation of the short beam (5) is the same as above.
Install supporting beams (4)(5) on the column(1) (2)(3),
tighten the screw (F) with the 5x5 allen key (A).
Page 2 of 4
C
A
2
3
C
x6
A
5 x 5
1
9
2.5x2.5
A
7
6
14
13
D
x16
D
12
5
A
4 x 4
G
4
2
10
2 4
3
13
A
54
A
7
6
G
G
A
A
9
STEP3 STEP4
STEP5
STEP6
Install Transmission Rod
Unscrew
Insert
Tighten
Spin
Unscrew
Insert
Insert
Insert
Tighten
Spin
The rotation angle should not exceed
one third of a turn.
Insert the long and short transmission rods (6) (7) into the left, middle
and right columns (1) (2) (3) respectively, and use the 2.5 x 2.5 allen
key (A) to screw the long and short transmission rods (6) (7) .
Install Supporting Plates
Connect the long supporting plate (9) to the columns (1) (3), connect the short
supporting plate(10) to the column(2). fix them with the screw (C) and tighten the
screw by 5X5 allen key(A).
Install Tabletop, Control Box
and Handset
Not provided
Adjust the length of the beam (4) (5) according
to the size of the table board
The distance between the two sides
shall not be longer than 200 mm
Connect the tabletop and the handset (13) with screws (D),
fix the control box (12)on the tabletop with its own screws,
and tighten it with a pistol drill.
The control box shall be placed
near the middle of the table to
ensure that the motor wire can be
connected to the control box.
Tighten the Beam Screw and the
Drive Rod Nut
Use the 4 x 4 allen key (A) to tighten the 8 screws on the long
and short beams (4) (5), and use the nut wrench (G) to tighten
the nuts on the long and short transmission rods (6) (7).
Self-owned
screw
Page 3 of 4
14
12
B
x8
A
2.5x2.5
A
11
B
5
11
4
15
15
15
15
STEP7
STEP8
Install Baffle
Install the baffle (11) on the long and short beams (4) (5)
with screws (B), and tighten it with a 2.5 x 2.5 allen key(A).
Connect all Cable on to the Control Box
Do not connect the power before the wiring is completed.
You can use the cable tie (15) to
sort out the cables on the table
to keep the cables tidy.
Tear off Manage cable Fix
Port for
handset
Power port
Port for cable
connected to the
lifting column
Attention
1. Power supply: AC100V-240V,50/60Hz
2. Service Environment: 0-40℃
3. Unplug the power plug before cleaning, wipe the dust on surface with slight wet
dishcloth when cleaning, be careful not to let the drops into the internal parts, not loose
the connector.
4. The electric box contains electronic components, metals, plastics, wires etc., so
dispose of it in accordance with each country's environmental legislation, not the
general household waste.
5. Check carefully to ensure correct and complete assembly before using.
6. Be familiar with all functions and program settings of the product before first use.
7. Children are forbidden to play on the product because of unforeseen action when
playing, so any dangerous consequences caused by this improper action will not be on
manufacturers.
8. Slight noise caused by the V-ribbed belt or brake system due to structure will not
have any effect on the use of the equipment.
9. Corrosive or abrasive materials are forbidden to clean the equipment. Must ensure
that the cleaner used will not pollute the environment.
10. This appliance can be used by children aged from 8 years and above and persons
with reduced physical, sensory or mental capabilities or lack of experience and
knowledge if they have been given supervision or instruction concerning use of the
appliance in a safe way and understand the hazards involved. Children shall not play
with the appliance.
11. Cleaning and user maintenance shall not be made by children without supervision.
12. If the supply cord is damaged, it must be replaced by the manufacturer, its service
agent or a similarly qualified person in order to avoid a hazard.
13. Please make sure there is no hazard sources in your operating environment. e.g.,
do not litter the tools around. Always be careful to treat the packaging materials in order
to avoid any possible danger, e.g. plastic bag may lead to choking hazard to children.
14. Keep the original package of the equipment if necessary in case of the future use in
transportation.
Waste disposal This marking indicates that this product should
not be disposed with other household wastes.
To prevent possible harm to the environment or
human health from uncontrolled waste disposal,
recycle it responsibly to promote the sustainable
reuse of material resources. To return your used
device, please use the return and collection
systems or contact the retailer where the
product was purchased. They can take this
product for environmental safe recycling.
Common fault treatment
The following tips will help you detected and eliminate the common
fault and error. If the error you meet is not on the list, please contact
our customer service.
Error Method
No response while pressing
The desktop moving towards
the opposite direction as ordered
Rising in a low speed
The desk moving downwards
without any operation
Automatically Self-Reset
Overload Operation
Can’t reach the min or max height
Check if all the cables well connected;
Reset;
Check if overloaded, max loading: 100kg;
Restart after suspend for 18mins while
connecting with power;
Reposition;
Page 4 of 4

Other Jason.L Indoor Furnishing manuals

Jason.L Quadro Square leg 4 person corner workstation H... User manual

Jason.L

Jason.L Quadro Square leg 4 person corner workstation H... User manual

Jason.L Quadro Wood A 2P Run workstation User manual

Jason.L

Jason.L Quadro Wood A 2P Run workstation User manual

Jason.L ST SUPREME H24T User manual

Jason.L

Jason.L ST SUPREME H24T User manual

Jason.L San Fran 2 Person Run Workstation User manual

Jason.L

Jason.L San Fran 2 Person Run Workstation User manual

Jason.L Vibe 50mm User manual

Jason.L

Jason.L Vibe 50mm User manual

Jason.L Quadro Loop Boardroom table User manual

Jason.L

Jason.L Quadro Loop Boardroom table User manual

Jason.L Litewall User manual

Jason.L

Jason.L Litewall User manual

Jason.L Switch System Boardroom User manual

Jason.L

Jason.L Switch System Boardroom User manual

Jason.L Quadro Square leg Counter table Radius... User manual

Jason.L

Jason.L Quadro Square leg Counter table Radius... User manual

Jason.L Quadro Square 4P workstation User manual

Jason.L

Jason.L Quadro Square 4P workstation User manual

Jason.L Switch System Single Corner Desk User manual

Jason.L

Jason.L Switch System Single Corner Desk User manual

Jason.L Flexi premium User manual

Jason.L

Jason.L Flexi premium User manual

Jason.L Horizon Workstation 6 Person User manual

Jason.L

Jason.L Horizon Workstation 6 Person User manual

Jason.L Quadro Square Counter table User manual

Jason.L

Jason.L Quadro Square Counter table User manual

Jason.L Quadro A leg Counter table Radius Corners User manual

Jason.L

Jason.L Quadro A leg Counter table Radius Corners User manual

Jason.L Blackjack User manual

Jason.L

Jason.L Blackjack User manual

Jason.L Horizon L-Shaped Quadro A User manual

Jason.L

Jason.L Horizon L-Shaped Quadro A User manual

Jason.L San Fran 2 Person Run Workstation User manual

Jason.L

Jason.L San Fran 2 Person Run Workstation User manual

Jason.L Quadro Square Boardroom Table User manual

Jason.L

Jason.L Quadro Square Boardroom Table User manual

Jason.L Horizon Quadro A 3P Run User manual

Jason.L

Jason.L Horizon Quadro A 3P Run User manual

Jason.L Quadro User manual

Jason.L

Jason.L Quadro User manual

Jason.L San Fran User manual

Jason.L

Jason.L San Fran User manual

Jason.L Quadro Square User manual

Jason.L

Jason.L Quadro Square User manual

Jason.L Quadro Wood A leg Counter table Radius... User manual

Jason.L

Jason.L Quadro Wood A leg Counter table Radius... User manual

Popular Indoor Furnishing manuals by other brands

Costway JV11204 manual

Costway

Costway JV11204 manual

SUNON DAM9003.058072 Assembly manual

SUNON

SUNON DAM9003.058072 Assembly manual

HOMCOM 312-088V00 manual

HOMCOM

HOMCOM 312-088V00 manual

sweeek. LOFT ILFCTGIG manual

sweeek.

sweeek. LOFT ILFCTGIG manual

Furniture of America Ponderay CM4348C Assembly instructions

Furniture of America

Furniture of America Ponderay CM4348C Assembly instructions

Lightolier Specplus SPS2GFSVA2FT specification

Lightolier

Lightolier Specplus SPS2GFSVA2FT specification

kupper 70790 Assembly instruction

kupper

kupper 70790 Assembly instruction

Next PARIS 899684 Assembly instructions

Next

Next PARIS 899684 Assembly instructions

Argos Home Hygena 4129626 Assembly instructions

Argos Home

Argos Home Hygena 4129626 Assembly instructions

Homelegance 1524T-1 Assembly instructions

Homelegance

Homelegance 1524T-1 Assembly instructions

Wonderland 342 manual

Wonderland

Wonderland 342 manual

Cooper Lighting LUMIERE FS1-xx* Specification sheet

Cooper Lighting

Cooper Lighting LUMIERE FS1-xx* Specification sheet

Southern Enterprises BC272300TX Assembly instructions

Southern Enterprises

Southern Enterprises BC272300TX Assembly instructions

Smart Comfort 556038 Assembly instruction

Smart Comfort

Smart Comfort 556038 Assembly instruction

Trasman REGAL EMMET 1345 Assembly manual

Trasman

Trasman REGAL EMMET 1345 Assembly manual

Interior Solutions 9370-55NC17U operating instructions

Interior Solutions

Interior Solutions 9370-55NC17U operating instructions

Itatiaia BALC 1PT 1GAV 65 EXCLUSIVE Assembly instruction

Itatiaia

Itatiaia BALC 1PT 1GAV 65 EXCLUSIVE Assembly instruction

Vente Unique OLBIA G-4375 Product description

Vente Unique

Vente Unique OLBIA G-4375 Product description

manuals.online logo
manuals.online logoBrands
  • About & Mission
  • Contact us
  • Privacy Policy
  • Terms and Conditions

Copyright 2025 Manuals.Online. All Rights Reserved.