Jedo FYN User manual


Zdj. 1 Zdj. 2
Zdj. 3 Zdj. 4
Zdj. 5 Zdj. 6 Zdj. 7
Zdj. 8 Zdj. 9 Zdj. 10

Zdj. 12Zdj. 11 Zdj. 13
Zdj. 14
Zdj. 15 Zdj. 16 Zdj. 17
Zdj. 18 Zdj. 19 Zdj. 20

Wózek zgodny z normą: EN 1888:2012
OSTRZEŻENIA !!!!
Przed użytkowaniem przeczytać niniejszą instrukcję i zachować ją na później.
Bezpieczeństwo dziecka może być zagrożone, jeśli zalecenia niniejszej instrukcji
nie będą stosowane.
Ostrzeżenie !
Nigdy nie zostawiaj swojego dziecka bez
opieki.
Ostrzeżenie !
Upewnij się przed użyciem , czy wszystkie
urządzenia blokujące są włączone.
Ostrzeżenie !
Aby uniknąć obrażeń, upewnij się, czy two-
je dziecko jest odsunięte kiedy rozkła-da
się lub składa niniejszy wyrób.
Ostrzeżenie !
Nie pozwalaj dziecku bawić się niniejszym
wyrobem.
Ostrzeżenie !
Używaj uprzęży, gdy twoje dziecko zacznie
samodzielnie siedzieć,
Ostrzeżenie !
To siedzisko nie jest odpowiednie dla dzieci
w wieku poniżej 6 miesiąca życia.
Ostrzeżenie !
Zawsze używaj systemu zapięć.
Ostrzeżenie !
Sprawdź czy urządzenia mocujące gondolę
lub siedzisko lub fotelik samochodowy są
prawidłowo załączone przed użyciem.
Ostrzeżenie !
Niniejszy wyrób nie jest odpowiedni do bie-
gania lub jazdy na rolkach.
Ostrzeżenie !
Wózek jest przeznaczony do transportu
dzieci od 0 miesiąca życia do maksymalnej
masy ciała 15 kg.
Ostrzeżenie !
Każde obciążenie zawieszone na rączce
wózka narusza jego stabilność.
Wózek powinien być użytkowany przez
jedno dziecko
Używanie dodatkowego (fotelik, torba,
osłona przed deszczem itp.) nie dopusz-
czonego przez producenta wyposażenia,
może negatywnie wpływać na bezpieczeń-
stwo.
Za bezpieczeństwo dziecka jest odpowie-
dzialny jego dorosły opiekun
Siedzisko lub gondola nie mogą być
używane jako fotelik samochodowy.
Nie należy pozostawiać wózka na postoju
bez zaciągniętych hamulców.
W czasie umieszczania dziecka w wóz-
ku lub wyjmowaniu go z wózka, hamulce
musza być zawsze zaciągnięte
Wózka nie należy nigdy pozostawiać na
postoju na pochyłościach.
W czasie regulowania ustawień wózka,
jego części ruchome powinny znajdować
się poza zasięgiem dziecka.
Umieszczenie zbyt dużego ciężaru w wóz-
ku, nieprawidłowy montaż lub używa-nie
niedozwolonego wyposażenia dodatkowe-
go mogą prowadzić do uszkodzenia lub
zniszczenia wózka.
Nie należy pozostawiać wózka w miejscach
niebezpiecznych, także jeśli jest pusty.
- Nie należy pokonywać wózkiem scho-
dów, także ruchomych , oraz miejsc bar-
dzo stromych. Może to być niebezpieczne
dla dziecka.
- Nigdy nie należy umieszczać żadnych
przedmiotów na budce wózka.
- Dostarczany w komplecie z wózkiem kosz
na zakupy ma dopuszczalną ładowność
3 kg. Cięższe przedmioty umieszczać
zawsze na środku kosza. Nierównomierne
rozmieszczenie ciężaru w koszu może upo-
śledzić stabilność wózka.
- Przedmioty w koszu nie mogą wystawać
na bokach poza obręb kosza, ponieważ
mogą się wkręcić w szprychy.
- Zastosowanie nie dopuszczonych przez
producenta części zamiennych może być
niebezpieczne.
- Doglądanie stanu technicznego wózka
jest obowiązkiem użytkownika.
- Przy przenoszeniu wózka przez przeszko-
dy należy uważać, żeby żadne z połączeń
zatrzaskowych się nie odblokowało.
- Nie należy stosować w gondoli dodatko-
wego materacyka oprócz tego, który został
dostarczony w zestawie.
- Dostarczana w komplecie torba pielęgna-
cyjna ma dopuszczalną ładowność 2 kg.
- Niniejszy wyrób jest odpowiedni dla
dziecka, które nie może siedzieć samo-
dzielnie, przewracać się i poruszać się na
swoich rękach i kolanach. Maksymalna
masa dziecka: 9 kg
- Nowo narodzone dzieci należy przewozić
w pozycji leżącej.
Hasło OSTRZEŻENIE oznacza informacje
istotne dla bezpieczeństwa dziecka.
Hasło WAŻNE oznacza informacje ułatwia-
jące obsługę wózka.
Uwaga !
Uwagi odnośnie bezpieczeństwa oraz
wskazówki zawarte w niniejszej instruk-
cji nie są w stanie uwzględnić wszystkich
możliwych sytuacji i warunków użytkowa-
nia. Ze zrozumiałych względów nie da się
wyposażyć niniejszego produktu w zdro-
wy rozsądek, ostrożność czy troskliwość.
Walory te powinna wnieść osoba użytkująca
i obsługująca wózek.
Ważnym jest, żeby każda osoba użytkują-
ca wózek i jego wyposażenie dodatkowe
dobrze rozumiała niniejsza instrukcję.
Dlatego każdą osobę, która będzie posłu-
giwała się wózkiem, nawet przez bardzo
krótki czas, należy poinstruować co do za-
sad jego prawidłowego użytkowania. Jeśli
wskazówki instrukcji są niejasne zachodzi
potrzeba bliższych wyjaśnień lub odpo-
wiedzi na jakiekolwiek inne pytania, należy
zwrócić się do autoryzowanego przedsta-
wiciela handlowego firmy JEDO.

1. Nie należy pozostawiać wózka na dłużej
w miejscach silnie nasłonecznionych.
2. Wózek należy przechowywać w suchym
miejscu. Jeżeli rama wózka jest mokra, na-
leży ją starannie osuszyć.
3. W przypadku kontaktu wózka z woda
morską lub użytkowania go na ulicach po-
sypywanych solą, należy ramę wózka umyć
i osuszyć.
5. Nie należy pozostawiać wózka na dłuż-
szy czas na jasnych wykładzinach pod-
łogowych (PCV, linoleum) oraz parkie-
tach drewnianych lakierowanych. Guma
opon może zabarwić podłoże na czarno
Zalecane jest smarowanie końcówek osi
oraz zawieszenia co trzy miesiące. Przed
smarowaniem należy oczyścić szmatką
końcówki osi. Do smarowania osi można
używać wazeliny technicznej lub oleju sa-
mochodowego.
6. Należy kontrolować czy ciśnienie powie-
trza w oponach jest odpowiednie. Ciśnienie
w kołach pompowanych powin-no wynosić
0,14 – 0,17 MPa
7. Tapicerkę wózka można czyścić wilgotną
szmatką lub gąbką używając delikatnego
środka piorącego.
8. Tapicerki wózka nie należy prać w pralce.
Pielgnacja i konserwacja
1. P.P.H.U. Jędroch udziela gwarancji
na zakupiony przez Państwa produkt
marki JEDO na okres 24 miesięcy od daty
zakupu.
2. Reklamacje należy zgłaszać w punkcie
sprzedaży, w którym produkt został
zakupiony.
3. Reklamowany produkt należy oddać w
stanie czystym oraz bezpiecznie zapako-
wany najlepiej w karton wraz z instrukcją
obsługi.
4. Wady produktu wykryte w okresie gwa-
rancji będą bezpłatnie usuwane w terminie
14 dni od daty dostarczenia go, za pośred-
nictwem Sprzedawcy do Producenta.
5. Okres gwarancji ulega przedłużeniu o
czas naprawy.
6. Sposób naprawy określa udzielający
gwarancji.
7.Warunkiem niezbędnym do uwzględ-
nienia reklamacji jest posiadanie dowodu
zakupu z wypełnioną datą oraz podpisami
obu stron.
8.Producent bezpłatnie usunie ewentualną
niesprawność produktu pod warunkiem
wykorzystywania go zgodnie z przeznacze-
niem i zalecenia instrukcji obsługi.
9.Wpisy w gwarancji mogą dokonywać
jedynie serwisanci Producenta pod rygo-
rem nieważności. Brak druku gwarancyj-
nego wyklucza gwarancję.
10.Terytorialny zasięg ochrony gwarancyj-
nej obejmuje obszar Unii Europejskiej.
11.Gwarancja na sprzedany towar
konsumpcyjny nie wyłącza, nie ogranicza,
ani nie zawiesza uprawnień kupującego
wynikających z niezgodności towaru z
umową.
Warunki gwarancji
- uszkodzenia wynikające z niewłaściwego
przechowywania
-uszkodzenia mechaniczne i technicz-
ne powstałe w wyniku niewłaściwego
użytkowania, bądź używania niezgodnego
z instrukcją obsługi.
- zmiany koloru (odbarwienie) tkaniny przy
silnym nasłonecznieniu lub stosowaniu
niewłaściwych środków chemicznych
- naturalne zużycie elementów mecha-
nicznych będących wynikiem eksploatacji.
Wprowadzanie jakichkolwiek własnych
zmian konstrukcyjnych produktu powodu-
je utratę gwarancji.
wszelkie przebarwienia powstałe w wy-
niku kontaktu gumy z podłożem (np. PCV,
linoleum, parkiety drewniane lakierowane)
- przebicie dętki
Reklamacji nie podlegają

INSTRUKCJA OBSŁUGI
1. Rozkładanie wózka.
Aby rozłożyć stelaż należy odpiąć blokadę
zabezpieczającą stelaż przed rozłożeniem. (zdj. 1)
· Rozłożenie wózka następuje poprzez pociągniecie
rączki do góry przy jednoczesnym przytrzymaniu ramy
podwozia. (zdj. 2)
· Gdy rączka znajdzie się w odpowiedniej pozycji
następuje automatycznie jej zablokowanie w zamknięciu
zatrzaskowym, któremu towarzyszy wyraźnie słyszalne
„kliknięcie”. Przypadkowemu złożeniu się wózka, gdyby
zamknięcie zatrzaskowe nie znajdowało się w pozycji
zablokowanej, zapobiega uruchomienie blokady zabez-
pieczającej
Ostrzeżenie!
· Przed użyciem wózka należy zawsze sprawdzić, czy
zamknięcie zatrzaskowe znajduje się w pozycji zabloko-
wanej. Jeżeli zamknięcie nie jest w prawidłowej pozycji,
użycie wózka jest niebezpieczne.
2.Montowanie i demontowanie kół
·Zdjąć plastikowe ochraniacze z końcówek osi wózka.
Ochraniacze zachować celem zabezpieczenia osi, gdy
wózek nie będzie już używany.
Aby zdemontować koło 12” nacisnąć do oporu sprężynę
koła i pociągnąć koło do siebie aż do zsunięcia z osi. (Zdj.
3) Aby je powtórnie zamontować wciśnij przycisk i wsuń
koła na oś, następnie zwolnij przycisk i pociągnij je do
siebie aż do momentu zablokowania.
- Zamontować przednie 10 calowe koło (Zdj.4) z wideł-
kami poprzez włożenie osi widełek do obrotnicy, aż do
usłyszenia „kliknięcia” oznaczającego zablokowanie koła
we właściwej pozycji. . Przednie koła
można zablokować do jazdy na wprost poprzez naciśnię-
cie blokady obrotnicy. (Zdj.5B)
Aby koła zdemontować należy nacisnąć do oporu
sprężynę obrotnicy i pociągnąć koło z widełkami do dołu.
(zdj. 5A)
Ostrzeżenie!
Na kołach jest smar, który może zabrudzić tekstylia.
Niebezpieczeństwo uduszenia: zadbać, żeby plastikowe
ochraniacze końcówek osi nie dostały się w ręce dziecka.
3 .Uruchamianie hamulców
· Wózek hamuje się naciskając poprzeczny pedał hamulca
(Zdj.6), tak żeby końcówki drążka hamującego zabloko-
wały zębatki kół.
· Zwolnienie hamulca następuje poprzez pociągnięcie
pedału hamulca do góry.
4. Montaż / demontaż gondoli:
Założyć gondolę na podwozie wprowadzając bolce znaj-
dujące się w jej dolnej części w mechanizm centralnego
wpięcia gondoli, zamknięcie nastąpi automatycznie.
(Zdj.7,8,19,20)
Aby zdemontować gondolę z podwozianależywcisnąć
do oporu czerwonych przycisków znajdujących się w
dolnej, środkowej części gondoli (Czynność ta nie musi
być wykonywana jednocześnie po obu stronach gondoli).
Następnie należy unieść gondolę ku górze.
5.Montaż okrycia na nóżki
Założyć okrycie na nóżki na gondolę i zapiąć na napy
znajdujące się na bokach budki i okrycia.
6. Montaż siedziska (wkładu spacerowego):
Siedzisko montujemy i demontujemy tak jak gondolę.
Siedzisko można montować na dwa sposoby, podnóż-
kiem w stronę kierunku jazdy lub odwrotnie.
- Założyć tapicerkę siedziska naciągając ją na ramę
siedziska, następnie zapiąć wszystkie napy.
Ostrzeżenie !
Przed użyciem sprawdzić czy gondola względnie siedzi-
sko są prawidłowo zablokowane w zatrzaskach.
Ostrzeżenie !
Przed użyciem wózka należy zawsze sprawdzić czy opar-
cie jest prawidłowo zablokowane.
7.Montaż/ demontaż budy siedziska spacerowego
Siedzisko posiada oddzielną budkę. Aby zamontować ją
na siedzisku spacerowym należy wsunąć czarne uchwyty
znajdujące się na końcach pałąka w plastikowe zaczepy
umieszczone po obu stronach stelaża siedziska.
Aby budkę zdemontować należy wcisnąć czarny przycisk
znajdujący się na elemencie do montażu budki (Zdj.9),
następnie wysunąć budkę z zaczepów.
8. Montaż/demontaż barierki
Umieścić barierkę ochronną na ramie siedziska poprzez
włożenie jej do plastikowych uchwytów.
W celu zdemontowania barierki należy wcisnąć czerwony
przycisk znajdujący się w jej dolnej części i pociągnąć
barierkę do góry, czynność powtórzyć z drugiej strony.
(Zdj. 10)
9.Montaż okrycia na nóżki
Naciągnąć okrycie na siedzisko i przypiąć je za pomocą
nap.
10. Składanie wózka
- W celu złożenia stelaża należy zdemontować gondolę/
siedzisko spacerowe oraz zdemontować lub odblokować
przednie koła.
Następnie należy złożyć podwozie pociągając ku górze
plastikowe uchwyty składania wózka (Zdj. 11) znajdujące
się na prowadnicy. Nastąpi zablokowanie. Odwodząc
blokadę bezpieczeństwa znajdującą się na wysokości
wpięcia gondoli dokończyć składanie. Celem dalszego
zmniejszenia wymiaru wózka można zdjąć koła.
11.Regulowanie wysokości rączki
Należy jednocześnie nacisnąć na dwa czarne przyciski
umieszczone na prowadnicy po obu jej stronach, od
wewnątrz, i przesuwając prowadnicę odpowiednio,
zmniejszać lub zwiększać jej wysokość (Zdj. 12).
12.Ustawianie pozycji podnóżka
Podnóżek można ustawić w trzech pozycjach. Pozycja
niska (opuszczona): znajdujący się w pozycji poziomej

podnóżek należy pociągnąć do siebie uchwyt blokady
podnóżka (Zdj.13) i ostrożnie opuścić w dół.
Pozycja pozioma: podnóżek należy unieść z pozycji
opuszczonej do poziomu, blokada następuje automatycz-
nie.
13. Regulowanie oparcia siedziska
Oparcie siedziska można ustawić w czterech pozycjach.
Aby oparcie opuścić , pociągnij plastikową dźwignię w
tylnej części oparcia (Zdj.14) a następnie ustaw właściwą
pozycję. Aby unieść oparcie, wystarczy pchnąć je ku
górze, aż do osiągnięcia właściwej pozycji. Zablokowanie
nastąpi automatycznie.
14. Regulowanie oparcia w gondoli
Regulacja oparcia odbywa się za pomocą pokrętła znaj-
dującego się w tylnej, dolnej, zewnętrznej części gondoli
wózka. (Zdj.15)
15. Regulacja pięciopunktowego pasa bezpieczeństwa
Siedzisko wyposażone jest w 5-cio punktowe pasy bez-
pieczeństwa. Aby zamontować pasy na siedzisku przełóż
końcówki szelek (plastikowa klamra) przez otwory znaj-
dujące się w oparciu siedziska pod materiałem oraz przez
metalowe uchwyty znajdujące się bo bokach siedziska.
W ten sam sposób montujemy część pasa znajdującą się
miedzy nóżkami dziecka. Należy ich używać od momentu
gdy dziecko zacznie samodzielnie siadać. Rozepnij pasy,
wypinając widełki z centralnej klamry usadź dziecko,
wyreguluj długość pasków, tak aby przylegały do ciała
dziecka, ale go nie uciskały. A następnie wepnij widełki
wszystkich pasków do centralnej klamry. (Zdj.16)
Siedzisko posiada dodatkowy pas krokowy , który
przypinamy do barierki za pomocą napy. Jest to element
dodatkowy i nie zwalnia z konieczności stosowania 5-cio
punktowych pasów bezpieczeństwa.
Ostrzeżenie! Zawsze używaj pasów bezpieczeństwa jeśli
dziecko potrafi samodzielnie siedzieć.
16. Regulacja sztywności zawieszenia
Wózek posiada regulację sztywności tylnego zawieszenia.
Aby dokonać regulacji , przesuń dźwignię znajdującą się
pod sprężyną amortyzatora. (Zdj.17). Czynność wykonaj
przy obu tylnych kołach. Zawieszenie posiada dwa usta-
wienia: twarde i miękkie.
17. Folia przeciwdeszczowa
Wózek posiada w zestawie folię przeciwdeszczową z wy-
wietrznikiem. Aby ją zamontować naciągnij jeden koniec
na budkę a drugi na koniec gondoli.
18. Moskitiera
Gondola wózka wyposażona jest w moskitierę , aby ją
zamontować należy naciągnąć jeden jej koniec na budę
następnie odepnij rzepy , lub napy znajdujące się bo obu
stronach budki i zaczep uszko moskitiery o napę lub rzep.
(Zdj. 18) Zapnij napę lub rzep i naciągnij drugą część
moskitiery na gondolę.
19. Montaż fotelika samochodowego
Wózek oferowany jest również w wersji z fotelikiem
samochodowym dla dzieci o wadze od 0 do 13 kg. W
celu zamontowania fotelika należy najpierw przymoco-
wać adaptery do stelaża wózka, wpinając je identycznie
jak gondolę, następnie umieścić na adapterach fotelik,
wpięcie nastąpi automatycznie.
Ostrzeżenie !
Przed przystąpieniem do użytkowania fotelika upewnij
się, że adaptery są prawidłowo zamontowane. Po za-
montowaniu adapterów możemy przystąpić do montażu
fotelika, montujemy go w identyczny sposób jak gondolę.
Ostrzeżenie ! Przed przystąpieniem do użytkowania nale-
ży upewnić się, że fotelik jest prawidłowo zamontowany.
W celu wypięcia adapterów należy wcisnąć przycisk
znajdujący się na boku fotelika, czynność powtórzyć z
drugiej strony.
Do wózków marki JEDO z odpowiednim adapterem
można zamontować następujące foteliki:
1. Adapter MC:
-Maxi – Cosi : Cabriofix, Citi, Pebble
-Cybex: Aton 3, Aton 4, CBX
-Kiddy: Evolution Pro2,Evo- Lunafix
-Safety 1st : Mimas
-Recaro: Privia
2. Adapter R-YPP
- Recaro: Young Profi Plus

The stroller complies with the standard:
EN 1888:2012 WARNINGS !!!!
Before use read this manual and keep it for later. Child safety may be at risk if the
recommendations of this manual are not applied.
- The stroller should be used by one child.
- Using additional equipment (the car
seat, bag, rain cover, etc.), not allo-
wed by the equipment manufa-cturer
may negatively affect the safety.
- Adult guardian is responsible for his or
her child’s safety.
- The seat or carrycot cannot be used as
a car seat.
- Do not leave the stroller for a stopover
without brakes being pulled out.
- At the time of placing the child in the
stroller or removing him or her from the
stroller, the brakes must always be pulled
out.
- The stroller should never be left for a sto-
pover on the slopes.
- During adjustment of the strol-
ler settings, its moving parts should
be located out of the child’s reach.
- Putting too much weight in the strol-
ler, incorrect installation or using unau-
thorized accessories may lead to da-
mage or destruction of the stroller.
- Do not leave the stroller in dangerous pla-
ces, even if it is empty.
- Do not overcome the stairs, also escala-
tors and very steep places using the strol-
ler. It can be dangerous for the child.
- Never place any objects on the stroller hood.
- The shopping basket (which is a part)
provided with a stroller has maximum load
capacity of 3 kg. Heavier objects should
always be placed in the centre of the ba-
sket. The uneven distribution of weight in
the basket may badly influence the stroller
stability.
- Objects in the basket cannot protrude
outside the basket, because they could col-
lide with spokes.
- The application of spare parts not appro-
ved by the manufacturer can be dangero-
us.
- Inspecting of the stroller technical condi-
tion is in the responsibility of the user.
- When transporting the stroller over the
obstacles, one should pay attention that
none of the snap connections is unbloc-
ked.
- One should not use the additional
mattress except the one which was delive-
red in the complete set.
- The nursing bag delivered in the
complete set has got permissible load
of 2 kg.
- The present product is suitable for a
child who cannot sit up unaided, toss
and move on his/her hands and knees.
Maximum child’s mass: 9 kg
- Newborn babies should be transported in
lying position.
Entry WARNING means information rele-
vant to the safety of the child.
Entry IMPORTANT means information to
help operate the stroller.
Warning ! Notes on safety and guidance
included in this manual cannot cover all
possible situations and conditions of use.
For obvious reasons, it is not possible to
equip this product in common sense, cau-
tion and thoughtfulness. These assets sho-
uld be contributed by a person who explo-
its and operates the stroller. It is important
that each person exploiting this stroller and
its accessories is able to understand pro-
perly this manual. Therefore, any person
who will use the stroller, even for a very
short time, must be instructed about the
principles of its proper use.
When the manual guidelines are not clear,
there is a need for further clarification or
answer any other questions, please contact
an authorized sales representative of JEDO
company.
Warning !
Never leave your child unattended.
Warning !
Before use make sure that all locking devi-
ces are turned on.
Warning !
To avoid injury make sure your child is moved
away while folding or unfolding this product.
Warning !
Do not let your child play with this product.
Warning !
Use harnesses when your child starts to sit
up unaided.
Warning !
This seat is not suitable for children under
6 months of age.
Warning !
Always use fastening system.
Warning !
Check if the carrycot attachment devices
or seat, or car seat are properly attached
before use.
Warning !
This product is not suitable for running or
skating.
Warning !
The stroller is designed to transport chil-
dren from 0 month of life to maximum
body weight of 15 kg.
Warning !
- Each load suspended on the stroller guide
violates its stability.

1. Do not leave the stroller in strong
sunlight for a long time.
2. The stroller should be kept in a dry
place. If the frame of the stroller is wet,
dry it carefully.
3. In the case of the stroller contact with
sea water or using it on the streets sprin-
kled with salt, the stroller frame should be
washed and dried.
4. Do not leave the stroller on the bright
floor covering (PVC, linoleum) and
varnished wooden floors for a long time.
Rubber tyres can stain the surface in black
5. It is recommended to lubricate the
ends of axles and suspension every three
months. Before greasing, clean the ends
of the axles with the cloth. For the axes
lubricating you can use the technical
vaseline or motor oil.
6. Please check whether the air pressure
in tyres is adequate. Pressure in pneuma-
tic wheels should be 0.14 – 0.17 MPa.
7. The stroller upholstery can be cleaned
with a damp cloth or sponge using a mild
detergent.
8. The stroller upholstery should not be
washed in the washing machine.
1. P.P.H.U. Jędroch will provide a guaran-
tee for the purchased JEDO product for
a period of 24 months from the date of
purchase.
2. Complaints must be reported at the
point of sale wherein the product was
purchased.
3. The faulty product must be left clean
and preferably packed in a carton, toge-
ther with the manual.
4. Product defects detected during the
warranty period will be fixed free of charge
within 14 days from the date of delivery,
through the Seller to the Manufacturer.
5. The warranty period shall be extended
by the time of repair.
6. The repair method is determined by the
guarantor.
7. The prerequisite for accepting the com-
plaint is to have a proof of purchase with a
date filled in and signatures of both sides.
8. The manufacturer removes free of
charge a possible malfunction of the
product, provided that it is used according
to specifications and recommendations of
the manual.
9. Entries in the warranty can be made
only by the manufacturer service techni-
cians, under rigor of invalidity. No printing
of the guarantee excludes the warranty.
10. The territorial scope of guarantee
protection covers the area of the European
Union’s Member States.
11. Warranty for consumer goods being
sold does not exclude, limit or suspend
the buyer’s rights arising from the
incompatibility of goods.
The terms of the warranty
- damage caused by improper storage
- mechanical and technical damage
caused by improper use, or use not in
accordance with the manual.
- colour change (discoloration) of the
fabrics in strong, bright sunlight or impro-
per use of chemicals.
- natural tear and wear of mechanical
components resulting from the operation.
Making any changes in the construction of
the product will void the warranty.
- any discoloration caused by rubber con-
tact with the ground (e. g. PVC, linoleum,
varnished wooden floors)
- the inner tube puncture.
Care and maintenance Complaints are not subject to:

USER’S MANUAL
1. Unfolding the stroller
· Unfold the stroller by pulling the handle upwards and
holding the frame of chassis at the same time. (Picture 2)
· When the handle is in the right place, it is automatically
blocked in a snap-in mechanism. That action is assisted
by a characteristic, clearly audible “click”. Activation of
a safety lock prevents accidental folding of the stroller in
case the snap-in mechanism is not blocked.
Attention!
· Before you use the stroller make sure that the snap-in
mechanism is blocked. If it is not in the right position, it
is not safe to use the stroller.
2. Mounting and disassembling the wheels
·Take off the plastic protectors from the final parts of
the axles of the stroller. Keep the protectors in order to
protect the axles later on when you no longer use the
stroller.
In order to dismantle the 12” wheels push the springs of
the wheels as far as they will go and pull them towards
you until they slide off the axle. (Picture 3) If you want
to mount them again, push the button and insert the
wheels. Then release the button and pull them towards
you until they are blocked.
-Mount the front 10-inch wheel (Picture 4) with the fork
by putting the fork’s axle into the turntable until you hear
it click, which means that the wheel is blocked in the
right position. The front wheels may be locked to go only
forward by pushing the turntable’s lock. (Picture 5 B)
In order to dismantle the wheels push the spring of the
turntable as far as it will go and push the wheel with the
fork downwards. (Picture 5 A)
Attention!
There is grease on the wheels, which may make the
textiles dirty.
Risk of suffocation: make sure that the child does not
reach the plastic protectors of the axles
3. Starting of brakes up
· The stroller breaks by pressing the lateral brake pedal
(Picture 6), so that the ends of the brake lever block the
sprocket wheel.
· Releasing of the break is enabled by pulling the brake
pedal up.
4. Installing and uninstalling of the carrycot:
Put the hood on the chassis by entering the bolts located
in its lower part into central plug mechanism of carrycot,
it will be closed automatically. (Picture 8, 9, 19, 20)
To remove the carrycot from the chassis, press the red
buttons to the stop, located at the bottom, central part of
the carrycot. (This operation does not have to be carried
out simultaneously on both sides of the carrycot). Next
lift the carrycot upwards.
5. Footcover installation
Put the footcover on the carrycot and fasten it with the
snaps located on the sides of hood and footcover.
6. Seat installation (travel insert):
Installing and uninstalling of the seat is the same as
carrycot.
The seat can be installed in two ways; the footboard can
be in the direction of travel or vice versa.
- Put the seat upholstery by pulling it to the seat frame,
and next fasten all the snaps.
Warning !
Before use check if the carrycot or the seat are properly
locked at the latches.
Warning ! Before using the stroller always check if the
backrest is locked properly.
7. Seat’s hood installing / uninstalling
The seat has got the separate hood.
In order to place it on the walking seat, one should insert
the black holders located on the bow ends into the
plastic hooks at both sides of the seat frame/chassis.
In order to remove the hood, one should press the black
button located in its lower part and pull it up, repeat on
the other side (Picture 9)
8. Barrier installation/uninstallation
- Place the protective barrier on the frame of the seat by
inserting it into plastic holders.
In order to remove the barrier, press the red button
located in its lower part and pull it up, repeat on the other
side (Picture 10).
9. Installing of the foot muff
Stretch the covering on the seat and pin it with a snap.
10. Folding the stroller
- In order to fold the frame dismantle the gondola
(Point 4) and dismantle or unlock the front wheels.
After that fold the chassis by pulling upwards the plastic
handles for folding the stroller located at the handgrip
(Picture 11). The chassis will be locked. Pull the safety
lock located in the place where the gondola is fixed
and complete folding the frame. If you need to further
decrease the size of the stroller, you also may dismantle
the wheels.
In order to release the adapters, push the button located
at the side of the child seat. Repeat the same action at the
other side.
11. Adjusting the height of the guide rail
Simultaneously press the two black buttons located on
the guide rail, on its both sides, from inside, and moving
the guide rail properly, increase or decrease its height
(Picture 12).
12. Setting of the footboard position
The footboard can be adjusted at three positions. Low
position (lowered): the footboard located at the horizontal
position must be pulled forward by ratchet handle
(Picture 13) and carefully let down.
Horizontal position: the footboard should be lifted from
the lowered position to the level, this blockade automati-
cally locks by itself.

13. Backrest adjusting
The backrest of the seat can be adjusted at four positions.
To lower the backrest, pull the plastic lever at the rear
part of the backrest (Picture 14) and next set the correct
position. To lift the backrest, it is enough to push it
upward until it reaches the correct position. It automati-
cally locks by itself.
14. Backrest adjusting in carrycot
Backrest adjusting is performed by using the knob
located in the rear, lower, outer part of the carrycot.
(Picture 15)
15. Five-point safety belt adjusting
The seat is equipped with five-point safety belts. To
install the belts on the seat, put the ends of the harnesses
(plastic buckle) through the holes located in the seat
backrest, under the fabric, and through the metal handles
located on the both sides of the seat.
In the same way, we mount the part of the belt located
between the legs of the child. This should be used from
the day when a baby starts to sit up unaided. Taking the
forks out from the central buckle, undo the belts. Place
the baby, adjust the length of the belts so as they are
close to baby’s body, but they must not oppress the
baby. Then plug the forks of all the belts into the central
buckle (Picture 16).
The seat has an additional crotch strap which must be
pinned to the frame with a snap. This is an additional
element and does not exempt from the application of
5-point safety belts.
Warning!
Always use the safety belts if the child can sit unaided.
16. Setting of suspension stiffness
The stroller has got adjustment of the stiffness of rear
suspension. To adjust it, move the lever under the shock
absorber spring (Picture 17). This action should be made
on both rear wheels. The suspension has two settings:
hard and soft.
17. Rain cover
The stroller is equipped with rain cover and vent. To
mount it, pull one end into the hood and the other at the
end of the carrycot.
18. Mosquito net
The carrycot is equipped with a mosquito net. To mount
it, stretch one end into the hood, next undo the Velcros
or snaps, located on the both sides of the hood, and
attach mosquito net “ear” to the snap or Velcro
(Picture 18). Fasten the snap or Velcro and pull the other
part of the net on the carrycot.
19. Installing of car seat
The stroller is also offered in version with the car seat
for children weighing from 0 to 13 kg. To install the seat,
the adapters must be first attached to stroller rack/frame
plugging them identically as in case of carrycot. Next put
the seat on the adapters, it connects automatically.
Warning !
Before using the seat, make sure that the adapters are
installed properly.
After installing of the adapters you can start to install
the child seat. It is installed identically as in the case of
carrycot.
Warning !
Before using the child seat, make sure it is installed
properly.
To take the adapters out, you should press
the plastic buttons located on both sides of the seat.
The strollers of JEDO make, with adequate
adapter, one should mount the following seats:
1. MC adapter:
- Maxi – Cosi: Cabriofix, Citi, Pebble
- Cybex: Aton 3, Aton 4, CBX
- Kiddy: Evolution Pro2, Evo- Lunafix
- Safety 1st: Mimas
- Recaro: Privia
2. R-YPP adapter
- Recaro: Young Profi Plus

Kočárek v souladu s normou:
EN 1888:2012 VÝSTRAHY !!!!
Před použitím si přečtěte tento návod a uschovejte jej do budoucna.
Bezpečnost dítěte může být ohrožena, pokud nebudou dodržovány pokyny tohoto
návodu.
Výstraha!
Nikdy nenechávejte dítě bez dozoru.
Výstraha!
Před použitím se ujistěte, že jsou zajištěny
všechny blokovací mechanismy.
Výstraha!
Abyste zabránili úrazům, ujistěte se, že
je vaše dítě v bezpečné vzdálenosti při
rozkládání nebo skládání tohoto výrobku.
Výstraha!
Nedovolte dítěte hrát si s tímto výrobkem.
Výstraha! Používejte popruhy, když vaše
dítě začne samo sedět.
Výstraha!
Toto sedátko není vhodné pro děti ve věku
do 6 měsíců.
Výstraha!
Vždy používejte zajišťovací systém.
Výstraha!
Zkontrolujte, zda mechanismus upevňující
korbu nebo sedátko anebo autosedačku je
správně zajištěn před použitím.
Výstraha!
Tento výrobek není určen k běhání nebo
jízdě na kolečkových bruslích.
Výstraha!
Kočárek je určen pro děti od 0 měsíců do
maximální tělesné hmotnosti 15 kg.
Výstraha!
– Každá zátěž zavěšená na rukojeti kočár-
ku narušuje jeho stabilitu.
– Kočárek se má používat pouze pro jedno dítě.
– Používání dodatečného příslušenství
(autosedačka, taška, pláštěnka atp.)
neschváleného výrobcem může negativně
ovlivnit bezpečnost.
– Za bezpečnost dítěte zodpovídá dospělá
osoba.
– Sedátko nebo korba se nesmí používat
jako autosedačka.
– Během každého stání musí být kočárek
zabrzděný.
– Při vkládání dítěte do kočárku nebo
vyjímání z kočárku musí být kočárek vždy
zabrzděn.
– Kočárek nikdy nenechávejte stát ve
svahu.
– Při upravování nastavení kočárku se
jeho pohyblivé části musí nacházet mimo
dosah dítěte.
– Umístění příliš velké zátěže do kočárku,
nesprávná montáž nebo používání nedo-
voleného dodatečného příslušenství může
kočárek poškodit nebo zničit.
– Kočárek nenechávejte na nebezpečných
místech, i když je prázdný.
– S kočárkem nejezděte po schodech,
také pohyblivých, a také na velmi prudkém
svahu. Může to být nebezpečné pro dítě.
– Na boudičku kočárku nepokládejte žádné
předměty.
– Nákupní koš přiložený v sadě ke kočár-
ku má dovolenou únosnost 3 kg. Těžké
předměty vždy umísťujte do středu koše.
Nestejnoměrné rozmístění zátěže v koši
může narušit stabilitu kočárku.
– Předměty v koši nesmí vyčnívat do stran
mimo obrys koše, protože se mohou
zamotat do drátů kola.
– Používání náhradních dílů neschvále-
ných výrobcem může být nebezpečné.
– Uživatel je povinen dohlížet na technický
stav kočárku.
– Při přenášení kočárku přes překážky
dávejte pozor, aby se žádný zacvakávací
spoj neuvolnil.
- Nepoužívejte další matraci v gondole
navíc ten, který byl dodán.
- Dodává se kompletní výměna taška má
únosnost 2 kg.
- Tento výrobek je určený pro děti, které
ještě samy nesedí, neotáčí se a nelezou po
čtyřech. Maximální nosnos 9kg
- Nově narozené děti by měly být přepra-
vovány v poloze lže.
Heslo VÝSTRAHA znamená informace
důležité pro bezpečnost dítěte.
Heslo DŮLEŽITÉ znamená informace
usnadňující obsluhu kočárku.
Upozornění! Poznámky týkající se bezpe-
čnosti a pokyny obsažené v tomto návodu
nemohou zohlednit všechny možné
situace a podmínky používání. Z pochopi-
telných důvodů není možné tento výrobek
vybavit zdravým rozumem, opatrností
nebo pečlivostí. Tyto vlastnosti by měla
mít osoba, která používá a obsluhuje
kočárek.
Je důležité, aby každá osoba, která
používá kočárek a jeho dodatečné
příslušenství, dobře pochopila tento
návod. Proto každou osobu, která bude
používat kočárek, byť i na krátkou dobu,
je třeba poučit o zásadách jeho správného
používání.
Pokud jsou pokyny tohoto návodu nejasné
nebo je třeba bližší vysvětlení anebo
odpověď na jakýkoli jiný dotaz, obraťte se
na autorizovaného obchodního zástupce
firmy JEDO.

1. Kočárek nenechávejte delší dobu na silně
osluněných místech.
2. Kočárek uchovávejte na suchém místě.
Pokud je kostra kočárku mokrá, pečlivě ji
osušte.
3. Přijde-li kočárek do styku se slanou vo-
dou nebo se používá na ulicích posypaných
solí, umyjte a osušte kostru kočárku.
4. Kočárek nenechávejte delší dobu na
světlých podlahových krytinách (PVC, lino-
leum) a dřevěných lakovaných parketách.
Guma pneumatik může zbarvit podklad
dočerna.
5. Doporučuje se mazat koncovky náprav
a zavěšení každé tři měsíce. Před mazáním
očistěte hadříkem koncovky náprav. K ma-
zání náprav používejte technickou vazelínu
nebo motorový olej.
6. Kontrolujte, zda tlak vzduchu v pneu-
matikách je správný. Tlak v nafukovacích
kolech musí činit 0,14–0,17 Mpa.
7. Čalounění kočárku vyčistěte vlhkým
hadříkem nebo houbou a jemným pracím
prostředkem.
8. Čalounění kočárku neperte v pračce.
Ošetřování a údržba
1. P.P.H.U. Jędroch poskytuje záruku na
výrobek značky JEDO, který jste si zako-
upili, na dobu 24 měsíců od data nákupu.
2. Reklamace nahlašujte v prodejně, ve
které jste výrobek zakoupili.
3. Reklamovaný výrobek odevzdejte v či-
stém stavu a bezpečně zabalený nejlépe
do kartonu společně s návodem k obsluze.
4. Vady výrobku zjištěné v záruční době
bude zdarma odstraňovat ve lhůtě 14 dnů
od data jeho doručení prostřednictvím
prodejce výrobce.
5. Záruční doba se prodlouží o dobu
opravy.
6. Způsob opravy určuje poskytovatel
záruky.
7. Podmínkou nutnou k uznání reklamace
je předložení dokladu o nákupu s vypl-
něným datem a podpisy obou stran.
8. Výrobce zdarma odstraní případnou
nefunkčnost výrobku pod podmínkou, že
je výrobek používán v souladu s určením a
pokyny návodu k obsluze.
9. Zápisy do záručního listu mohou pro-
vádět pouze servisní zaměstnanci výrobce
pod sankcí neplatnosti. Chybějící záruční
tiskopis vylučuje záruku.
10. Územní dosah záruční ochrany zahr-
nuje území Evropské unie.
11. Záruka na prodané spotřební zboží
nevylučuje ani neomezuje a nepozastavuje
nároky kupujícího vyplývající z neshodno-
sti zboží.
Záruční podmínky
– poškození vyplývající z nesprávného
uchovávání,
– mechanická a technická poškození
vzniklá v následku nesprávného používání
nebo používání neshodného s návodem
k obsluze,
– změny barvy (vyblednutí) látky při sil-
ném oslunění nebo používání nevhodných
chemických přípravků,
– přirozené opotřebení mechanických
částí ve výsledku používání. Provádění
svépomocí jakýchkoli konstrukčních změn
výrobku způsobuje ztrátu záruky,
– veškeré zbarvení vzniklé při styku
gumy s podkladem (např. PVC, linoleum,
dřevěné lakované parkety),
– propíchnutí duše.
Reklamaci nepodléhají

NÁVOD K OBSLUZE
1.Rozkládání kostry kočárku
-Aby bylo možné rozložit kostru, je potřeba přidržet rám
podvozku a potom držíce za rukojeť potáhnout nahoru.
(Obr 1,2)
-Když je rukojeť ve správné poloze dojde do automatic-
kého zaklapnutí blokujícího mechanismu, doprovázené
zřetelným a slyšitelným „cvaknutím“. Náhodnému sesta-
vení kočárku v případě, že není blokující mechanismus ve
správné poloze, zabraňuje bezpečnostní pojistka
Upozornění!
Před započetím používání kočárku se ujistěte, zda je
blokující mechanismus zajištěný. V případě, že blokující
mechanismus není ve správné poloze, používání kočárku
je nebezpečné.
2. Montáž a demontáž kol
-Odejměte plastové chrániče z konců ose kočárku.
Chrániče uschovejte pro pozdější zabezpečení os, když
kočárek nebude používán.
Chcete-li demontovat kolo 12”, je třeba stlačit pružinu
kola a potáhnout kolo k sobě až do momentu vysunutí
kola z osy. (obr 3)
Chcete-li je znovu namontovat, stiskněte tlačítko a vsuňte
kola na osu, poté uvolněte tlačítko a táhněte kola k sobě,
dokud nezapadnou do blokády.
-Montáž 10 - palcové přední kolo s vidlicí (obr 4): vložte
osu vidlice na otočnu dokud neuslyšíte „cvaknutí”, což
znamená, že kolo je zablokované ve správné poloze. Před-
ní kola je možné uzamknout stisknutím blokády otočny a
zabránit tak jízdě v přímém směru. (obr 5 B)
Při demontáži maximálně stiskněte pružinu otočny a
táhněte kolo s vidlicí dolů. (obr 5 A)
Upozornění!
Na kolech je mazivo, které může zašpinit oblečení.
Nebezpečí udušení: Uschovejte plastové chrániče os
mimo dosah dětí.
3. Brzdění
Kočárek zabrzdíte stisknutím příčného pedálu brzdy (obr
6), tak aby konce brzdové tyče zablokovaly ozubnice kol.
Brzdu uvolníte zatažením brzdové tyče nahoru.
4. Montáž/demontáž korby
Korbu nasaďte na podvozek tak, že vložíte kolíky nacháze-
jící se v její spodní části do mechanismu centrálního
upevnění korby, zajištění nastane automaticky (obr
7,8,19,20).
Abyste korbu odebrali z podvozku, stiskněte na doraz
červená tlačítka umístěná ve spodní, střední části korby
(tuto činnost proveďte současně na obou stranách
korby). Pak korbu nadzvedněte.
5. Připevnění přikrývky na nožičky
Natáhněte přikrývku na nožičky na korbu a zapněte cvoky
umístěné na bočních stranách boudičky a přikrývky.
6. Montáž sedátka (sportovní vložky):
Sedátko montujte a demontujte jako korbu.
Sedátko můžete namontovat dvojím způsobem, podno-
žkou ve směru jízdy nebo opačně.
– Nasaďte čalounění sedátka tak, že jej natáhnete na
kostru sedátka, pak zapněte všechny cvoky.
Upozornění!
Před použitím zkontrolujte, zda jsou korba, případně
sedátko správně zajištěny v západkách.
Upozornění!
Před použitím kočárku vždy zkontrolujte, zda je opěrka
správně zajištěna.
7. Montáž/demontáž madla
– Ochranné madlo připevněte na kostru sedátka tak, že jej
vložíte do plastových úchytů.
Abyste madlo odebrali, stiskněte červené tlačítko
nacházející se v jeho spodní části a potáhněte madlo na-
horu, stejnou činnost proveďte na druhé straně (obr 9).
8. Montáž/demontáž boudičky sportovního sedátka
Sedátko má samostatnou boudičku. Abyste ji namontova-
li na sportovní sedátko, zasuňte černé spony nacházející
se na koncích oblouku do plastových úchytů umístěných
na obou stranách kostry sedátka. Abyste mohli boudičku
demontovat, stiskněte černé tlačítko nacházející se na
montážním prvku boudičky (fot. 10), pak boudičku
vysuňte z úchytů.
9. Montáž přikrývky na nožičky
Přikrývku natáhněte na sedátko a zapněte cvoky.
10. Skládání kočárku
Pro složení rámu demontujte gondolu nebo demontujte
nebo odblokujte přední kola.
Poté složte podvozek zatažením za plastové kliky, které
jsou umístěné na rukojeti. (obr 11) Bude zablokován.
Skládání dokončíme vyjmutím bezpečnostního zámku,
který se nachází ve výšce gondoly. Pro další zmenšení
rozměru kočárku je možno demontovat kola.
Odpojení adaptéru: stiskněte pojistky na obou stranách.
11. Nastavení výšky rukojeti
Stiskněte současně dvě černá tlačítka umístěná
na rukojeti na obou stranách z vnější strany a přeso-
uváním rukojeti upravujte vhodně její výšku (obr 12).
12. Nastavení polohy podnožky
Podnožku můžete nastavit do tří poloh. Nízká poloha
(spuštěná): podnožka se nachází ve vodorovné poloze,
potáhněte k sobě páčku pojistky podnožky (obr 13) a
opatrně ji spusťte dolů. Vodorovná poloha: podnožku
zvedněte
ze spuštěné polohy do zvýšené polohy, zajištění nastane
automaticky.
13. Nastavení opěrky sedátka
Opěrku sedátka můžete nastavit do čtyř poloh.
Abyste opěrku sklopili, potáhněte plastovou páčku
v zadní části opěrky (obr 14) a pak nastavte vhodnou
polohu. Abyste opěrku zvedli, zatlačte ji nahoru, až bude

ve správné poloze. Zajištění nastane automaticky.
14. Nastavení opěrky v korbě
Opěrku nastavujte pomocí otočného regulátoru
umístěného v zadní, spodní, vnější části korby kočárku
(obr 15).
15. Nastavení pětibodového bezpečnostního pásu
Sedátko je vybaveno pětibodovými bezpečnostními pásy.
Abyste namontovali pásy na sedátko, protáhněte konce
popruhů (plastová spona) otvory nacházejícími se v opěr-
ce sedátka pod látkou a kovovými držáky na bočních
stranách sedátka.
Stejným způsobem namontujte část pásu, která se
nachází mezi nožičkami dítěte. Používejte je od okamžiku,
kdy dítě začne samo sedět. Rozepněte pásy, odepněte
vidlice z centrální spony, posaďte dítě, upravte délku
pásů tak, aby přiléhaly k tělu dítěte, ale netlačily jej. Pak
zapněte vidlice všech pásů do centrální spony (obr 16).
Sedátko má dodatečný krokový pás, který se připíná k
madlu pomocí cvoků. Je to dodatečný prvek, ale zároveň
s ním se musí používat pětibodové bezpečnostní pásy.
Upozornění! Bezpečnostní pásy používejte vždy, když dítě
začíná samo sedět.
16. Nastavení tuhosti zavěšení
Kočárek má nastavení tuhosti zadního zavěšení. Abyste
provedli nastavení, stiskněte páčku umístěnou pod
pružinou tlumiče (obr 17). Tuto činnost proveďte u obou
zadních kol. Zavěšení má dvě nastavení: tvrdé a měkké.
17. Fólie proti dešti
Kočárek má ve výbavě fólii proti dešti s větracím okén-
kem. Abyste ji namontovali, natáhněte jeden konec na
boudičku a druhý na konec korby.
18. Moskytiéra
Korba kočárku je vybavena moskytiérou, abyste ji
namontovali, natáhněte jeden z jejích konců na boudičku,
pak odepněte suché zipy nebo cvoky, které se nacházejí
na obou stranách boudičky, a zavěste ouško moskytiéry
na cvok nebo suchý zip (obr 18). Cvok nebo suchý zip
zapněte a natáhněte druhou část moskytiéry na korbu.
19. Montáž autosedačky
Kočárek je také nabízen ve verzi s autosedačkou
pro děti s hmotností od 0 kg do 13 kg. Abyste namonto-
vali autosedačku, nejprve připevněte adaptéry na kostru
kočárku tak, že je nasadíte stejným způsobem jako korbu,
pak na adaptéry nasaďte autosedačku, zajištění nastane
automaticky.
Upozornění!
Dříve než začnete autosedačku používat, ujistěte se, že
adaptéry jsou správně namontovány.
Po namontování adaptérů namontujte autosedačku,
montujte stejným způsobem jako korbu.
Upozornění!
Dříve než začnete autosedačku používat, ujistěte se, že je
správně namontována.
Abyste adaptéry odjistili:
Aby se odpojte adaptér, stisknutím tlačítka na straně
sedadla, Opakujte na druhé straně
Pro kočárky JEDO s odpovídajícím adaptéru je možné
namontovat následující sedadla:
1. Adapter MC:
Maxi – Cosi : Cabriofix, Citi, Pebble
Cybex: Aton 3, Aton 4, CBX
Kiddy: Evolution Pro2,Evo- Lunafix
Safety 1st : Mimas
Recaro: Privia
2. Adapter R-YPP
- Recaro: Young Profi Plus

Ein Kinderwagen nach der Norm EN 1888: 2012
WARNUNGEN !!!
Vor dem Gebrauch lesen Sie bitte diese Anleitung und bewahren Sie sie für später auf.
Die Sicherheit ihres Kindes kann gefährdet werden, wenn die Empfehlungen dieses
Handbuches nicht beachtet werden.
Warnung:
Lassen Sie ihr Kind nie unbeaufsichtigt im
Wagen sitzen.
Warnung:
Vergewissern Sie sich vor Gebrauch, dass
alle Verriegelungen geschlossen sind.
Warnung:
Um Verletzungen zu vermeiden, vergewis-
sern Sie sich, dass ihr Kind nicht in der
Nähe des Kinderwagens ist, wenn er au-
fge-klappt oder zusammengeklappt wird.
Warnung:
Lassen Sie Ihr Kind mit diesem Produkt
nicht spielen.
Warnung:
Verwenden Sie einen Sicherheitsgurt,
sobald ihr Kind selbständig sitzen kann.
Warnung:
Dieser Sitz ist nicht geeignet für Kinder
unter 6 Monaten.
Warnung:
Schließen Sie grundsätzlich die Verschlüsse.
Warnung:
Überprüfen Sie, ob die Montageeinrich-
tungen für die Babytragetasche, den Sitz
oder den Autositz vor Gebrauch richtig
befestigt sind.
Warnung:
Dieses Produkt ist für Laufen oder Skaten
nicht geeignet.
Warnung:
Der Kinderwagen ist bestimmt für Kinder
von 0 Monaten bis zu einem Gewicht von
max. 15 kg.
Warnung:
An der Führungsleiste des Kinderwagens
darf nichts aufgehängt werden, da da-
durch die Stabilität beeinträchtigt wird.
- Der Kinderwagen darf nur für ein Kind
verwendet werden.
- Der Gebrauch von Zubehör, das nicht
vom Hersteller genehmigt ist (Autositz,
Tasche, Regenschutz, etc.), kann die
Sicherheit negativ beein-flussen.
-Für die Sicherheit des Kindes ist ein
erwachsener Babysitter verant-wortlich.
- Der Sitz oder die Babytragetasche kann
nicht als Autositz verwendet werden.
- Lassen Sie den Kinderwagen nicht ohne
angezogene Bremsen stehen.
- Die Bremsen müssen immer ange-zogen
sein, wenn Sie ihr Kind in den Kinderwa-
gen setzen oder es heraus-nehmen .
- Lassen sie den Kinderwagen nie an
abschüssigen Stellen stehen.
- Wenn man am Kinderwagen etwas ein-
stellt, dann sollten sich seine beweglichen
Teile außerhalb der Reichweite des Kindes
befinden.
- Zu viel Gewicht im Kinderwagen,
fehlerhafte Montage bzw. die Verwendung
nicht zugelassener Zubehörteile kann
zur Beschädigung oder Zerstörung des
Kinderwagens führen.
- Lassen Sie den Kinderwagen nicht an
gefährlichen Orten stehen, auch wenn er
leer ist.
- Verwenden Sie den Kinderwagen nicht
auf Stufen, Rolltreppen und sehr ab-
schüssigem Gelände, da es für das Kind
gefährlich sein kann.
- Legen Sie niemals Gegenstände auf das
Verdeck des Kinderwagens.
- Der mitgelieferte Einkaufskorb hat ein
Gewichtslimit von 3 kg. Schwere Gegen-
stände sollten immer in die Mitte des
Einkaufkorbs gelegt wer-den. Ungleiche
Gewichtsverteilung im Einkaufskorb
kann die Stabilität des Kinderwagens
beeinträchtigen.
- Gegenstände im Einkaufskorb dürfen
nicht über die Seiten des Einkaufkorbs
hinausragen, da sie sich in die Speichen
der Räder verfangen können.
- Die Verwendung von Ersatzteilen, die
nicht vom Hersteller genehmigt sind,
könnte Folgen für die Sicherheit haben.
- Der Kinderwagen muss vom Be-nutzer
regelmäßig gewartet werden.
- Wenn Sie den Kinderwagen über Hinder-
nisse tragen, achten Sie stets darauf, dass
keine Arretierungen entriegelt sind.
- Es sollte nicht in einem Babytragetasche
zusätzliche Matratze, darüber hinaus, die
im Lieferumfang enthalten.
- Im Lieferumfang Tasche für Baby-Zube-
hör hat die zulässige Tragkraft 2 kg.
- Dieses Produkt ist geeignet für ein Kind,
das nicht allein sitzen kann, stolpern und
zu bewegen, auf Ihren Händen und Knien.
Das maximale Gewicht des Kindes: 9 kg
- Neugeborenen Kinder transportieren Sie
die Bauchlage.
WARNUNG bedeutet die für die Sicherheit
des Kindes wichtigen Informationen.
WICHTIG bedeutet Informationen für die
einfache Bedienung des Kinderwagens.
Achtung: Anmerkungen bezüglich der
Sicherheit und Hinweise, die in diesem
Handbuch enthalten sind, können nicht
alle möglichen Situationen und Bedingun-
gen für
die Verwendung berücksichtigen. Aus ver-
ständlichen Gründen ist es nicht möglich
dieses Produkt mit gesundem Mensche-
nverstand, Vorsicht und Rücksichtnahme
auszustatten. Diese Eigenschaften sollte
die Person besitzen, die diesen Kinderwa-
gen benützt.
Es ist wichtig, dass jede Person, die die-
sen Kindewagen und das Zubehör benützt,
diese Anleitung versteht.
Daher sollte jede Person, die diesen Kin-
derwagen, sei es auch nur für eine kurze
Zeit benützt, über den richtigen Gebrauch
unterwiesen werden.
Wenn die Hinweise der Anleitung nicht
klar sind, wenn es einen Bedarf für we-
itere Klärung gibt oder um andere Fragen
zu beantworten, sollte man mit einem
autorisierten Händler von JEDO Kontakt
aufnehmen.

1. Setzen Sie ihren Kinderwagen nie über
längere Zeit dem prallen Sonnenlicht aus.
2. Der Kinderwagen sollte an einem troc-
kenen Ort aufbewahrt werden. Wenn der
Rahmen des Kinder-wagens nass ist, sollte
man ihn sorgfältig trocknen.
3. Wird der Kinderwagen am Meer oder auf
salzgestreuten Straßen verwendet, spritzen Sie
das Gestell ab und trocknen Sie es danach.
4. Bitte stellen Sie den Kinder-wagen nicht
für längere Zeit auf hellen Bodenbelägen,
insbesondere PVC und Linoleum und
lackierten Holzböden ab, da sich bedingt
durch die Gummireifen die Oberfläche
schwarz färben könnte.
5. Es wird empfohlen, die Achsen-enden
und die Aufhängung alle drei Monate abzu-
schmieren. Vor dem Abschmieren sollte
man mit einem Tuch die Achsenenden
reinigen. Zum Abschmieren der Achsen
können Sie technische Vaseline oder
Motorenöl verwenden.
6. Bitte überprüfen Sie regelmäßig den Lu-
ftdruck in den Reifen. Der Luftdruck in den
Luftreifen sollte 0,14 – 0,17 Mpa betragen.
7. Die Polsterung des Kinderwagens kann mit
einem feuchten Tuch oder Schwamm mit einem
milden Reinigungsmittel gereinigt werden.
8. Die Polsterung des Kinderwagens sollte nicht
in der Waschmaschine gewaschen werden.
Pflege und Wartung
1. P.P.H.U. Jędroch gewährt für das von
Ihnen erworbene Produkt Jedo eine Ga-
rantie für einen Zeitraum von 24 Monaten
ab dem Kaufdatum.
2. Beschwerden sind an die Verkaufsstelle
zu richten, wo das Produkt gekauft wurde.
3. Das defekte Produkt soll in einem sau-
beren Zustand und sicher in einen Karton,
am besten mit einer Bedienungsanleitung
verpackt, zurückgegeben werden.
4. Produktfehler, die während der Garan-
tiezeit auftreten, werden innerhalb von
14 Tagen ab dem Datum der Lieferung
an den Verkäufer, durch den Hersteller
kostenlos repariert werden
5. Die Garantiezeit wird um die Zeit der
Reparatur verlängert.
6. Die Reparaturmethode wird vom Her-
steller entschieden..
7. Voraussetzung für die Annahme der
Beschwerde ist der Kaufnach-weis, der
sowohl vom Lieferanten wie vom Käufer
unterschrieben sein muss, versehen mit
dem Kaufdatum.
8. Der Hersteller entfernt kostenlos die
mögliche Fehlfunktion des Produkts, sofern
Sie es bestimmungsgemäß und nach der
Bedienungsanleitung verwendet wurde.
9. Einträge in die Garantiekarte können
nur von den Service-Technikern des Her-
stellers vorge-nommen werden, um gültig
zu sein. Das Fehlen des Eintrags schließt
jegliche Garantie aus.
10. Der Garantieschutz gilt für das Gebiet der EU.
11. Die Garantie für verkaufte Konsum-
güter schließt nicht aus, begrenzt nicht
oder setzt die Rechte des Käufers nicht
aus, die aus der Unvereinbarkeit der
Waren mit dem Vertrag erfolgen.
Garantiebedingungen
- Schäden, die aus unsachgemäßer Lage-
rung resultieren
- Technischer und mechanischer
Beschädigung durch unsachgemäßen Ge-
brauch oder Missachtung der Gebrauch-
sanleitung.
- Farbwechsel (Verfärbung) des Gewebes
durch pralles Sonnenlicht oder unsachge-
mäßer Verwendung von Chemikalien.
- Natürlicher Abnutzung von mechani-
schen Komponenten, die aus der Nutzung
resultiert oder bei eigenen Veränderungen
des Produkts
- Jeder Verfärbung, die durch den Kontakt
vom Gummi mit dem Boden verursacht
wird (z.B. PVC, Linoleum, lackiertes
Holzparkett)
- Beschädigung des Luftreifens
Der Garantieanspruch entfällt bei

BEDIENUNGSANLEITUNG
1 Kinderwagen öffnen
· Kinderwagen wird geöffnet, indem Griff nach oben bei
gleichzeitigem Halten des Rahmens des Fahrgestells
gezogen wird. (Abb. 1,2)
· Wenn der Griff in entsprechender Position ist, wird er
automatisch im Schnappverschluss blockiert, dabei lässt
sich charakteristischen „Klick” hören. Betätigung Sicher-
heitsblockade beugt vor zufälligem Zusammenklappen
des Kinderwagens vor, falls Schnappverschluss in nicht
blockierter Stellung stehen würde.
Warnung!
· Vor Benutzung des Kinderwagens soll man immer
prüfen, ob Schnappverschluss in blockierter Position
steht. Falls der Verschluss in richtiger Position nicht
steht, ist die Benutzung des Kinderwagens gefährlich.
2.Montage und Demontage von Rädern
· Plastikschützer aus Endungen der Kinderwagenachsen
herausnehmen. Schützer behalten, um später Achsen
wieder zu schützen, wenn der Kinderwagen nicht mehr
benutzt wird.
Um Rad 12” zu demontieren, Radfeder bis zum Ende
drücken und Rad zu sich ziehen, bis es aus der Achse
herausgeht.(Abb. 3) Um es wieder zu montieren, drücken
Sie die taste und schieben Sie Räder an Achse ein, dann
lassen Sie die Taste los und ziehen Sie Rad zu sich bis es
blockiert wird.
- Vorderes 10” Rad (Abb. 4) durch Einlegen der Gabe-
lachse in Drehscheibe bis es sich „Klick” hören lässt,
der Blockieren des Rades in richtiger Position bedeutet,
montieren. .
Vordere Räder können zur geradeaus Fahrt durch Ein-
drücken der Blockade der Drehscheibe blockiert werden.
(Abb. 5 B)
Zur Demontage der Räder soll Drehscheibenfeder bis
zum Anschlag gedrückt werden und Rad mit Gabel nach
unten gezogen werden.
Warnung!
An den Rädern gibt es Schmiermittel, das Textilien
schmutzen kann. (Abb. 5 A)
Erdrosselungsgefahr: sorgen, damit Plastikschützer der
Achsenendungen in die Hände des Kindes nicht gelangen.
3. Das Betätigen der Bremsen
· Der Kinderwagen wird durch das Treten des Brem-
spedals (Abb. 6) gebremst. Die Enden der Bremsstange
blockieren die Zahnkränze der Räder.
· Die Bremse wird durch das Ziehen des Brems-pedals
nach oben gelöst.
4. Montage/Entfernen der Babytragetasche:
Legen Sie die Babytragetasche auf das Fahrgestell.
Durch die Einführung der Stifte, die sich im unteren Teil
befinden, in den Mechanismus der Zentralverriegelung
der Babytragetasche, erfolgt das Schließen automatisch
(Abb. 7,8, 19,20).
Entfernen Sie die Babytragetasche vom Fahr-gestell,
indem Sie die roten Tasten im unteren, zentralen Teil der
Gondel bis zum Anschlag drücken.
(Dies muss nicht gleichzeitig auf beiden Seiten der Ba-
bytragetasche erfolgen). Dann soll die Babytragetasche
angehoben werden.
5. Anbringen der Beindecke
Legen Sie die Beindecke auf die Babytragetasche und be-
festigen Sie sie mit Druckknöpfen, die sich an den Seiten
des Verdecks und der Beindecke befinden.
6. Montage des Sitzes (zumSpazierengehen)
Der Sitz wird wie die Babytragetasche angebracht und
entfernt. Der Sitz kann auf zwei Arten montiert werden,
mit der Fußauflage in oder gegen die Fahrtrichtung,
- der Sitzbezug wird angebracht, indem man ihn über den
Sitzrahmen zieht, dann schließen Sie alle Druckknöpfe.
Warnung:
Vor Gebrauch sollte man prüfen, ob die Babytragetasche
oder der Sitz richtig
verriegelt sind.
Warnung:
Vor Gebrauch bitter immer prüfen, ob die Rückenlehne
richtig verriegelt ist.
7. Anbringen/ Entfernen des Verdecks des Sitzes
Der Sitz verfügt über ein separates Verdeck. Um ihn an-
zubringen, stecken Sie die schwarzen Handgriffe, die sich
an den Enden der Lenkstange befinden, in die Plastikha-
ken an beiden Seiten des Sitzrahmens. Um das Verdeck
zu entfernen, drücken Sie die schwarze Taste (Abb. 9),
dann ziehen Sie das Verdeck aus den Haken heraus.
8. Anbringung/Entfernung des Sicherheitsbügels
- Befestigen Sie den Sicherheitsbügel, indem Sie ihn in
die Kunststoffhalter stecken. Um den Sicherheitsbügel zu
entfernen, drücken Sie die rote Taste, die sich unten am
Sicherheitsbügel befindet und ziehen Sie ihn nach oben,
verfahren sie ebenso auf der anderen Seite. (Abb. 10).
9. Montage der Abdeckung an die Füße
Strecken Sie die Abdeckung auf den Sitzplatz und befesti-
gen Sie sie mit Druckknöpfen.
10. Zusammenklappen des Kinderwagens
- Zum Zusammenklappen der Stellage soll Gondel de-
montiert werden, sowie vordere Räder sollen demontiert
oder entlockt werden.
Dann soll Fahrgestell zusammengeklappt werden, indem
Plastikgriffe zum Kinderwagenzusammenklappen, die
sich am Griff befinden, nach oben gezogen werden (Abb.
11). Es kommt zur Blockierung. Sicherheitsblockade,
die sich an Montagestelle der Gondel befindet, abziehen
und somit Zusammenklappen beenden. Um die Größe
des Kinderwagens noch zu verkleinern, kann man Räder
demontieren.
Um Adapter herauszunehmen, soll man Taste, die sich an
der Seite des Kindersitzes befindet, eindrücken, Tätigkeit
an der anderen Seite wiederholen.
11. Die Höhe des Lenkers einstellen
Drücken Sie gleichzeitig die beiden innenliegenden
This manual suits for next models
1
Table of contents
Languages:
Other Jedo Stroller manuals
Popular Stroller manuals by other brands

Kid Trax Toys
Kid Trax Toys Ford Bronco KT1505WM owner's manual
Tendercare
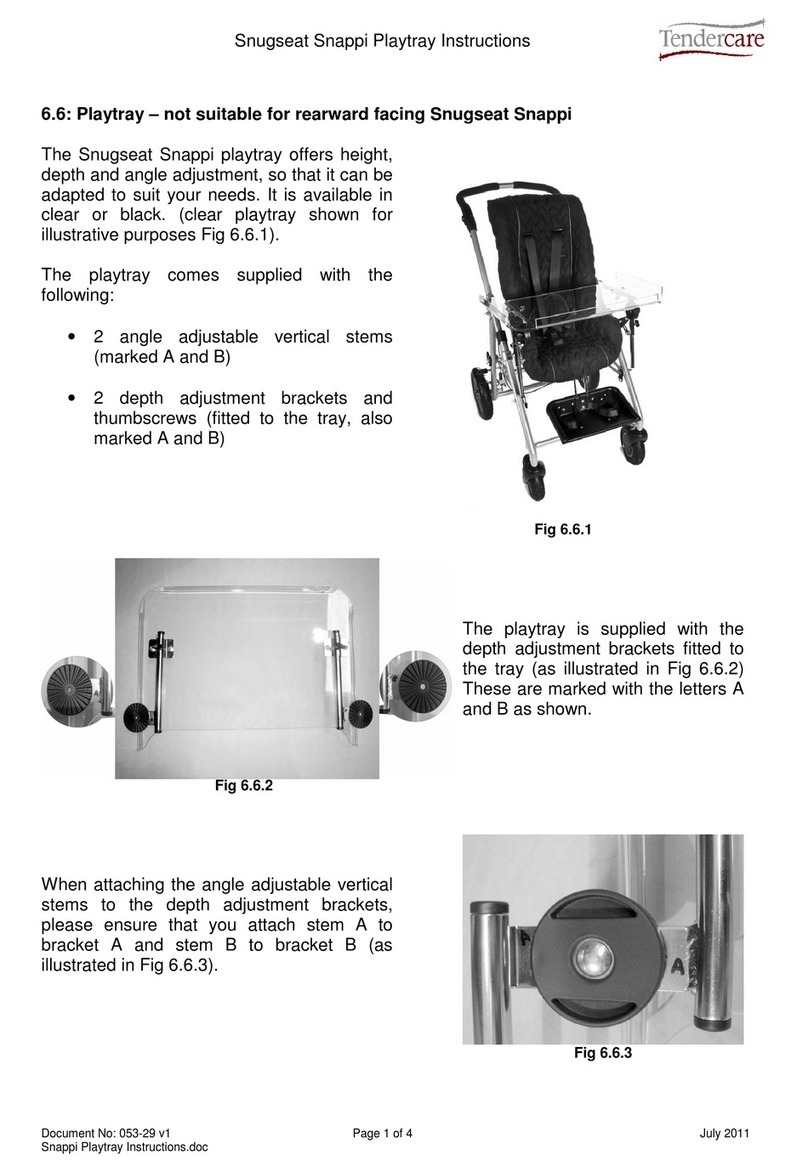
Tendercare Snugseat Snappi instructions

Peg-Perego
Peg-Perego Culla Primonido Instructions for use

Kolcraft
Kolcraft Tour Sport Universal Umbrella instruction sheet
Kolcraft
Kolcraft Jeep Liberty 3-Wheel Stroller instruction sheet
Graco
Graco Aire 4 Platinum owner's manual
