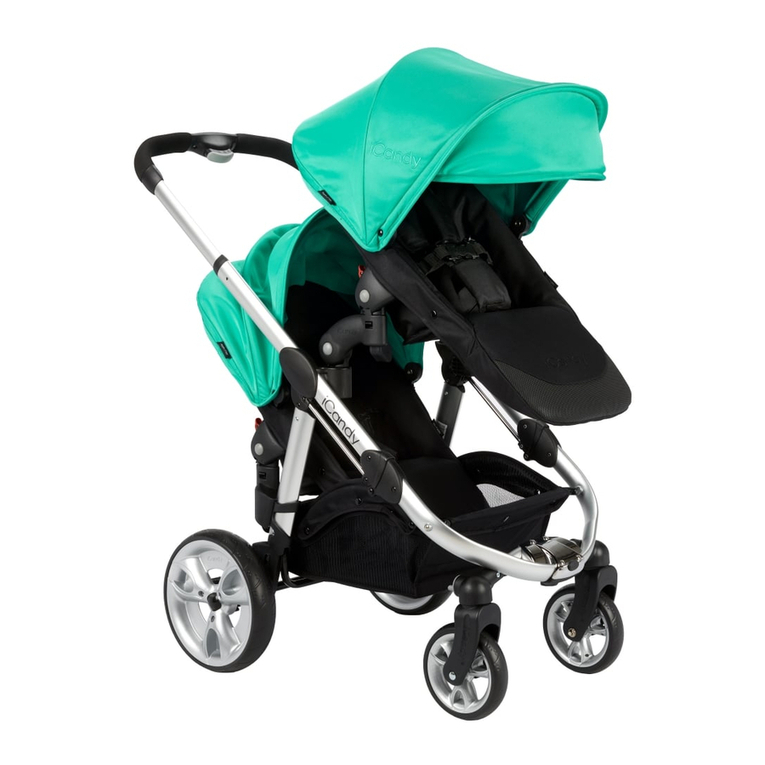
Jedo Trim User manual

RUCZDEENPL

Z dbałością o szczegóły stworzyliśmy oryginalny,
funkcjonalny i nowoczesny wózek – TRIM.
Dziękujemy za dokonanie zakupu!!
—
With attention to detail we created the original,
functional and modern baby carriage – TRIM.
Thank you for your purchase!!
—
Mit der Sorge um Details haben wir eine originalen,
funktionalen und modernen – TRIM-Wagen geschaffen.
Vielen Dank für Ihren Einkauf!!
—
S důrazem na detail jsme vytvořili originální, funkční
a moderní vysokozdvižný vozík – TRIM.
Děkujeme za Váš nákup!!
—
С заботливостью о деталях мы создали оригинальную,
функциональную и современную коляску – TRIM.
Спасибо за совершение покупки!!
22a
22b
23a
23b
27
26
25
24
28
info: to jest 1-sza strona bloku
info: to jest zagięte skrzydełko okładki

3
2
4
5
1
7
6
9b
9a
10
8
14
13
11
12
15
16
17
19b
19a
19c
20
18
22a
21b
22b
23a
23b21a
27
26
25
24
28
info: to jest rozłożone skrzydełko
info: to jest 1-sza strona bloku

instrukcja obsługi | PL instrukcja obsługi | PL
Wózek zgodny z normą: EN 1888:2012
OSTRZEŻENIA !!!!!
GONDOLĘ I SIEDZISKO WÓZKA TRIM
UŻYTKOWAĆ JEDYNIE Z PODWOZIEM
TRIM.
WAŻNE! Zatrzymaj tę instrukcję do
przyszłego użytkowania.
Przed użytkowaniem przeczytać niniejszą
instrukcję. Bezpieczeństwo dziecka może
być zagrożone, jeśli zalecenia niniejszej
instrukcji nie będą stosowane.
OSTRZEŻENIE!
Nigdy nie zostawiaj swojego dziecka bez
opieki.
OSTRZEŻENIE!
Upewnij się przed użyciem , czy wszystkie
urządzenia blokujące są włączone.
OSTRZEŻENIE!
Aby uniknąć obrażeń, upewnij się, czy
twoje dziecko jest odsunięte kiedy rozkła-
da się lub składa niniejszy wyrób.
OSTRZEŻENIE!
Nie pozwalaj dziecku bawić się niniejszym
wyrobem.
OSTRZEŻENIE!
Używaj uprzęży, gdy twoje dziecko
zacznie samodzielnie siadać.
OSTRZEŻENIE!
To siedzisko nie jest odpowiednie dla
dzieci w wieku poniżej 6. miesiąca życia.
OSTRZEŻENIE!
Zawsze używaj systemu zapięć.
OSTRZEŻENIE!
Sprawdź czy urządzenia mocujące gondolę
lub siedzisko lub fotelik samochodowy są
prawidłowo załączone przed użyciem.
OSTRZEŻENIE!
Niniejszy wyrób nie jest odpowiedni do
biegania lub jazdy na rolkach.
OSTRZEŻENIE!
Wózek jest przeznaczony do transportu
dzieci od 0 miesiąca życia do maksymalnej
masy ciała 15 kg.
OSTRZEŻENIE!
• Jakiekolwiek obciążenie dołączone do
uchwytu i/lub tylnej strony oparcia i/lub
do boków wózka będzie wpływać
na stateczność wózka.
• Wózek powinien być użytkowany przez
jedno dziecko
• Akcesoria (fotelik, torba, osłona przed
deszczem itp.) , które nie są zaakcepto-
wane przez producenta, nie powinny być
stosowane.
• Za bezpieczeństwo dziecka jest odpo-
wiedzialny jego dorosły opiekun
• Siedzisko lub gondola nie mogą być uży-
wane jako fotelik samochodowy.
• Nie należy pozostawiać wózka na posto-
ju bez zaciągniętych hamulców.
• W czasie umieszczania dziecka w wózku
lub wyjmowaniu go z wózka, hamulce
musza być zawsze zaciągnięte
• Wózka nie należy nigdy pozostawiać na
postoju na pochyłościach.
• W czasie regulowania ustawień wózka,
jego części ruchome powinny znajdować
się poza zasięgiem dziecka.
• Umieszczenie zbyt dużego ciężaru
w wózku, nieprawidłowy montaż lub
używanie niedozwolonego wyposażenia
dodatkowego mogą prowadzić do uszko-
dzenia lub zniszczenia wózka.
• Nie należy pozostawiać wózka w miej-
scach niebezpiecznych, także jeśli jest
pusty.
• Nie należy pokonywać wózkiem scho-
dów, także ruchomych, oraz miejsc
bardzo stromych. Może to być niebez-
pieczne dla dziecka.
• Nigdy nie należy umieszczać żadnych
przedmiotów na budce wózka.
• Dostarczany w komplecie z wózkiem
kosz na zakupy ma dopuszczalną ładow-
ność 3 kg. Cięższe przedmioty umiesz-
czać zawsze na środku kosza. Nierówno-
mierne rozmieszczenie ciężaru w koszu
może upośledzić stabilność wózka.
• Przedmioty w koszu nie mogą wystawać
na bokach poza obręb kosza, ponieważ
mogą się wkręcić w szprychy.
• Zastosowanie nie dopuszczonych przez
producenta części zamiennych może być
niebezpieczne.
• Doglądanie stanu technicznego wózka
jest obowiązkiem użytkownika.
• Przy przenoszeniu wózka przez prze-
szkody należy uważać, żeby żadne
z połączeń zatrzaskowych się nie odblo-
kowało.
• Nie należy stosować w gondoli dodat-
kowego materacyka oprócz tego, który
został dostarczony w zestawie.
• Dostarczana w komplecie torba pielęgna-
cyjna ma dopuszczalną ładowność 2 kg.
• Niniejszy wyrób jest odpowiedni dla
dziecka, które nie może siedzieć samo-
dzielnie, przewracać się i poruszać się na
swoich rękach i kolanach. Maksymalna
masa dziecka: 9 kg.
• Nowo narodzone dzieci należy przewozić
w pozycji leżącej.
Hasło OSTRZEŻENIE! oznacza informacje
istotne dla bezpieczeństwa dziecka
Hasło UWAGA! oznacza informacje uła-
twiające obsługę wózka
UWAGA!
Uwagi odnośnie bezpieczeństwa oraz
wskazówki zawarte w niniejszej instrukcji
nie są w stanie uwzględnić wszystkich
możliwych sytuacji i warunków użytkowa-
nia. Ze zrozumiałych względów nie da się
wyposażyć niniejszego produktu w zdro-
wy rozsądek, ostrożność czy troskliwość.
Walory te powinna wnieść osoba użytku-
jąca i obsługująca wózek.
Ważnym jest, żeby każda osoba użytkują-
ca wózek i jego wyposażenie dodatkowe
dobrze rozumiała niniejsza instrukcję.
Dlatego każdą osobę, która będzie posłu-
giwała się wózkiem, nawet przez bardzo
krótki czas, należy poinstruować co do za-
sad jego prawidłowego użytkowania. Jeśli
wskazówki instrukcji są niejasne zachodzi
potrzeba bliższych wyjaśnień lub odpo-
wiedzi na jakiekolwiek inne pytania, należy
zwrócić się do autoryzowanego przedsta-
wiciela handlowego firmy JEDO.
PIELĘGNACJA I KONSERWACJA
1. Nie należy pozostawiać wózka na dłużej
w miejscach silnie nasłonecznionych.
2. Wózek należy przechowywać w suchym
miejscu. Jeżeli rama wózka jest mokra,
należy ją starannie osuszyć.
3. W przypadku kontaktu wózka z woda
morską lub użytkowania go na ulicach
posypywanych solą, należy ramę wózka
umyć i osuszyć.
4. Nie należy pozostawiać wózka na dłuż-
szy czas na jasnych wykładzinach podło-
gowych (PCV, linoleum) oraz parkietach
drewnianych lakierowanych. Guma opon
może zabarwić podłoże na czarno.
5. Zalecane jest smarowanie końcówek osi
oraz zawieszenia co trzy miesiące. Przed
smarowaniem należy oczyścić szmatką
końcówki osi. Do smarowania osi można
używać wazeliny technicznej lub oleju
samochodowego.
PL instrukcja

instrukcja obsługi | PL instrukcja obsługi | PL
1. ROZKŁADANIE WÓZKA
Odbezpieczyć blokadę zabezpieczającą
stelaż przed rozłożeniem (zdj. 1).
Rozłożenie wózka następuje poprzez po-
ciągnięcie rączki do góry, gdy znajdzie się
ona w odpowiedniej pozycji następuje au-
tomatyczne jej zablokowanie w zamknię-
ciu zatrzaskowym, któremu towarzyszy
wyraźnie słyszalne „kliknięcie”.
2. MONTOWANIE I DEMONTOWANIE KÓŁ
Aby zdemontować tylne koła wciśnij przy-
cisk znajdujący się po wewnętrznej stronie
stelaża (naprzeciw hamulca) (zdj. 2) i wy-
pnij koło wraz z osią. Czynność powtórzyć
po drugiej stronie.
Aby je powtórnie zamontować wciśnij
przycisk służący do wypinania kół i wsuń
oś koła do otworu znajdującego się na
stelażu (zdj. 3). Następnie zwolnij przycisk
i pociągnij je do siebie aż do momentu
zablokowania.
Zamontować przednie 10” koło z wideł-
kami poprzez włożenie osi widełek do
obrotnicy, aż do usłyszenia kliknięcia ozna-
czającego zablokowanie koła we właściwej
pozycji.
Przednie koła można zablokować do jazdy
na wprost poprzez obrócenie mechani-
zmu blokady kół znajdującego się po obu
stronach stelaża pod podnóżkiem (zdj. 4)
w lewo (patrząc od strony rączki) aż do
usłyszenia kliknięcia.
Aby zdemontować koła przednie należy
wcisnąć szary przycisk znajdujący się od
wewnętrznej strony stelaża zaraz pod
elementem obrotowym blokującym przed-
nie koła (zdj. 5).
OSTRZEŻENIE! Na kołach jest smar, który
może zabrudzić tekstylia.
6. Należy kontrolować czy ciśnienie
powietrza w oponach jest odpowiednie.
Ciśnienie w kołach pompowanych powin-
no wynosić 0,14 – 0,17 MPa.
7. Tapicerkę wózka można czyścić wilgotną
szmatką lub gąbką używając delikatnego
środka piorącego.
8. Tapicerki wózka nie należy prać w pralce.
9. Użytkownik zobowiązany jest do ruty-
nowych przeglądów, konserwacji i czysz-
czenia wózka.
WARUNKI GWARANCJI
1. P.P.H.U. Jędroch udziela gwarancji na
zakupiony przez Państwa produkt marki
JEDO na okres 24 miesięcy od daty zakupu.
2. Reklamacje należy zgłaszać w punk-
cie sprzedaży, w którym produkt został
zakupiony.
3. Reklamowany produkt należy oddać
w stanie czystym oraz bezpiecznie zapa-
kowany najlepiej w karton wraz z instruk-
cją obsługi.
4. Wady produktu wykryte w okresie
gwarancji będą bezpłatnie usuwane
w terminie 14 dni od daty dostarczenia
go, za pośrednictwem Sprzedawcy do
Producenta.
5. Okres gwarancji ulega przedłużeniu
o czas naprawy.
6. Sposób naprawy określa udzielający
gwarancji.
7. Warunkiem niezbędnym do uwzględ-
nienia reklamacji jest posiadanie dowodu
zakupu z wypełnioną datą oraz podpisami
obu stron..
8. Producent bezpłatnie usunie ewentual-
ną niesprawność produktu pod warunkiem
wykorzystywania go zgodnie z przezna-
czeniem i zalecenia instrukcji obsługi.
9. Wpisy w gwarancji mogą dokonywać je-
dynie serwisanci Producenta pod rygorem
nieważności. Brak druku gwarancyjnego
wyklucza gwarancję.
10. Terytorialny zasięg ochrony gwaran-
cyjnej obejmuje obszar Unii Europejskiej,
Norwegię, Szwajcarię oraz terytorium
Federacji Rosyjskiej.
11. Gwarancja na sprzedany towar kon-
sumpcyjny nie wyłącza, nie ogranicza, ani
nie zawiesza uprawnień kupującego wyni-
kających z niezgodności towaru.
REKLAMACJI NIE PODLEGAJĄ
• uszkodzenia wynikające z niewłaściwego
przechowywania
• uszkodzenia mechaniczne i techniczne
powstałe w wyniku niewłaściwego użyt-
kowania, bądź używania niezgodnego
z instrukcją obsługi
• zmiany koloru (odbarwienie) tkaniny przy
silnym nasłonecznieniu lub stosowaniu
niewłaściwych środków chemicznych
• naturalne zużycie elementów mecha-
nicznych będących wynikiem eksploata-
cji. Wprowadzanie jakichkolwiek wła-
snych zmian konstrukcyjnych produktu
powoduje utratę gwarancji
• wszelkie przebarwienia powstałe
w wyniku kontaktu gumy z podłożem
(np. PCV, linoleum, parkiety drewniane
lakierowane)
• przebicie dętki
3. URUCHAMIANIE HAMULCÓW
Wózek hamuje się naciskając pedał hamul-
ca umiejscowiony przy prawym kole (od
strony rączki) (zdj. 6).
Zwolnienie hamulca następuje poprzez
naciśnięcie identycznego pedału hamulca
umiejscowionego przy kole lewym.
4. MONTAŻ / DEMONTAŻ GONDOLI
Założyć gondolę na podwozie wprowa-
dzając plastikowe adaptery gondoli znaj-
dujące się w jej dolnej części w mechanizm
centralnego wpięcia. Zamknięcie nastąpi
automatycznie.
Aby zdemontować gondolę należy wci-
snąć równocześnie przyciski znajdujące się
po obu stronach gondoli (zdj. 7) następnie
należy unieść gondolę do góry.
OSTRZEŻENIE! Przed użyciem sprawdzić
czy gondola jest prawidłowo zablokowana
w centralnym wpięciu.
5. MONTAŻ OKRYCIA NA NÓŻKI
Założyć okrycie na nóżki na gondolę i za-
piąć za pomocą nap znajdujących się po
bokach budki i okrycia.
• Przedłużany element okrycia w linii „T”
należy przypiąć do budki za pomocą ma-
gnesów umieszczonych w jej wnętrzu.
• Przedłużany element okrycia w linii „R”
można przypiąć do budki za pomocą ma-
gnesu znajdującego się w górnej części
budy, pod daszkiem.
6. REGULOWANIE OPARCIA W GONDOLI
Regulacja oparcia odbywa się za pomocą
elementu służącego do regulacji umiejsco-

instrukcja obsługi | PL instrukcja obsługi | PL
wionego pod spodem gondoli na wysoko-
ści oparcia (zdj. 8).
Aby oparcie podnieść należy delikatnie
wcisnąć dany element i zablokować opar-
cie w wybranej pozycji poprzez prze-
mieszczenie go w przód lub w tył.
7. FUNKCJA KOŁYSKI W GONDOLI
Aby gondola spełniała funkcję kołyski
należy przestawić dwa elementy kołyski
znajdujące się w spodniej części gondoli
z pozycji ułożenia poziomego do ułożenia
pionowego (zdj. 9a,b).
8. USTAWIENIE WENTYLACJI W GONDOLI
Aby zmienić ustawienie wentylacji należy
przesunąć w prawo lub w lewo ele-
ment regulacji wentylacji umiejscowiony
w spodniej części gondoli (zdj. 10).
9. SKŁADANIE GONDOLI
Aby złożyć gondolę należy zdjąć materiał
wewnętrzny gondoli aby odsłonić ukryty
pod nim mechanizm składania gondoli
(zdj. 11), następnie należy przemieścić
4 mechanizmy składania w kierunku do
środkowej części gondoli (zdj. 12). Aby
gondolę rozłożyć należy umieścić mecha-
nizmy składania w pozycji wyjściowej.
10. MONTAŻ SIEDZISKA (WKŁADU
SPACEROWEGO)
Siedzisko montujemy i demontujemy
podobnie jak gondolę za pomocą dwóch
przycisków znajdujących się po obu stro-
nach siedziska.
Siedzisko można montować na dwa
sposoby przodem lub tyłem do kierunku
jazdy.
OSTRZEŻENIE! Przed użyciem sprawdzić
czy siedzisko jest prawidłowo zablokowa-
ne w centralnym wpięciu.
OSTRZEŻENIE! Przed użyciem wózka
należy zawsze sprawdzać czy oparcie jest
prawidłowo zablokowane.
11. MONTAŻ/ DEMONTAŻ BUDY
SIEDZISKA
Siedzisko jest wyposażone we własną
budę, aby zamontować ją na siedzisku
należy wsunąć plastikowe elementy mo-
cowania budki znajdujące się na końcach
pałąka (zdj. 13) w plastikowe łączniki
umiejscowione po obu stronach oparcia.
(zdj. 14).
Aby budkę zdemontować należy wcisnąć
przycisk znajdujący się w elemencie mo-
cowania budki, następnie pociągnąć pałąk
ku górze.
12. MONTAŻ / DEMONTAŻ / REGULACJA
WYSOKOŚCI BARIERKI
Zamontować barierkę ochronną poprzez
umieszczenie elementu służącego do
montażu barierki w łączniki (zdj. 15)
W celu zdemontowania barierki należy
wcisnąć szary przycisk znajdujący się
po obu stronach siedziska na wysokości
barierki (zdj. 16a) następnie pociągnąć ją
do siebie.
Aby zmienić wysokość barierki należy wci-
snąć czerwony przycisk (zdj. 16b) znajdu-
jący się po obu stronach bezpośrednio na
jej zakończeniu, następnie ustawić pożą-
daną wysokość barierki. Blokada w wybra-
nej pozycji nastąpi automatycznie.
13. MONTAŻ OKRYCIA NA NÓŻKI
(SIEDZISKO)
Naciągnąć okrycie na siedzisko i przypiąć je
za pomocą nap.
14. REGULOWANIE OPARCIA SIEDZISKA
Oparcie siedziska można ustawić w kilku
pozycjach.
Aby oparcie opuścić wciśnij i przytrzymaj
plastikowy element regulacji znajdujący
się w tylnej części oparcia, następnie
ustaw właściwą pozycję. (zdj. 17).
UWAGA! Używając tego samego przycisku
możemy złożyć siedzisko na pół, aby to
uczynić wciskamy wyżej opisany przycisk
i przemieszczamy oparcie siedziska ku
przodowi.
Operacją tą wykonujemy po uprzednim
demontażu budy siedziska (nie dotyczy
linii R).
Aby unieść oparcie wystarczy pchnąć je ku
górze, aż do osiągnięcia właściwej pozycji.
Zablokowanie nastąpi automatycznie.
15. USTAWIANIE POZYCJI PODNÓŻKA /
REGULACJA DŁUGOŚCI
Podnóżek można ustawić w kilku pozy-
cjach. Aby go opuścić należy wcisnąć dwa
przyciski umiejscowione po obu stronach
podnóżka i ostrożnie opuścić go w dół.
(zdj. 18).
Aby podnóżek podnieść należy unieść go
z pozycji opuszczonej ku górze, blokada
następuje automatycznie.
Podnóżek można przedłużyć poprzez wy-
ciągnięcie plastiku podnóżka i zamonto-
wanie go dalej w odpowiednich otworach
(zdj. 19a,b,c).
16. REGULACJA PASA BEZPIECZEŃSTWA
(SIEDIZSKO)
Siedzisko wyposażone jest w 5-cio punk-
towe pasy bezpieczeństwa.
Należy ich używać od momentu gdy dziec-
ko zacznie samodzielnie siadać.
Rozepnij pasy, wypinając widełki z central-
nej klamry, usadź dziecko w siedzisku wy-
reguluj długość pasów za pomocą klamry
tak aby przylegały do ciała dziecka ale
go nie uciskały, następnie wepnij widełki
pasów do centralnej klamry (zdj. 20).
Aby pasy zdemontować należy otworzyć
klapkę w tylnej części oparcia, następnie
przełożyć klamry znajdujące się na zakoń-
czeniach pasów przez otwory znajdujące
się w oparciu.
W ten sposób demontujemy pasy umiej-
scowione powyżej ramion dziecka.
Pasy biodrowe są zamontowane na stałe
i ie ma możliwości ich zdemontowania.
Jeśli chcemy zdemontować któryś z ele-
mentów poszycia siedziska wówczas
demontujemy pasy ramienne i przeciąga-
my cały pas wraz z klamrą przez otwór
w wykładce lub poszyciu siedziska.
Siedzisko posiada dodatkowy pas kro-
kowy, który zapinamy wokół barierki za
pomocą nap. Jest to element dodatkowy
i nie zwalnia z konieczności stosowania
5-cio punktowych pasów bezpieczeństwa.
OSTRZEŻENIE! Zawsze używaj pasów
bezpieczeństwa jeśli dziecko potrafi sa-
modzielnie siedzieć.
17. DEMONTAŻ POSZYCIA SIEDZISKA
Demontaż rozpoczynamy od wypięcia
budy (pkt. 11) oraz demontażu pasów
5-cio punktowych (pkt. 16).
Kolejnym etapem jest zdjęcie materiału
siedziska poprzez zdjęcie 4 gumek umiej-

instrukcja obsługi | PL instrukcja obsługi | PL
scowionych w spodniej części siedziska
(zdj. 21a,b), które przytrzymują materiał
we właściwym miejscu.
Następnie należy zdjąć materiał siedzi-
ska poprzez wysunięcie go ze szczeliny
znajdującej się wokół oparcia siedziska
(zdj. 22a,b).
UWAGA! Zakładając materiał siedziska
należy zwrócić uwagę aby gumki przy-
trzymujące nie dostały się do mechanizmu
składania oparcia (zdj. 23a,b).
18. REGULOWANIE WYSOKOŚCI RĄCZKI
Należy jednocześnie wcisnąć dwa przyci-
ski umieszczone na rączce po obu jej stro-
nach od wewnątrz i przesuwając rączkę
odpowiednio zmniejszać lub zwiększać jej
wysokość (zdj. 24).
19. SKŁADANIE WÓZKA
UWAGA! W celu złożenia stelaża należy
zdemontować gondolę lub siedzisko, kosz
oraz ustawić rączkę w takiej pozycji aby
przylegała do aluminiowego profilu stela-
ża. (zdj. 25).
UWAGA! Wózek należy zawsze składać
z odblokowanymi przednimi kołami.
Następnie należy złożyć stelaż poprzez
wciśnięcie dwóch przycisków umieszczo-
nych na plastikowych uchwytach (zdj. 26)
umiejscowionych na rączce wózka.
Po odblokowaniu mechanizmu składa-
nia należy pociągnąć uchwyty do siebie
i przemieścić rączkę do przodu.
Celem dalszego zmniejszenia wymiarów
wózka przed rozpoczęciem procedury
składania należy zdemontować koła oraz
błotniki.
Aby zdemontować błotniki należy wysu-
nąć je ku górze. Aby je ponownie zamon-
tować należy wsunąć je w plastikowe
elementy do montażu błotników (zdj. 27).
20. FOLIA PRZECIWDESZCZOWA
Wózek posiada w zestawie folię przeciw-
deszczową za wywietrznikiem zarówno
na gondole jak i na siedzisko. Aby ją za-
montować naciągnij jeden koniec na bud-
kę, a drugi na gondolę (od strony rączki).
21. MOSKITIERA
Gondola oraz siedzisko wyposażone są
w moskitierę, aby ją zamontować nale-
ży założyć jeden jej koniec (oznaczony
wszywką) na budę i przypiąć ją za pomocą
nap umiejscowionych po obu jej stronach,
następnie zaczep drugi koniec moskitiery
o gondole lub podnóżek siedziska.
22. MONTAŻ FOTELIKA
SAMOCHODOWEGO
Wózek oferowany jest również w wersji
z fotelikiem samochodowym dla dzieci
o wadze od 0 do 13 kg. W celu zamonto-
wania fotelika należy najpierw umieścić
adaptery na stelażu wózka wpinając je
identycznie jak gondolę, następnie za-
montować fotelik na adapterach. Wpięcie
nastąpi automatycznie.
OSTRZEŻENIE! Przed przystąpieniem do
użytkowania fotelika upewnij się, że ada-
ptery są prawidłowo zamontowane.
W celu wypięcia adapterów należy wci-
snąć przycisk znajdujący się na boku fote-
lika, czynność powtórzyć z drugiej strony.
Do wózków marki JEDO z odpowiednim
adapterem można zamontować następu-
jące foteliki:
1. Adapter M
• Maxi-Cosi: Cabriofix, Citi, Pebble
• Cybex: Aton 3, Aton 4, CBX
• Kiddy: Evolution Pro2, Evo-Lunafix
• Safety 1st: Mimas
• Recaro: Privia
• Avionaut: Ultralite, Kite
2. Adapter R
• Römer: Baby Safe Plus,
Baby Safe Plus SHR II
23. MONTAŻ / DEMONTAŻ KOSZA
Aby kosz zdemontować należy go delikat-
nie unieść i zdjąć ze stelaża.
Aby kosz ponownie zamontować należy
umieścić go na 4 plastikowych bolcach
umiejscowionych na stelażu (zdj. 28).
Kosz można złożyć do transportu poprzez
wciśnięcie dna kosz do środka.

user manual | EN user manual | EN
Stroller compliant with norm: EN
1888:2012
WARNINGS!!!!!
THE TRIM STROLLER CARRY COT AND
SEAT SHOULD BE USED ONLY WITH THE
TRIM CHASSIS.
IMPORTANT! - Keep these instructions
for future use.
Read this manual before use. Child safety
may be at risk if the recommendations
contained in the manual are ignored.
WARNING!
Never leave your child unattended.
WARNING!
Make sure before use that all locking
devices are on.
WARNING!
To avoid injury, make sure your child
remains at a safe distance while this
product is assembled or disassembled.
WARNING!
Do not allow your child to play with this
product.
WARNING!
Use a harness when your child starts to
sit on their own.
WARNING!
This seat is not suitable for children under
6 months of age.
WARNING!
Always use the fastening system.
WARNING!
Before use, check that all carry cot or
seat, or car seat mounting devices are
properly attached.
WARNING!
This product is not suitable for running
or in-line skating.
WARNING!
The stroller is designed to transport chil-
dren from 0 months of age to a maximum
weight of 15 kg.
WARNING!
Any load attached to the handle and / or
rear side of the backrest and / or to the
sides of the stroller will affect the stabil-
ity of the stroller.
• Stroller should be used for one child only.
• Accessories (the seat, bag, rain cover,
etc.) that are not approved by the
manufacturer, should not be used.
• The child’s safety is the responsibility
of their adult guardian.
• The seat or the carry cot cannot be used
as a car seat.
• Do not leave the stroller standing with-
out brakes on.
• At the times of placing the baby in the
stroller or removing it from the stroller,
the brakes must always be on.
• Stroller should never be left stationary
on sloping ground.
• When adjusting the stroller settings, the
moving parts should be out of reach of
the child.
• Placing an excessive weight in the
stroller, incorrect installation or use of
non-authorized accessories may result
in damage to- or destruction of- the
stroller.
• Do not leave the stroller in hazardous
locations, even if it is empty.
• Do not use the stroller on stairs, or es-
calators, and on steep surfaces. This can
be dangerous for the baby.
• Never place any objects on the stroller
hood.
• The shopping basket supplied with the
stroller has a maximum load capacity
of 3 kg. Heavy objects are to be always
placed at the center of the basket. Un-
even distribution of weight in the basket
may impair the stability of the stroller.
• Items in the basket may not protrude
beyond the sides of the basket, as they
may fall between the wheel spokes.
• The application of spare parts that are
not approved by the manufacturer can
be dangerous.
• The care for the technical condition
of the stroller is the responsibility of
the user.
• When transporting the stroller over
obstacles, make sure that none of the
latch connections come undone.
• Do not use the any additional mat-
tresses for the carry cot, except the one
supplied by manufacturer.
• The changing bag supplied with the
product has a maximum load capacity
of 2 kg.
• This product is suitable for a child who
cannot sit alone, turn over or move
around on their hands and knees. Maxi-
mum weight of the child: 9 kg
• Newly-born children should be trans-
ported in a lying position.
WARNING! indicates information impor-
tant for the child’s health and safety.
NOTICE! indicates information that fa-
cilitates the use of the stroller.
NOTICE!
Notes on security and guidance contained
in this manual cannot cover all possible
situations and conditions. For obvious
reasons it is not possible to equip this
product with common sense, caution and
care. These should be supplied by the
person using this stroller.
It is important that each person operating
the stroller and its accessories under-
stands this instruction well. Therefore,
any person using the stroller, even for
a very short period of time, should be in-
structed as to the principles of its proper
use. If the guidelines are vague, or further
instructions are required, please contact
an authorized of JEDO company products.
CARE AND MAINTENANCE
1. Do not leave the stroller in direct sun-
light for long periods of time.
2. The stroller should be stored in a dry
place. If the frame of the stroller gets
wet, dry it carefully.
3. In the event of contact with sea water
or use on surfaces sprinkled with salt,
wash and dry the stroller frame.
4. Do not leave the stroller for a long time
on light floor coverings (PVC, linoleum)
and varnished wooden floors. The stroller
rubber tires may leave black stains on
surfaces.
5. It is recommended to lubricate the
axle tips and the suspension every three
months. Before lubrication, clean the axis
tips with a cloth. For lubricating the axis,
use Vaseline or technical automotive oil.
6. Make sure the air pressure in the tires is
adequate. Tire pressure should be around
0.14 – 0.17 MPa
7. The stroller upholstery can be cleaned
with a damp cloth or sponge, using a mild
detergent.
8. Upholstery cannot be cleaned in
a washing machine.
9. The user is obliged to perform routine
cleaning, maintenance and control of the
stroller.
EN user manual

user manual | EN user manual | EN
1. ASSEMBLING THE STROLLER
Release the safety lock, securing the
frame from unfolding (Photo no.1) The
unfolding of the stroller is performed by
pulling the handle up, when it reaches the
correct position, it automatically locks in
a locking clamp, accompanied by a clearly
audible „click” sound.
2. ATTACHING AND REMOVING THE
WHEELS
To remove rear wheels, press the button
on the inside of the frame (in front of
the brake) (Photo no.2) and remove the
wheel along with the axle. Repeat for the
other side. To re-attach, push the button
for disengaging the wheels and push the
wheel axle into the hole in the frame.
(Photo no.3). Then release the button
and pull them together until they lock.
- Install the front 10 „wheel with the fork,
by inserting the axle forks into the rotary
element, until you hear a click of the
wheel locking into its correct position.
The front wheels may be locked to run
straight-ahead only, by turning the lock
mechanism of wheels located on both
sides of the frame, under the footrest
(Photo no.4) to the left (looking from the
handle) until it clicks.
To remove the front wheel, press the
gray button on the inside of the frame,
just below the rotary element locking the
front wheels (Photo no.5)
WARNING! The wheels are covered with
a lubricant, which may stain textiles.
WARRANTY CONDITIONS
1. P.P.H.U. Jędroch grants warranty for the
purchased JEDO product, for a period of
24 months from the date of purchase.
2. Complaints should be reported at the
point of sale of the product.
3. The product subject to complaint must
be returned clean and securely packed,
in a cardboard box, preferably with the
instruction manual attached.
4. Product faults detected during the
warranty period will be repaired free of
charge within 14 days from the date of
delivery by Reseller to the Manufacturer.
5. The guarantee period is extended by
the repair time.
6. The means of repair are determined by
the guarantor.
7. It is necessary for the complaint to
be considered to provide the proof of
purchase, including date and signature of
both parties.
8. The manufacturer will remove any pos-
sible malfunction of the product, provided
is has been used as intended and recom-
mended by the manual.
9. Entries in the warranty card may only
be made by service technicians, otherwise
it may be rendered void. Lack of printed
warranty card excludes warranty services.
10. The territorial coverage of the warran-
ty covers the area of the European Union,
Norway, Switzerland and the Russian
Federation.
11. Warranty for consumer goods sold does
not exclude, limit or suspend the rights of
the buyer arising from the incompatibility
of the goods.
THE WARRANTY DOES NOT COVER
• Damage resulting from improper storage
• Mechanical and technical damages
caused by improper use or use not in ac-
cordance with the instruction manual.
• Color changes (discolorations) in fabrics
resultant from bright sunlight or im-
proper use of chemicals.
• Natural wear and tear of mechanical
components resulting from operation.
Performing any self-made structural
alterations to the product will void the
warranty.
• Any discoloration caused by contact of
rubber with the ground (e.g. PVC, lino-
leum, wooden lacquered parquet).
• Punctures to the inner tubes of
the wheels.
3. ENGAGING THE BRAKES
The stroller is stopped by pressing the
brake pedal, positioned at the right wheel
(handle side – (Photo no.6)).
Release the brake by pushing the identical
brake pedal, positioned at the left wheel.
4. ASSEMBLY / REMOVAL
OF THE CARRY COT
Assemble the carry cot on the chassis by
inserting the plastic carry cot adapters,
located in its lower part, into the central
locking mechanism. Locking will occur au-
tomatically. To remove the carry cot, press
buttons simultaneously on both sides of
the carry cot (Photo no.7), then lift the
carry cot up.
WARNING! Before use, check if the carry
cot is properly locked in the central lock-
ing mechanism.
5. INSTALLATION OF THE FOOT COVER
Put the foot cover on the carry cot and
fasten using the press-studs on the sides
of the cupola and the cover.
• The „T” line extendable cover element
must be clipped to the booth by means
of magnets in its interior.
• The „R” line extendable cover element
may be clipped to the booth with a
magnet located at the top of the hood,
under the sun-roof.

user manual | EN user manual | EN
6. ADJUSTING THE BACKREST
OF THE CARRY COT
Adjusting the backrest is done by means
of a regulating element, positioned
underneath the carry cot, at the level of
the backrest (Photo no.8). To raise the
backrest, gently press the element and
lock the backrest in the desired position,
by moving it forward or backward.
7. THE ROCKER FUNCTION
OF THE CARRY COT
To use the carry cot’s rocker function,
move the two rocker elements located
at the bottom of the carry cot from the
horizontal position to the vertical position
(Photo no.9 A, B).
8. SETTING THE CARRY COT VENTILATION
To change the carry cot ventilation, move
the ventilation control located on the
bottom of the carry cot to the right or to
the left (Photo no.10).
9. REMOVAL OF THE CARRY COT
To remove the carry cot, remove the
material inside the carry cot to reveal
the hidden mechanism of the carry cot
(Photo no.11), then move the 4 folding
mechanisms towards the center part of
the carry cot (Photo no.12). To remove
the carry cot, the mechanisms must be
moved to their folding position.
10. SEAT ASSEMBLY (STROLLING INSERT)
The seat assembly and disassembly is
performed similar to the carry cot, with
two buttons located on both sides of
the seat. The seat can be installed in two
ways - facing forward or rearward.
WARNING! Do not carry the seat by
grasping the footrest!
WARNING! Before use, check if the seat is
properly locked in the central latch.
WARNING! Before using the stroller,
always check whether the backrest is
properly locked.
11. INSTALLATION / REMOVAL OF SEATS
HOOD
The seat is equipped with its own hood,
in order to mount it on the seat, insert
the plastic hood-fastening elements
located at the ends of the rod (Photo
no.13) into plastic connectors located on
both sides of the backrest. (Photo no.14).
To remove the hood, press the button on
the hood-fastening element, then pull the
rod upwards.
12. INSTALLATION / REMOVAL / RAIL
HEIGHT ADJUSTMENT
Mount the safety rail by placing the ele-
ment for rail mounting in the connectors
(Photo no.15).
In order to remove the rail, press the gray
button located on both sides of the seat
at the height of the rail (Photo no.16 A),
then pull it towards you. To change the
height of the rail, press the red button
(Photo no.16 B), located on both ends,
then set the desired height of the railing.
Locking in the selected position happens
automatically.
13. ASSEMBLY OF FEET COVER (SEAT)
Stretch cover on the seat and attach us-
ing press-studs.
14. ADJUSTING THE BACKREST
OF THE SEAT.
The backrest of the seat can be set in
several positions. To lower the backrest,
pull the plastic regulation element located
in the rear of the backrest, then set the
correct position (Photo no.17).
WARNING!! The same button is used to
fold the seat in half; in order to do that,
press the button described above a lit-
tle longer and move the backrest of the
sear toward the front. This operation is
performed after prior dismantling of seat
cupola (not applicable to the R line).
To raise the backrest, simply push it up-
wards until you reach the correct position.
Locking will occur automatically.
15. SETTING THE FOOTREST POSITION /
ADJUSTING THE LENGTH
The footrest can be adjusted in several
positions. To lower it, press the two but-
tons located on both sides of the footrest
and gently lower it down (Photo no.18).
To raise the footrest, lift it upwards, it
will lock automatically. The footrest can
be extended by pulling out the plastic
footrest and fixing it in the corresponding
holes (Photo no.19 A, B, C).
16. ADJUSTING THE SAFETY BELT (SEAT)
The seat is equipped with a 5-point
safety belt. Use it from the moment
when the baby starts to sit on their own.
Undo belts, removing the fork from the
central buckle, place the child in the seat,
adjust the length of the belt by means of
brackets, so that they fit the child’s body
but are not too tight, then plug the fork
back into the central belt buckle (Photo
no.20). To remove the belt, open the flap
in the rear of the backrest, then pull the
buckles located at the ends of the belt
through the holes in the backrest. This is
the way to dismantle the belts positioned
above the child’s shoulders. Lap belts are
fixed in place and they cannot be dis-
mantled. If we want to dismantle one of
the elements of the cover of the seat,
dismantle the shoulder straps and drag
the entire belt with the buckle through
the hole in the seat cover. The seat belt
has an additional crotch belt, which is
fastened around the railing using press-
studs. This is an additional element, and
does not exempt from the application of
the 5-point safety belt.
WARNING! Always use seat belts when
the child is able to sit independently.
17. REMOVAL OF SEAT COVER
Dismantling is performed by first remov-
ing the cupola (Pos. 11) and removing the
5-point belt (paragraph 16).
The next step is taking off the material of
the seat, by removing the 4 elastic bands
located in the bottom of the seat (Photo
no.21), which hold the material in place.
Then remove the material of the seat, by
sliding it from the slots located around
the seat backrest (Photo no.22 A, B).

user manual | EN user manual | EN
WARNING! When putting on the material of
the seat, pay attention that the retaining
elastic bands do not get into the backrest
folding mechanism (Photo no.23 A, B).
18. HANDLE HEIGHT ADJUSTMENT
Simultaneously press the two buttons on
both sides of the inside of the handle and
move the handle to increase or decrease
its height accordingly (Photo no.24).
19. DISASSEMBLY OF THE TROLLEY
WARNING! In order to collapse the chas-
sis, remove the carry cot or seat and the
basket and set the handle in a position
adjoining to the aluminum frame. (Photo
no.25).
WARNING! Stroller must always be col-
lapsed with the front wheels unlocked.
Next, fold the rack by pressing the two
buttons on the plastic handles (Photo
no.26), located on the handle of the
stroller.
After unlocking the collapsing mechanism,
pull the handles toward each other and
move the lever to the front.
In order to further reduce the size of the
stroller before starting the collapsing pro-
cedure, remove the wheels and fenders.
To remove the fenders, pull them up-
wards. To reassemble them, insert them
into the plastic components for fenders’
mounting (Photo no.27).
20. RAIN COVER
The stroller is equipped with a rainproof
cover with vents, for both the carry cot
and the seat. To mount it, slide one end
onto to the cupola, and the other onto
the carry cot (from the side of the lever).
21. MOSQUITO NET
The carry cot and the seat are equipped
with a mosquito net; to mount it, slide
one end (marked INSERT) onto the cupola
and attach it with press-studs located on
both sides, then hook the other end of
the mosquito net to the carry cot or the
footrest of the seat.
22. CAR SEAT INSTALLATION
The stroller is also manufactured in a ver-
sion with a car seat, for children weighing
from 0 to 13 kg. In order to install the car
seat, first put the adapters on the stroller
chassis, plugging them identically as for
the carry cot, then mount the seat on the
adapter. It plugs in automatically.
WARNING! Before using the seat, make
sure that the adapters are properly
mounted.
In order to unplug the adapters, press the
button on the side of the seat, repeat for
the other side.
WARNING!
The car seat, used together with the
chassis, does not replace a crib or bed;
should the child needed to sleep, it is
recommended to place it in a proper
carry cot, crib or bed.
Using proper manufacturer adapters, the
TRIM stroller may be used with the fol-
lowing seats:
1. The M Adapter
• Maxi-Cosi: Cabriofix, Citi, Pebble
• Cybex: Aton 3, Aton 4, CBX
• Kiddy: Evolution Pro2, Evo-Lunafix
• Safety 1st: Mimas
• Recaro: Privia
• Avionaut: Ultralite, Kite
2. The R Adapter
• Römer: Baby Safe Plus,
Baby Safe Plus SHR II
23. BASKET INSTALLATION / REMOVAL
To remove the basket, gently lift and re-
move it from the rack. To reassemble the
basket, place it on the 4 plastic pins lo-
cated on the frame (Photo no.28). Basket
can be folded for transport, by collapsing
the bottom of the basket.

Unterricht | DE Unterricht | DE
Ein Kinderwagen konform mit der Norm:
EN 1888:2012
WARNHINWEISE !!!!!
DIE TRAGEWANNE UND DEN SITZ DES
TRIM-KINDERWAGENS NUR MIT DEM
TRIM-UNTERGESTELL GEBRAUCHEN.
WICHTIG! - Diese Anleitung für den spä-
teren Gebrauch Bewahren.
Vor dem Gebrauch diese Anleitung durch-
lesen.
Die Sicherheit des Kindes kann gefährdet
sein, wenn die in der Anleitung enthal-
tenen Empfehlungen nicht gebraucht
werden.
WARNHINWEIS!
Ihr Kind nie unbeaufsichtigt lassen.
WARNHINWEIS!
Vor Gebrauch sollte man sich vergewis-
sern, ob alle Verriegelungen eingeschaltet
sind.
WARNHINWEIS!
Um Verletzungen zu vermeiden, sicher-
stellen, dass Ihr Kind weit entfernt ist,
wenn dieses Produkt zerlegt oder zusam-
mengelegt wird.
WARNHINWEIS!
Ihr Kind nicht zulassen, mit diesem Pro-
dukt zu spielen.
WARNHINWEIS!
Einen Sicherheitsgurt verwenden, wenn
Ihr Kind alleine zu sitzen beginnt.
WARNHINWEIS!
Dieser Sitz ist für Kinder unter 6 Monaten
nicht geeignet.
WARNHINWEIS!
Immer die Systemverschlüsse verwenden.
WARNHINWEIS!
Vor Gebrauch überprüfen, ob die Monta-
gevorrichtungen der Tragewanne oder
des Sitzes sowie des Autositzes richtig
angebracht sind.
WARNHINWEIS!
Dieses Produkt ist nicht geeignet zum
Joggen oder Skaten.
WARNHINWEIS!
Dieser Kinderwagen ist so konzipiert,
Kinder von 0 Monate alte bis zu einem
Höchstgewicht von 15 kg zu transportie-
ren.
WARNHINWEIS!
• Irgendwelche Last, die an dem Handgriff
und / oder der Rückseite der Rückenleh-
ne und / oder an den Seiten des Kinder-
wagens beigefügt ist, wird die Stabilität
des Kinderwagens beeinträchtigen.
• Der Kinderwagen sollte für ein Kind ver-
wendet werden.
• Zubehör (Kindersitz, Tasche, Regen-Ab-
deckung, etc.), die nicht vom Hersteller
zugelassen sind, sollten nicht verwendet
werden.
• Für die Sicherheit des Kindes ist sein
erwachsener Vormund verantwortlich.
• Der Sitz oder die Tragewanne dürfen
nicht als Autositz verwendet werden.
• Den Kinderwagen ohne angezogenen
Bremsen nicht im Stillstand stehen
lassen.
• Zum Zeitpunkt in dem das Kind in den
Kinderwagen gelegt oder aus dem
Kinderwagen entfernt wird, müssen die
Bremsen immer angezogen sein
• Der Kinderwagen sollte nie an Gelände-
Hängen stehen gelassen bleiben.
• Während dem Anpassen der Einstellun-
gen des Kinderwagens sollten die be-
weglichen Teile außerhalb der Reichweite
des Kindes sein.
• Das Unterbringen einer zu großen Last im
Kinderwagen, nicht ordentliche Montage
oder Gebrauch nicht zugelassenen Zube-
hörs, kann zu Schäden oder Zerstörung
des Kinderwagens führen.
• Den Kinderwagen nicht in gefährdeten
Bereichen stehen lassen, auch wenn der
Kinderwagen leer ist.
• Mit dem Kinderwagen keine Treppen,
auch bewegliche Treppen und sehr steile
Stellen überwinden. Dies kann für das
Kind gefährlich sein.
• Keine Gegenstände auf die Haube vom
Kinderwagen stellen.
• Der im Komplett mit dem Kinderwagen
mitgelieferte Einkaufskorb hat eine
Tragfähigkeit von 3 kg. Schwerere Ge-
genstände immer in die Mitte des Korbes
legen. Eine ungleichmäßige Verteilung der
Last in dem Korb, kann die Stabilität des
Kinderwagens beeinträchtigen.
• Gegenstände in dem Korb dürfen nicht
über die Seiten des Korbs vorstehen, da
sie zwischen die Speichen eindrängen
können.
• Die Anwendung von nicht zugelassenen
vom Hersteller Ersatzteilen kann gefähr-
lich se.
• Wartung und Pflege des technischen
Zustandes vom Kinderwagen liegt in der
Verantwortung des Benutzers.
• Wenn der Kinderwagen über Hindernisse
rüber getragen werden soll, sicherstellen,
dass keine der Schnapp-Verbindungen
nicht entblockt wurden.
• In der Tragewanne keine zusätzliche
Matratze als die im Komplett gelieferte
verwenden.
• Die im Komplett gelieferte Wickeltasche
hat eine zulässige Tragfähigkeit von 2 kg.
• Dieses Produkt ist für ein Kind geeignet,
das nicht alleine sitzen, sich umdrehen
und auf seinen eigenen Händen und
Knien bewegen kann. Maximales Gewicht
des Kindes: 9 kg
• Die neu geborene Kinder sollten in einer
liegenden Position transportiert werden.
Das Stichwort WARNHINWEIS! bedeu-
tet wesentliche Informationen für die
Sicherheit des Kindes.
Das Stichwort ANMERKUNG! bedeutet
Informationen, welche die Bedienung
des Kinderwagens erleichtern.
ANMERKUNG!
Anmerkung zur Sicherheit und Hinweise
die in dieser Anleitung enthalten sind,
können nicht alle möglichen Situationen
und Bedingungen abdecken. Aus offen-
sichtlichen Gründen ist es nicht möglich,
dieses Produkt in den gesunden Men-
schenverstand, Vorsicht und Sorgfalt
auszustatten. Diese Werte sollte diejenige
Person hineinbringen, die den Kinderwa-
gen betreibt oder bedient.
Es ist wichtig, dass jede Person, die den
Kinderwagen und das Zubehör gebraucht,
diese Anweisung gut verstanden hat.
Daher ist jede Person, die einen Kinderwa-
gen, auch für einen sehr kurzen Zeitraum
verwenden wird, sollte in Bezug auf die
Grundsätze seines korrekten Gebrauches
angewiesen werden. Wenn die Richtlinien
der Anweisungen unklar sind, wird eine
weitere Erklärungen oder Antworten auf
andere Fragen benötigt, wenden Sie sich
bitte an einen autorisierten Händler der
Firma JEDO.
PFLEGE UND WARTUNG
1. Der Kinderwagen darf nicht für längere
Zeit in der prallen Sonne gelassen werden.
2. Der Kinderwagen sollte an einem tro-
DE Unterricht

Unterricht | DE Unterricht | DE
ckenen Ort aufbewahrt werden. Wenn der
Rahmen des Kinderwagens nass ist, sollte
man ihn sorgfältig abtrocken.
3. Bei Berührung des Kinderwagens mit
Seewasser oder beim Verwenden dieses
auf den mit Salz bestreuten Straßen, soll-
te der Rahmen des Kinderwagens gewa-
schen und abgetrocknet werden.
4. Der Kinderwagen darf nicht für eine
lange Zeit auf hellen Bodenbelägen (PVC,
Linoleum) und auf lackierten Holzböden
gelassen werden. Die Gummireifen kön-
nen die Oberfläche des Untergrundes in
schwarz färben.
5. Es wird empfohlen, alle drei Monate die
Achs-Spitzen und Federung zu schmieren.
Vor der Schmierung sollen die Achsen-
Spitzen mit einem Tuch gereinigt werden.
Für die Schmierung der Achsen kann tech-
nische Vaseline oder Kfz-Öl verwendet
werden.
6. Es ist zu prüfen, ob der Reifendruck
ausreichend ist. Der Reifendruck in den
gepumpten Rädern sollte 0,14 - 0,17 MPa
betragen
7. Die Polsterung des Kinderwagens kann
mit einem feuchten Tuch oder Schwamm
mit einem milden Reinigungsmittel gerei-
nigt werden.
8. Die Polsterung des Kinderwagens sollte
nicht in der Waschmaschine gewaschen
werden.
9. Der Benutzer ist verpflichtet, Routine-
kontrollen, Wartung und Reinigung des
Kinderwagens durchzuführen.
GARANTIEBEDINGUNGEN
1. Das Unternehmen P.P.H.U. Jędroch gibt
eine Garantie für das durch Sie einge-
kaufte Produkt der Marke JEDO, für einen
Zeitraum von 24 Monaten ab dem Datum
des Kaufes.
2. Reklamationen sollten an der Verkaufs-
stelle eingereicht werden, in der das
Produkt gekauft worden ist.
3. Das beanstandete Produkt sollte in
einem sauberen und sicher verpackt Zu-
stand, vorzugsweise in einem Karton mit
der Bedienungsanleitung zurückgegeben
werden.
4. Produktmängel die während der Garan-
tiezeit entdeckt werden, innerhalb von 14
Tagen ab dem Zeitpunkt des Zureichens,
vermittelt durch den Verkäufer an den
Hersteller, werden kostenfrei repariert.
5. Die Garantiezeit wird um die Reparatur-
zeit verlängert.
6. Die Reparaturmethode bestimmt den
Garantiegeber.
7. Die notwendige Voraussetzung für
die Berücksichtigung der Beanstandung
ist, zu diesem Zeitpunkt, den mit Da-
tum ausgefüllten Kaufnachweis und mit
der Unterschriften zu haben, es werden
dann kostenlos mögliche Fehlfunktio-
nen des Produktes entfernt, sofern die
Verwendung als übereinstimmend mit der
Zweck-Bestimmung und den Hinweisen
der Bedienungsanleitung waren.
9. Einträge in der Garantie dürfen nur von
Servicetechnikern des Herstellers vorge-
nommen werden, unter Gültigkeits-Aus-
schluss. Fehlender Garantie-Druck schließt
eine Garantie aus.
10. Der räumliche Geltungsbereich der Ga-
rantie deckt den Bereich der Europäischen
Union, Norwegen, der Schweiz und der
Russischen Föderation ab.
11. Die Garantie auf verkaufte Konsum-
güter schließt nicht aus, begrenzt nicht
oder setzt die Rechte des Käufers aus der
fehlende Konformität von Waren entste-
hen nicht aus.
DEN REKLAMATIONEN
UNTERLIEGEN NICHT
• Schäden, die durch unsachgemäße Lage-
rung resultierende
• mechanische und technische Schäden die
durch unsachgemäße Nutzung oder Ver-
wendung nicht in Übereinstimmung mit
den Anweisungen verursacht werden.
• Farbwechsel (Verfärbung) des Gewebes,
bei hellem Sonnenlicht oder unsachge-
mäße Verwendung von Chemikalien.
• Natürliche Abnutzung von mechani-
schen Komponenten aus dem Betrieb.
Wenn Änderungen an der Konstruktion
des Produktes gemacht werden, ist die
Garantie nichtig.
• Jede Verfärbungen durch Kontakt von
Gummi mit dem Boden (z. B. PVC, Linole-
um, Holzparkettlack)
• Pannen des Innenschlauches.

Unterricht | DE Unterricht | DE
1. ZERLEGEN DES KINDERWAGENS
Die Sicherheitsverriegelung des Gestells
vor dem Zerlegen lösen (Foto 1)
Die Zerlegung des Kinderwagens erfolgt
dadurch, den Griff nach oben ziehen, wenn
er sich in der richtigen Position befinden
wird, wird es automatisch im Schnapp-
Verschluss verriegelt, mit einem deutli-
chen, hörbaren „Klick” begleitet.
2. MONTAGE UND DEMONTAGE
VON RÄDERN
Um die Hinterräder zu entfernen, die Taste
auf der Innenseite des Gestells drücken
(gegen über der Bremse) (Foto 2), und
dann das Rad mit Achse entfernen. Wie-
derholen auf der anderen Seite.
Zu ihrer erneuten Montage den Druck-
knopf zum Einspannen des Rades drücken
und die Radachse in das Loch im Gestell
hineinschieben (Foto 3). Dann die Tas-
te loslassen und an sich ziehen, bis es
einrastet.
- Das vordere 10”-Rad mit einer Gabel
montieren, indem die Achse der Gabeln in
die Drehscheibe eingeschoben wird, bis ein
Klick zu hören ist, was bedeutet, dass das
Rad in seiner Position eingerastet ist.
Die Vorderräder können zur Geradefahrt
verriegelt werden, durchs Drehen nach
links (gesehen vom Griff aus)des Verrie-
gelungsmechanismus der Räder, die sich
auf beiden Seiten des Gestells unter der
Fußstütze (Foto 4) befinden, bis man ein
Klick beim Einrasten hört.
Um die Vorderräder zu demontieren, sollte
die graue Taste auf der Innenseite des Ge-
stells gedrückt werden, direkt unter dem
Drehelement das die Vorderräder verrie-
gelt (Foto 5).
WARNHINWEIS! Auf den Rädern ist ein
Schmiermittel, das die Textilien be-
schmutzen kann.
3. AKTIVIEREN DER BREMSEN
Der Kinderwagen wird gebremst durch
Drücken des Bremspedals das am rech-
ten Rade (seitens des Griffs) positioniert
ist. (Foto 6) Die Bremse wird freigesetzt
durch Drücken auf ein gleiches Bremspe-
dal, das auf dem linken Rad positioniert
ist.
4. MONTAGE / DEMONTAGE DER Tragewan-
ne
Die Tragewanne auf das Fahrgestell set-
zen, durch Einführen in das zentrale Steck-
Mechanismus von Kunststoffadaptern der
Tragewanne, die sich im ihren unteren Teil
befinden. Der Verschluss erfolgt automa-
tisch.
Um die Tragewanne zu demontieren, soll-
ten gleichzeitig die Tasten die sich auf bei-
den Seiten der Tragewanne befinden(Foto
7) gedrückt werden, dann die Tragewanne
nach oben anheben.
WARNHINWEIS! Vor dem Gebrauch prüfen,
ob die Tragewanne richtig im zentralen
Steck-Mechanismus verriegelt ist.
4. MONTAGE / DEMONTAGE
DER TRAGEWANNE
Die Tragewanne auf das Fahrgestell set-
zen, durch Einführen in das zentrale Steck-
Mechanismus von Kunststoffadaptern der
Tragewanne, die sich im ihren unteren Teil
befinden. Der Verschluss erfolgt automa-
tisch.
Um die Tragewanne zu demontieren,
sollten gleichzeitig die Tasten die sich auf
beiden Seiten der Tragewanne befinden
(Foto 7) gedrückt werden, dann die Trage-
wanne nach oben anheben.
WARNHINWEIS! Vor dem Gebrauch prüfen,
ob die Tragewanne richtig im zentralen
Steck-Mechanismus verriegelt ist.
5. MONTAGE DER ABDECKUNG AUF DEN
FÜSSEN
Die Abdeckung der Füße auf die Trage-
wanne drauflegen und mit Druckknöpfen
die sich auf den Seiten der Kabine und
der Abdeckung befinden, anknöpfen.- Das
ausziehbare Element der Abdeckung in
der „T“-Linie soll mittels Magneten an
die Kabine befestigt werden, die in ihrem
Inneren angeordnet sind.
- Das ausziehbare Element der Abdeckung
in der „R“-Linie kann mit einem Magneten,
das sich im oberen Teil der Kabine unter
der Überdachung befindet, an die Kabine
angeknöpft werden.
6. VERSTELLUNG DER RÜCKENLEHNE
IN DER TRAGEWANNE
Die Verstellung der Rückenlehne wird
durch ein Regelungs-Element durchge-
führt, das sich unterhalb der Tragewanne
in der Höhe der Rückenlehne befindet
(Foto 8).
Um die Rückenlehne anzuheben, vorsichtig
dieses Element drücken und die Rücken-
lehne in der gewünschten Position blo-
ckieren, indem man diese vorwärts oder
rückwärts bewegt.
7. EINE WIEGE-FUNKTION IN
DER TRAGEWANNE
Dass die Tragewanne eine Wiege-Funktion
ausführt, sollen zwei Wiege-Elemente an
der Unterseite der Tragewanne umgestellt
werden, von der horizontalen Position in
die vertikale Ausrichtung (Foto 9 a, b).
8. EINSTELLUNG DER BELÜFTUNG
IN DER Tragewanne
Um die eingestellte Belüftung zu ändern,
sollte das Regelungs-Element der Lüftung,
positioniert im Boden der Tragewanne,
nach rechts oder links bewegt werden
(Foto 10).
9. ZUSAMMENLEGEN DER Tragewanne
Um die Tragewanne zusammen zu legen,
das Material im Inneren der Tragewanne
entfernen, um das darunter versteckte
Klappmechanismus der Tragewanne (Foto
11) aufzudecken, dann die vier Klapp-
mechanismen in Richtung des mittleren
Teils der Tragewanne verlegen (Foto 12).
Um die Tragewanne zerlegen, müssen die
Klappmechanismen, in ihre Ausgangsstel-
lung gesetzt werden.
10. MONTAGE DES SITZES
(SPAZIERGANG-EINSATZ)
Der Sitz wird sowie die Tragewanne mon-
tiert und demontiert mit zwei Tasten die
sich auf beiden Seiten des Sitzes befinden.
Der Sitz kann auf zwei Arten angebracht
werden, nach vorne oder nach hinten
gerichtet.
WARNHINWEIS! Den Sitz nicht durch Grei-
fen an die Fußstütze tragen!
WARNHINWEIS! Vor dem Gebrauch prüfen,
ob der Sitz richtig im zentralen Steck-Me-

Unterricht | DE Unterricht | DE
chanismus gesperrt angeschlossen ist.
WARNHINWEIS! Bevor der Kinderwagen
gebraucht wird, immer kontrollieren, ob die
Rückenlehne richtig verriegelt ist.
11. MONTAGE / DEMONTAGE
VOM VERDECK DES SITZES
Der Sitz ist mit einem eigenen Verdeck
ausgestattet, um dieses auf dem Sitz
zu montieren, sollen die Kunststoff-
Befestigungselemente des Verdecks an
den Enden des Bügels (Foto 13) in die
Kunststoff-Anschlüsse gelegt werden, die
sich auf beiden Seiten der Rückenlehne
befinden. (Foto 14)
Um das Verdeck zu demontieren, sollte
die Taste auf dem Befestigungs-Element
des Verdecks gedrückt werden, dann den
Bügel nach oben ziehen.
12. MONTAGE / DEMONTAGE / HÖHEN-
VERSTELLUNG DER BARRIERE
Die Sicherheits-Barriere montieren, durch
Einlegen des Montage-Elementes der Bar-
riere in die Verbindungsstücke (Foto 15)
Um die Barriere zu demontieren, die graue
Taste drücken, die sich auf beiden Seiten
des Sitzes, in der Höhe der Barriere (Foto
16 A) befindet, dann diese an sich ziehen.
Um die Höhe der Barriere zu ändern, die
rote Taste (Foto 16 B) auf beiden Seiten
direkt an ihrem Ende drücken, dann die
gewünschte Höhe der Barriere einstellen.
Die Verriegelung der ausgewählten Lage
geschieht automatisch.
13. MONTAGE DER ABDECKUNG
AUF DEN FÜSSEN (Sitz)
Die Abdeckung auf den Sitz draufziehen
und mit den Druckknöpfen anknöpfen.
14. EINSTELLUNG DER RÜCKENLEHNE
DES SITZES
Die Rückenlehne des Sitzes kann in meh-
reren Positionen eingestellt werden.
Um die Rückenlehne zu senken, das
Verstell-Element aus Kunststoff ziehen,
das sich im hinteren Teil der Rückenlehne
befindet, dann die richtige Position ein-
stellen (Foto 17).
Anmerkung !! Mit der gleichen Taste kann
der Sitz zu Hälfte zusammengelegt wer-
den, um dies zu tun, die Taste wie oben
beschrieben drücken und die Rückenlehne
des Sitzes nach vorne bewegen.
Dieser Vorgang wird durchgeführt, nach-
dem der Verdeck des Sitzes (gilt nicht für
die Linie R) abgebaut wird.
Um die Rückenlehne zu erhöhen, einfach
diese nach oben schieben, bis sie die
richtige Position erreicht. Die Verriegelung
erfolgt automatisch.
15. POSITION DER FUSSSTÜTZE
EINSTELLUNG / LÄNGE EINSTELLEN
Die Fußstütze kann in mehrere Positionen
eingestellt werden. Um diese herunterzu-
lassen, die beiden Tasten drücken, die sich
auf beiden Seiten der Fußstütze befindet
und sanft nach unten senken. (Foto 18)
Um die Fußstütze zu erhöhen, aus der ab-
gesenkten Stellung nach oben hin heben,
die Verriegelung erfolgt automatisch.
Die Fußstütze kann durch Herausziehen
der Kunststoff-Fußstütze verlängert wer-
den und diese weiter in entsprechenden
Löcher befestigen (Foto 19 a, b, c).
16. EINSTELLUNG DES
ANSCHNALLGURTES (SITZ)
Der Sitz ist mit 5-Punkt-Anschnallgurten
ausgestattet.
Diese sollen von dem Moment an verwen-
det werden, ab dem das Kind allein
zu sitzen beginnt.
Die Gürtel aufschnallen, die Gabel der zen-
tralen Schnalle reinstecken, das Kind in den
Sitz hinsetzen, die Länge der Gürtel mit
Klammern so einstellen, um an den Körper
des Kindes anzupassen, aber es nicht
drückt, dann die Gürtel-Gabel in die zentra-
le Gürtelschnallen hineinstecken (Foto 20).
Um die Gürtel zu demontieren, die Klappe
in der Rückseite der Rückenlehne öffnen,
dann die Schnallen an den Enden des
Gurtes durch die Löcher die sich auf der
Rückenlehne befindet durchziehen.
Auf diese Weise werden diese Gurte ab-
gebaut, die über die Schultern des Kindes
reichen.
Beckengurte sind auf festen montiert,
und es gibt keine Möglichkeit ihrer
Demontage.
Wenn ein des Elementes der Sitz-Schale
demontiert werden soll, dann demontiert
man die Schultergurte und den gesamten
Gürtel mit der Schnalle zieht man durch
das Loch im Rumpf oder in der Sitz-Schale
durch.
Der Sitz hat einen zusätzlichen Schritt-
gurt, der um die Barriere mit Druckknöpfen
befestigt wird. Es ist ein zusätzliches
Element, und befreit nicht von der Anwen-
dung eines 5-Punkt-Sicherheitsgurtes.
WARNHINWEIS! Immer Sicherheitsgurte
gebrauchen, wenn das Kind alleine
sitzen kann.
17. ABBAU DER SITZSCHALE
Abbau der Schale wird mit dem abknöpfen
des Verdecks begonnen (Punkt 11) und mit
der Demontage der 5-Punkt-Gurte (Punkt
16).
Der nächste Schritt ist die Abnahme des
Stoffes des Sitzes indem die 4 Gummibän-
der in der Unterseite des Sitzes (Foto 21
a, b) lokalisierte zu entfernen sind, die den
Stoff in der geeigneten Lage halten.
Dann wird der Stoff des Sitzes entfernt,
indem er durch die Schlitze rund um die
Rückenlehne (Foto 22 a, b) herausge-
schoben wird
ANMERKUNG! Beim Aufsetzen des Sitz-
Stoffes, soll darauf geachtet werden, dass
die Gummibänder nicht in das Mechanis-
mus der umklappbare Rückenlehne (Foto
23 a, b) kommen.
18. HÖHENVERSTELL DES GRIFFS
Gleichzeitig die beiden Tasten innen auf
beiden Seiten des Griffs drücken und den
Griff bewegen um ihn zu erhöhen oder
seine Höhe zu verringern (Foto 24).
19. DEN KINDERWAGEN
ZUSAMMENLEGEN
ANMERKUNG! Um das Gestell zusammen-
legen, die Tragewanne oder den Sitz und
den Korb demontieren sowie den Griff in
so eine Lage stellen, dass er an das Alumi-
nium-Gestell anliegen wird (Foto 25).
ANMERKUNG! Der Kinderwagen soll immer
so zusammengelegt werden, dass die
Vorderräder entriegelt sind.
Danach soll das Gestell zusammengelegt
werden, durch Drücken der beiden Knöpfe
an den Kunststoff-Halterungen (Foto 26)

Unterricht | DE Unterricht | DE
die sich am Griff des Kinderwagens
befinden.
Nach dem Entriegeln des Faltmechanis-
mus die Halterungen an sich ziehen und
den Griff nach vorne verlegen.
Um die Größe des Kinderwagens weiter zu
reduzieren, bevor das Verfahren der Zu-
sammenlegung eingeleitet wird, sollen die
Räder und Kotflügel entfernt werden.
Um die Kotflügel demontieren, sollte man
diese nach oben herausheben. Um diese
erneut zu montieren, soll man sie in die
Kunststoff-Montage-Elemente für die
Kotflügel (Foto 27) hineinfügen
20. REGENSCHUTZ-FOLIE
Der Kinderwagen hat im kompletten
Satz hinter der Entlüftungsöffnung eine
Regenschutz-Folie, so für die Tragewanne
als auch für den Sitz. um diese zu mon-
tieren soll man ein Ende auf das Verdeck
draufziehen, und das andere auf die Trage-
wanne (von der Seite des Griffs).
21. MOSKITONETZ
Tragewanne und der Sitz sind mit einem
Moskitonetz ausgestattet, um es zu
montieren, sollte ein sein Ende (markiert
durch einen Einsatz) aufs Verdeck aufge-
setzt werden und mit auf beiden Seiten
angebrachten Druckknöpfen angeknöpft
werden, dann das andere Ende des Moski-
tonetzes an die Tragewanne oder Fuß-
stütze anbringen.
22. AUTOSITZ INSTALLIEREN
Der Kinderwgen wird auch in einer Version
mit einem Autositz für Kinder mit Kör-
pergewicht von 0 bis 13 kg angeboten.
Um den Autositz zu installieren, müssen
zuerst auf dem Gestell Adapter ange-
bracht werden, die man identisch wie die
Tragewanne anschließt, dann den Autositz
auf den Adaptern montieren. Das Hinein-
stecken folgt automatisch.
Warnhinweis ! Vor der Benutzung des Au-
tositzes, sollte man sich überzeugen, dass
die Adapter korrekt installiert sind.
Um die Adapter zu trennen, sollte die
Taste an der Seite des Sitzes gedrückt
werden. Das gleiche auf der anderen Seite
wiederholen.
WARNHINWEIS!
Ein Autositz wird zusammen mit dem
Fahrgestell verwendet, er ersetzt die
Krippe oder das Bett nicht. Wenn ein Kind
Schlaf benötigt, wird empfohlen, in der
entsprechenden Tragewanne, einer Krippe
oder im Bett es zu platziert.
Wenn Firmen-Adapter gebraucht werden,
können an den TRIM-Kinderwagen folgen-
de Autositze montiert werden:
1. Adapter M
• Maxi-Cosi: Cabriofix, Citi, Pebble
• Cybex: Aton 3, Aton 4, CBX
• Kiddy: Evolution Pro2, Evo-Lunafix
• Safety 1st: Mimas
• Recaro: Privia
• Avionaut: Ultralite, Kite
2. Adapter R
• Römer: Baby Safe Plus,
Baby Safe Plus SHR II
23. MONTAGE / DEMONTAGE DES KORBES
Um den Korb zu demontieren, soll man ihn
vorsichtig heben und vom Gestell nehmen.
Um den Korb wieder anmontieren, soll
man ihn auf vier Kunststoffzapfen setzen,
die sich auf dem Gestell (Foto 28) befin-
den.
Den Korb kann man für den Transport
zusammenklappen, indem man den Boden
des Korbes ins Innere hineindrückt.

uživatelská příručka | CZuživatelská příručka | CZ
Vozík shodný s normou: EN 1888:2012
UPOZORNĚNÍ!!!!!
GONDOLA A SEDÁTKO VOZÍKU TRIM POUŽÍ-
VAT POUZE S PODVOZKEM TRIM.
DŮLEŽÍTÉ! – UCHOVEJTE SI TYTO POKYNY
PRO BUDOUCÍ POUŽITÍ.
Před použitím si přečtěte tuto příručku.
Bezpečnost dětí může být ohrožena, pokud
nebudou dodržena doporučení obsažená v
této příručce.
UPOZORNĚNÍ!
Nikdy nenechávejte dítě bez dozoru.
UPOZORNĚNÍ!
Před použitím se ujistěte, že jsou všechna
blokovací zařízení zapnutá
UPOZORNĚNÍ!
Aby nedošlo ke zranění Vašeho dítěte, ujis-
těte se, že dítě není přítomno při skládání
nebo rozebírání tohoto produktu.
UPOZORNĚNÍ!
Nedovolte, aby si vaše dítě hrálo s tímto
výrobkem.
UPOZORNĚNÍ!
Používejte popruhy, když vaší dítě začne
samostatně sedat.
UPOZORNĚNÍ!
Sedadlo není vhodné pro dítě mladší 6
měsíců.
UPOZORNĚNÍ!
Vždy používejte systém popruhu.
UPOZORNĚNÍ!
Zkontrolujte, zda je sedadlo je před použitím
správně instalována.
UPOZORNĚNÍ!
Tento výrobek není vhodný pro běhání nebo
bruslení.
UPOZORNĚNÍ!
Vozík je určen pro přepravu dětí od 1. měsíce
do maximální hmotnosti 15 kg.
UPOZORNĚNÍ!
• Jakékoliv zátěže připojené k rukojeti nebo
k zadní straně opěradla nebo na stranách
vozíku budou mít vliv na stabilitu vozíku.
• Vozík by měl být používán pouze jedním
dítětem.
• Příslušenství (autosedačka, taška,
pláštěnka, atd.) neschválené výrobcem
nemohou být používány.
• Za bezpečnost je odpovědný dospělý
opatrovník dítěte
• Sedadlo nemůže být použito jako
autosedačka.
• Nenechte stát vozík bez zajištěných brzd.
• V době umisťování nebo vyndávání dítěte
z vozíku, brzdy musí být vždy zajištěny
• Vozík nesmí být ponechán nezajištěn na
svazích.
• Během nastavování vozíku, pohyblivé
části by měly být mimo dosah dítěte.
• Umístění nadměrné hmotnosti na vozíku,
nesprávná instalace nebo používání ne-
povoleného příslušenství může způsobit
poškození nebo zničení vozíku.Nepone-
chávejte vozík v nebezpečných místech, i
v případě, že je vozík prázdný.
• Nepřekonávejte strmé nebo pohyblivé
schody nebo jiné překážky.
• Na obal vozíku nepokládejte těžké před-
měty.
• Dodávaná k vozíku nákupní košík je určen
na max. hmotnost 3 kg. Nerovnoměrné
rozložení hmotnosti v koši může narušit
stabilitu vozíku.
• Položky v koši nesmí vyčnívat po stranách
koše, protože se mohou zašroubovat do
špice.
• Použití neschválených výrobcem náhrad-
ních dílů může být nebezpečné.
• Za péči o technický stav vozíku je zodpo-
vědný uživatel.
• Při přepravě vozíku přes překážky, uji-
stěte se, že žádný ze spojů
• nebude odblokován.
• Nepoužívejte jiná příslušenství a matrace,
než ta, která byla dodána.
• Dodává se kompletní technická taška o
nosnosti 2 kg.
• Tento produkt je vhodný pro dítě, které
nemůže sedět samo, otočit se a pohy-
bovat se na rukou a kolenou. Maximální
hmotnost dítěte: 9 kg
• Nově narozené děti by měly být přepravo-
vané v leže.
Heslo UPOZORNĚNÍ! znamená informaci
týkající se bezpečnosti dítěte.
Heslo POZOR! Znamená informaci pro
ovládaní vozíku.
POZOR!
Poznámky k bezpečnosti a pokyny ob-
sažené v tomto návodu nemohou pokrýt
všechny možné situace a podmínky. Ze
zřejmých důvodů není možné vybavit tento
výrobek pro všechny možné situace. Na
tyto případné situace by měla pamatovat
osoba používající vozík.
Je důležité, aby každá osoba obsluhující
vozík a jeho příslušenství dobře znala tyto
instrukce. Proto každá osoba, která používá
vozík, a to i za velmi krátkou dobu, by měla
být poučena zásadám správného použí-
vání. Když pokyny jsou nejasné a budete
potřebovat další vysvětlení nebo odpově-
dět na jakékoliv další otázky, obraťte se na
autorizovaného prodejce Jedo.
PÉČE A ÚDRŽBA
1. Nenechávejte vozík delší dobu na přímém
slunci.
2. Vozík by měly být skladovány na suchém
místě. V případě, že rám je mokrý, pečlivě jej
vysušte.
3. V případě kontaktu s mořskou vodou
nebo posypovou solí, vozík rádně umyjte a
vysušte.
4. Nenechávejte vozík dlouhou dobu na
jasné podlahové krytině (PVC, linoleum) a
na lakované dřevěné podlaze. Gumové pne-
umatiky mohou způsobit černé skvrny.
5. Doporučuje se, mazání konce osy vozíku
a suspenze každé tři měsíce. Před mazáním
vyčistěte osu hrotu hadříkem. Pro mazání
osy, můžete použít vazelínu nebo automo-
bilový olej.
6. Měli byste zkontrolovat, zda tlak v pneu-
matikách je dostačující. Tlak v pneumati-
kách by měl být od 0,14 do 0,17 MPa
7. Čalounění vozíku lze čistit vlhkým had-
říkem nebo houbičkou s jemným čisticím
prostředkem.
8. Čalounění by neměl být prát v pračce.
9. Uživatel je povinen provádět rutinní kont-
rolu, údržba a čištění vozíku.
PODMÍNKY ZÁRUKY
1.P.P.H.U. Jędroch poskytuje záruku na zboží
značky JEDO na dobu 24 měsíců od data
zakoupení.
2. Stížnosti by měly být předloženy v místě
prodeje, kde jste výrobek zakoupili.
3. Vadný výrobek musí být vrácen v čisté a
bezpečně zabalena kartónové krabici s uži-
vatelskou příručkou.
4. Vady výrobku zjištěné v průběhu záruční
doby budou opraveny bezplatně ve lhůtě 14
dnů ode dne doručení.
CZ uživatelská
příručka

uživatelská příručka | CZuživatelská příručka | CZ
1. ROZKLÁDÁNÍ VOZÍKU
Uvolněte bezpečnostní zámek (obr. 1).
Rozložení vozíku probíhá zatažením za kliku
nahoru, když se klika bude nachází nahoře,
zatáhněte to do správné polohy, klika se pak
následně automaticky zamkne uzavřením
uzávěru, doprovázený zřetelně slyšitelné
„cvaknutí“.
2.MONTÁŽ / DEMONTÁŽ KOL
K odstranění zadních kol kol, stiskněte tla-
čítko na vnitřní straně rámu (v přední části
brzdy) (obr. 2) a vytáhněte kolo s nápravou.
Opakuje na druhé straně.
Chcete-li znovu namontovat tlačítka pro
uvolnění kola zatlačte osu kola do otvoru
v rámu (obr. 3). Poté uvolněte tlačítko a táh-
nout dohromady dokud nezapadne.
- Vsaďte přední kolo 10 „s vidličkou vlože-
ním nápravy vidlice točnu, dokud neuslyšíte
cvaknutí do kola uzamknout do správné
polohy.
Přední kola je možné uzamknout do rovně
otočení mechanismu zámku kol umístě-
ných na obou stranách rámu pod stupačky
(obr. 4) na levé straně (při pohledu z rukoje-
ti), dokud nezapadne. Pro odstranění před-
ního kola, stisknutím tlačítka šedé na vnitřní
straně rámu těsně pod otočným prvkem
zajišťovacího předního kola (obr. 5).
UPOZORNĚNÍ! Na kolečkách je lubrikant,
který může znečistit textilii.
3. SPUŠTĚNÍ BRZDY
Vozík se zastaví při sešlápnutí brzdového
pedálu umístěného na pravém kole (boční
rukojeti). (obr. 6)
Uvolněte brzdu zatlačením totožným brz-
dovým pedálem umístěným na levém kole.
5. Záruční doba se prodlužuje o dobu trvání
opravy.
6. Způsob opravy určuje prodávající.
7. Předpokladem pro přijetí reklamace je mít
doklad o nákupu ke dni vyplněný a pode-
psaný oběma stranami.
8. Výrobce bezplatně odstraňuje možné
závady, které vznikly i přes řádné dodržo-
vání příručky.
9. Záznamy v záručním listu mohou pro-
vádět pouze servisní technici pod hrozbou
neplatnosti. Na chybějící záruční list se
reklamace nevztahuje.
10. Územní působnost záruky pokrývá
oblast Evropské unie, Norska, Švýcarska a
Ruské federace.
11. Záruka na spotřební zboží nevylučuje
omezení nebo pozastavení práva kupujícího
vyplývající z neslučitelnosti zboží.
REKLAMACI NEPODLÉHAJÍ
• poškození způsobená nesprávným skla-
dováním
• mechanická a technická poškození způso-
bená nesprávným používáním nebo po-
užíváním, které není v souladu s návodem
k obsluze.
• změny barvy textilie z důvodu působení
jasného slunečního světla nebo ne-
správným používáním chemikálií.
• přirozené opotřebení mechanických dílů
vyplývající z provozu, vstupu na kte-
roukoliv z jeho vlastních strukturálních
změn výrobku povede ke zrušení záruky.
• všechny Zabarvení způsobené styku se
základovou pryže (např. PVC, linoleum,
dřevěné parkety lak)
• probití trubice
4. MONTÁŽ/DEMONTÁŽ GONDOLY
Umístit gondolu na podvozek zavedením
plastových adaptérů gondoly umístěné ve
spodní části mechanismu centrálního kra-
vatu. K uzavření dojde automaticky.
Chcete-li odebrat gondolu stiskněte sou-
časně tlačítka na obou stranách gondoly
(obr. 7) a následně zvedněte gondolou na
vrchol.
UPOZORNĚNÍ! Před použitím zkontrolujte,
zda je gondola řádně uzamčena v centrál-
ním zapojení.
5. MONTÁŽ SESTAVY NOHOU
Vložte kryt a upevněte jej pomocí zástrček
na bocích kabiny a krytu.
• Výsuvný kryt prvek linka „T“ je třeba
připnout k boxu pomocí magnetů v jeho
vnitřku.
• Prodloužitelný element krycí řádek „R“
může být oříznut do boxu s magnetem,
který se nachází v horní části boudy pod
střechou.
6. REGULOVÁNÍ OPĚRADLA GONDOLY
Nastavitelné opěradlo je regulováno prv-
kem pro regulaci umístěným pod gondolou
ve výšce opěradla (obr. 8).
Chcete-li zvýšit opěradlo, jemně stiskněte
položku a zajistěte opěradlo v požadované
poloze pohybem vpřed nebo vzad.
7. FUNKCE KOLÉBKA
Pro použití funkce kolébka je nutno použít
dva prvky, umístěné v dolní části gondoly
z polohy vodorovné orientaci na vertikální
orientaci (obr. 9 a, b).

uživatelská příručka | CZuživatelská příručka | CZ
8. NASTAVENÍ VĚTRÁNÍ GONDOLY
Chcete-li změnit větrání přesuňte do levé
nebo pravé části ovládání ventilace umístě-
né na spodní straně gondoly (obr. 10)
9. SKLADÁNÍ
K odstranění materiálu uvnitř gondoly od-
halte skryté pod skládacím mechanismem
gondoly (obr. 11), pak přesuňte 4 skládací
mechanismy směrem ke středu gondo-
ly (obr. 12). K rozšíření gondoly je nutné
zavést mechanismy při předkládání původní
pozice.
10. MONTÁŽ SEDÁTKA (PROCHÁZKOVÉHO)
Sestavu sedadla a demontáž, jakož i gondo-
ly se dvěma tlačítek umístěných na obou
stranách sedadla.
Sedadlo může být instalováno dvěma způ-
soby dopředu nebo dozadu směřující.
UPOZORNĚNÍ! Nenoste sedačku uchopením
za podnožky!
UPOZORNĚNÍ! Před použitím zkontrolujte,
zda je sedadlo řádně uzamčena v centrální
zapojen.
UPOZORNĚNÍ! Před použitím kočárku, vždy
zkontrolujte, zda je opěradlo zadního seda-
dla správně uzamčeno.
11. MONTÁŽ/ DEMONTÁŽ SEDADLA
Sedlo je vybaveno vlastní systémem k mon-
táži sedadla. Vložení plastové upevňovací
prvky budky umístěné na koncích hlavy
(obr. 13) v plastových spojek umístěných na
obou stranách opěradla. (obr. 14). Chcete-li
odstranit ochranný kryt, stisknutím tlačítka
na prvku montážní krabice, vytáhněte kon-
zolu nahoru.
12. MONTÁŽ / DEMONTÁŽ / REGULACE
VÝŠKA BARIÉR
Namontovat bezpečnostní lištu umístě-
ním prvek používaný pro upevnění kolejnic
v přepínačích (obr. 15).
Chcete-li nainstalovat kolejnice, stiskněte
tlačítko šedé umístěné na obou stranách
sedadla ve výšce zábradlí (obr. 16 a), vytáh-
něte ji směrem k sobě.
Chcete-li změnit výšku překážek, stiskněte
červené tlačítko (obr. 16 b) umístěné na
obou stranách přímo ke svému konci, a poté
nastavte požadovanou výšku zábradlí. Za-
mknout vybranou položku automaticky.
13. MONTAŻ KRYTU NOHOU (SEDADLO)
Natáhněte krytí a následně je připevněte
k sedadlu.
14. REGULACE OPĚRÁTKA SEDADLA
Opěradlo sedadla je možné nastavit v něko-
lika polohách.
Chcete-li snížit opěradlo, zatáhněte za
plastovou část systému umístěného v zadní
části opěradla, pak nastavte správnou
polohu (obr. 17).
Poznámka!! S použitím stejného tlačítka
můžete vytvořit místo pro půl až tak učinit,
stiskněte tlačítko, jak je popsáno výše, a
jsou pohybující se zpět směrem na předním
sedadle.
Tato operace se provádí po demontáži stán-
ky sedadla (neplatí pro linku R).
Chcete-li zvýšit opěradlo jednoduše tlačte
nahoru, Až se dostanete k Správné poloze.
Uzavření dosáhnete automaticky.
15. NASTAVENÍ POLOHY PODNOŽKA /
NASTAVENÍ DÉLKY
Podnožka může být nastavena v několika
polohách. Chcete-li ukončit stisknutím
dvou tlačítek umístěných na obou stranách
nohou a pomalu spusťte dolů. (obr. 18)
Ke zvednutí podnožky, zvedněte ji ze spuš-
těné polohy směrem automaticky v horní
části zámku.
Podnožka může být prodloužena vytažením
plastového podnožky a připojit jej na do
příslušných otvorů (obr. 19 a, b, c).
16. REGULACE BEZPEČNOSTÍHO PÁSU
(SEDADLO)
Sedadlo je vybaven 5-ti bodovými bezpeč-
nostními pásy.
Použijte je od chvíle, kdy dítě začne sedět
samo.
Odepněte pásy od bodné vidlice s cent-
rálním přezkou, posaďte dítě v sedačce,
nastavte délku pásů pomocí držáků, aby se
vešly do těla dítěte, ale aby jej neutlačovalo,
poté připojte kolébku k centrálním pásům
(obr. 20).
Odstraňte popruhy, otevřete klapku v zadní
části opěradla, a pak přeneste přezky, které
se nachází na koncích pásu do otvorů v
opěradle.
Tímto způsobem budeme rozebírat pásy
umístěné nad ramenem dítěte.
Břišní pásy jsou namontovány na pevno a
nemohou být demontovány.
Chceme-li rozebrat jeden z prvků skořepiny
sedadla pak rozeberte ramenní popruhy
a přetáhněte celý opasek s přezkou přes
otvor v trupu nebo vycpávkou sedadla.
Bezpečnostní pás má další zabezpečení,
které je upevněno kolem zábradlí. To je další
prvek, a nevyjímá se z používání 5-bodové-
ho bezpečnostního pásu.
UPOZORNĚNÍ! Vždy používejte bezpeč-
nostní pásy, když se dítě může sedět
samostatně.
17. DEMONTAŻ ČALOUNĚNÍ SEDADLA
Demontáž začínáme vypojením (bod 11)
a sejmutí pásu (bod 16).
V další fázi je obraz materiál sedadla
odstraněním 4 gumičky lokalizované ve
spodní části sedadla (obr. 21 a, b), které drží
materiál na místě.
Pak vyjměte materiál sedačky zasunutím
ze slotů umístěných kolem zadního sedadla
(obr. 22 a, b).
POZOR! Za předpokladu, že materiál se-
dadla, věnovat pozornost udržení gumu
nevstupuje mechanismus skládání opěradlo
(obr. 23 a, b).
18. NASTAVENÍ VÝŠKY
Stiskněte současně dvě tlačítka na klice
na obou stranách vnitřku
a pohybem rukojeti, respektive snížit nebo
zvýšit jeho výšku (obr. 24).
19. DEMONTÁŽ VOZÍKU
POZOR! Aby se rám k instalaci gondola nebo
sedadlo, koš a nastavit páku v poloze ulpí-
vat na hliníkovém rámu (obr. 25).
POZOR! Vozík se vždy musí skládat se slo-
ženými koly.

uživatelská příručka | CZuživatelská příručka | CZ
Poté předložte stojan stisknutím dvou tlačí-
tek na plastovou rukojeť (obr. 26) umístěné
na rukojeti vozíku.
Po odemknutí mechanismu skládací, vy-
táhněte držadla k sobě a posuňte rukojeť
směrem dopředu.
Aby se dále snížila velikost vozíku před
zahájením postupu pro podání odstranit
kola a blatníky.
Chcete-li odebrat blatníky tahejte směrem
nahoru, vložte je do plastových komponen-
tů pro montáž blatníků (obr. 27).
20. NEPROMOKAVÁ FÓLIE
Vozík je součástí pláštěnka s větracími ot-
vory na obě gondoly a na sedadle. Chcete-li
připojit ji vytáhnout jeden konec k budce,
a druhá na gondolu.
21. MOSKITIÉRA
Gondola a sedlo jsou vybaveny sítí proti
moskytům pro montáž by měla převzít
jeden konec (označená vložka) do kůlny
a připojí ji s vlasem lokalizovaným na obou
stranách, pak háček druhý konec sedadla
komáří gondoly nebo stupačkou.
22. MONTAŻ AUTOSEDAČKY
Vozík je nabízen v provedení s autosedač-
kou pro děti s hmotností od 0 do 13 kg. Aby
bylo možné nainstalovat autosedačku vždy
na prvním místě adaptér do vozíku je ucpání
shodně na gondole, pak instalovat sedačku
na adaptéru. Ucpávání automaticky.
Varování! Před použitím sedačky, ujistěte
se, že adaptéry jsou správně namontovány.
Aby se odpojte adaptér, stisknutím tlačít-
ka na straně sedadla, Opakujte na druhé
straně.
UPOZORNĚNÍ!
Autosedačka používá spolu s podvozkem
nenahrazuje postýlku nebo postel, jestliže
dítě potřeba spánku se doporučuje, aby byly
umístěny v pravém gondoly postýlce nebo
v posteli.
Použití remních adaptérů může být vozík
TRIM namontovat následující míst:
1. Adapter M
• Maxi-Cosi: Cabriox, Citi, Pebble
• Cybex: Aton 3, Aton 4, CBX
• Kiddy: Evolution Pro2, Evo-Lunax
• Safety 1st : Mimas
• Recaro: Privia
• Avionaut: Ultralite, Kite
2. Adapter R
• Römer: Baby Safe Plus,
Baby Safe Plus SHR II
23. INSTALOVÁNÍ / ODINSTALOVÁNÍ KOŠE
Chcete-li vyjmout koš, jemně zvedněte
a vyjměte stojan.
K sestavení koše, umístit jej na 4 plastové
kolíky umístěné na rámu (obr. 28).
Koš lze složit pro přepravu stiskem dno
koše uvnitř.
Table of contents
Languages:
Other Jedo Stroller manuals
