JessEm 07151 User manual

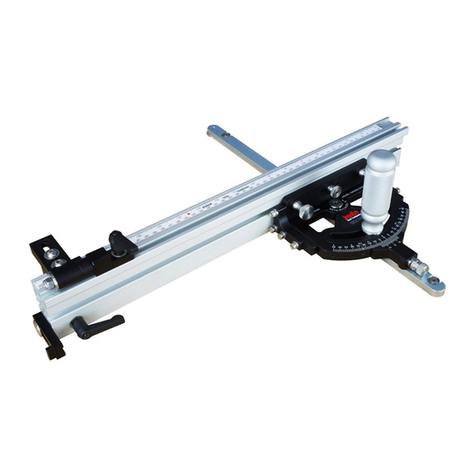
Miter Gauge
Micro Adjuster
Model #07151
x
TO REDUCE THE RISK OF INJURY, USER MUST READ OPERATORS
MANUAL

THANK YOU FOR CHOOSING
Thank you for choosing this product from JessEm Tool Company. We appreciate
your support and hope that our product serves you well. This product is designed
to provide many years of reliable service provided it is used as intended and taken
care of.
X
This user manual will assist you in assembly and general operaon of this product.
It is not our intent to teach you about woodworking. It is assumed that you are an
experienced woodworker with the basic skills and experience necessary to use this
product safely. If aer reading the following instrucons you are unsure or
uncomfortable about safely using this product, we urge you to seek addional
informaon through widely available woodworking books or classes.
X
As part of our Connuous Product Improvement Policy, JessEm products are always
advancing in design and funcon. Therefore, there may be dierences between
what is shown in our catalogs, website or at retail display and what is sold at me
of purchase. We reserve the right to make posive changes to our products at our
discreon.
If you have any quesons about our products or service, please call
us at 1-800-436-6799 or email us at customerservice@jessem.com
Find us on social media
youtube.com/JessEmToolCompany
facebook.com/JessEmTools
instagram.com/jessemtoolcompany
324 Desbrisay Avenue
Moncton, New Brunswick,
E1E 0G8, Canada
Toll Free: 800-436-6799
Local Phone: 705-726-8233
Fax: 705-327-0295
Website: www. JessEm.com

JessEm.com FOR TECHNICAL SUPPORT CALL 1-800-436-6799
Page1
WHATS IN THE BOX
Item #
Descripon
QTY.
1
T-Bolt
1
2
5/16” O.D. x ¼” ID x ¼” Long Bushing
1
3
Fence Mount
1
4
¼” S.S. Small OD Washer
3
5
Plasc Adjustable Knob
1
6
Adjustment Lock Knob
1
7
010 O-ring
2
8
3/8” O.D. x 5/16” ID x 1/4” Long Bushing
1
9
M8 S.S. Small OD Washer
2
10
5/64” Hardened steel Ball
12
11
Adjustment Spindle
1
12
Thrust Bearing Retainer
2
13
Adjustment Screw
1
14
Adjustment Sleeve
1
15
014 O-ring
1
16
Adjustment Knob
1
17
1/8” x 0.25” Acetal Dowel Pin
1
18
8-32 x 3/16” S.S. Cup Point Set Screw
2
19
Adjustment Nut
1
20
Upper Flip Stop
1
21
¼”-20 x 1/2” S.S. BHCS
1
22
¼”-20 x 3/4” S.S. BHCS
1
23
7/16” O.D. x 5/16” ID x 3/8” Long Flanged
1
24
Lower Flip Stop Bushing
1

JessEm.com FOR TECHNICAL SUPPORT CALL 1-800-436-6799
Page2
WARRANTY
JESSEM TOOL LIMITED WARRANTY
All JessEm products are warranted to be free
from defects in material and workmanship.
JessEm will repair or replace any product which
upon inspecon proves to be defecve for a
period of (1) year from dated receipt and proof of
purchase. All warranty claims should be made
direct to JessEm Tool Company.
Contact JessEm for a warranty claim return
authorizaon and instrucons to proceed. The
consumer is responsible for shipping costs to
return product to JessEm Tool Company. We will
repair or replace the product at our discreon
and JessEm Tool will return shipment to you at no
charge.
WARRANTY LIMITATIONS
This warranty does not cover:
• Repairs or alteraons made or aempted by
anyone other than JessEm Tool Company or an
authorized JessEm service professional.
-Normal wear and tear
-Abuse, misuse or neglect.
-Improper care or maintenance.
-Connued use aer paral failure.
-Products that have been modied in any
way.
-Products used with improper accessories

JessEm.com FOR TECHNICAL SUPPORT CALL 1-800-436-6799
Page3
IMPORTANT SAFETY PRECAUTIONS
•Before operang any power tools, read and understand all safety instrucons in the owner’s manual
that came with them.
•If you do not have a manual, contact the manufacturer and obtain one before using any power tool.
•Always wear eye protecon in compliance with ANSI safety standards when operang any power tool.
•Do not wear loose clothing or jewellery that may catch on the tools or equipment.
•Unplug the tool or machine when making any adjustments.
WARNING: To reduce the risk of injury, always
unplug your tool before performing any
maintenance. Never disassemble the tool or try to
do any rewiring on the tool's electrical system.
WARNING: This product can expose you to
chemicals including lead and/or chromium,
known to the State of California to cause cancer and
birth defects or other reproducve harm.
WARNING: Read and understand all
instrucons before using. Failure to follow all
instrucons listed above or to us the micro adjuster
in a safe manor may result in serious personal injury.
WARNING: Drilling, sawing, sanding or
machining wood products can expose you to
wood dust, a substance known to the state of
California to cause cancer. Avoid inhaling wood dust
or use a dust mask or other safeguards for personal
protecon.
TOOLS REQUIRED
-5/32” hex key (included)
Aaching Micro Adjuster to Fence
.x
1. With the plasc adjustable knob loosened,
slide the T-bolt into the T-Track on the top of
your Miter Gauge. Ensure the micro adjuster is
oriented so the ip stop will lay down onto the
face that will be used to push the workpiece
(see gure 1).
x
2. Slide the micro adjuster to the desired posion
and ghten the plasc adjustable knob to lock
it onto the fence.
3. With the ip stop in the downward posion,
slide the lower stop into the upper stop unl it
is aligned with the fence. Using a 5/32” Hex
Key, insert the two screws with washers and
ghten unl the lower stop is rmly aached
to the rest of the body
4. Your Micro Adjuster is now set for your miter
gauge and ready to be used.
x
x
Figure 1
pictured with Mite-R-Excel II (Not Included)

JessEm.com FOR TECHNICAL SUPPORT CALL 1-800-436-6799
Page4
Note: this product has been designed to be
used with the JessEm Mite-R-Excel II.
HOW TO USE
1. Loosen the adjustment lock knob and
turn the adjustment knob unl the stop
is located roughly in the middle of its
range of moon. Reghten the
adjustment lock knob and turn the
adjustment sleeve unl it is zeroed in
its current posion. This will allow you
to adjust the stop in either direcon if
required.
2. Loosen the plasc adjustable handle
and slide the Micro Adjuster unl the
right-hand side of the upper ip stop is
aligned with the desired cut length.
3. Using a scrap piece of wood, make a
cut and check the length. If the length
is o, loosen the adjustment lock knob
and turn the adjustment knob to
change the length. Use the scale on the
adjustment sleeve to adjust by the
correct amount. Turning the
adjustment knob clockwise will
lengthen the cut while counter
clockwise will shorten it. Ensure the
adjustment lock knob is reghtened
before making another cut.
4. When not in use, simply ip the stop
out of the way to use the miter gauge
without obstrucon.
Table of contents
Other JessEm Tools manuals
