manuals.online logo
Brands
  1. Home
  2. •
  3. Brands
  4. •
  5. Johnson
  6. •
  7. Laser Level
  8. •
  9. Johnson 9100 User manual

Johnson 9100 User manual

This manual suits for next models

1

Other Johnson Laser Level manuals

Johnson 40-6690 User manual

Johnson

Johnson 40-6690 User manual

Johnson JLX LEVEL UP 40-6681 User manual

Johnson

Johnson JLX LEVEL UP 40-6681 User manual

Johnson 40-6680 User manual

Johnson

Johnson 40-6680 User manual

Johnson 1876-2400 User manual

Johnson

Johnson 1876-2400 User manual

Johnson 40-6250 User manual

Johnson

Johnson 40-6250 User manual

Johnson 40-6692 User manual

Johnson

Johnson 40-6692 User manual

Johnson 40-0612 User manual

Johnson

Johnson 40-0612 User manual

Johnson 40-6636 User manual

Johnson

Johnson 40-6636 User manual

Johnson 40-6650 User manual

Johnson

Johnson 40-6650 User manual

Johnson 40-6028 User manual

Johnson

Johnson 40-6028 User manual

Johnson 40-6174 User manual

Johnson

Johnson 40-6174 User manual

Johnson 40-6250 Operating and maintenance instructions

Johnson

Johnson 40-6250 Operating and maintenance instructions

Johnson 40-6936 User manual

Johnson

Johnson 40-6936 User manual

Johnson 40-6602 User manual

Johnson

Johnson 40-6602 User manual

Johnson 40-6650 User manual

Johnson

Johnson 40-6650 User manual

Johnson 40-6080 User manual

Johnson

Johnson 40-6080 User manual

Johnson 40-6060 User manual

Johnson

Johnson 40-6060 User manual

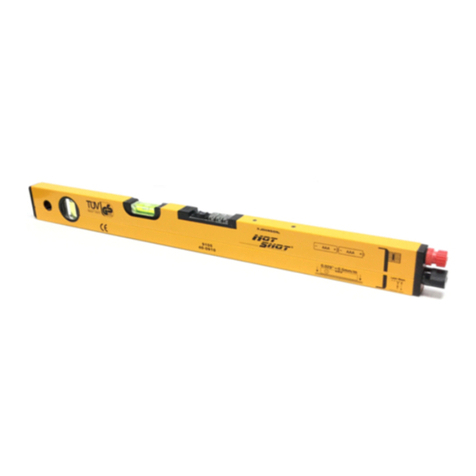
Johnson Hot Shot 40-0917 User instructions

Johnson

Johnson Hot Shot 40-0917 User instructions

Johnson 40-6060 User manual

Johnson

Johnson 40-6060 User manual

Johnson 40-6674 User manual

Johnson

Johnson 40-6674 User manual

Johnson 40-6685 User manual

Johnson

Johnson 40-6685 User manual

Johnson 1760-2400 User manual

Johnson

Johnson 1760-2400 User manual

Johnson HOT SHOT 9105/40-0910 User manual

Johnson

Johnson HOT SHOT 9105/40-0910 User manual

Johnson 40-6688 User manual

Johnson

Johnson 40-6688 User manual

Popular Laser Level manuals by other brands

Sokkia DT7C Operator's manual

Sokkia

Sokkia DT7C Operator's manual

Nedo ET-5 operating instructions

Nedo

Nedo ET-5 operating instructions

geo-FENNEL Maxi-Liner FL 65 HP user manual

geo-FENNEL

geo-FENNEL Maxi-Liner FL 65 HP user manual

LaserLiner X2-Laser manual

LaserLiner

LaserLiner X2-Laser manual

Spectra LL300N manual

Spectra

Spectra LL300N manual

geo-FENNEL Selection PRO FLG 40-PowerCross GREEN SP user manual

geo-FENNEL

geo-FENNEL Selection PRO FLG 40-PowerCross GREEN SP user manual

Nedo Crossliner 4 operating instructions

Nedo

Nedo Crossliner 4 operating instructions

Lasertec FX360G instruction manual

Lasertec

Lasertec FX360G instruction manual

Flex ALC 8 Original operating instructions

Flex

Flex ALC 8 Original operating instructions

Cocraft HL 20-SG Original instructions

Cocraft

Cocraft HL 20-SG Original instructions

LaserLiner SuperCross-Laser SCL 2 operating instructions

LaserLiner

LaserLiner SuperCross-Laser SCL 2 operating instructions

Leica iCON robot 60 user manual

Leica

Leica iCON robot 60 user manual

DeWalt DW082 Original instructions

DeWalt

DeWalt DW082 Original instructions

LaserLiner ActiveFinder XP user manual

LaserLiner

LaserLiner ActiveFinder XP user manual

imex EL20 manual

imex

imex EL20 manual

Fixturlaser NXA D I-0912 user manual

Fixturlaser

Fixturlaser NXA D I-0912 user manual

Skil 560 Original instructions

Skil

Skil 560 Original instructions

Metrica 33806 Operation manual

Metrica

Metrica 33806 Operation manual

manuals.online logo
manuals.online logoBrands
  • About & Mission
  • Contact us
  • Privacy Policy
  • Terms and Conditions

Copyright 2025 Manuals.Online. All Rights Reserved.

ABOUT THIS PRODUCT
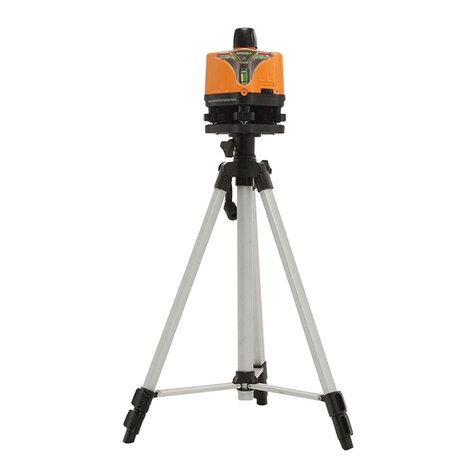
This leveling instrument uses a laser beam to plot distant points or lines.
The sleeve, or main body, of this spirit level is made of heavy-duty aluminum
and contains two level vials (horizontal and adjustable) as well as a
semi-conductor laser.
When installed on the leveling base and rotated 360-degrees, the laser
point (beam) of this level will always project at a constant horizontal. The
lightweight, yet sturdy, tripod quickly sets the laser point at the required
height. The laser point attachments included in the kit help find level and
plumb points easily. These attachments can be adjusted to any angle.
This level may be used both indoors and out. It is suitable for contractors
and DIY’ers alike.
ACCESSORIES INCLUDED
• 360-degree rotating leveling base
• Telescoping tripod
• 90-degree angle deviator (splitter) lens
• Line projection (spreader) lens
• Tinted goggles
• 2 AAA (1.5V) batteries
ATTENTION! ATTENTION!
• Never look into the laser beam without certified eye protection.
Improper use of this laser level may cause injury to the eyes.
• Do not direct laser beam at another person or reflective surfaces.
Even a lower capacity laser beam may cause injury to the eyes.
• Store laser level out of children’s reach. It is not a toy.
• Any change to the laser level resulting in increased performance is
strictly prohibted. Any claim for damages due to injuries resulting
from the non-compliance of these safety instructions will be refused.
• When storing laser level for time periods over 3 months, remove the
batteries from the unit in order to avoid damage due to battery leaks.
• This laser level does not contain any serviceable parts. Never open
the housing, as this will void the warranty.
2© 2003 Johnson Level & Tool Mfg. Co., Inc.
LASER LEVEL KIT
Model #9100/40-0909
ASSEMBLY & OPERATING MANUAL
INSERTING/CHANGING BATTERIES
& ACTIVATING THE LASER BEAM
Open the red, threaded connector
and insert the two AAA (1.5V) batteries
as shown on the diagram printed on
the level sleeve.
To turn the laser level “on”, rotate the
knob located above the laser beam
exit hole in a clockwise direction.
To turn the beam “off”, rotate the
knob counter-clockwise.
Note: Used (discharged) batteries
are hazardous waste and must be
disposed of properly.
ASSEMBLY & ADJUSTMENT
Expand the legs of the tripod and position it firmly on an
even, near-level surface. On uneven surfaces and inclines,
compensate by adjusting the telescoping legs of the tripod
and find level with the aid of the built-in Bull’s Eye™ centering
vial (found at the top of the tripod’s base).
Tightly screw the rotating leveling base and tripod together.
Bring the leveling plate of the base into a level position
by means of the three adjusting screws and the built-in
Bull’s Eye™ centering vial.
Place the spirit level on the leveling plate and tighten
it with the locking clamp. Check to ensure the vial registers level.
Use the regulating screws to adjust. (Center the bubble exactly
between the markings on the vial).
Loosen the “stop” screw, rotate the level 90 degrees and check for level
again using one of the other adjusting screw(s)--if necessary. Return to
original position and re-check, re-adjusting if required.
The elevation of the laser point can be fixed to the desired position
using the tripod’s handle crank. Use the degree scale on the leveling
base to set the level at the required angle.
Threaded connector
On/off knob
Laser beam exit hole
WARNING!
DO NOT LOOK DIRECTLY INTO THE LIGHT BEAM.
DO NOT AIM LIGHT BEAM DIRECTLY INTO EYES.
THIS WILL DAMAGE THE EYES.
© 2003 Johnson Level & Tool Mfg. Co., Inc. 3
TECHNICAL INFORMATION
Class 2 Laser; Class 3 Protection
Length of Level: 15-3/4" (40cm)
Measuring Range: 40-45m
Measuring Accuracy: +/- 1/4" at 40 ft. (+/- 0.5mm/m)
Maximum Yield: <1mW
Wavelength: 630-680nm
Power Supply: 2 AAA (1.5V) batteries
Laser spirit level Horizontal level vial
Laser beam exit hole
On/off switch
Adjustable vial
Rotating base
Level clamp screw
Level adjusting screw
4© 2003 Johnson Level & Tool Mfg. Co., Inc.

GUARANTEE STATEMENT
This Laser Level Kit is guaranteed against all defects
in construction and material. This guarantee is limited
to the replacement of defective parts upon presentation
of the original sales receipt. This guarantee is not applicable
in the event of, but not limited to, damage due to misuse
by failing to heed the instructions presented herein,
of unauthorized manipulation of the level and its
attachments, or upon negligence of the purchaser/user.
NF EN 60825-1 1997
NF EN 60825-1/A1 2000
CLASS 2 LASER
90° ANGLE/
BEAM SPLITTING OPTION
By inserting the splitter lens into the laser beam
exit hole, the emerging laser beam is split by
90 degrees. This generates a vertical (perpen-
dicular) reference line to the standard, horizon-
tal laser beam.
LINE PROJECTION
By mounting the line projector attachment, a
line will be projected onto the wall (instead of a
point). In order to achieve the most accurate
line, mark two points with the help of the point
beam. Mount the line projector attachment and
connect these points with the projected line.
Please note: Use of the line projection lens
results in a loss of brightness.
WARNING!
DO NOT LOOK DIRECTLY INTO THE LIGHT BEAM.
DO NOT AIM LIGHT BEAM DIRECTLY INTO EYES.
THIS WILL DAMAGE THE EYES.
© 2003 Johnson Level & Tool Mfg. Co., Inc. 5 6 © 2003 Johnson Level & Tool Mfg. Co., Inc.