LIVELLA DIGITALE
Manuale operativo
SiMboli Sul diSplay lCd
Il simbolo batteria lampeggia quando la tensione scende
sotto 2.2V
Indica che la funzione di segnalazione acustica è attiva
reF Indica che lo strumento è in modalità angolo relativo
HIndica che la funzione HOLD (blocco della misura) è attiva
In modalità angolo assoluto, quando la livella è a +/- 1°
vicino allo zero, il display LCD simula il modo di funziona-
re di una bolla
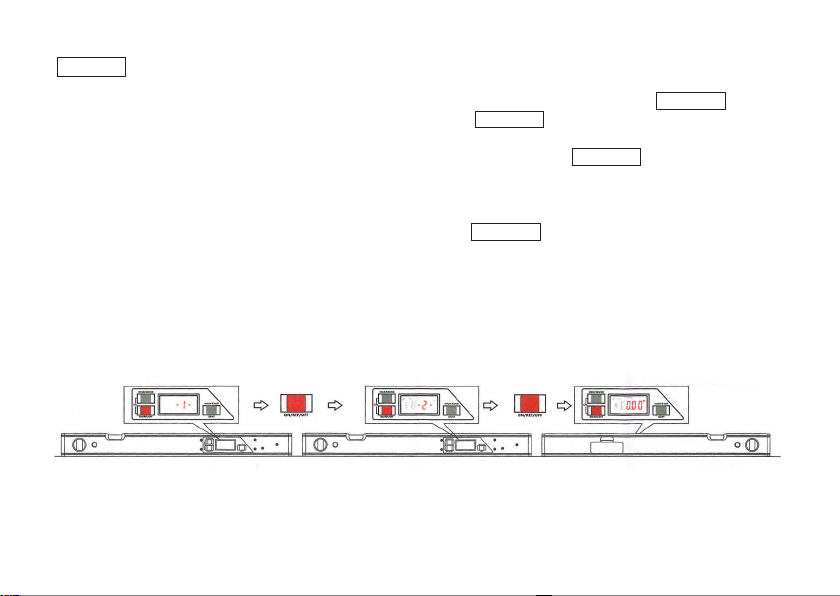
-1- Indica che la livella digitale si sta calibrando in una 1°
direzione
-2- Indica che la livella digitale si sta calibrando nella 2° dire-
zione opposta alla prima
note iMportante
1) La livella digitale è stata pre-tarata in fabbrica
2) Il prodotto deve essere ricalibrato solo se è stato fatto cadere
(vedi taratura)
3) Per facilitare la lettura, quando si superano i 90° sul display i
numeri si capovolgono e il segno +/- si inverte.
4) “ERRO” compare quando la livella è inclinata di più di 30° in
avanti o indietro ed è fuori dal suo campo di misura.
taSti FunZione
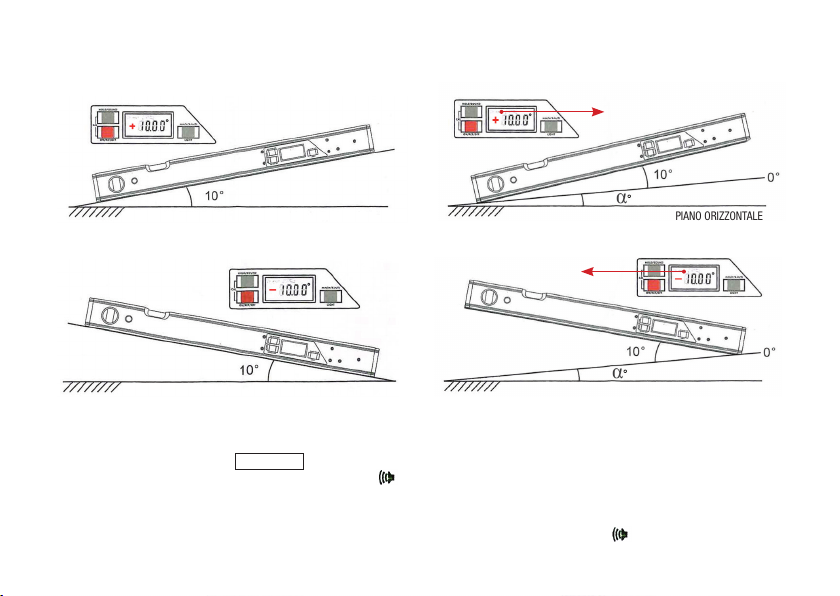
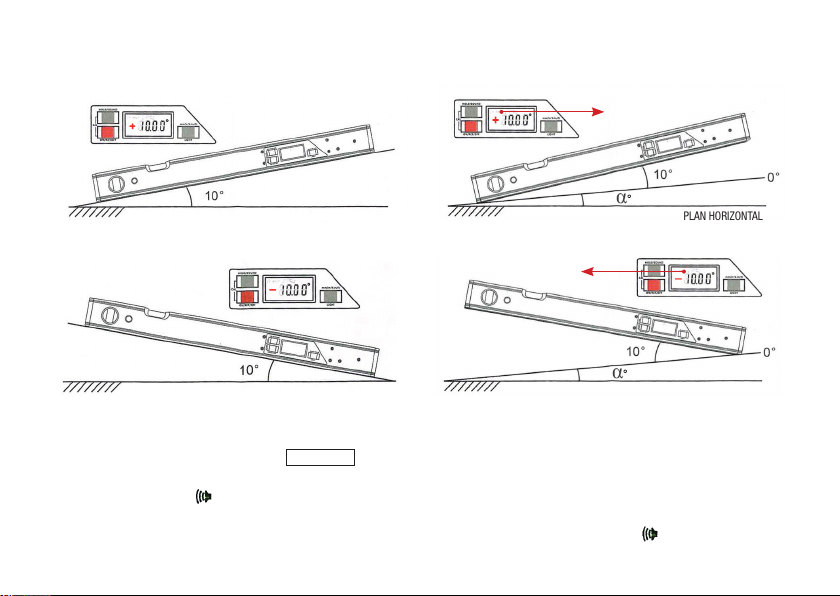
ON/REF/OFF
Premere una volta il pulsante per accendere lo
strumento. Premere in successione il pulsante
per scegliere la modalità di misurazione angolo
assoluto (Fig. 1) o misurazione angolo relativo
(Fig. 2 compare il simbolo REF). In modalità REF,
lo strumento inizia a misurare l’angolo a partire
dalla posizione in cui si trova la livella all’atto
dell’azzeramento. Premere il pulsante per oltre 3
secondi per spegnere lo strumento.
HOLD/SOUND
Premere brevemente una volta per accedere alla
funzione HOLD e l’icona Hverrà visualizzata. La
misura visualizzata viene congelata. Per tornare
alla misura istantanea, premere nuovamente il
tasto HOLD brevemente.
Attenzione: la funzione HOLD può essere at-
tivata sia in modalità angolo assoluto che in
modalità angolo relativo (REF).
LCD
TASTO
FUNZIONE