JohnsonSuisse Colonial Instruction sheet

Wall Basin Model JBSC861.1
Pedestal Model JBSC830
Installation Guidelines
Colonial - Wall Basin with Pedestal
610
205
80
~810
455
205
1/2
General Dimensions
Bathroom Products Australia
2/97 Banksia St.
Botany, NSW, 2019
Tel: 1300 717 717
Fax: 1300 746 480
www.johnsonsuisse.com.au
2/2
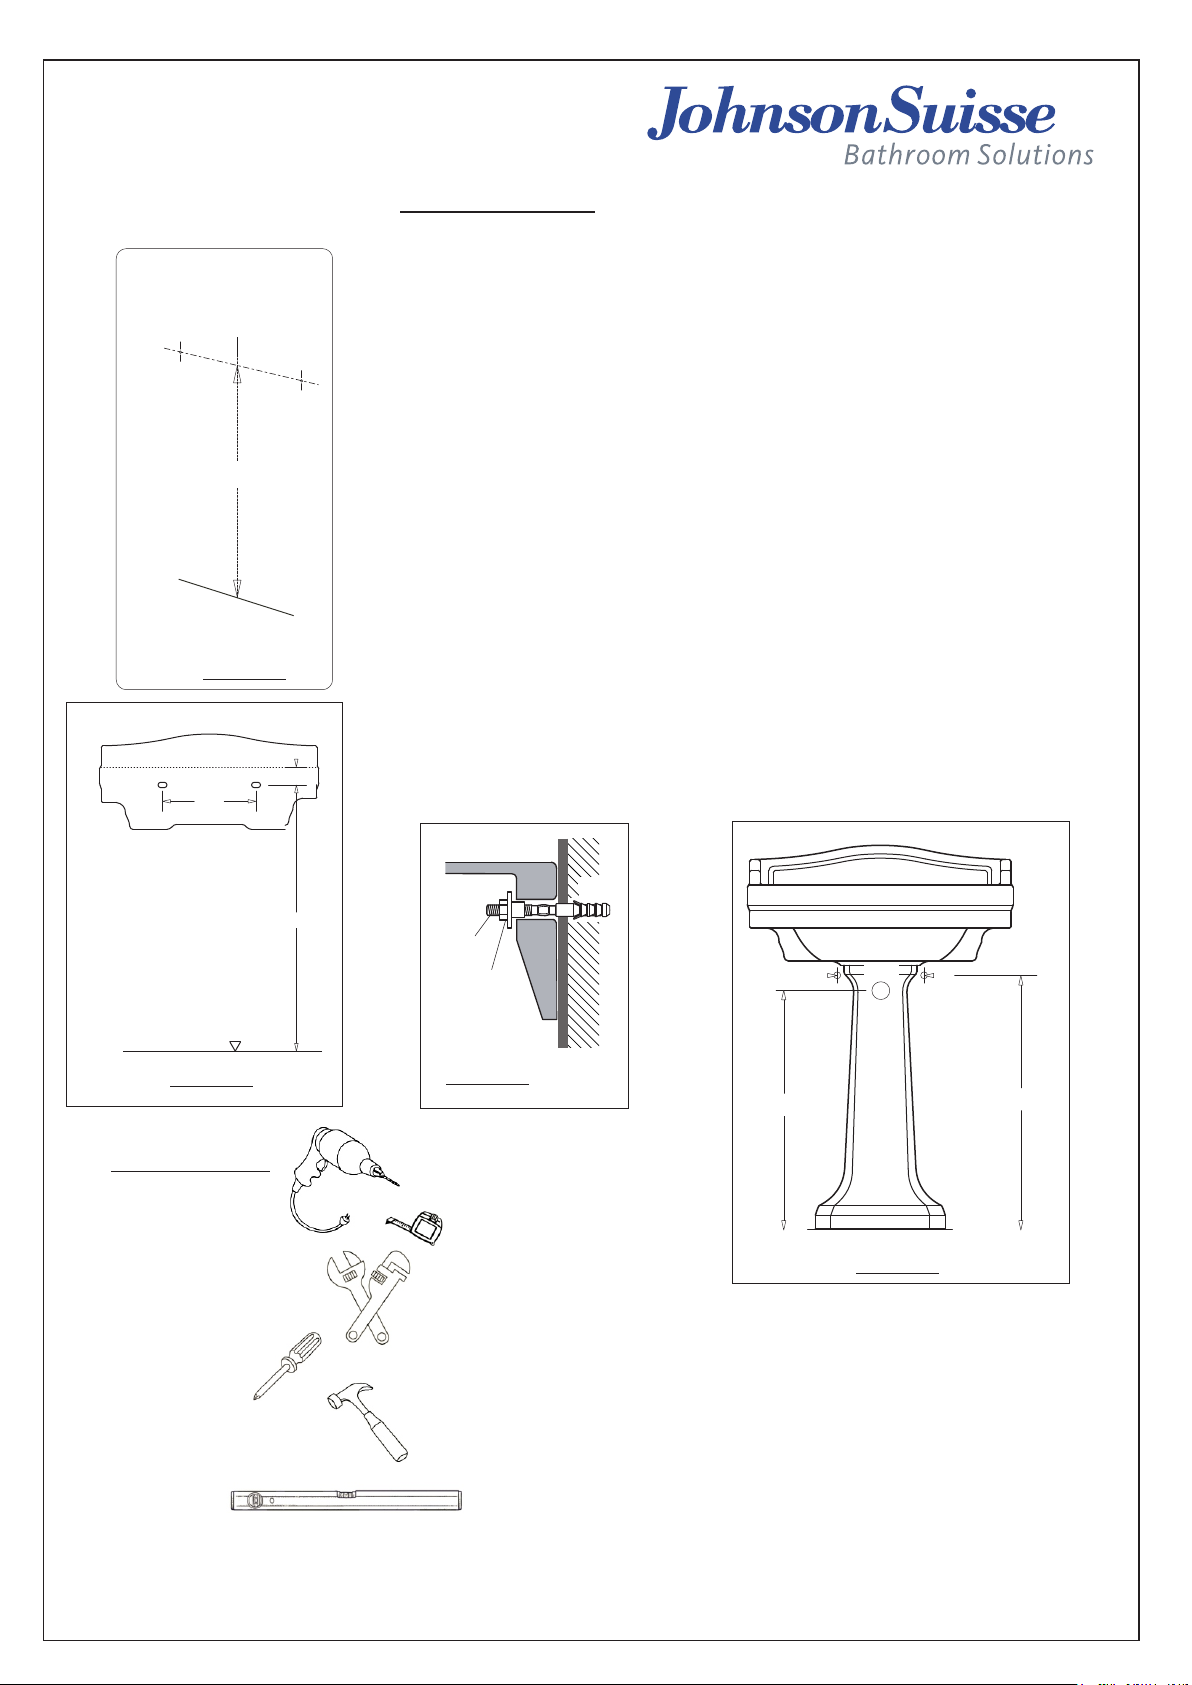
INSTALLATION
• Determine the required position for the basin, and mark a vertical
centerline for this position.
Note: the Basin need to be installed supported by the Pedestal.
•Mark a horizontal line for the fixing at ~760mm above finished floor
level, and mark at 130mm each side of the centerline (refer to
diagram 1 and 2).
•Drill 2 holes Ø12mm in the wall (masonry), insert wall plugs and
screw in the Rag bolts securely. Position the basin, and secure to
the wall using the Plastic Flange Nuts (refer to diagram 3).
If installing into a timber frame, drill a 6m pilot hole and thread
rag bolt directly into timber.
•Check at this point that the pedestal will fit underneath the basin,
and if not, make the necessary adjustments.
•Ensure that the waste and water inlets are in place (refer to
diagram 4).
•Make all water and waste connections as required.
•Position pedestal in place on the floor and under the basin.
•Seal around the sides and top of the basin with a suitable silicone. It
is recommended to also apply silicone to the part-line between the
basin and pedestal to assist in securing the pedestal to place.
Required Tools
ŸDrill
ŸTape Measure
ŸSpanners
ŸScrewdriver
ŸHammer
ŸSpirit level
V0.1
130
~760
WALL FIXING
DIMENSIONS
Diagram 1
Diagram 2
FFL
260
50
BACK VIEW
~760
Diagram 3
* RECOMMENDED WATER INLET/OUTLET LOCATIONS
550*
200*
590*
Diagram 4
Wall
Plug
Plastic flange
Nut
Rag Bolt
Basin
130
C
L
This manual suits for next models
1
Other JohnsonSuisse Bathroom Fixture manuals


