Joy-it MOTORINO User manual

MOTORINO
Motor controll for Arduino
1. GENERAL INFORMATION
Dear customer,
thank you for choosing our product. In the following, we will show you how to
use your product.
Should you encounter any unexpected problems during use, please do not
hesitate to contact us.
The Motorino board is an expansion board for the controll and application
of up to 16 PWM controlled 5 V servo motors. The board must be additionally
supplied with a voltage from 4.8 to 6 V that the supply of the motors is ensured
at any time. That way it is also possible that greater projects can be supplied
with enough power.
It is for example perfect to control the JOY-IT robot arm.

2. TECHNICAL DETAILS & SAFETY INSTRUCTIONS
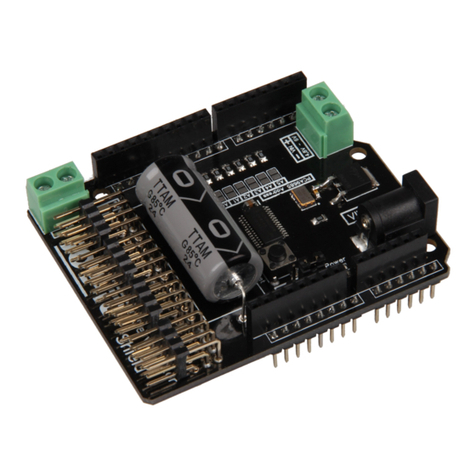
The Motorino expansion board is equipped with 16 channels for
5V-servomotors as well as with a connection possibility for one additional
capacitor. The power supply can be either supplied with a coaxial power
connector or with a voltage supply, both from 4.8 to 6 V.
The Motorino board possesses additionally a crystal oscillator to rene
frequencies as accurately as possible and to minimise deviations as little as
possible.
Art-No.: Robot02
high-quality robot arm made of
aluminium with pivoted rotary
plate and accommodation for
motor control /
singleboard-computer
powered by 6 pieces of 20 kilo
digital servomotor

On the backside of the board can be read a
numeration of channels.
The 3 PINs of each channel are read buttom-up for
the connection of the ground line, voltage line and
the signal line [GND | V+ | PWM].
Plug the board on the PINs of your Arduino and
the cable of your 5 V servo motors at the channel
PINs.
An additional voltage supply via a cable or a 5V
coaxial power connector is for the operation
mandatory.
To prevent abrupt voltage drops is the board
euipped with a capacitor. But should this in
special exceptions not be suiecient enough
then an additional capacitor can be connected in
parallel at the provided connection.
Channel 0-15
4,8 - 6 V
voltage supply
4,8 - 6 V DC IN
connection
for
additional
capacitor
Your power supply must be adjusted of its performance at your connected
motors because insuiecently dimensioned power supplies can be regonized
that the motors are jerking instead of a owing movement.
We recommend the application of our 4.8 A power supply RB-Netzteil2 which
oers a continuous output of 24 W.
Aer you plugged in the expansion board on your Arduino, the connection of
an additional power supply and the connection of servo motors, the board is
ready to use.

saey instruction:
To prevent a reserve polarity, note the identiers on the board of each inputs
(+ and - symbol). A reserve polarity can cause damage to your board, the
connected Arduino and other peripherials!
The connected motors and their generated movement can be a danger. We
recommend of having adequate safety distance or rather to take measures
that no one encounters moving parts.
3. ESTABLISHMENT OF THE ARDUINO
Aer you plugged in the expansion board on your Arduino Uno, the connection
of an additional power supply and the connection of servo motors, the board
is ready to use.
It can be used as the power supply a 5 V coaxial power connector as well as a
voltage from 4.8 up to 6 V from the provided input.
The soware example from chapter 4 shows the fundamental functions and
applications of the servo motors with the Motorino. The servo motors can be
connected with an arbitrary channel. The example controlls each channel one
aer another and uses the exhaustive range of motion of the servo motors. As
a matter of course is it possible to adjust and change the example aer your
purposes and requirements.
Upload the complete sample code on your Arduino.
Note that you have to download the additional libraries rst into your Arduino
library management. The necessary steps can you read in the following. Also
note that for the application of the example it has to be downloaded the
additional library Wire from the library data base.
Because our Motorino board is equipped with an additional crystal oscillator
for which is a special library needed as well. This is based on the Adafruit-PWM-
Servo-Driver-Library, which is particular adjusted at your board.
We recommend using only our modied library.
This library can be downloaded with the following link.
http://cloud.joy-it.net/index.php/s/dugsbHDtye59owY

Open like in the follwing picture the Arduino library management to install the
Wire library.
Aer that the library mangaement opens, search for Wire library and install it.

Next step is to add the modied library aer you already downloaded it.
Unzip rst the downloaded archive and copy it in the le Adafruit-PWM-Servo-
Driver-Library-master in the following register:
C:\Users\[your user name]\Documents\Arduino\libraries
The libraries are now installed completely.
4. INSTALLATION OF THE MODULE
Now you can execute the example le to test the Motorino board. You can nd
this le in the following register:
Open the there the le with your Arduino programm and transfer it fully to
your Arduino. The example program will activate all servo channales one aer
another.
C:\Users\[your user name]\Documents\Arduino\libraries\Adafruit_PWM_Servo_Driver_Library\examples\servo
5.ESTABLISHMENT OF THE I2C-ADRESS
It is also possible to connect various Motorino boards. In doing so, you have to
note that each board needs its own I2C adress. To congurate this , the jumper
can be soldered. A open jumper means therefore a 0 in the address and a
closed jumper an 1.

www.joy-it.net
Simac Electronics Handel GmbH
Pascalstr. 8 47506 Neukirchen-Vluyn
Published: 16.07.2019
7. SUPPORT
If any questions remain open or problems arise aer your purchase, we are
available by e-mail, telephone and with a ticket support system to answer
these.
Ticket-System: http://support.joy-it.net
Telephone: +49 (0)2845 98469 – 66 (10 - 17 o‘clock)
For further information visit our website:
www.joy-it.net
6. FURTHER INFORMATION
Our information and redemption obligation according to
the electro-law (ElektroG)
Symbol on electrial and electronic products :
This crossed-out bin means that electrical and electronic products do not
belong into the household waste. You must hand over your old appli-ance
to a registration oice. Before you can hand over the old appliance, you
must remove used batteries and accumulators which are not enclosed by
the device.
Return options :
As the end user, you can hand over with the purchase of a new device
your old appliance (which has essentially the same functions as the new
one) free of charge for disposal. Small devices which do not have outer
dimensions greater than 25 cm can be submitted independently of the
purchase of a new product in normal household quantities.
Possibility of restitution at our company location during our opening
hours :
Simac GmbH, Pascalstr. 8, D-47506 Neukirchen-Vluyn
Possibility of restitution nearby :
We send you a parcel stamp with which you can send us your old appliance
free of charge. For this possibility, you must contact us via e-mail at
Information about packaging:
Please package your old appliance safe during transport. Should you not
have a suitable packaging material or you do not want to use your own
material, you can contact us and we will send you an appropriate package.
2
1
Table of contents
Other Joy-it Controllers manuals
Popular Controllers manuals by other brands

Sollae Systems
Sollae Systems CIE-H14G user manual

LSI
LSI MegaRAID SCSI 320-2E Quick Hardware Setup Guide

Auber Instruments
Auber Instruments DSPR300 instruction manual

Alcor
Alcor AU9440 Technical reference manual

National Instruments
National Instruments Network Adapter NI PXIe-6672 installation guide

Pentair
Pentair AVID XA+ Installation & operating instructions