•
Do not use machine if ON/OFF switch does not work. In the unlikely
event that the switch becomes defective, have it replaced by a qualified
JUGS service technician.
•
Keep the machine clean, and free of grit and dirt. WIth the machine
unplugged, use only a clean damp cloth for cleaning. Never use brake
fluids, gasoline, petroleum-based products, or any solvents to clean the
machine.
•
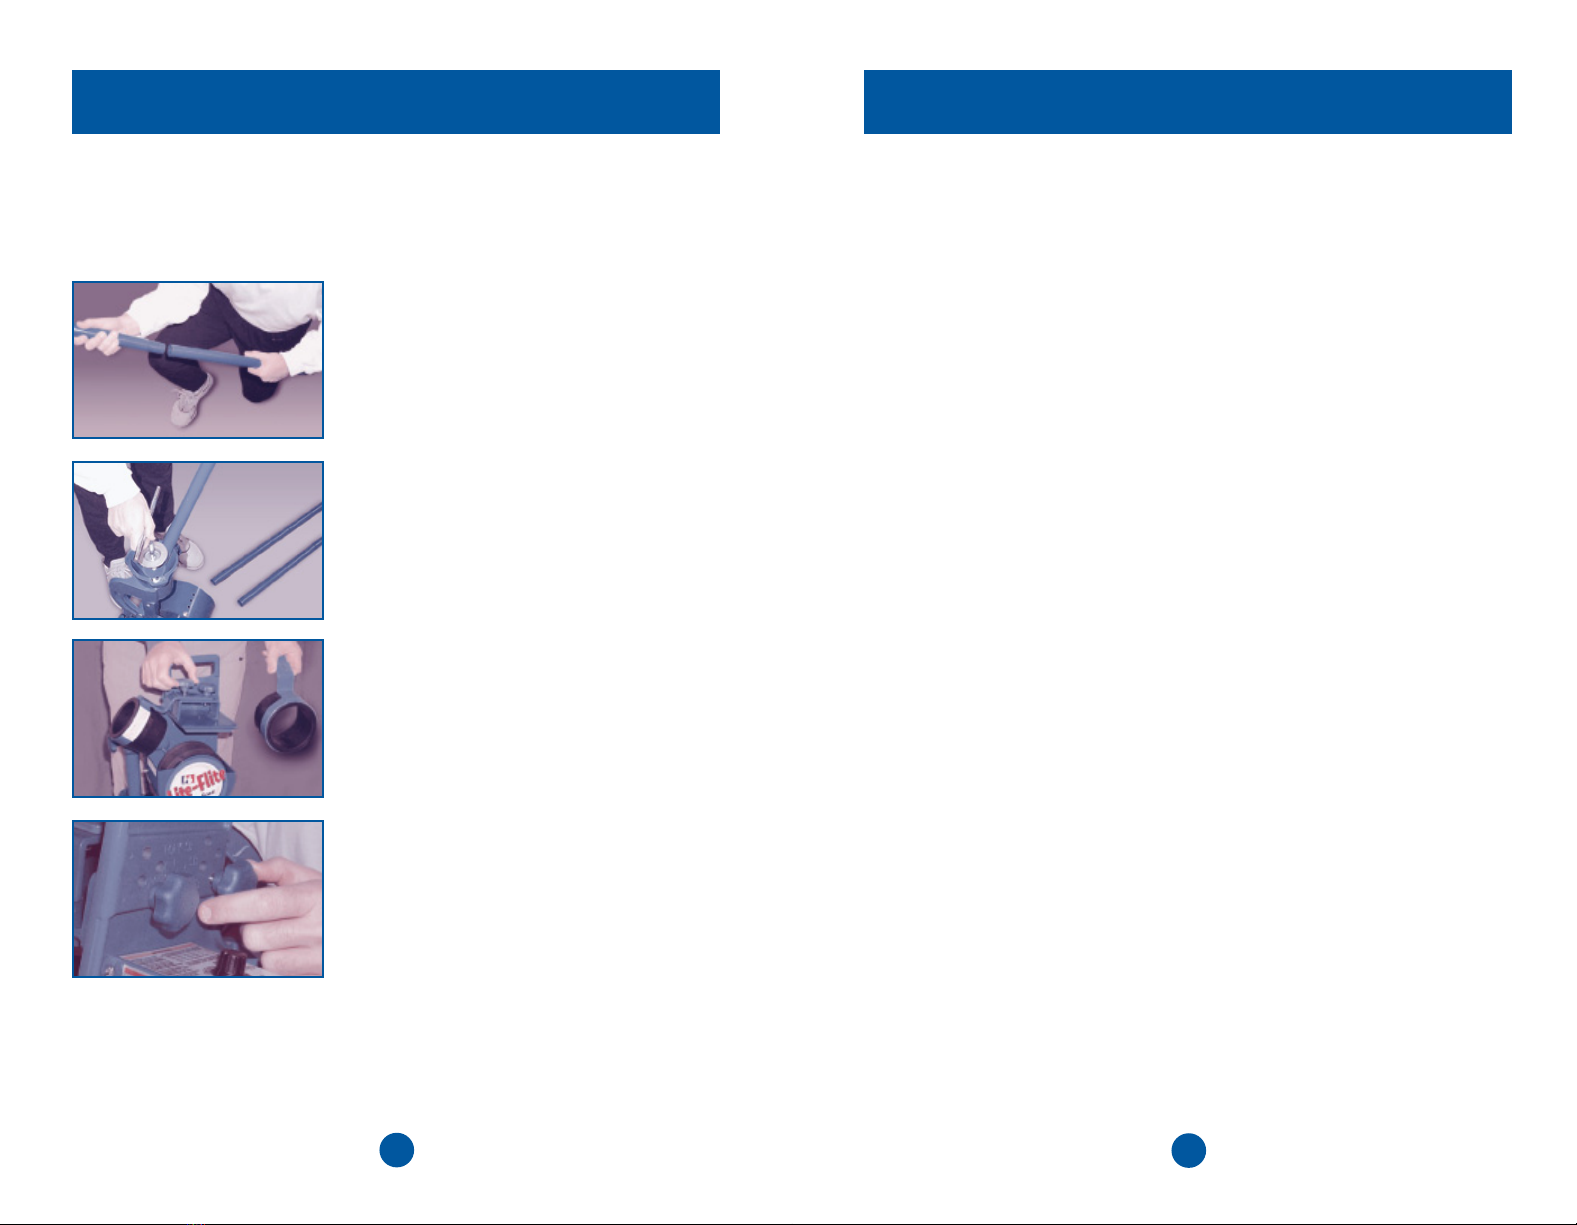
Tighten the T-Handle and Switch-and-Play
™
knobs securely after
adjusting trajectory.
•
Protect the operator. Place a pitcher's screen in front of the pitching
machine.
•
Operate and store this pitching machine only in a clean, dry location.
Do not use outdoors if it is raining. If machine becomes wet, do not use. A
potential shock hazard exists if this machine is used while or after it has
become exposed to water. Hand-dry surface water from machine with a
clean cloth and allow the machine to completely air-dry before its next use.
•
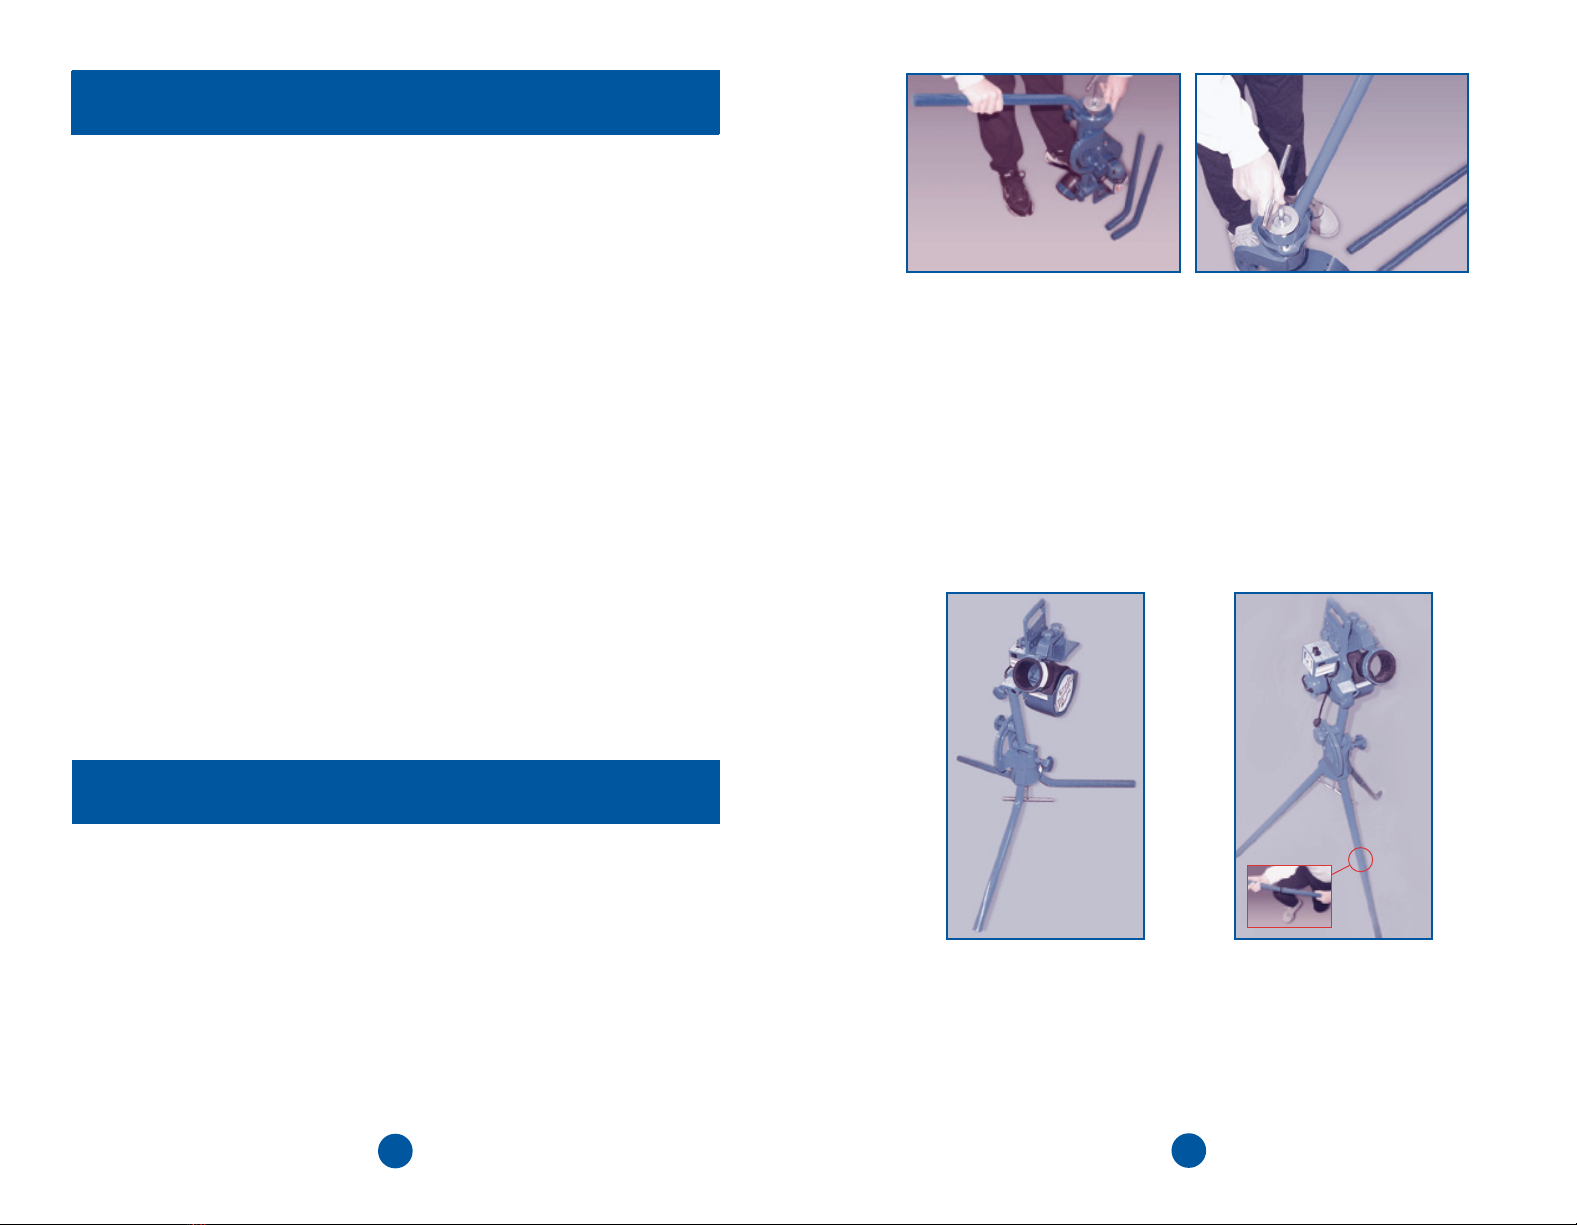
Avoid awkward operations and hand positions where a sudden slip
could cause your hand to move into the rotating tire. ALWAYS make sure
you have good footing and balance.
•
Use only JUGS replacement parts when servicing. All repairs, whether
electrical or mechanical, should be made by a qualified JUGS service tech-
nician.
•
Do not operate this machine under the influence of drugs, alcohol, or
any medication.
•
Stay alert and exercise control. Watch what you are doing and use
common sense. Do not operate this machine when you are tired. Do not
rush.
•
Avoid accidental starting when reconnecting to a power supply.
Always turn off the machine before disconnecting it from a power source.
Never leave the machine running unattended. Turn the power off. Do not
leave the machine until the tire has come to a complete stop.
8
•
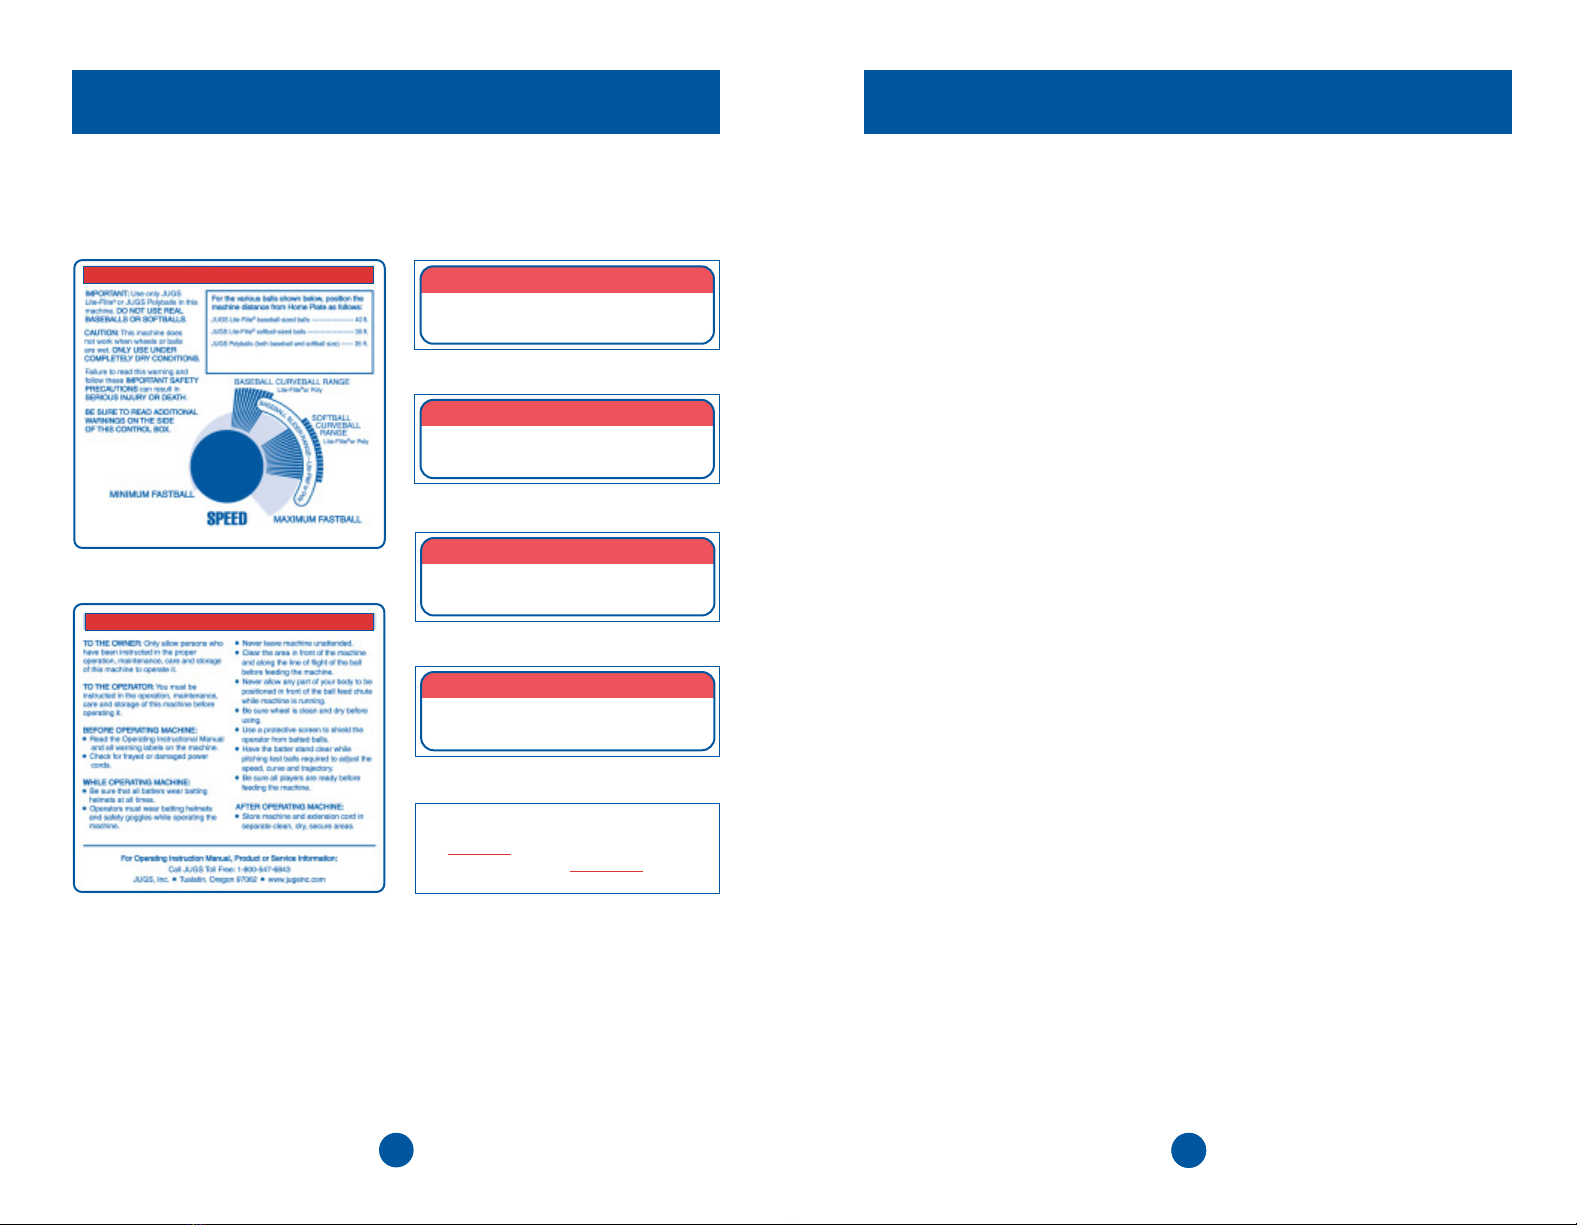
Use the right ball. Use only JUGS
Lite-Flite
®
or JUGS Polyballs in this
machine. DO NOT USE REAL
BASEBALLS OR SOFTBALLS.
•
Inspect extension cords periodically. Replace them if damaged.
•
Use the proper extension cord. Make sure your extension cord is in
good condition. When using an extension cord, be sure to use one heavy
enough to carry the current your machine will draw. An undersized cord
will cause a drop in line voltage resulting in loss of power and overheating.
Awire gauge size (A.W.G.) of at least 16 is recommended for an extension
cord 25 feet or less in length. If in doubt, use the next heavier gauge. The
smaller the gauge number, the heavier the cord.
•
Do not abuse the cord. Never yank the cord to disconnect it from a recep-
tacle. Keep cord away from heat, oil, and sharp edges. Stay constantly
aware of the cord’s location, and keep it well away from the rotating tire.
•
Dress properly. Do not wear loose clothing, gloves, neckties, rings,
bracelets, or other jewelry. They can get caught and draw you into the
moving parts. Long hair should be tied up and tucked under hats and
helmets. Severe physical harm may result if loose clothing, jewelry or hair
is caught in rotating tire.
•
Always wear safety glasses and batting helmets while the wheels are
rotating. Debris on the tires can fly off and cause physical harm. Everyday
eyeglasses have only one-impact-resistant lenses; they are NOT safety
glasses.
•
Never touch rotating tire. Do not put hands or fingers into the ball feed
chute. Hands and fingers should only go to the edge of the chute.
•
Inspect the machine before every use. If damaged, have it repaired by
a qualified JUGS service technician.
•
Inspect tire before every use. Be sure tire is free of grit and debris before
turning on the machine.
7
LF Instructions.0103 3/22/04 11:17 AM Page 8