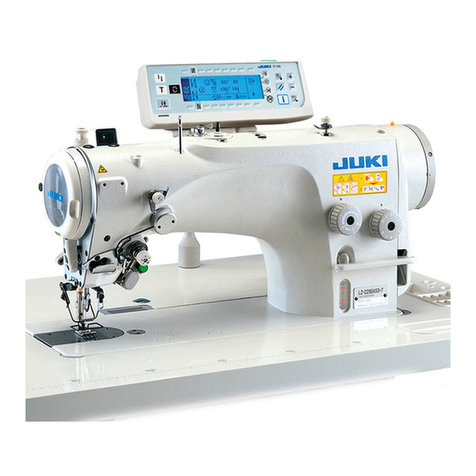
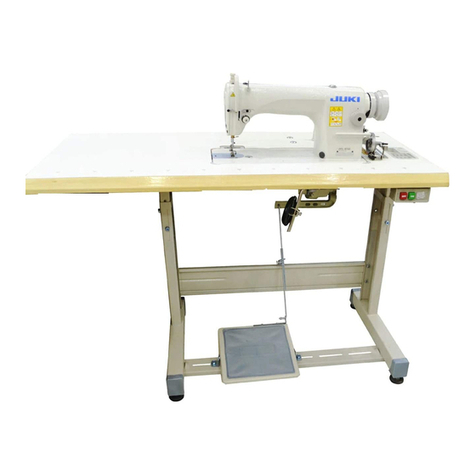
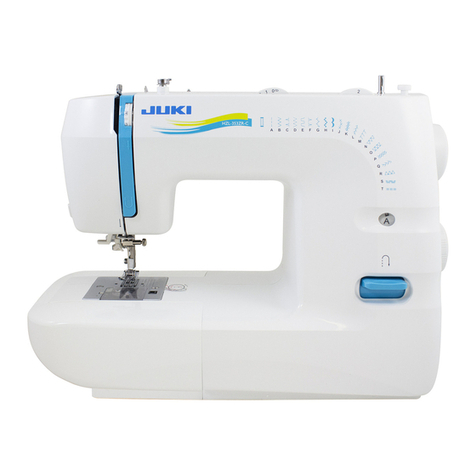
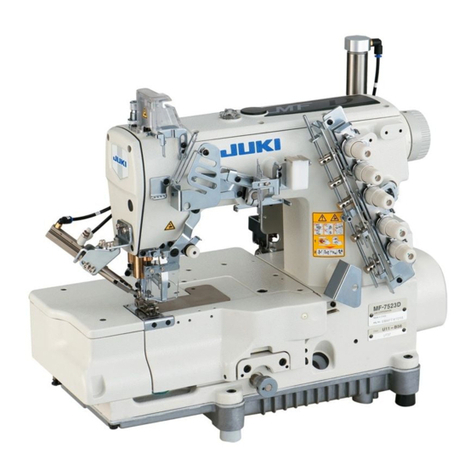
JUKI HZL-E61 User manual

INSTRUCTION MANUAL
MANUEL
D’INSTRUCTIONS
MANUAL
DE
INSTRUCCIONES
GEBRUIKSAANWIJZING
COMPUTER
SEWING
MACHINE
MACHINEA
COUDRE
ELECTRONIQUE
MAQUINA
DE
COSER
ELECTRONICA
COMPUTER
NAAIMACHINE


“IMPORTANT SAFETY INSTRUCTIONS”
“When using an electrical appliance, basic safety precautions should always be followed, including the following:”
“Read all instructions before using this sewing machine.”
“DANGER_____To reduce the risk of electric shock:”
1. “An appliance should never be left unattended when plugged in. Always unplug this appliance from the electric
outlet immediately after using and before cleaning.”
2. “Always unplug before relamping. Replace bulb with same type rated 15 Watts.”
“WARNING_____To reduce the risk of burns, fire, electric shock, or injury to persons:”
1. “Do not allow to be used as a toy. Close attention is necessary when this appliance is used by or near children.”
2. “Use this appliance only for its intended use as described in this manual. Use only attachments recommended
by the manufacturer as contained in this manual.”
3. “Never operate this appliance if it has a damaged cord or plug, if it is not working properly, if it has been dropped
or damaged, or dropped into water. Return the appliance to the nearest authorized dealer or service center for
examination, repair, electrical or mechanical adjustment.”
4. “Never operate the appliance with any air openings blocked. Keep ventilation openings of the sewing machine
and foot controller free from the accumulation of lint, dust and loose cloth.”
5. “Keep fingers away from all moving parts. Special care is required around the sewing machine needle.”
6. “Always use the proper needle plate. The wrong plate can cause the needle to break.”
7. “Do not use bent needles.”
8. “Do not pull or push fabric while stitching. It may deflect the needle causing it to break.”
9. “Switch the sewing machine off ("O") when making any adjustments in the needle area, such as threading
needle, changing needle, threading bobbin, or changing presser foot and the like.”
10. “Always unplug sewing machine from the electrical outlet when removing covers, lubricating, or when making
any other user servicing adjustments mentioned in the instruction manual.”
11. “Never drop or insert any object into any opening.”
12. “Do not use outdoors.”
13. “Do not operate where aerosol (spray) products are being used or where oxygen is being administered.”
14. “To disconnect, turn all controls to the off (“O”) position, then remove plug from outlet.”
15. “Do not unplug by pulling on cord. To unplug, grasp the plug, not the cord.”
“SAVE THESE INSTRUCTIONS”
“This sewing machine is intended for household use only.”
Use only foot controller YC-485 with your HZL-E61.
Be sure to turn power switch OFF and disconnect
the plug from the wall outlet before replacing the
sewing machine needle or lubricating the machine.
When not in use, be sure to turn power switch
OFF and unplug the machine.
Do not use thinner or other similar solvents to clean
the machine. Do not expose the machine to direct sunlight or
humid atmosphere.
1

“NOTES DE SECURITE IMPORTANTES”
“Lorsque vous utilisez un appareil électrique, des précautions élémentaires doivent toujours être suivies, comme celles-ci.”
“Lisez attentivement ces instructions avant d’utiliser cette machine à coudre.”
“DANGER_____Pour réduire le risque d’électrocution.”
1. “Un appareil ne doit jamais être laissé sans surveillance lorsqu’il est branché. Toujours débrancher cet appareil du
secteur immédiatement après utilisation et avant de le nettoyer.”
2. “Toujours débrancher avant de changer l’ampoule. Remplacer l’ampoule par une du même type (15watts).”
“ATTENTION_____Pour les risques de brûlure, électrocutions et de blessures.”
1. “Ne pas utiliser cet appareil comme un jouet. Porter une attention particulière lorsque cet appareil est utilisé per des
enfants.”
2. “N’utiliser cet appareil que dans le cadre de ses fonctions, mentionnées dans le présent manuel. N’utiliser que lespiéces
fournies ou recommandées par le fabricant dans ce manuel.”
3. “Ne pas utiliser cet appareil si une de ses prises ou cordons est endommagé, ou s’il ne fonctionne pas correctement.
S’il est tombé, a été endommagé, tombé dans l’eau, retourner l’appareil auprès de votre revendeur le plus proche pour
un réparation, ou une vérification technique ou électrique.”
4. “Ne jamais utiliser cet appareil dans un lieu dépourvu d’aération. Maintenez une ventilation suffisante autours de la
machine et du rhéostat et éviter la poussière et les chutes de tissus aux alentours des sources d’aération de la
machine.”
5. “Eloigner vos doigts des pièces mobiles de la machine. Faites particulièrement aux mouvements de l’aiguille.”
6. “Toujours utiliser la plaque aiguille appropriée. Un plaque non appropriée peut faire casser l’aiguille.”
7. “Ne pas utiliser d’aiguilles courbes.”
8. “Ne pas tirer ou pousser le tissu lorsque vous cousez., cela pourrait abîmer, voire casser l’aiguille.”
9. “Mettre l’interrupteur de la machine en position <OFF> losrque vous manipulez l’aiguille, ou l’enfilez. De même lorsque
vous changez le pied presseur.”
10. “Débranchez toujours votre machine lorsque vous ôtez le capot, lorsque vous la nettoyez, ou pour tout autre manipulation
mentionnée dans le manuel d’instruction.”
11. “Ne jamais laisser d’objet entrer dans les ouvertures de la machine.”
12. “Ne pas utiliser à l’extérieur.”
13. “Ne pas utiliser lorsqu’un aérosol a été pulvérisé, ou lorsque de l’oxygène a été administré.”
14. “Avant de débrancher la machine, mettre l’interrupteur en position éteint <OFF>.”
15. “Ne pas débrancher en tirant sur le cordon. Pour débrancher, tenir la prise, pas le cordon.”
“RETENEZ CES INSTRUCTIONS”
“Cette machine à coudre est destinée à une utilisation domestique uniquement.”
Assurez-vous d’avoir débranchér la machine de
la prise murale avant de remplacer l’aiguille ou de
nettoyer la machine.
Lorsqu’elle n’est pas utilisée, débranchez toujours
votre machine.
Ne pas utiliser de détergents ou alcool pour
nettoyer la machine. Ne pas exposer la machine directement au soleil
ou dans une atmosphère humide.
2

“NORMAS DE SEGURIDAD”
Cuando utilice la máquina deberá observar todas las normas de seguridad, especialmente las que se detallan a continuación.
Antes de utilizar la máquina, lea las instrucciones.
PELIGRO____Para reducir el riesgo de descarga eléctrica.
1. Nunca deje desatendida la máquina cuando esté enchufada. Desconéctela de la red eléctrica cuando haya finalizado su
trabajo.
2. Desenchufe la máquina siempre que deba realizar cualquier manipulación con ella. Cuando cambie la bombilla, sustitúyala
por otra del mismo voltaje.
ADVERTENCIA____Para reducir el riesgo de quemaduras, fuego, descarga eléctrica o cualquier
otro daño.
1. Esta máquina no es ningún juguete. Tenga mucho cuidado cuando esté usándose por niños o cerca de ellos.
2. Use esta máquina para los fines descritos en esta guía. Utilice exclusivamente los accesorios recomendados por el fabricante.
3. No trabaje con la máquina si el cable o el enchufe están dañados, si la máquina no funciona bien o está estropeada, si
la máquina ha sufrido algún golpe, se ha caído o se ha mojado.
En todos estos casos, lleve inmediatamente la máquina al servicio técnico de su distribuidor para su reparación
4. No bloquee las aperturas de refrigeración de la máquina mientras la esté usando. Mantenga estas aperturas abiertas
y limpias de suciedad y de residuos. También mantenga en óptimas condiciones el pedal.
5. No acerque nunca los dedos a las partes móviles, sobretodo a la aguja de la máquina cuando esté enchufada.
6. Use siempre el placa agujas original, un placa agujas no adecuado puede romper la aguja.
7. No use agujas torcidas.
8. Cuando esté cosiendo, no tire de la ropa ni la empuje, sino la aguja acabará rompiéndose.
9. Desenchufe la máquina (“O”) siempre que vaya a realizar ajustes en el área de la aguja, como son el enhebrado de la
aguja y de la canilla, o el cambio del prensatelas, etc.
10. Antes de realizar los trabajos de mantenimiento descritos en esta guía, se debe desconectar la máquina de la red eléctrica.
11. No introducir ningún objeto en las aperturas de las máquinas.
12. No use la máquina al aire libre.
13. No utilice la máquina en lugares donde se han utilizado productos con gas propelente (sprays) u oxígeno.
14. Para desconectar la máquina, apague el interruptor de encendido (“O”) y desconecte el enchufe de la máquina de la
red eléctrica.
15. Desenchufe de la red tirando del enchufe y no del cable.
“SIGA ESTAS INSTRUCCIONES”
Esta máquina está diseñada para su uso doméstico.
Desconecte la máquina de la red eléctrica antes
de cambiar la aguja o de lubricar la máquina. Cuando no esté usando la máquina, manténgala
desconectada.
No utilice disolventes para limpiar la máquina. No exponga la máquina directamente a la luz del
sol ni tampoco la mantenga en lugares húmedos.
3

4
BELANGRIJKE VEILIGHEIDSINSTRUCTIES
Als u een elektrisch apparaat gebruikt, moet u altijd de basis veiligheidseisen in het oog houden,
inclusief deze: Lees alle instructies voordat u deze naaimachine gaat gebruiken.
GEVAAR! Voorkom een elektrische schok.
1. Laat het apparaat nooit allen met de stekker in het stopcontact.
2. Haal de stekker van het apparaat altijd uit het stopcontact na gebruik en voor reiniging.
3. Haal de stekker van het apparaat altijd uit het stopcontact voordat u het lampje (max 15 W) verwisselt.
WAARSCHUWING! Voorkom brand, een elektrische schok of andere verwondingen.
1. Laat dit apparaat niet als speelgoed gebruiken. Let goed op als u dit apparaat in de buurt van kinderen gebruikt.
2. Gebruik het apparaat alleen voor de doelen waarvoor het gemaakt is, zoals beschreven in deze gebruiksaanwijzing.
Gebruik alleen toebehoren aanbevolen door de fabrikant en beschreven in deze gebruiksaanwijzing.
3. Gebruik dit apparaat nooit als de snoeren of de stekker beschadigd zijn, het niet goed functioneert, is gevallen of beschadigd
of nat geworden is. Laat het apparaat nakijken bij de dichtstbijzijnde dealer of service punt voor onderzoek en reparatie.
4. Gebruik het apparaat nooit met geblokkeerde luchtopeningen. Houd de ventilatieopeningen
van de machine en de voetpedaal vrij van stof, kleding en afval.
5. Houdt uw vingers weg bij bewegende delen. U moet vooral opletten in de buurt van de naald.
6. Gebruik altijd de juiste steekplaat. Een verkeerde steekplaat kan naaldbreuk veroorzaken.
7. Gebruik geen verbogen naalden.
8. Duw of trek niet aan de stof terwijl u naait. Hierdoor kan de naald verbuigen en breken.
9. Schakel de machine uit “O” als u aanpassingen uitvoert in de buurt van de naald, zoals naald
verwisselen of draad inrijgen van de naald, of bij het verwisselen van de naaivoet en dergelijke.
10. Haal de stekker van het apparaat altijd uit het stopcontact bij het openen van de machine, bij het
smeren, of andere onderhoudswerkzaamheden beschreven in deze gebruiksaanwijzing.
11. Stop niets in welke opening dan ook.
12. Gebruik de machine niet buiten.
13. Gebruik de machine niet terwijl er spuitbussen of zuurstof gebruikt worden.
14. Bij het uitschakelen zet u eerst de hoofdschakelaar op “O” en vervolgens trekt u de stekker uit het stopcontact.
15. Trek aan de stekker, niet aan het snoer.
16. Als er olie in uw ogen komt, spoel dan meteen met water.Als u olie naar binnen krijgt, consulteer direct uw huisarts.
ONDERHOUD VAN DUBBEL
GEÏSOLEERDE PRODUCTEN
In een dubbel geïsoleerd product zijn er twee isolatie systemen geïnstalleerd in plaats van de gewone aarde. Er is geen
gewoon aardingsysteem aangebracht en hoeft niet aangebracht te worden. Onderhoud op een dubbel geïsoleerd product
moet zeer zorgvuldig en met verstand van zaken worden gepleegd. Gebruik alleen identieke vervangingsonderdelen.
Een dubbel geïsoleerd product is gemerkt met de woorden Double insulation of Double insulated.
Het symbool bevindt zich meestal op het betreffende apparaat.
BEWAAR DEZE INSTRUCTIES
Deze naaimachine is alleen bedoeld voor huishoudelijk gebruik.
1. Haal de stekker van het apparaat altijd uit het
stopcontact bij het smeren, of het verwisselen
van de naald.
2. Als de machine niet gebruikt wordt, hoort
de stekker niet in het stopcontact.
3. Gebruik geen thinner of soortgelijke oplosmiddelen
om uw machine te reinigen.
4. Stel uw machine niet bloot aan direct zonlicht of aan
een vochtige omgeving.

5
CONTENTS / TABLE DES MATIERES
Importantsafeguards························································1
Principalparts····································································7,8
Accessories········································································9
Majorfunctions····························································10-13
Windingthebobbin···················································14-16
Placing bobbin in the case
Threadingthemachine·············································17-19
Automatic needle threader
Pulling up the bobbin thread
Changingthepresserfoot···············································20
Attachingtheneedle·························································21
Types of feet and their application ································ 22
How toadjustthreadtension··········································23
Fabric,thread andneedle table ·····································24
Howtoadjuststitchlength(manually)·························26,27
Straightstitch·································································28,29
Straight stitch on strechy fabric
Automaticlockstitch ·················································30-33
Manual lock stitch and sewing start on heavy fabric
Zigzagstitch·······································································34
How to adjust stitch width (manually) ····························35
Overcasting·········································································36
Reinforcedstretchstitch···················································37
Automaticbuttonholes···············································38-41
Bartacking·····································································42,43
Quiltingstitch······································································44
Patchwork··········································································45
Insertingzippers·························································46-49
Lapped insertion
Centered insertion
Blindstitch······································································50,51
Quiltingattachment····························································52
Optionalparts·····························································53-60
Invisible zipper foot / Manual buttonhole foot
Rolled hemming foot / Even feed foot
Smooth foot
Replacinglamp··································································61
Maintenance(Cleaning)···················································62
Performancechecklist ·····················································63
Specificationtable·····························································63
CONTENTS
TABLE DES MATIERES
Mise engarde ···································································2
Principauxéléments·························································7,8
Accessoires········································································9
Fonctionsprincipales················································10-13
Embobinage·······························································14-16
Placer la canette dans le boîtier
Enfilage········································································17-19
Enfileur automatique
Remonter le fil de canette
Changementdepiedpresseur······································20
Mise en place de l’aiguille ··············································21
Types de pieds et spplications ······································22
Réglage de la tension de fil ···········································23
Tableau des tissus, fils et aiguilles ································ 24
Réglagedelalongueurdupoint(manuel)················26,27
Pointdroit·······································································28,29
Point droit sur tissu extensible
Pointd’arrêtautomatique·········································30-33
Point d’arrêt manuel et départ de la couture sur les
tissu épais
Pointzig-zag·······································································34
Commentrégler lalargeur despoints(manuellement) ···35
Surfilage··············································································36
Pointextensiblederenfort···············································37
Boutonnièresautomatiques·····································38-41
Coutured’arrêt·····························································42,43
Pointdecourtepointe·······················································44
Patchwork···········································································45
Insertion de fermeture à glissière ··························· 46-49
Insertion latérale
Insertion centrale
Ourletinvisible·······························································50,51
Ensemblepourquilting·····················································52
Piècesoptionnelles···················································53-60
Pied fermeture invisible
Pied boutonnière manuelle
Pied ourlet roulé / Pied double entraînement
Pied à semelle lisse
Remplacementdel’ampoule··········································61
Maintenance(nettoyage)·················································62
Problèmeséventuelset remèdes simples ···················· 64
Tableaudecaractéristiques·············································64
6
ÍNDICE
INHOUD
Normas deseguridad ······················································3
Principalespiezas·····························································7,8
Accesorios··········································································9
Funcionesprincipales···············································10-13
Hacercanilla·······························································14-16
Colocar la canilla en el canillero
Enhebrarlamáquina·················································17-19
Enhebrado automático de la aguja
Subir el hilo de la canilla
Cambiodelprensatelas··················································20
Colocarlaaguja································································21
Tipos de prensatelas y sus aplicaciones ····················· 22
Ajuste de la tensión del hilo ··········································· 23
Tabla de tejido, hilo y aguja ············································ 25
Ajuste dela longituddepuntada(manual)················26,27
Pespunterecto······························································28,29
Pespunte recto en tejido tipo punto
Puntada automática de seguridad ························· 30-33
Puntada de seguridad manual e inicio de costura
en tejidos gruesos
Puntadazigzag·································································34
Mododeajustarlaanchura depuntada (manualmente) ·35
Sobrehilado········································································36
Puntada de refuerzo en tejido tipo punto ····················· 37
Ojalesautomáticos····················································38-41
Presillado······································································42,43
Puntadaacolchada···························································44
Patchwork··········································································45
Colocación de cremalleras ······································ 46-49
Inserción lateral
Inserción centrada
Puntadainvisible··························································50,51
Mecanismoparaelacolchar··········································52
Piezasopcionales·····················································53-60
Prensatelas de puntada invisible
Prensatelas de ojales manual
Prensatelas de dobladillo de caracolillo
Prensatelas para alimentar el tejido de forma uniforme
Pata deslizante
Cambiarlabombilla·························································61
Mantenimiento(limpieza)·················································62
Lista de problemas y soluciones ··································· 65
Tabladecaracterísticas···················································65
ÍNDICE / INDICE
Belangrijke veiligheidsinstructies...................................................,2
Voornaamste delen ......................................................................7-8
Accessoires......................................................................................9
Belangrijkste functies...............................................................10-13
Opspoelen................................................................................14-16
Plaats de spoel
Inrijgen van de machine..........................................................17-19
De automatische naaldinrijger
Ophalen van de onderdraad
Verwisselen van de naaivoet........................................................20
Verwisselen van de naald.............................................................21
Naaivoeten en hun toepassing ....................................................22
Aanpassen van de draadspanning..............................................23
Stof, garen en naalden tabel.........................................................24
Steeklengte aanpassen (handmatig) ....................................26,27
Rechte steek............................................................................. 28,29
Rechte steek op rekbare stof
Automatische locksteek..........................................................30-33
Handmatige locksteek
Naaistart met zware stof
Zig zag steek..................................................................................34
Steekbreedte aanpassen (handmatig)........................................35
Overlocksteek.................................................................................36
Versterkte stretchsteek..................................................................37
Automatische knoopsgaten....................................................38-41
Cordonsteek.............................................................................42-43
Quiltsteek........................................................................................44
Patchwork.......................................................................................45
Ritsen inzetten..........................................................................46-49
Overlapte rits
Gecentreerde rits
Blindsteek .................................................................................50-51
Quiltvoet..........................................................................................52
Optionele voeten......................................................................53-60
Blinde ritsvoet
Handmatige knoopsgatvoet
Rolzoomvoet
Dubbeltransportvoet
voet voor gladde stoffen
Lamp verwisselen..........................................................................61
Onderhoud (Schoonmaken) ........................................................62
Verhelpen van storingen...............................................................63
Specicaties....................................................................................63

Principal Parts / Principaux éléments
Principales Piezas / Onderdelen van de machine
1. Spool pin
2. Bobbin thread guide
3. Thread tension dial
4. Thread spool cap
5. Bobbin winding regulator
6. Bobbin winder
7. Face cover
8. Speed controller
9. Reverse stitch button
10. Start/Stop button
11. Auxiliary bed
1. Porte-bobine
2. Guide-fil de canette
3. Bouton de tension du fil
4. Chapeau de bobine
5. Arrêt du dévidoir de
canette
6. Dévidoir de canette
7. Capot frontal
8. Curseur de vitesse
9. Bouton de marche arrière
10. Bouton start/stop
11. Rallonge de bras
1. Pivote del portaconos
2. Guía-hilo de la canilla
3. Tensor del hilo
4.Tapa de la bobina del hilo
5. Regulador del bobinador
de la canilla
6. Bobinador de la canilla
7. Tapa frontal
8. Regulador de velocidad
9. Botón de costura inversa
10. Botón de marcha / paro
11. Base auxiliar
12. Griffe de transport
13. Botón de puntada
automática de seguridad
14. Panel de selección de
puntadas
15. Volante
16. Interruptor de encendido
/ Luz
17. Enchufe para el cable
18. Enchufe para el pedal
19. Asa
20. Palanca del prensatelas
21. Indicador del bobinador
12. Palanca de los dientes de
arrastre
13. Bouton de point d’arrêt
auto
14. Panneau de sélection du
point
15. Interrupteur de courant
16. Volant manuel
17. Prise du cordon
d’alimentation
18. Prise du rhéostat
19. Poignée
20. Levier du pied presseur
21. Indicateur de remplissage
de la canette
12. Drop feed lever
13. Automatic lock stitch
button
14. Stitch selection panel
15. Handwheel
16. Light / Power switch
17. Power cord receptacle
18. Speed controller
receptacle
19. Handle
20. Presser foot lever
21. Bobbin winding monitor
7
6
1
3
5
4
2
8
14
7
11
10
13
9
12
21
20
17
16
15
19
18
1. Garenpen
2. Garenwinderdraadgeleider
3. Draadspanningsknop
4. Garenklostegenhouder
5. Garenwinder aftaster
6. Garenwinder
7. Voorkap
8. Snelheidsregelaar
9. Retoursteekknop
10. Start-stopknop
11. Vrije arm aanschuiftafel
12. Transporteurverzinkknop
13. Automatische
locksteekknop
14. Steekkeuze paneel
15. Handwiel
16. Licht-
en stroomschakelaar
17. Stekkeringang
18. Voetpedaal-
stekkeringang
19. Handgreep
20. Naaivoethefboom
21. Garenwinder monitor

8
Foot speed controller
Rhéostat
Pedal
Electric power cord
Cordon électrique
Cable eléctrico
1. Cortahilos
2. Enhebrador de la aguja
3. Palanca de ojales
4. Palanca que afloja el
prensatelas
5. Caña del prensatelas
6. Dientes
7. Placa aguja
8. Canillero
9. Clamp de la aguja
10. Aguja
11. Prensatelas
12. Botón que afloja la tapa
del garfio
13. Tapa del garfio
14. Canilla
1. Coupe-fil
2. Enfile-aiguille
3. Levier de boutonnière
4. Releveur de pied
presseur
5. Montage du pied
presseur
6. Griffes d’entraînement
7. Plaque aiguille
8. Boîtier à canette
9. Montage du pied
10.Aiguille
11. Pied presseur
12. Bouton d’ouverture du
capot
13. Capot de la canette
14. Canette
1. Thread Cutter
2. Needle threader
3. Buttonholing lever
4. Presser foot release
lever
5. Presser foot shank
6. Feed dog
7. Needle plate
8. Bobbin case
9. Needle clamp
10. Needle
11. Presser foot
12. Hook cover release
button
13. Hook cover
14. Bobbin
1
6
3
4
2
5
7
8
9
10
11
12
13
14
1. Draadafsnijder
2. Draadinrijger
3. Knoopsgatvoetaftaster
4. Naaivoethendel
5. Naaivoethouder
6. Transporteur
7. Steekplaat
8. Spoelhuls
9. Naaldklem
10. Naald
11. Naaivoet
12. Ontgrendelingsknop
13. Klapplaatje
14. Spoeltje
Voetpedaal
Elektrisch snoer

9
* Standard presser foot (A) is equipped with machine.
* Le pied standard (A) est monté sur la machine.
* El prensatelas estándar (A) está incluido con la máquina.
Accessories /Accessoires
Accesorios /Accessoires
T-shape screw-driver
Tournevis en T
Destornillador en forma de T
Blindstitch presser foot (D)
Pied pour surfilage (D)
Prensatelas de puntada invisible (D)
Seam ripper
Découd-vite
Descosedor
Zipper foot (B)
Pied fermeture à glissière (B)
Prensatelas de cremallera (B)
Overcasting foot (C)
Pied ourlet invisible (C)
Prensatelas de sobrehilar (C)
Bobbins (3)
Canettes (3)
Canillas (3)
Small spool cap (2)
Petit chapeau de bobine (2)
Tapa para la bobina de hilo (2)
Standard presser foot (A)
Pied presseur standard (A)
Prensatelas standard (A)
Buttonhole foot (E)
Pied boutonnière (E)
Prensatelas de ojales (E)
· You can keep instruction manual at hard case.
· Vous pouvez ranger votre manuel d’instructions dans le capot rigide.
· Le sugerimos guardar el manual de instrucciones en la maleta rígida.
Spool pin
Broche porte-bobine
Eje de carrete
Quilt guide
Guide ouateur
Guía de colcha
Quilting attachment
Ensemble pour quilting
Mecanismo para acolchar
Needle pack HAx1 No.11 2P
No.14 1P
Paquet d’aiguilles (130-705H)
Paquete de agujas HAx 1 Nº 11x2
Nº 14x1
( )
( )
Auxiliary Bed
Plateau de travail
Base auxiliar
- U kunt de handleiding bewaren in de beschermkap van de machine.
Standaard naaivoet (A) Knoopsgatvoet (D) Ritsvoet (B)
Aanschuiftafel
Blindzoomvoet (D) Overlockvoet (C)
Quiltvoet
Garenpen Quilt geleider Spoeltjes
Naalden
Tornmes
T-vorm schroevendraaier Garenklostegenhouders
* Standaard Naaivoet (A) is gemonteerd op de machine.

Major functions / Fonctions principales
Funciones principales / Voornaamste functies
Type of Stitch patterns and operation (Operation/indication panel)
Types de point et sélection (touches de sélection)
Tipos de puntada y funciones (panel indicativo / operativo)
Automatic reverse stitch button
Bouton d’exécution automatique
de points arrière
Botón de costura inversa
automática
Stitch length adjusting lever
Curseur de réglage de la
longueur du point
Palanca de ajuste de la longitud de
puntada
Stitch length manual adjustment button
Touche de réglage manuel de la longueur du point
Botón de ajuste manual de la longitud de puntada
Zigzag width manual adjustment
button
Touche de réglage manuel de
largeur
Botón de ajuste manual de anchura
Zigzag width adjusting lever
Levier de réglage de largeur
Palanca de ajuste de anchura
Pattern
Configuration
Patrón
Symbol of presser foot
Symbole de presseur
Símbolo de prensador
10
Automatic lock stitch button
Touche de point de programmation
du point d’arrêt
Botón de puntada automática de
seguridad
This sewing machine has stitch
patterns for stretchy fabric such
as knitted fabric, jersey and so
on.
Cette machine possède des
programmes spéciaux pour les
matières extensibles comme les
mailles, tricots, jerseys, etc.
La máquina tiene tipos de
puntada para diferentes tejidos
como el punto, jersey, etc.
Stitch patterns for stretchy fabrics
Programmes pour matières extensibles
Tipos de puntada para tejidos tipo punto
Straight stitch for elastic
Point droit pour mailles fines
Pespunte recto para tejido elástico
Stretch reinforcing stitch
Point droit triple extensible
Puntada de refuerzo para tejido
tipo punto
3-step zigzag stitch
Zig-zag piqué à 3 points
Zig zag de tres pasos
Blind stitch for elastic
Ourlet invisible extensible
Puntada invisible para tejido
elástico
Stitch selection button
Touches de sélection du point
Botón de selección de puntada
Steeksoorten en werkwijze (Steekkeuze paneel)
Druktoets steeklengte regeling Steeklengte schuifregelaar
Druktoets steekbreedte regeling Steekbreedte schuifregelaar
Automatische afwerksteek knop Automatische retoursteek knop
Steek Naaivoet symbool
Steekkeuze knoppen
Steken voor rekbare stoffen
Elastische rechte steek 3-staps zig zag steek
Versterkte stretchsteek Elastische blindzoomsteek
Deze machine heeft steken voor
rekbare stoffen zoals gebreide
stof, jersey en dergelijke.

11
Speed controller
Push speed controller plug
into lower receptacle at right
end of machine.
During use of foot control-
ler, Start and Stop Button is
nonusable.
Rhéostat
Insérez la prise ’jack’ du
rhéostat dans son logement
à l’arrière de la machine.
Le rhéostat branché, le bou-
ton “marche/arrêt“ ne
fonctionne plus.
Power cord
Push power cord plug [1]
into upper receptacle at right
end of machine.
Plug [2] into electric outlet.
Cordon électrique
Insérez la prise du cordon
(1) dans son logement à
l’arrière de la machine.
Branchez (2) dans la prise
de courant.
Cable
Conecte el enchufe [1] en
el receptáculo que hay en
la parte inferior derecha de
la máquina.
Conecte el enchufe [2] a la
To run the machine press
foot speed controller. The
harder you press, the faster
machine will sew. To stop
machine, remove foot from
controller.
Pour actionner la machine,
appuyez sur le rhéostat.
Puls on appuie, plus la
vitesse est élevée (en
rapport avec la position du
curseur de vitesse). On
arrête la machine en
retirant le pied.
Pise el pedal para que la
máquina empiece a
funcionar. Cuanto más
fuerte sea la presión que
ejerce con el pie, más
rápida irá la máquina. Para
parar, simplemente deberá
de dejar de pisar el pedal.
[1]
[2]
Major Functions / Fonctions principales
Funciones principales / Voornaamste functies
Mains power and light
switch
Interrupteurs de courant
et de lumière
Interruptor de
encendido y de luz
ON
OFF
Pedal
Conecte el cable del pedal en el enchufe que hay en la
parte inferior derecha de la máquina. Durante el uso del
pedal,los botones de inicio y paro no funcionan.
Voetpedaal
Steek de stekker van de voetpedaal in de onderste
stekkeringang aan de rechterkant van de machine.
Als u de voetpedaal gebruikt, kunt u
de start-stopknop niet gebruiken. Omde machine te latenlopen
drukt u de voetpedaal in. Hoe
dieper u indrukt, hoe harder
de machine gaat. Om de
machine te stoppen, haalt u
uw voet van de pedaal.
Elektrisch snoer
Steek de machinestekker in
de bovenste stekkeringang
aan de rechterkant van de
machine (1).
Steek vervolgens de stekker
in het stopcontact (2).
Licht- en elektra
schakelaar.

Reverse stitch button
Push it manually to secure
the stitches at sewing-start
and end of seam. If you push
this button at sewing-end,
needle will stop at its high-
est position.
Touche de couture
arrière
Utilisez cette touche pour
arrêter vos coutures au
départ et à la fin. Si vous
l’actionnez la machine
arrêtée, l’aiguille remontera
en position haute.
Speed controller
You can adjust Maximum
sewing speed.
Curseur de vitesse
Vous pouvez régler la
vitesse maximale de cou-
ture avec ce curseur
électronique.
Regulador de velocidad
Se puede ajustar la
velocidad máxima.
Faster
Rapide
Más rápido
Slower
Lent
Más lento
12
Bobbin winding monitor
When bobbin winding shaft
is in its working position,
LED light is on. When the
light is on, needle and hand
wheel will not move.
Indicateur de remplissage
de canette
Lorsque l’axe du dévidoir
est en position de
remplissage (vers la droite),
la LED lumineuse est
allumée. A ce moment,
l’aiguille et le volant sont
débrayés.
Indicador del bobinador
de la canilla
Cuando el eje del
bobinador de la canilla está
en su posición de trabajo,
este indicativo luminoso
está encendido. Cuando
dicha luz esté encendida,
no se moverán ni la aguja
ni el volante dela máquina.
Presser foot lever
(a) Presser foot goes up.
(b) Presser foot comes
down.
Levier du pied presseur
(a) Le pied remonte.
(b) Le pied descend.
Palanca del prensatelas
(a) Prensatelas sube
(b) Prensatelas baja
(a)
(b)
Start/stop button
Press the button for start.
Push it again to stop sew-
ing. Needle will stop at its
lowest position.
Touche marche/arrêt
Pressez cette touche pour
démarrer ou pour arrêter la
machine. L’aiguille s’arrête
en position basse.
Cette touche n’est active
que le rhéostat débranché.
Botón de marcha/paro
Apriete dicho botón para
empezar a coser.
Apriételo una segunda vez
para parar la máquina. La
aguja parará en su posición
más baja.
Botón de puntada inversa
Apriétela manualmente para atacar en el inicio y final de
costura. Si aprieta dicho botón al final de la costura, la
aguja parará en su posición más alta.
Start-stopknop
Druk op de knop om met
naaien te beginnen. Als u
opnieuw op de knop drukt,
stopt de naald in de laagste
positie.
Garenwinder lampje
Indiendegarenwinderasinzijn
werkende positie staat, brandt
dit lampje. Nu is de machine
verder uitgeschakeld en naait
dus niet.
Naaivoet hefboom
(a) Naaivoet omhoog
(b) Naaivoet omlaag
Snelheidsregelaar
Langzaam -Snel.
Om de snelheid handmatig
te regelen.
Retoursteekknop
Druk op deze knop voor een retoursteek om uw naad veilig
te stellen aan het begin en einde van de naad. Als u de knop
heeft ingedrukt, stopt de naald in de hoogste positie.

Thread tension dial
(a) To increase the needle
thread tension.
(b) To decrease the needle
thread tension.
Bouton de tension du fil
(a) Pour augmenter la
tension du fil d’aiguille.
(b) Pour diminuer la tension.
Tensor del hilo
(a) Para aumentar la tensión
del hilo de la aguja.
(b) Para disminuir la tensión
del hilo de la aguja.
(a)
(b)
Stitch length adjustment
In order to change stitch
length of each stitch pattern:
Push manual button (light
will be on) and move the le-
ver to the desired position.
Touche de réglage de la
longueur du point
Afin de régler manuellement
la longueur de chaque point.
Actionnez d’abord la touche
(le voyant s’allume) puis
déplacez le curseur de
réglage vers la position
voulue.
Ajuste de la longitud de
puntada
Para cambiar la longitud de
puntada de cada tipo de
puntada: Apriete el botón
manual (el indicativo
luminoso se encenderá) y
mueva la palanca hacia la
posición que desee.
* Stitch length will be auto-
matically set according to
the selected stitch pattern.
* Refer to page 26,27 for
stitch patterns which stitch
length can be adjusted.
* La longueur du point est
toujours prérégléé pour
chaque point.
* Référez-vous à la page
26,27 pour les points
pouvant être réglés en
longueur.
* La longitud de puntada se
ajusta automáticamente al
tipo de puntada
seleccionada.
* Consultar página 26, 27
para ver los tipos de puntada
donde se puede variar la
longitud de puntada.
Manual button
Curseur de réglage
Botón manual
Adjusting lever
Touche manuelle
Palanca de ajuste
Free arm
Draw the auxiliary bed to the
left side.
Bras-libre
Retirez la tablette-rallonge
vers la gauche.
Brazo libre
Tire hacia la izquierda de la
base auxiliar.
13
Drop feed dog
The feed dog should be
lowered for special sewing
techniques, such as free
motion embroidery.
The feed dog must be al-
ways up for normal sewing.
Locate the feed dog lever
on the front of the free arm.
Slide the lever either to the
right (down) [1] or the left
(up) [2]. To bring up the feed
dog, turn the handwheel
after sliding lever to the left.
[1]
[2]
Griffe d’entraînement par griffe
La griffe d’entraînement doit être placée en position basse
pour certaines techniques de couture spéciales telles que
la broderie libre. La griffe d’entraînement doit toujours
être en position haute pour la couture normale. Localiser
le levier de griffe d’entraînement à l’avant du bras libre.
Déplacer le levier vers la droite (position basse) [1] ou la
gauche [2] (position haute). Pour ramener la griffe
d’entraînement, en position haute, tourner le volant après
avoir déplacé le levier vers la gauche.
Baje el dentado de transporte
El dentado de transporte s deberá bajar de posición para
técnicas de cosidos especiales, como para bordados de
movimiento libre. Par cosido normal, el dentado de
transporte deberá estar siempre arriba. Coloque la
palanca del dentado de transporte en la parte frontal del
brazo libre. Deslice la palanca ya sea hacia la derecha
(abajo) [1] o hacia la izquierda arriba [2]. Para elevar el
dentado de transporte, gire el volante hacia la izquierda
después de deslizar la palanca.
Druktoets
Schuifregelaar
* De steeklengte wordt
automatisch aangepast
aan de steek die u kiest.
*Zie bladzijde 26 en 27
voor de steken waarvan
de steeklengte kan
worden aangepast.
Steeklengte aanpassen
Om de steeklengte van de
door u gekozen steek aan
te passen drukt u op de toets
(Licht gaat aan) en schuift u
de regelaar naar de
gewenste positie.
Draadspanningsknop
(a) Verhoog de
draadspanning.
(b) Verlaag de
draadspanning.
Vrije arm
Trek de aanschuiftafel naar links.
Uitschakelen Transporteur
Detransporteurkanuitgeschakeldomspecialenaaitechnieken
toe te passen, zoals borduren uit de vrije hand en stoppen.
Om gewoon te naaien moet de transporteur altijd in de hoge
stand staan. De instelknop van de transporteur bevindt zich
aan de voorkant van de vrije arm. Schuif de knop naar rechts
[1]omdetransporteuruitte schakelenofnaarlinks[2] om hem
in te schakelen. Draai het handwiel naar u toe om de
transporteur naar boven te laten komen nadat u hem
ingeschakeld heeft.
Trek de aanschuiftafel naar
links.

14
Winding Bobbin / Bobinage de la canette
Hacer Canilla / Opspoelen van de spoel
Take out the bobbin.
Retirez la canette vide.
Saque la canilla.
Open the hook cover.
Caution:
Turn off the machine before
opening the hook cover.
Ouvrez le capot.
Attention:
Débranchez la machine
auparavant.
Abra la tapa del garfio.
Precaución:
Antes de abrir la tapa del
garfio apague la máquina.
Winding a bobbin
Enfilage pour le remplissage de canette
Enhebrar para hacer canilla
* When you turn on the power to the machine under
the bobbin winding state, the machine will peep.
* Lorsque vous allumez la machine en mode de
remplissage de canette, eile émet un bip sonore.
* Cuando encienda la máquina bajo el estado de
hacer canilla, sonará un pitido.
12
Bobbin thread guide
Guide-fil de canette
Guía-hilo de la canilla
Bobbin winder
Dévidoir
Bobinador
Bobbin winding regulator
Arrêt de canette
Regulador del bobinador
Opspoelen van de spoel
* Als u de machine inschakelt in de spoelwindermodus,
piept de machine.
Spoelwinderdraadgeleider Spoelwinder
Spoelwinder schakelaar
Open het
spoelbeschermklepje:
Voorzichtig:
Zet de machine uit voor u het
klepje opent!
Neem de spoel uit de
spoelhuls.

15
Thread the bobbin
thread guide.
Put the thread with both
hands around the thread
guide so that it winds clock-
wise.
Enfilez le fil per le guide.
Insérez le fil avec les deux
mains sous le ressort du
guide pour qu’il se déroule
dans le sens d’une montre.
Enhebrar el guía-hilo de
la canilla.
Coloque el hilo manualmente
alrededor del guía-hilo de
forma que se enrolle en la
dirección de las agujas del
reloj.
Thread spool cap (Small)
Petite bobine
Tapa de la bobina (pequeña)
Small spool
Petite coiffe
Bobina de hilo
Thread spool cap (Large)
Grande bobine
Tapa de la bobina (grande)
Large spool
Grande coiffe
Bobina de hilo
3
4
Set the bobbin on the
bobbin winder.
Press the bobbin against the
bobbin winding regulator.
Placez la canette sur
l’axe du dévidoir.
Poussez la canette contre
l’arrêt de canette.
Coloque la canilla en el
bobinador.
Apriete la canilla contra el
regulador del bobinador.
Push the bobbin back to
the left.
Cut an excess thread and
take out the bobbin.
Poussez la canette vers
la gauche.
Coupez l’excédent de fil et
retirez la canette.
Empuje la canilla hacia
atrás y hacia la izquierda.
Corte el exceso de hilo y
saque la canilla.
Start winding the bobbin.
Upon completion of winding
the bobbin, press the start/
stop button again.
Embobinez la canette.
Une fois la canette remplie,
arrêtez la machine.
Empiece a hacer canilla.
Tras haber completado la
canilla, apriete otra vez el
botón de marcha/paro.
Bobbin winding
regulator
Arrêt de canette
Regulador
del bobinador
Bobbin
winder
Dévidoir
Bobinador
5
6
7
Place the thread spool and cap onto the spool pin.
Select the spool cap that matches the circumference of
the thread spool to be used.
Placez la bobine de fil et la coiffe sur le porte-bobine.
Sélectionnez le type de coiffe de taille appropriée à la
bobine.
Coloque la bobina de hilo con su tapa en el pivote
del portaconos.
Escoja la tapa adecuada al diámetro de la bobina del
hilo.
Garenklos-
tegenhouder(klein)
Kleine klos
Garenklos-
tegenhouder(groot)
Grote klos
Plaats de garenklos en –tegenhouder
op de klospen.
Kies de tegenhouder die het best past bij uw klos.
Inrijgen van de
spoeldraadgeleider.
Doe de draad met beide
handen om de geleider
met de klok mee.
Spoelwinder Spoelwinder-
schakelaar Plaats de spoel op
de winder.
Klik de spoel tegen de
schakelaar.
Begin het opspoelen.
Als u klaar bent met spoelen drukt
u nogmaals op de start/stopknop.
Druk de spoel terug
naar links.
Knip de draad af en neem
de spoel van de winder.
Als u klaar bent met spoelen
drukt u nogmaals op de start/
stopknop.

Thread the bobbin case.
Put the thread [1], place
thread on groove [2] and
draw the thread to rear of
machine.
Enfilez le boîtier à
canette.
Passez le fil dans la fente
(1), puis ressortez-le par la
fente (2) et place vers
l’arrière de la machine.
Enhebrado del canillero.
Coloque el hilo por el [1],
páselo por la ranura [2] y
llévelo hacia la parte poste-
rior de la máquina.
Put the bobbin in the
bobbin case.
Place the bobbin so that
thread winds counterclock-
wise.
Placez la canette dans
son boîtier.
Elle doit tourner dans le
sens inverse des aiguilles
d’une montre.
Coloque la canilla en el
canillero.
Coloque la canilla de forma
que el hilo salga en la
dirección contraria a las
agujas del reloj.
Close the hook cover.
Refermez le capot.
Cierre la tapa del garfio.
Adjusting the bobbin thread guide
Réglage du guide-fil de canette
Ajuste del guía-hilo de la canilla
In the case where the bobbin is unevenly
wound with thread according to the type of
thread, the bobbin thread guide has to be ad-
justed.
Dans le cas où la canette serait mal remplie,
selon le type de fil, il convient de régler le guide.
En el caso de que la canilla esté mal bobinada,
se deberá ajustar el guía-hilo de la canilla.
Move the bobbin thread guide up or
down to adjust so that the bobbin is
evenly wound with thread.
Déplacez le guide-fil en hauteur pour
le régler afin que le fil soit
régulièrement enroulé sur la canette.
Mueva el guía-hilo de la canilla arriba
o abajo de forma que el bobinado de
la canilla sea uniforme.
•~•›
[1]
[2]
89
10
•~
16
Plaats de spoel in
de spoelhuls.
Plaats de spoel zodanig dat
het garen tegen de klok in
afwikkelt.
De spoelhuls bedraden.
Doe de draad langs de inkeping
[1] en geleidt de draad naar links
door de groef [2] en trek de draad
naar de achterkant van
de machine.
Doe de klep weer op
de steekplaat.
Afstellen van de spoelwinderdraadgeleider
Als de spoel niet correct wordt opgewonden, moet
u de draadgeleider als aangegeven bijstellen.
Stel de schroef zodanig dat de spoel
correct wordt opgewonden.

17
[2]
[3]
[4]
[7]
[8]
Threading The Machine / Enfilage de la machine
Enhebrado de la máquina / Inrijgen van de machine
Thread the thread guide.
Enfilez le guide-fil.
Guía-hilos.
Raise the presser foot
lever.
Relevez le pied presseur.
Levante el prensatelas.
Draw the thread through
the groove and pull it
downward.
Passez le fil dans la fente
et tirez-le vers le bas.
Pase el hilo por la ranura
y tire de él hacia atrás.
Pass the thread around
[3], then pull it upward.
Passez le fil autour [3]
puis tirez-le vers le haut.
Pase el hilo alrededor
del punto [3] y tire de él
hacia arriba.
[3]
[2]
[1]
* Be sure to raise the presser foot before threading the
machine head.
* Le pied presseur doit toujours être relevé pour enfiler
la machine.
* Asegúrese de subir el prensatelas antes de enhebrar
la máquina.
1
[2]
2
3
4
Be sure to turn off the machine before
threading.
CAUTION:
ATTENTION:
PRECAUCIÓN: Apague la máquina antes de
enhebrar la máquina.
Assurez-vous d’avoir éteint la
machine avant l’enfilage.
Take-up
Levier tendeur
Tira-hilos
VOORZICHTIG: Zet de machine uit voordat u gaat
inrijgen. * Doe de naaivoethefboom omhoog voor u met inrijgen begint.
Draad-
hefboom
Doe de naaivoethefboom
omhoog.
Doe de draad door de
geleider.
Doe de draad door de gleuf
naar beneden [2].
Passeer de ronding en dan
naar boven [3].

Thread the hook.
Push threading lever all the
way down and a hook will go
through eye of needle.
Pass thread in front of
needle and below hook.
Enfilez le crochet.
Abaisser le levier de l’ enfile-
aiguille, afin que le crochet
passe à travers le chas.
Présentez le fil devant
l’enfileur; relacher le levier.
Enhebrar el garfio.
Empuje hacia abajo la
palanca enhebradora del
hilo, el garfio se colocara en
el ojo de la aguja.
Pase el hilo delante de la
aguja y por debajo del garfio.
Lower the presser foot.
Lower the needle threader.
Raise the needle. Then,
lower the needle threader
and thread (A).
Abaissezlepied presseur.
Abaissez l’enfile-aiguille.
Relevez l’aiguille. Puis,
decendez l’enfileur et le fil
(A).
Baje el prensatelas.
Baje el enhebrador de la
aguja.
Suba la aguja. A
continuación, baje el
enhebrador de la aguja y
enhebre (A).
Raise the needle
threader.
Release the lever, and the
needle will be threaded.
Relevez le levier de
l’enfileur.
En relâchant le levier,
l’aiguilles sera enfilée.
Levante la palanca del
enhebrador.
Afloje la palanca y la aguja
se enhebrará.
Draw out thread.
Draw out thread through
needle eyelet by approxi-
mately 10 cm.
Tirez le fil.
Tirez la boucle du fil depuis
le chas d’aiguille sur 10 cm.
Pase el hilo.
Deje que sobresalga un
cabo de hilo de unos 10 cm
por detrás de la aguja.
* Check to be sure that the needle is in its highest position.
* Contrôlez que l’aiguille est bien en position la plus haute.
* Asegúrese de que la aguja esté en su punto más alto.
Automatic Needle Threader
Enfilage automatique de l’aiguille
Enhebrado automático del aguja
(A)
1
4
3
2
Hook
Crochet
garfio
18
Thread the thread to
take-up [4], then pull it
downward.
Enfilez le levier
tendeur de fil [4], puis
redescendez.
Enhebre el tira-hilos [4]
y tire del hilo hacia abajo.
Draw the thread behind
[5] from the right.
Glissez le fil dessous [5]
depuis la droite.
Desde la derecha, pase
el hilo por detrás del
punto [5].
[5]
Take-up
Levier tendeur
Tira-hilos
[4]
6
5
Draadhefboom
Doe de draad door de
draadhefboom [4] en dan
naar beneden.
Doe de draad vanaf
rechts achter de naald-
klem-draadgeleider [5].
Automatische draadinrijger
* Draai het handwiel naar u toe tot de naald in de hoogste stand staat.
Doe de naaivoet naar beneden.
Zorg dat de naald in de hoogste stand staat en druk de
draadinrijger naar beneden met de draad aan de haak
als aangegeven. (A).
De draad door de naald.
Doe de inrijger nu helemaal naar beneden. Er verschijnt nu
een haakje door het naaldoog. Geleidt de draad nu voor de
naald onder langs het haakje.
Haakje
De draadinrijger omhoog.
Laat de draadinrijger los en de draad zal door het naaldoog
zijn getrokken.
Draad doorvoeren.
Trek de draad ongeveer 10 cm door het naaldoog.
Other manuals for HZL-E61
3
Table of contents
Other JUKI Sewing Machine manuals

JUKI
JUKI AB-1351 User manual

JUKI
JUKI DDL-8700-7 User manual

JUKI
JUKI LZ-2290A/IP-110A/SC-915 User manual

JUKI
JUKI MS-1190 User manual

JUKI
JUKI MO-654DE User manual

JUKI
JUKI LK-1850 Series User manual

JUKI
JUKI HZL-E80 User manual

JUKI
JUKI LU-2810-7 Series User manual

JUKI
JUKI MO-804 User manual

JUKI
JUKI LU-562 User manual

JUKI
JUKI AMS-220EN / IP-420 User manual

JUKI
JUKI SC-910N Quick start guide

JUKI
JUKI MO-613V User manual

JUKI
JUKI PL12 User manual

JUKI
JUKI LU-2810-6 User manual

JUKI
JUKI LS-1340 User manual

JUKI
JUKI MH-380 Owner's manual

JUKI
JUKI MEB-3200 Series Quick start guide

JUKI
JUKI LK-1903B Series User manual

JUKI
JUKI DDL-9000A User manual