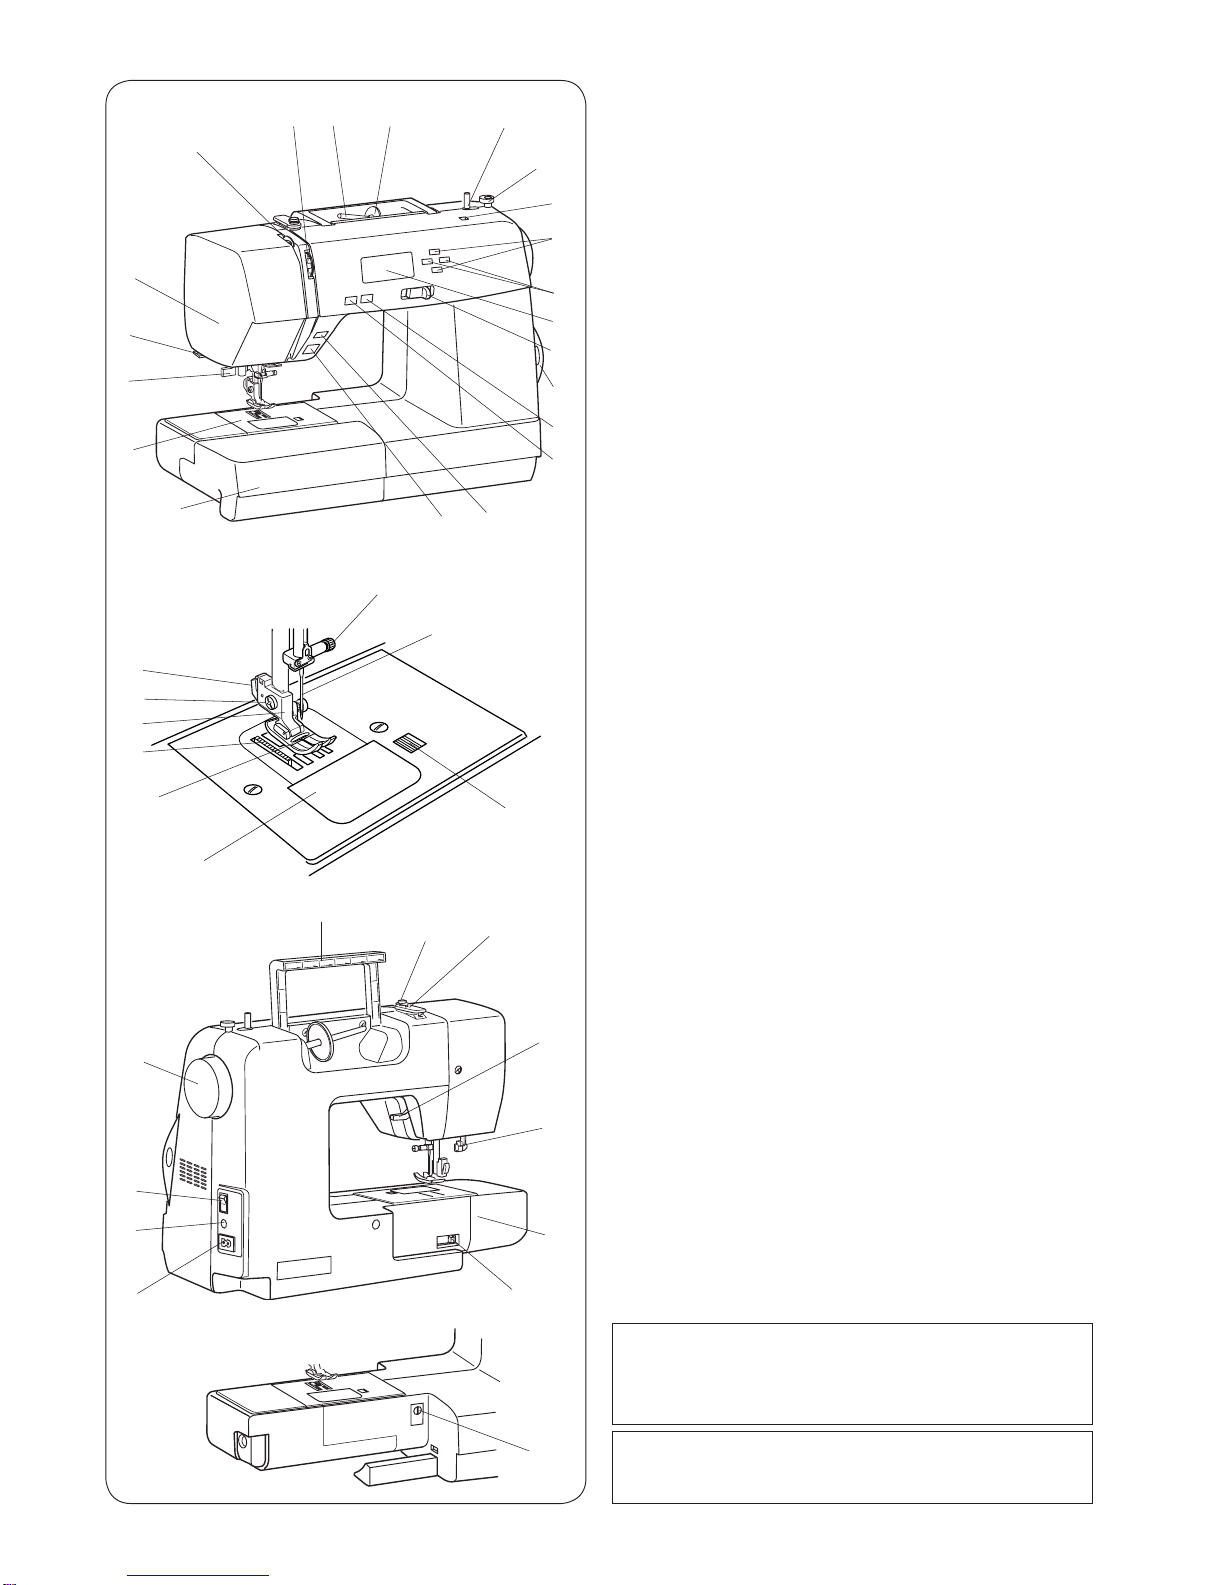
6
②
③ ④
⑤
⑥
②
③
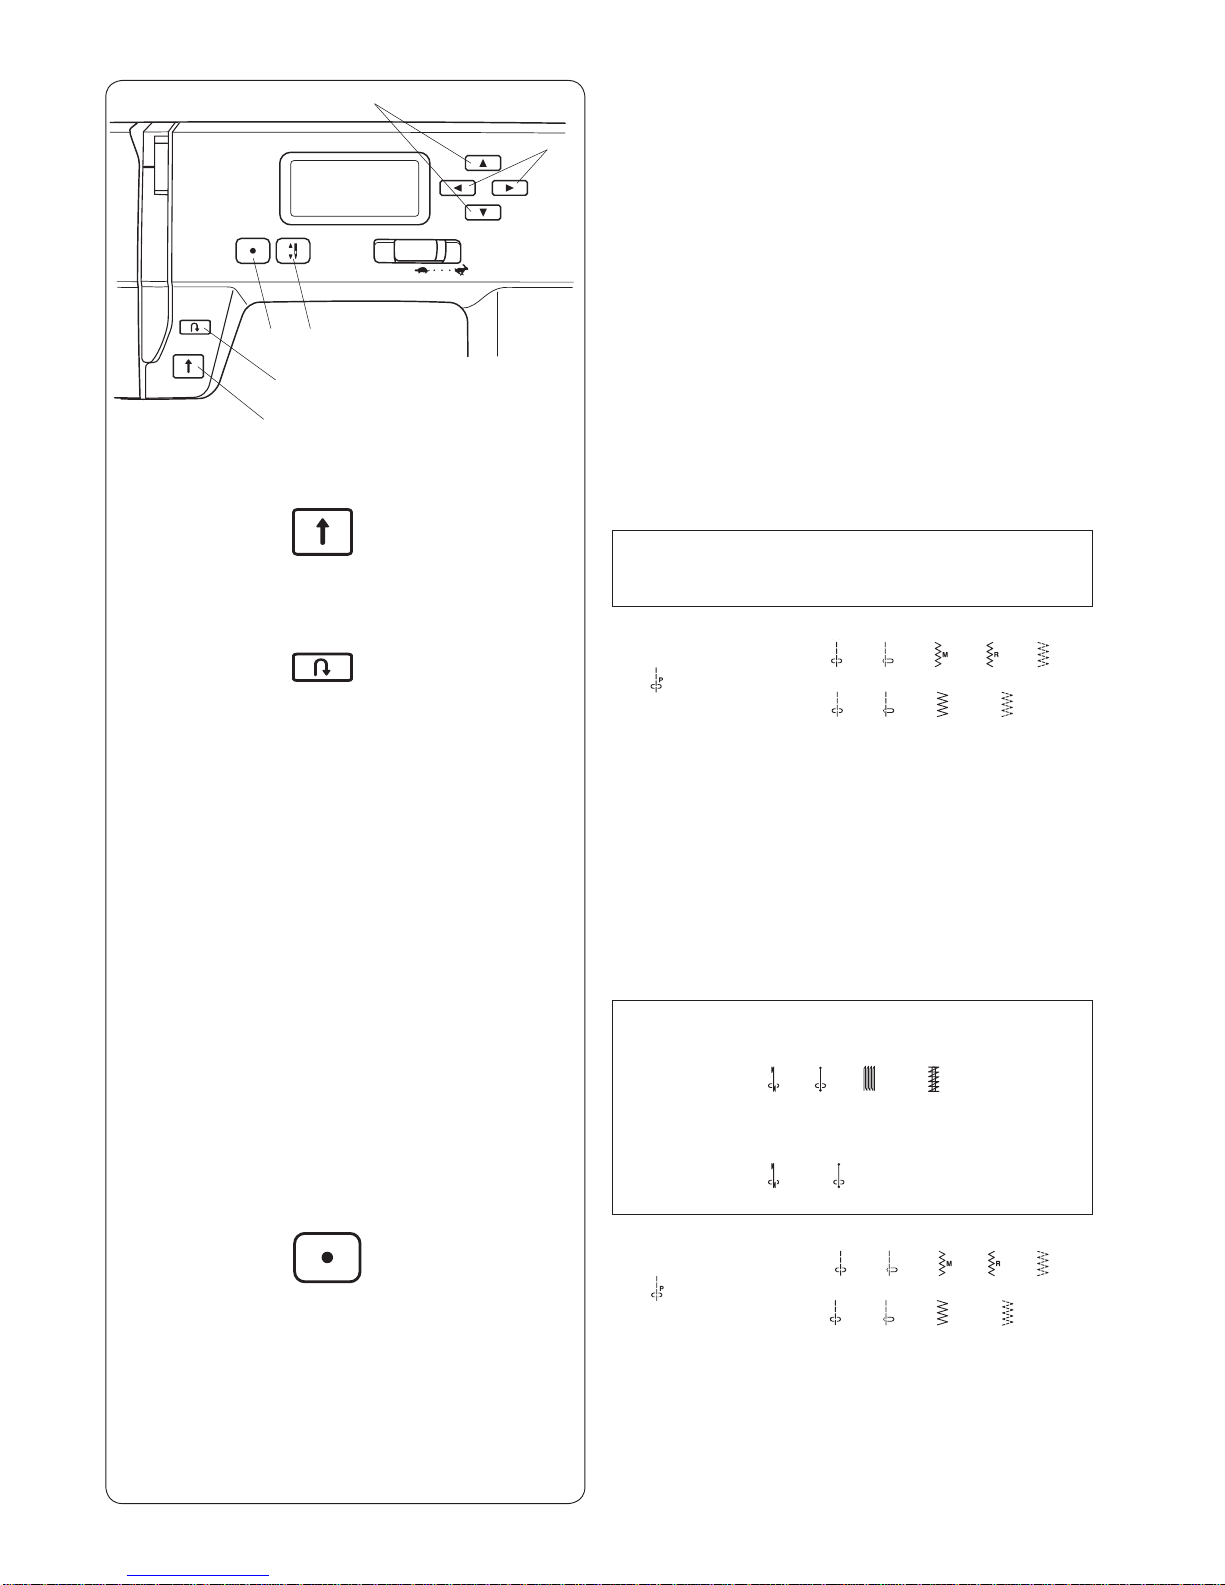
Machine Operating Buttons
①
①
①Start/Stop button
Press this button to start or stop the machine.
The machine starts running slowly for the first few
stitches, and it then runs at the speed set by the speed
control slider.
The machine runs slowly as long as this button is being
pressed.
NOTE:
The start/stop button cannot be used when the foot
control is connected to the machine.
②Reverse button
• When stitch pattern 00 , 01 , 12 , 13 , 14 or
20 is selected (100-stitch model);
• When stitch pattern 00 , 01 , 07 or 08 is
selected (20-stitch model);
The machine will sew in reverse as long as the
reverse button is pressed. Release the button to sew
forward.
When the machine is stopped and foot control is
disconnected, the machine will sew in reverse slowly
as long as the reverse button is pressed. Release the
button to stop the machine.
• When any other stitches are selected;
If you press the reverse button when sewing any other
patterns, the machine will immediately sew locking
stitches and automatically stop.
NOTE:
100-stitch model;
There will be particular functions of the reverse button
when pattern 02 , 03 , 09 or 10 is selected.
Refer to page 22, 32 and 33 for instructions.
20-stitch model;
There will be particular functions of the reverse button
when pattern 02 or 03 is selected.
Refer to page 22 for instructions.
③Auto-lock button
• When stitch pattern 00 , 01 , 12 , 13 , 14 or
20 is selected (100-stitch model);
• When stitch pattern 00 , 01 , 07 or 08 is
selected (20-stitch model);
Press the auto-lock button to sew a locking stitch
immediately. The machine will automatically stop.
• When any other stitches are selected;
Press the auto-lock button to sew a locking stitch
at the end of current pattern. The machine will
automatically stop.
00 01 02 03 04 05 06 07 08 09
10 11 12 13 14 15 16 17 18 19
20 21 22 23 24 25 26 27 28 29
30 31 32 33 34 35 36 37 38 39 40 41 42 43
FFFFFFFAFFFFAF
FFFFFFFFFFFFFF
FFFFFFFFFFFFFF
FFFFFFFFFFFFFF
FFFFFFFFFFFFFF
60 61 62 63 64 65 66 67 68 69 70 71
58 59
44 50 51 52 53 54 55 56 5745 46 47 48 49
90 91 92 93 94 95 96 97 98 99
86 87 88 89
72 73 74 70 81 82 83 84 8575 76 77 78 79