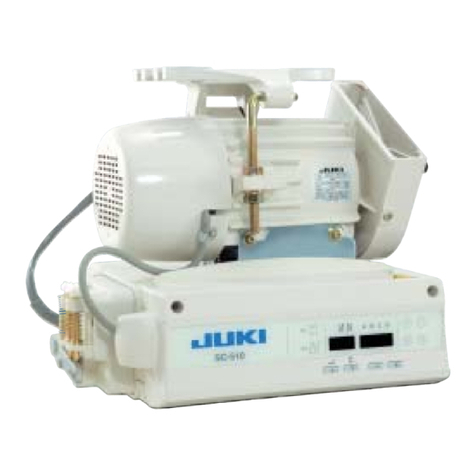
JUKI SC-20 Quick start guide

aJUKI
SC-20
SC-120
SC-220
SC-320
ENGINEER'S
MANUAL
SC-20
SC-320
No.
1-35-3
1990.7
From the library of: Superior Sewing Machine & Supply LLC

PREFACE
The engineer's manual is written for the technical personnelwho are responsible for the service and maintenance of the
sewing machines. This manual presents detailed explanation
of
the adjusting procedures, etc. which are not covered by
the INSTRUCTION
MANUAL
intended for the maintenance personneland operators at a garment factory.
It is advisable to use this engineer's manual is combination with the pertinent INSTRUCTION
MANUAL
and PARTS
LIST when servicingthe sewing machines
of
these models.
OPERATION
PRECAUTIONS
Z Oo
not
put
your
(irsgers
into
the
thread
take-up
cover
while
(he
machine
is
operating.
4.
During
operation,
be
careful
not to allow
your
or any
Other person's head or hands to come close to the
handwheel,
V
bell,
bobbin
winder
or
motor.
Also, do
not place anything close to them. Doing so may be
dangerous.
i 1_
6. To achieve
security,
be
sure
that
the
power
supply
earth
wire has
been
connected
before
ope'ating
the
sewing
machine.
1. Keep hands away from (he needle when the
power switch is turned ON or while the machine it
operating.
3. Be sure to
turn
the
power
switch OFF
before
tilling
the
machine
head
or
removing
the V
belt
S. If
your
machine
is
provided
with
a belt
cover,
finger
guard
or
any
other
protectors,
do
not
operate
your
machine
with
any
of
them
removed.
7. No
motor
sound
is
heard
when
the
sewing
machine
is
not
operating.
So. do
not
forget
to
turn
the
power
OFF
at
the
end
of
work.
From the library of: Superior Sewing Machine & Supply LLC

i
•'*
*•'
CONTENTS
1.
GENERAL
•
•••••;
•• ^
1-1.
Features • • • . 1
2. OPERATION 3
2-1.
Name
ofpart 3
2-2. Test run ^
2-3.
SC-20
Powerindicatorbox ^
2-4.
SC-120
Control
panel
^
2-5.
SC-220
Control
panel
®
2-6. SC-320 Control panel 12
3.
ADJUSTMENT
21
3-1.
Belt
tension
21
3-2. Prevention motor vibration (for Ncompany'smotor) 21
3-3. Checkingand correcting the rotational direction of sewingmachine 21
3-4.
Pedal
22
3-5. Maximum sewing speed 25
3-6.
Auto-lifter
27
3-7. Howto
reduce
the handlightfrom
flickering
(for
single
phaseonly) 28
4.
FUNCTIONS
29
4-1. Power supply voltage 29
4-2.
Functions
selection
switches
30
4-3. Increase
of
control panel functions 44
44.
Safety circuit 46
4-5. Connectors for standing work 48
4-6. Production control systemand needle-upstop switch functions 50
5.
MAINTENANCE
AND
INSPECTION
51
5-1. Howto replacethe sensorpotentiometer set 51
5-2.
Memory
battery
charging
monitor LED
(SC-320
only) 53
5-3.
Motor
malfunction
detector
LED
53
54.
Solenoid
monitor
LED
54
5-5. How
to
replace each circuit board 55
5-6. Troubleshooting 64
5-7. Circuit board installment diagrams 75
5-8. Connector connection diagrams 80
5-9. Type
of
rating plates for SCseries
of
the PSC unit 81
5-10. Block diagrams 82
From the library of: Superior Sewing Machine & Supply LLC

1.
GENERAL
1-1.
Features
1)
Use
ofan
AC
servomotor
provides
the
following
mqor
advantages:
(1) No noise or vibration while the machine is at rest.
(2)
The
power
consumption
is
40%
to
60%
compared
with
the
conventional
power
consumption.
(3)
The
motor
weight
has
been
almost
halved,
permitting
easier
layout
change.
(4)
The
absence
ofa
clutch
(no
brake
in
case
ofN
company's
motor)
makes
theunit
virtually
maintenance-fiee.
(H
company's
brake
is
good
for
more
than10
years
under
normal
operation.)
Unlike the DC servomotor, there is no bmsh.
2) Pedaloperation features
(1) Youcansetthe
maximum
sewing
speed
in400
s.p.m.
stepswith fingertipcontrol according to the type of
operation and your level
of
proficiency.
(In the conventional unit, the motor pulleyhad to
be changedto alter the maximum
sewing
speed.)
Further, you canget the samespeedat any time.
(2) The
conventional
speed
limit
knobis
also
provided.
So, by combining the knob with the function
mentioned in(1)
above,
high-speed
playstrokecan
be provided. This eliminatesthe need for large
pedalingforce to maintain high speed,significantly
reducing operator foot fatigue.
(3) The
speed
acceleration
starting
pointcanbe
adjusted
about 1mm (0.039") by pedal stroke to suit with
each operator.
(4) The minimumspeedfor depressing the front part of
the pedal can be changed(from 200 s.p.m. to 400
s.p.m.).
High-speed'
play
stroke
Pedal
depression
amount
(3)
1mm
(0.039
'l
adjustable
by
^
pedal
stroke
>/
/ (4) 400 spm
_t
200
spm
Pedal
depression
amount
3)
Reverse
feedstitchingfeatures
(1)
As
in
the
conventional
model,
you
can
select
either
the
mode
in
which
priority
is
given
to
pedaling
for
the
starting
reverse
feed
stitching
orthe
mode
in
which
the
machine
performs
nonstop
reverse
feed
stitching
at
a preset speed.
(2)
The
reverse
feed
stitching
speed
has
been
increased
from
1,700
s.p.m.
to
1,900
s.p.m.
(about
12%
increase).
Furthermore, the
speed
canbe
adjusted
from
1,000
s.p.m.
to 3,500
s.p.m.,
using
the
variable
resistor.
(3)
The
speed
control
circuitry
has
been
improved
to
prevent
overrun
or
1-stitch
error
when
the
reverse
feed
stitching speed is changed.
4) Thesoftstart speedhasbeen
increased.
The
soft
start
speed
for
assuring
properly
interlaced
threads
ofa
starting
stitch
has
been
increased
from
200
s.p.m.
to 800 s.p.m.
The
soft
start
speed
is
now
adjustable
within
a
range
of
200
s.p.m.
to
2,000
s.p.m.,
so
you
do
not
have
to
drop
the speed more than necessary.
- 1 -
From the library of: Superior Sewing Machine & Supply LLC

5)
Enhanced
series
with
easy
upgrading
• '•^ ^ ^
Thecontroller
comes
inthe
SC-20,
SC-120,
SC-220,
SC-320
and
SC-522
series,
andyoucan
easily
upgrade
them
simply
by
replacing
their
control
panels
(excluding
the
SC-522).
?; > ..
6) A manualcount-downcapabilityhasbeen added.
As
an
additional
capability,
the
manual
count-down
capability
has
been
added
to
the
one-touch
type
reverse
feed
switch
to
provide
the
control
based
ofa
preset
number
of
stitches.
Description Applications
Count
back
When the one-touch type reverse feed switch
is pressed,the preset number of stitches is
counted
down.
Sewing pleats
Count
back
+
Thread
trim
When the one-touch type reverse feed switch
ispressed,the preset number
of
stitches is
counted
down,
and
threads
are
trimmed.
Replaces the reverse feed
stitching at a seam end.
(This feature is especially useful
in a sewing machine for standing
work
because
the
need
for
operating
the
thread trimmer
switch
is
eliminated.)
7)
Even
ifa
material
overlap
at
sewing
startorendis
thick,
the
needle
will
notbe
caught
inthe
thick
overlap.
(After
thread
trimming,
youcanturnthe
handwheel
inthe
reverse
direction
to
bring
the
needle
barup to its
highestposition.)
8) Aconnectorfor standing workhasbeen
provided
asa standarditem.
9) A
terminal
for connection to a
sewing
control
system
hasbeen
provided.
10)
The
automatic
presser
foot
lifting
capability
can
be
added
simply
by
adding
the
AK
auto-lifter
and
a
transistor
circuit
board.
11)
The
control
panel
is
very
easy
to
operate
and
the
slant
panel
surface
makes
it
easier
to
see
indication
on
the
panel.
12)
To
ensure
easier
operation
of
the
control
panel,
each
key
has
been
assigned
to
only
one
function.
13)
You
can
setthe
lifting
duration
ofthe
Auto-lifter
after
thread
trimming
for60
sec.
or ten
minutes.
(For
a
sewing
machine
for
standing
work,
it
is
advisable
to
set
the
lifting
duration
for
ten
minutes.)
14)
The
output
transistor
has
been
designed
to
be
a
unit
circuit
board
to
make
ita
common
part.
If
any
trouble
should occur, the minimum function is assured.
(Example
: If
the
thread
trimmer
transistor
fails,
the
wiper
transistor
will
work
to
permit
thread
trimming
and
reversefeed stitching.)
15)
The
trouble
checking
feature
for
the
output
system
(output
monitor
LED)
has
been
added
to
the
conventional
input
system.
This
enables
you
to
quickly
and
easily
identify
defective
parts.
16) Reliability
The
machine
uses
only
the
components
which
have
passed
our
reliability
test
conducted
on
each
discrete
component.
17)
We
are
planning
to
provide
the
following
options
inthe
future:
Sewing
controlcounter(oflowcost)
18)
The
machine
controller
now
can
be
applied
to
the
control
of
the
ED-1
(cloth
edge
sensor)
(Optional).
- 2 -
From the library of: Superior Sewing Machine & Supply LLC

2.
OPERATION
2-1. Name
of
part
O Power switch
oControl
box
0Synchronizer
O
L-shaped
threadstand
0
PSCbox
0 Max.speed control knob
0Motor
m
0 Pedal
0One-touch type
reverse
feedswitch
0
Wiper
0 Stand
levelling
screw(or caster)
0 400 s.p.m.-step speed control knob
0 Connector for standing operation
0 Connector for production control system
- 3
From the library of: Superior Sewing Machine & Supply LLC

O Power switch
Power switch for
the
motor,
PSC and
control
box.
0Control
box
Used
to
make
settings
for
automatic
reverse
feed
stitching,
the
number
ofstitches forpattern
sewing
orother
sewing conditions.
®Synchronizer
Incorporated
in
the
machine
pulley,
the
synchronizer
detects
the
needle
position
(up
or
down)
and
the
se^ymg
speed,
then
sends
a
resultant
input
signal
to the
main
circuit
board
inthe
PSC
box.
. .
O
L-shaped
thread
stand
0 PSC box
Comprises
a
circuitry
to
control
the
sewing
machine
and
motor,
an
output
circuitry
to
operate
the
elements
(thread
trimming
solenoid,
reverse
feed
solenoid,
etc.),
a
pedal
sensor
to
detect
pedal
position,
and
a
power
circuitry
to
actuate
the
elements.
0
Max.
speed
controlknob
Allows
analog
adjustment
of the
maximum
sewing
speed
without
changing
themotor
pulley.
0 Motor
Operates
the
machine
at
high
speed
medium
speed
low
speed
in
response
toa
signal
received
from
the
PSC
box.
(AnH
company's
motoris
provided
witha
brake.)
0 Pedal
The
front
and
back
parts
ofthe
pedal
are
depressed
to
control
the
sewing
speed
and
to
actuate
the
thread
trimmer,
presser
footlifter
(only
fora
version
with
AK-31,
AK-34),
etc.
©
One-touch
type
reverse
feed
switch
Usedby hand to perform
reverse
feed stitching.
#
Wiper
Wipes
the
needle
thread
off
the
material
after
thread
trimming
in
response
toa
wiper
signal
received
from
the
PSC
box.
0 Stand
levelling
screw
(or caster)
Used
to
perform
adjustment
sothatthe
stand
rests
flatly
onthe
floor
to
minimize
vibration
during
operation.
0 400 s.p.m.-step speedcontrol knob
This
switch
has
16
steps
from
1to 16in
order
to
digitally
setthe
maximum
speed
in400
s.p.m.
steps.
0Connector for standing operation
Used
fora
sewing
machine
designed
for standing operation.
0 Connector for production control system
Usedto connect the machine to a production control system.
- 4 -
From the library of: Superior Sewing Machine & Supply LLC

2-2.
Test
Run
^
1) Operationwhen the power switchis turned ON
When
the
power
switch
is
turned
ON,
if the
needle
isnot initsupperstop
position,
the
machine
rotates
untilits €?
needle reaches
the
upper stop position, and then stops with its needle in that position.
If
the needle is already in its upper stop position when the power switch is turned ON, the sewingmachine stays
stationary.
'-Uf
2)Pedal operation
(1) Thepedalisoperatesin the
foUowing
four steps, (exceptfora
Version
with
AK-31,
AK-34)
©—
High
speed
Low
speed
Stop
Thread
trimming
High
speed
Low
speed
Stop
(neutral)
Thread
trimming
The
sewing
machine runs at low speed when you depress the front part of the pedal.
The
sewing
speed
changes
fromlowto highwhenthe front part of the pedalisfurther
depressed.
(However,if the automatic
reverse
feed stitching switch has been set, the machine willnot mn at high speed
until it completes
reverse
feedstitching.)
When
the pedalis returnedto the neutralposition(stop position),the
machine
will
stop with
needle
down.
When
the backpart of the pedalis depressed, the thread trimmerisactuated and the needlegoesup and
stops in its upper position.
(When
the wiperswitchhasbeenset to ON,the wiperisactuated.)
- 5 -
7^
From the library of: Superior Sewing Machine & Supply LLC

(2) In caseof a versionwith AK-31,AK-34
The pedalisoperated in the
following
fivesteps:
High
speed
Low
speed
Stop
Presser
foot
lifting
Thread
trimming
@
High
speed
Low
speed
Stop
(neutral)
Presser
foot
lifting
Thread
trimming
o The
sewing
machine
startsat low
speed
whenthe front part of the pedalislightly
depressed,
o The
sewing
speed
changes
from
lowto highwhenthe front part of the pedalis further
depressed.
(However,
if the
automatic
reverse
feed
stitching
switch
has
been
set,the
sewing
speed
will
not
change
to
highuntil
reverse
feed stitching iscompleted.)
o
When
the pedalis returned to the neutral(stop) position,the
machine
stopswith its needledown,
o
When
the backpart of the
pedal
islightly
depressed,
the
presser
foot
will
goup.
o
When
the backpart of the pedalisfurther depressed, the presser foot comesdown,thread trimmeris
actuated, and the machine stops with its needle up.
(If the wiperswitchhas been set to ON, the wiperis actuated.)
o
Between
the lowandhigh
sewing
speedpositions, the
machine
runsat a speedcorresponding to the pedal
depressionamount. (The speed is infinitely variable.)
o The proper thread trimmingaction willnot be disturbed evenif the pedal is returned to the neutral
position immediatelyafter the machinestarts thread trimming.
At this time, the thread trimmerproperlyoperates
even
if the front part of the pedalisdepressed,
however,
the safetycircuitryisput in operationso that the
machine
will
not mn after thread
trimming
iscompleted.
Therefore, the pedal must be returned to the neutral position once.
2-3.
SC-20
Power
Indicator
Box
1) Power indicator LED
o Lights up when the power switch is turned ON.
o This light stays ON for a while after the power is turned OFF. It is dangerousto carry out maintenance or
adjustment with the PSC box cover open. Be sure that the LED is OFF before starting maintenance such as
part replacement.
SC-
2 0
- 6 -
From the library of: Superior Sewing Machine & Supply LLC

2-4. SC 120 Control panel
1) Control panel
Automatic
reverse stitching (for end) indicator
lamp (LED)
•Lights
when
the
ending
reverse
stitching
switch
is
ON.
Power indicator lamp (LED)
•
Lights
up whenthe powerswitchisturned ON.
•
Stays
ON
for
a
while
immediately
after
the
power
switch
is
turned
OFF.
It is
dangerous
to
perform
any
maintenance
work
with
the
PSC
box
cover
open.
Be
sure
that
the
lamp
is
OFF
before
per
forming
maintenance
work
such
as
parts
replacement.
Switch
for
raising
the
needle.
•
If
this
switch
is
turned
ON
when
the
machine
stops
with
its
needle
down,
the
needle
goes
up
and
stops
in
its
upper
position.
• By depressing
the
back
part
of
the
pedal,
the
thread
trimmer
may
be
actuated.
(Note
that
this
switch
will
be
invalid
when
the
needle
has
been
moved
down
by
hand.)
2) Howto use the automatic
reverse
stitchingpatterns
Automatic
reverse
switching
(for
start)
switchO
Stitching
pattern
Automatic
reverse
stitching
(for
end)
switch 0
OFF
ON
OFF
OFF
OFF
ON
NN
ON
ON
m m
Automatic
reverse stitching (for start) indicator
lamp (LED)
•Lights
when
the
starting
reverse
stitching
switch
is
ON.
Switches
for
setting
the
number
of
stitches
•
These
are
pushbutton
switches for
setting
the
numbers
of
stitches
for
steps
A
and
B.
The
setting
range
is
from
0
to
9.
[+]...
.Increases
the
number
of
stitches
B . . . .Decreases
the
number
of
stitches
Automatic
reverse stitching (for start) switch
•
Used
to
turn
ON
or
OFF
automatic
reverse
stitching
at
sewing
start.
•
Each
time
this
switch
is
pressed,
it
alternately
turns
ON
or
OFF.
(This
switch
is
rendered
invalid
when
the
number
of
stitches
for
step
B
has
been
set
to
"0".)
Automatic
reverse stitching (for end) switch
•
Used
to
turn
ON
or
OFF
automatic
reverse
stitching
at
sewing
end.
•
Each
time
this
switch
is
pressed,
it
alternately
turns
ON
or
OFF.
(This
switch
is
rendered
invalid
when
the
number
of
stitches
for
step
B
has
been
set
to
"0".)
m
El
m
By combining ON and
OFF
conditions of automatic reverse
stitching (for start) switch O and automatic
reverse
stitching
(for end) switch O , four different stitching patterns are
available.
- 7 -
From the library of: Superior Sewing Machine & Supply LLC

2-5.
SC-220
Control
panel
1) Control panel
Automatic reverse stitching (for end) indicator
lamp (LED)
• Lights when
the
ending reverse stitching switch is ON.
• When pattern 4 has been selected, this lamp does not
light. ^
Automatic
reverse stitching (for start) indicator
lamp (LED)
• Lights when
the
starting reverse stitching switch is ON.
• When
pattern
4 has been selected, this lamp does not
light.
Power indicator lamp (LED)
• Lights when
the
power
switch is
turned
ON.
•Stays ON for a while immediately
after
the
power
switch
is
turned
OFF.
It is dangerous
to
perform any maintenance work with
the
PSC
box
cover
open.
Be sure
that
the
lamp is
OFF
before performing
maintenance
work
such
as
parts
replacement.
Automatic reverse stitching (for start) switch
•
Used
to
turn
ON
or
OFF
automatic
reverse
stitching
at
sewing
start.
• Each time this switch is pressed, it alternately
turns
ON
or OFF. (This switch is valid for patterns 1, 2
and
3.
For patterns 1 and 2, the switch is invalid for step B.
For pattern 3, it is invalid when the rotary switch
"SW1.
SNUMA—D"
in
the
PSC
box
has
been
set
to
"0".)
Automatic
reverse stitching (for end) switch
•
Used
to
turn
ON
or
OFF
automatic
reverse
stitching
at
sewing
end.
• Each
time
this
switch is pressed, it alternately
turns
ON
or
OFF.
(This switch is valid for
patterns
1, 2 and 3.
The
switch is invalid for step C in
pattern
1 and step B
in
pattern
2. It is also invalid when
the
rotary switch
"SWI.
SNUMA~D"
in
the
PSC
box
has
been
set
to
"0")
- 8 -
Automatic thread trimming indicator lamp (LED)
•Lights
when
the
automatic
thread
trimming
switch
is
ON.
• Ughts whenever pattern 4 has been selected.
• When
pattern
1 has been selected, this lamp does
not
light.
Pattern indicator lamps (LEDs)
• When a
pattern
(1 to 4) has
corresponding
lamp
lights.
been
selected,
the
Switches
for
setting
the
number
of
stitches
• These are pushbutton switches for setting
the
numbers
of
stitches for steps A to D. The setting range is from 0
to
9.
(When pattern 2 or 3 has been selected, the number
of
stitches
can
be
set
for
0
to
99
for
C
and
D
together.)
^
Increases
the numberof stitches
0
Decreases
the
number
of stitches
m
AB
AS
ICPj
B B B B
Pattern
selector
switches
• Used to select
one
of
the
four
patterns
displayed
on
the
panel.
Switch
for
raising
the
needle
• If
this
switch
is
turned
ON
when
the
machine
stops
with
its
needle
down,
the
needle
goes up
and
stops
in its
upper
positions.
• By depressing the back part
of
the pedal, the thread
trimmer
may
be
actuated.
(Note
that
this
switch
will be invalid
when
the
needle
has
been
moved
down
by
hand.)
Automatic
thread
trimming
switch
•
This
is a
selector
switch
to
cause
the
machine
to
automatically
trim
threads
upon
completion
of
the
last
sewing step even with
the
front part
of
the pedal
depressed.
• For patterns 2 and 3, this switch turns ON or
OFF
alternately
each
time
it is pressed.
• For pattern 4, the indicator is always ON regardless of
the switch
ON/OFF
condition.
From the library of: Superior Sewing Machine & Supply LLC

2)
How
to use
each
stitching pattern
1. Pattern $>
Automatic
reverse
stitching
(for
start)
switch 0
Stitching
pattern
Automatic
reverse
stitch
(for
end)
switch
0
2. Pattern :|>
Automatic
reverse
stitching
(for
start)
switch 0
Stitching
pattern
Automatic
reverse
stitch
(for
end)
switch
0
fim
0 0
OFF
ON
OFF OFF
OFF
ON
CD
CD
OFF
OFF
H.
>ۥ
OFF
n
ON
OFF
ON
ON
ON
ON
ON
•
:> •
i>
i»1
CO
f
I."
AB AB
IcdI
e e
%
A/Ci
B
ID
A. -B • C D
• Q Q E)
HS
ii
(B
(9 (9
GO
•JUKI
1. Turn pattern selector O ON.
2. By combining ON and OFF settings of automatic
reverse
stitching (for start) switch 0 and automatic reverse
stitching (for end)
switch
0 , four different stitching
patterns
are available.
3. For the starting automatic
reverse
stitching, set the
number
of
stitches using A and B
of
switch O . For the
ending automatic
reverse
stitching, set the number of
stitches using C and D
of
switch O .
(Precaution) Be sure that, when you selecta pattern selector
switch,
the
corresponding
pattern
Indicator
lamp
lights
up.
1. Turn pattern selector switch 0 ON.
2. By combining ON and
OFF
conditions
of
automatic
reverse stitching (for start) switch 0 and automatic
reverse stitching (for end) switch 0 , four different
stitching patterns are available.
3. For bofo starting and
ending
automatic
reverse
stitchings,
set the numbers
of
stitches using A and B of switch O .
4. The
numbers
of stitches for theintermediate stepscanbe
set within the range of 0 to 99, using C and D of switch
O .
5. When automatic thread trimming switch 0 has been
tumed ON, the thread trimmer
will
automatically be
actuated upon completion of steps Cand D or the ending
reverse stitching.
6.
When
automatic thread trimming switch 0 has been
tumedOFF,the
machine
stopswithits
needle
down
upon
completion of steps C andD. At this time,if you operate
the one-touch type reverse feed switch, the machine mns
at low
speed
(for
compensative
stitching). Further, if you
return the pedal to its neutral positionbeforeyou
depress
the front part of the
pedal
again,
you can
resume
sewing
operation regardless
of
the preset number
of
stitches.
- 9 -
From the library of: Superior Sewing Machine & Supply LLC

3. Pattern :|>
Automatic
reverse
stitching
(for start) switch ©
OFF
ON
OFF
ON
Yn
*
CD
ly
CD
CD
CD
Stitching
pattern
I/n
l/N
AB
AB
CD
AB
AB
CD
AB^
AB
CD
AB
AB
CD
Automatic
reverse
stitch
(for end) switch 0
OFF
OFF
ON
ON
1. Turn pattern selector switch © ON.
2. By combining ON and OFF conditions of automatic
reverse
stitching (for start) switch © and automatic
reverse
stitching (for end) switch 0 , four different
stitching patterns are available.
3. Set the numbers
of
stitches for steps AB and CD within
the
range
of 0 to 99, usingA to D of switch 0 .
4. Set numbers
of
stitches N for the starting and ending
automatic reverse stitching steps. (See the setting method
described below.)
5. Upon completion of each step, the machine stops with its
needle down even when you depress the front part of the
pedal. .At this time, if you operate the one-touch type
reverse feed switch, the machine will perform
compensative stitching.
6. If you depress the back part of tlie pedal during
intermediate AB or CD steps, the machine will
immediately trim the threads. If you depress the back
part of the pedal during the last CDstep, the machine will
trim the threads either immediately or upon completion
of the ending automatic reversestitching.
7. When automatic thread trimming switch 0 has been
turned ON, if you depress the front part
of
the pedal after
completion of the last step, the machine will
trim
the
threads either immediately or upon completion
of
the
ending automatic reverse stitching.
8.
When
automatic thread trimming switch © has been
turned OFF, the machine will stop with its needle down
upon completion
of
the last step. When the machine
stops, the pedal is in its neutral position. If you depress
the front part
of
the pedal, you can continue sewing
operation. At this time, if you return the pedal to its
neutral position before you depress the back part of the
pedal, the machine will trim the threads either
immediately or upon completion
of
reverse stitching.
(Note) For a machine equipped with an Auto-lifter, the
Auto-lifter
is
actuated
when
the
machine
stops
with
its
needle
down
upon
completion
of
a
step
or
when
the
machine
stops
with
its
needle
down
in
compensative
stitching
operation.
★
How
to set numberof stitchesNfor startingand
ending
automatic
reverse
stitching steps
4.
Pattern
TP6
S.GND
SNUMA~D
BT
SUB
•nCZl'^
JMAX
PNEUF
M400I
301
-
10
-
1. Turn the power switch OFF.
2. Open the PSC box cover.
3.
Using
a flat-bit screwdriver, set the arrow on rotary switch
(SWl) O on the main circuit board
to
the desired
number
of
stitches.
4.
Close
the
PSC
box
cover.
5. Turn the power switch ON
again.
This completes the
setting
of
number
of
stitches N.
(Note) Both starting and ending automatic
reverse
stitching
steps
will
have
the
same
number
of
stitches.
1.
Turn
pattern selector switch O ON.
(At this
time,
the
automatic
thread
trimming
indicator
lamp lights up.)
2. Set the numbersof stitchesfor stepsA to D,
using
A to D
of
switch
0 .
3. By depressing the front part of the pedal once, you can
make the machine perform a
series
of operations from
sewingsteps A to D to trimming the threads.
From the library of: Superior Sewing Machine & Supply LLC

^
How
to
increase
the numberof stepsfor Pattern
$>
(upto 9 steps)
sc.
EC
BTTa
SCMBT
K
TESTA
K>
EOON
TESTB
•>
SOFTON
K
TESTP
•D®
SOFT 1/2
SW4
SW6
SBTM/A
oLM-
KOSOO
oK
WIPON
•n
nQ||ro
HOSOl
O
SCMATR
•:
'^BSHPT
SCMESP
tr
HOSAO
•>
ACTA
K
HOSAI
K>
ACTS
d
HOSBO
•O
ACTD
a
KOSBi
CM®
H/N E
REV
9AKP
For the nonnal sewing specification, the number of steps is
four (A, B, C and D) at the maximum. The number of steps
can be increased as many as nine, however, by changing the
setting
of
the relevant DIP switch on the main circuit board
in
the
PSC
box.
1.
Tum
OFF the power switch.
2. Open the cover
of
the PSC box.
3. Set DIP switch (SW44BSRPT) O on the main circuit
board
to
its ON position.
4.
Close
the
cover
of
the
PSC
box.
5.
Tum
ON the power switch. This completes the setting
of
the
DIP
switch.
Now the sewing specification is as illustrated in the figure.
Set the number
of
stitches for steps A to C, using A to C
of
switch
O . Dof
switch
O is
used
to
specify
^e
number
of
all the steps.
(Example)
/A-»-B->-C^B
=>
The
number
of
all
the
steps
D=4 \
A^B^C^B^C
=>
\ The number of all the steps D = 5 /
(Precaution) If D is set to
"0",
all the numbers of stitches
specified for A through C will come
to
nothing
regardless
of
the
set
values
for
them.
11
-
From the library of: Superior Sewing Machine & Supply LLC

2-6. SC-320 Control panel
1) Control panel
+ -I- +
O Power indicator lamp (LED)
• Lights up when the power switch is turned ON.
• Stays ON for a while immediately after the power
switch
is
turned
OFF.
Reverse
stitching
pattern
switch
• Used to select a reverse stitching
pattern.
• When this switch is turned ON, lamp 0 comes ON,
while overlapping stitch indicator lamp 0 goes OFF.
Also, all indicator lamps associated to programmed
stitching will go
OFF.
0
Reverse
stitehing pattern indicator lamp
(LED)
• Lights up when the reverse stitching pattern switch is
turned
(DN.
OOverlapping stitch
pattern
selector switch
• Used
to
select an overlapping stitch pattern. When
this switch is turned ON, lamp 0 lights up, while
reverse
stitching indicator lamp 0 goes OFF. Also,
ail indicator lamps associated to programmed stitching
will go
OFF.
0 Overlapping stitch indicator lamp (LED)
•
Lights
up
when
the
overlapping
stitch pattern
switch
is
turned
ON.
0 Programmed stitching pattern ^ switch
• Used to select the
programmed
stitching
pattern
1.
• When this switch is turned ON, lamp 0 lights up.
O Programmed stitching pattern
$>
indicator lamp
(LED)
• Lights up when the programmed stitching pattern 1
switch
is
turned
ON.
0Programmed stitching pattern ^ switch
• Usedto select the programmed stitching pattern 2.
• When this switch is
turned
ON, lamp 0lights up.
o o
0Programmed stitching
pattern
^indicator lamp (LED)
' Lights up when the programmed stitching pattern 2
switch
is
turned
ON.
)
Switches
for
setting
the
number
of
stitches
Used to set the number
of
stitches within the range
of
0 to 9 for steps A to D.
"+"
:
Increases
the
number
of
stitches.
" :
Decreases
the
number
of
stitches.
0
Stitch
number
displays (LED)
• Indicates the number
of
stitches for each step (A to D).
0
Automatic
reverse stitching
(for
start)
switch
• Used to
turn
ON or
OFF
automatic
reverse
stitching
at
sewing
start.
• Each time this switch is pressed, it alternately turns
ONor OFF.
(When
step Bhas been set to "0", the
automatic reverse stitching at sewing start
cannot
be
set.)
0 AutcMnatic reverse stitching (for
start)
indicator lamp
(LED)
• Lights up when the automatic
reverse
stitching (for
start) switch is turned ON.
0
Automatic
reverse stitching (for end) switch
• Used to
turn
ON or
OFF
automatic
reverse stitching at
sewing end.
• Each time this switch is pressed, it alternately turns
ON or OFF.
(When
step C has been set to "0", the
automatic reverse stitching for sewing end cannot be
set.)
0Automatic reverse stitehing (for end) indicator lamp
(LED)
• Lights up when the automatic reverse stitching (for
end)
switch is
turned
ON.
From the library of: Superior Sewing Machine & Supply LLC

(E>
Stepsetting
switch
• Used
to
make a step change in order to set the number
of
stitches, needle
stop
position, presser
foot
lifter
ON/OFF,
thread trimming or
other
sewing conditions
for each step in programnied stitching. .
• The step can be changed from 1 to 15.
(If
there are steps for which the numbers
of
stitches
have
not
been set, only the step
of
the lowest number
will be displayed.)
•
"+"
:Increases
the
step
No.
" : Decreases
the
step
No.
I
Step
display (LED)
Displays a step (1 to 15).
I
Step
stitch
number
setting
switch
Used to set the
number
of
stitches within
the
range
of
0 to 99 for each sewing step.
"+"
:
Increases
the
number
of
stitches.
" :
Decreases
the
number
of
stitches.
When
the
"+"
or
side
of
the
switch
is
held
depressed,
the
number
of
stitches continues to increase
or
decrease.
I
Step
stitch
number
display (LED)
Displays the number
of
stitches for a step within the
range
of 0 to 99.
IMachine
stop
mode
selector
switches
Used to select the following machine stop modes at
the time when a step has been sewn:
o The machine will stop with the needle up.
o The machine will stop with the needle down,
o The machine will stop with the presser foot up.
o The machine will stop with the presser foot down,
o The machine will stop after thread trimming.
2) Howto useeachstitdimg pattern
(1) Reversestitching pattern
0 O O O 0 0 O
^
Hi
•JUKI
ac-3eo
w
^ ^ ^
YYV
0
1. Pressreversestitching pattern switch O •
2. Reverse stitching pattern indicator lamp 0 lights up,
and stitch number displays (LEDs) 0 for steps A to D
indicate the preset numbers
of
stitches. Also, automatic
reverse
stitching (for start) indicator lamp O and
automatic
reverse
stitching (for end) indicator lamp 0
show
the
ON
and
OFF
conditions
of
automatic
reverse
stitching (for start) switch 0 and automatic reverse
stitching (for end) switch 0 . -
13
Indicator lamps (LED) for showing
the
selected machine
stop
modes:
The
machine will
stop
with
the
needle up.
The machine will stop with
the
needle down.
The machine will stQp with the presser foot up.
The machine will stop with the presser foot down.
The machine will stop after thread trimming.
Step
insertion
switch
Used
to
insert a new sewing step in preset sewing steps.
Step
deletion
switch
Used to delete aparticular one from the preset'sewing
steps.
®
Restart
switch
• Used to restart sewing a programmed stitch step after
an empty bobbin has been replaced.
Switch
for
raising
the
needle
If the machine has stopped with its needle down, the
needle goes up and stops in its highest position when
this
switch
is
turned
ON.
'Memory
battery
exhaustion
monitor
lamp (LED)
This lamp may light up if the machine has been unused
for an extended period
of
time and the battery has
been
exhausted.
Automatic
reverse
stitching
(for
start)
switch O
Stitching
patterns
Automatic
reverse
stitching
(for
end)
switch O
OFF
OFF
ON
OFF
ON
OFF
ON
ON
3. To change the numbers
of
stitches, press the
"+"
or
" sides of switches 0 for setting the numbers of
stitches located under stitch number displays 0 for
steps
A to D.
4. By combining ON and OFF settings
of
automatic reverse
stitching (for start) switch 0 and automatic reverse
stitching (for end) switch 0 , four different stitching
patterns
are
available.
From the library of: Superior Sewing Machine & Supply LLC

(2) Oveilapping stitch pattern
9«
•JUKI
8C-3eO
O
GO
51
f T Y
5
El
1. Pressoverlappingstitching pattern switch O .
2.
Overlapping
stitch pattern indicator
lamp
O
lights
up,
and stitch
number
displays
©indicate the
preset
numbers
of
stitches.
3. To
change
the numbers of stitches,
press
the "+" or
"
sides
of
switches
O for setting the
numbers
of
stitches located under stitch number
displays
© for
steps A
to
D.
4. By
depressing
the front part of the pedal once, you can
cause
the
machine
to sew steps A to D in sequence and
then
to
actuate
its
thread
trimmer.
(Precaution)
The
numbers
of
stitches
which have
been
set
for
steps A to D are stored In memory
separately
from
the
numbers
of
stitches
for
a
reverse
stitching
pattern.
★
How
to
increase
the
number
of stepsfor Pattern (upto 9
steps)
K>
mih
sc.
EC
TESTA
TESTS
TESTP
SBTM/A
WIPON
NFEEO
^eSRPT
HOSAO
MOSAI
HOSBO
HOSBI
SW4
O
REV
SCMBT
EOON
SOFTON
SOFT 1/2
KOSOO
HOSDI
SCMATR
SCMESP
ACTA
ACTB
ACTO
H/N
SW6
oK
a
a
WKP
^3)
Programmed
stitching
pattern
^
•JUKI
SC-38a
r+)
Y Y Y
For the normal sewing specification, the number of steps is
four (A, B, C and D) at the maximum. The number
of
steps
can be increased as many as nine, however, by changing the
setting
of
the relevant DIP switch on the main circuit board
in
the
PSC
box.
1. Turn OFF the power switch.
2. Open the cover
of
the PSC box.
3. Set DIP switch (SW44BSRPT)
board
to
its ON position.
4.
Close
the
cover
of
the
PSC
box.
5. Turn ON the power switch. This completes the setting of
the
DIP
switch.
Now the sewing specification is as illustrated in the figure.
Set the number of stitches for steps A to C, usingA to C of
switch
O . Dof
switch
O is
used
to
specify
&e
number
of
all the steps.
(Example)
A-^-B-^-C^B
The number of all the steps D = 4
A^B-J-C-^B-^C
=>
The number
of
all the steps D = 5
(Precaution) if D is
set
to
"0",
all
the
numbers
of
stitches
specified
for
A
through
C will
come
to
nothing
regardless
of
the
set
values
for
them.
O
n
o
0
© ©
O
on
the
main
circuit
© ©
SjTi.
IX[-1
© ©
o
4. The needle-down stop lamp and the presser-foot-up stop
lamp of indicator lamps © (for showing the selected
machine stop modes at the time when a step has been
completed) light up.
5. If any of stitch number
displays
(A to D) O for the
reverse stitching pattern indicates a number of stitches
other than 4, then you can change it to 4 by pressing
the "+" or side of the correspondingswitch © for
setting the number of stitches.
1.
Checkingchanging
the
programmed
stitching
pattern
5>
1. Pressprogrammedstitching pattern 1 switch O .
2.
Automatic
reverse
stitching (for start) indicator
lamp
©
and automatic reverse stitching (for end) indicator lamp
©
light
up, and stitch number
displays
O for steps
A to D show
S] S]
SI
m .
3. Step display © shows i
111
, and step stitch number
display © shows
12
I
01
.-
14
-
From the library of: Superior Sewing Machine & Supply LLC

The
"+"
side of
switch
f
is
pressed
once
at
a
time
Indication
on
display 0
Indication
on
display 0
•
Dn
i-
u
/ n
I u
Zi
jn
(_
u
I
uI
C
6. Each time the "+" side of step setting switch 0
pressed, the indications will change as illustrated above.
7. If the
number
of
stitches
shown
on step stitch
number
display
0 is different
from
those
given
in the table
above,
change
it by
pressing
the "+" or side of
switch
0 for
setting
the
number
of
stitches
forastep.
8. If a machine stop mode is different from those
given
in
the table above, set it using switches 0 for selecting
the machine stop modes.
*
Selecting
a
machine
stop
mode
I n
I u
n
u
IS
Indicator lamps o
The
following
lamps
light up
°-l-
%
4M
° 1
20
Step
1
Pattern
10
10
Step
4
—O
20
Step
3
Step
2
9. With these settings, you can sew the pattern illustrated
at left by repeating the series of operations
Depressing
the front part of the pedal Automatic stop based on the
preset number of stitches Setting the pedal to its
neutral position Depressingthe front part of the pedal.
At this time, the step display indicates the step No. being
sewn, while the stitch number display and the machine
stop
mode indicator lamps stay OFF.
You can make the machine stop with its needle up after trimming the threads, or stop with its needle down or up without
trimming the threads, or stop with its presser foot up or down.
How
to
set
the
desired machine
stop
mode
Example 1 :
Setting
for
making
the
machine
stop
with
its
needle
down
and
presser
foot
up
°J_
^-5-
P
>€
Press
the
switches
and
1
—I
.
This
will
cause
the
corresponding indicator lamps to
light up.
Example
2 :
Setting
for
making
the
machine
stop
with
its
presser
foot
up
after
thread
trimming
• ^ ° 1
-5-
Press
the
switches
j>g| and
i
—i
.
This
will
cause
the
corresponding indicator lamps to
light up.
In this case, the needle-up stop
lamp and the needle-down stop
lamp
stay
OFF.
How to release
the
thread trimming switch The following two methods are available:
%
•
ir
>§
(T)
Press
switch
L^J
again.
This will place
the
machine in
the needle-down
stop
mode,
and the corresponding indi
cator
lamp will light up. (The
indicator lamp for machine
stop
after thread trimming
goes
OFF.)
-
15
-
-5_
>§
ff"
>§
Q)
Press
the
switch
;
-J-;
or
the switch j . This will
cause the corresponding indi
cator lamps to light up. (The
indicator lamp for machine
stop
after thread trimming
goes
OFF.)
From the library of: Superior Sewing Machine & Supply LLC

Adding
steps to the programmedstitching pattern 1
The
following
procedure
shows
how
to
add
two
steps
tothe
programmed
stitching
pattern
1in
order
to
sew
the
pattern
Illustrated
below:
rrartlo
•JUKI
s a a a
iSBi
®Fl
Fl!
ra.
1)
Press
the "+"
side
of step setting
switch
O three
k
times.
Indication
on
the
panel
2)
Press
the
switch
I—I and the
switch
I
-r-|
of
machine stop mode selector switches O •
3)
Press
the
"+"
side
of
step
setting
switch
O
once.
Indication on the panel |
4)
Keep
on
pressing
the
"+"
side
of
step
stitch
number
j ^
setting
switch
@
until
20
stitches
are
reached.
indication
on
the
panel
J
5)
Press
the
switch
i—I
and
the
switch
S machine stop mode selector switches O .
6)
Press
the "+"
side
of step settingswitch O
again.
Indication
on
the
panel
7)
Keep on pressing the
"+"
side
of
step
stitch
number
setting
switch
0
until
30
stitches
are
reached.
mdication
on
the
panel
8)
Press
the
switch
f—i
and
the
switch
f^l
of
machine
stop modeselector
switches
© .
9)
You can set up to 15 steps.
10) By turning ON or OFF automatic
reverse
stitching
(for start) switch O and automatic
reverse
stitching
(for end) switch © , you can
make
the machine
perform reverse stitching at the sewing start and/or
end.
(This cannot be programmed for each step.)
^
Step
6
Step1120
Indication
on
the
panel
jn
u
Indication
on
the
panel
D n
u
Indication
on
the
panel
20l
Steps
I
From the library of: Superior Sewing Machine & Supply LLC

(4)
Programmed
stitching
pattern
^
By
pressing
programmed
stitching
pattern
2
switch
® ,
you
can
perform
check
and
change
just
as
inthe
programmed
stitching
pattern
1.
The
panel
indications
and
stitching
pattern
stored
in
memory
are
as
shown
below.
a
Automatic
reverse
stitching
(for
start)
switch
@
and
automatic
reverse
stitching
(for
end)
switch
O
are
ON,
and
stitch
number
displays
(Ato D) ®
will
show
[3]
S [2 H] .
•JUKI
ac-3ao"
The
"+"
side
of
switch
0 is pressedonce a,
a
time
Indication
on
display
0
•J
J
5
•
•
~sl
Indication
on
display
0
I D
I U
UI
c n
D u
D C
c n
J u
I D
I
L.
n
u
0
i11 D
1
L.
n
0
@ o 0
Indicatorlamps o
The
following
lamps
light
up
cr
cr
cr
°4-
4
-
17
-
i-f
'•
1'D1
iX
o
o
140
Stitching
pattern
0—6—0
4
12
50
0-<
0
4
12 \4'
50
From the library of: Superior Sewing Machine & Supply LLC
This manual suits for next models
3
Table of contents
Other JUKI Sewing Machine manuals

JUKI
JUKI DDL-5550N User manual

JUKI
JUKI AMS-221EN/IP-420 Firmware update

JUKI
JUKI DMN-5420N-7 User manual

JUKI
JUKI DNU-1541S User manual

JUKI
JUKI DSC-244 User manual

JUKI
JUKI LK-1900AN Quick start guide

JUKI
JUKI MF-7200D User manual

JUKI
JUKI LBH-772NV-1 User manual

JUKI
JUKI MB-373N/BR10 User manual

JUKI
JUKI MO-655N User manual

JUKI
JUKI MB-1800 series User manual

JUKI
JUKI LK-1900BN User manual

JUKI
JUKI HZL-27Z User manual

JUKI
JUKI LZ-271 User manual

JUKI
JUKI MF-7900-E22 User manual

JUKI
JUKI MF-7524 User manual

JUKI
JUKI LU-1510N-7 Quick start guide

JUKI
JUKI MO-644D User manual

JUKI
JUKI HZL-NX7 User manual

JUKI
JUKI AB-1351 User manual