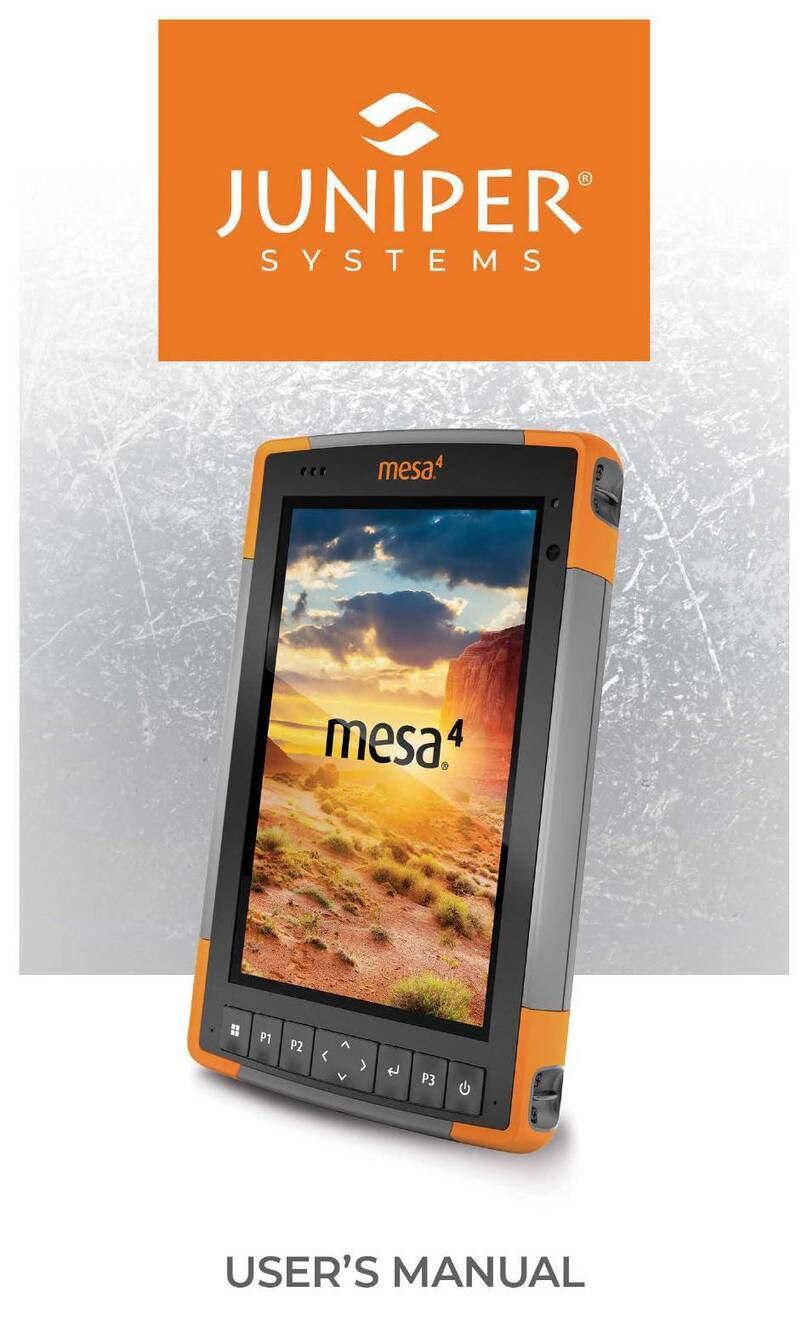
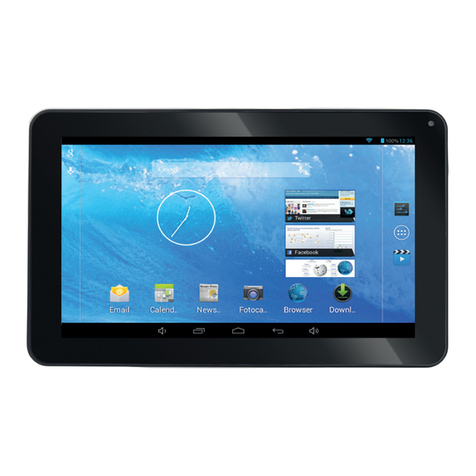
Juniper mesa 4 User manual

USER’S MANUAL

ii Mesa 4 Rugged Tablet User’s Manual
tel: 435.753.1881 lweb: www.junipersys.com
1132 W. 1700 N. Logan, UT 84321
Mesa 4 User’s Manual
Copyright ©Dec 2023 Juniper Systems, Inc. All rights
reserved. Information is subject to change without notice.
Part Number 31276-00
Trademarks
Juniper Systems®is a registered trademark of Juniper
Systems, Inc. Mesa 4™is a recognized trademark of Juniper
Systems, Inc.
Windows, Windows 11, and the Windows logo are
trademarks or registered trademarks of Microsoft
Corporation in the United States and/or other countries.
The Bluetooth®word mark is owned by the Bluetooth SIG,
Inc. Any use of such marks by Juniper Systems, Inc. is under
license.
Disclaimer
The names of other companies and products mentioned
herein may be the trademarks of their respective owners.
Cautions
WARNING! This symbol indicates that failure to follow
directions could result in serious injury.
CAUTION: This symbol indicates that failure to follow
directions could result in damage to equipment or loss
of information.
!
!

iii Mesa 4 Rugged Tablet User’s Manual
Contents
1. Getting Started 2
1.1 Overview................................................................2
1.1.1 The Anatomy of the Mesa 4 .....................................2
1.2 Perform Initial Tasks ...................................................4
1.2.1 Review Documentation.........................................4
1.2.2 Install and Charge the Battery Pack ...........................4
1.2.3 Set Up Windows ................................................5
1.2.4 Attach the Hand Strap .........................................6
1.2.5 Attach the Stylus Tether ........................................6
2. Standard Features 9
2.1 Display..................................................................9
2.1.1 Manually Adjust Display Brightness ............................9
2.1.2 Automatically Adjust Display Brightness .....................10
2.2 Camera ................................................................11
2.2.1 Photo and Video Library........................................11
2.3 Device Settings App ..................................................11
2.3.1 About............................................................11
2.3.2 Keypad Settings...............................................12
2.3.3 Touchscreen Profile Settings .................................15
2.3.4 Update the Mesa 4............................................15
2.4 LED Activity Indicators ...............................................16
2.5 Connector Ports......................................................17
2.5.1 Connector Protector ...........................................17
2.5.2 USB-A Port ....................................................17
2.5.3 USB-C Port ....................................................17
2.6 Micro SD and Nano SIM Cards .......................................17
2.7 Audio Features .......................................................18
2.8 Rugged ...............................................................19
2.9 Sensors ...............................................................19
2.9.1 Compass, Accelerometer, and Gyroscope ....................19
2.10 Bluetooth®Wireless Communication ............................. 20
2.10.1 Turn On or Off Bluetooth .................................... 20
2.10.2 Pair a Bluetooth Device ......................................21

iv Mesa 4 Rugged Tablet User’s Manual
2.11 Wi-Fi Wireless Networking ..........................................21
2.11.1 Connecting to a Wi-Fi Network...............................22
2.12 GPS/GNSS Receiver .................................................22
2.12.1 GNSS Settings.................................................23
2.12.2 GNSS Support ................................................25
2.13 Power Management ................................................25
2.13.1 Charging the Battery Pack(s) .................................26
2.13.2 Battery Status and Management ...........................26
2.13.3 Battery Life................................................... 28
2.13.4 Power Off the Mesa 4 ....................................... 28
2.14 Task Manager ........................................................29
2.15 Mesa 4 is Locked Up.................................................29
3. Optional Features and Accessories 33
3.1 4G LTE Data Modem .................................................33
3.1.1 Set up a Data Account with a Wireless Provider ..............33
3.2 Barcode Imager ..................................................... 34
3.2.1 Scan Test ......................................................34
3.2.2 Barcode Connector Settings .................................35
3.2.3 Reading a Barcode ............................................39
3.2.4 Barcode Types................................................40
3.2.5 Troubleshooting the Barcode Imager........................41
3.3 Pistol Grip............................................................ 42
3.3.1 To Use the Pistol Grip ......................................... 42
3.3.2 Holster ........................................................ 43
3.4 RFID Reader......................................................... 43
3.4.1 Scan Test ...................................................... 43
3.4.2 RFID Reader Settings ........................................44
3.4.3 Read an RFID Tag ............................................48
3.4.4 Antenna for RFID Reader ....................................48
3.5 RS-232 Port ..........................................................48
3.6 Vehicle Dock......................................................... 50
3.6.1 Mounting System..............................................51

vMesa 4 Rugged Tablet User’s Manual
3.7 Battery Charger ......................................................51
3.7.1 How to Use the Battery Charger ..............................51
4. Storage, Maintenance, and Recycling 55
4.1 Storing the Mesa 4 and Battery Pack................................55
4.1.1 Storing the Mesa 4 for More than Two Weeks ................55
4.2 Protecting the Touchscreen ........................................55
4.3 Cleaning the Mesa 4 .................................................55
4.4 Recycling the Mesa 4 and Batteries ................................56
5. Warranty and Repair Information 59
5.1 Limited Product Warranty ...........................................59
5.1.1 Two Year Warranty .............................................59
5.1.2 Ninety Day Warranty ..........................................59
5.1.3 Warranty Exclusions ...........................................59
5.1.4 Remedy .......................................................60
5.1.5 Limitation of Liability ..........................................61
5.1.6 Governing Law .................................................61
5.1.7 Warranty Repairs. . . . . . . . . . . . . . . . . . . . . . . . . . . . . . . . . . . . . . . . . . . . . . . 61
5.2 Complete Care Service Plans ........................................62
5.3 Repairs, Upgrades, and Evaluations.................................62
5.4 System Information for your Mesa 4 ............................... 63
6. Warnings, Regulatory Information, Licensing 65
6.1 Product Warnings ................................................... 65
6.1.1 Battery Warnings. . . . . . . . . . . . . . . . . . . . . . . . . . . . . . . . . . . . . . . . . . . . . . 65
6.1.2 Wall Charger Warnings ....................................... 66
6.2 Regulatory Information ............................................. 66
6.3 Certifications and Standards ....................................... 67
6.3.1 United States.................................................. 67
6.3.2 Canada .......................................................68
6.3.3 Radio Frequency Safety ..................................... 69
6.3.4 CE Marking (European Union)............................... 69
6.3.5 Restricted Materials Conformity............................. 69
6.4 Licensing Information .............................................. 70
7. Mesa 4 Rugged Tablet Specifications 73
1
Getting
Started

2Mesa 4 Rugged Tablet User’s Manual
1. Getting Started
1.1 Overview
The Mesa 4 Rugged Tablet™ from Juniper Systems has the
Windows 11 Pro operating system. Standard features include
a 7 in. display, capacitive touchscreen, keypad, front and
rear cameras, Bluetooth®, GPS/GNSS receiver, and Wi-Fi.
Standard accessories include a lithium-ion battery pack, AC
wall charger, hand strap, connector port cover, and fine-tip
capacitive stylus and tether. Optional features include a 4G
LTE data modem, RS-232 port, barcode imager, and UHF
RFID module.
1.1.1 The Anatomy of the Mesa 4
Front and Back Features
1 Notification LEDs
2 Touchscreen and display
3 Protective over-molded
bumper (all four corners)
4 Keypad
5 Microphone (one on each side)
6 Ambient light sensor
7 Front-facing camera lens, 5 MP
8 Power button
9 Rear-facing camera lens, 13 MP
10 Camera flash
11 Speaker
12 Battery door lock
13 Door to removable battery
compartment and card
slots
14 External device attachment
points (three on the back)
15 Storage slot for fine-tip
stylus
1
3
2
5
6
7
8
9
10
11
12
13
14
15
4
14
5
14

3Mesa 4 Rugged Tablet User’s Manual
Battery Compartment and Card Slots
Connector Ports
1Battery pack, removable
2Battery door
3Nano SIM card slot and
Micro SD/SDHC card slot
4Battery compartment
5 Keyboard connection
6 Location of internal
battery (not user
accessible)
7 Hand strap attachment
points (two on each side)
2
1
4
3
5
6
11
7
8 9 10
7 Connector port protector
8 USB-C
9 USB-A
10 12 V DC power input jack
11 Storage slot for fine-tip
stylus
7
7

4Mesa 4 Rugged Tablet User’s Manual
1.2 Perform Initial Tasks
When you receive your Mesa 4, perform the tasks outlined
in this section before first use.
1.2.1 Review Documentation
This user’s manual and other documents, such as release
notes, are available on our website at https://junipersys.com/
support/mesa-4/documentation. View, download, and print
documents as you desire. A PDF viewer is included with
your Mesa 4 apps.
1.2.2 Install and Charge the Battery Pack
The Mesa 4 comes with a rechargeable and removable
Li-ion battery pack, which you access from the back of the
tablet.
CAUTION: The Mesa 4 is not sealed against water and
dust when the battery door is not installed.
To install and charge the battery pack,
1. Push in the battery lock switch, slide it to the unlocked
position, and remove the door.
Note: If you are using a micro SD card for additional
memory or a nano SIM card for the optional cellular
data modem, you can install them now before you
install the battery pack or at another time. (See “2.6
Micro SD and Nano SIM Cards” on page 17.)
2. Insert the battery pack.
!
Black tab

5Mesa 4 Rugged Tablet User’s Manual
Hold the battery so that the black tab on the front
edge of the battery is up and facing the door latch.
(This tab helps you remove the battery.)
Place the back edge in first, gently pushing it under
the two battery catches.
Rotate the front edge down until it sits flat in the
battery compartment.
CAUTION: Do not insert the battery pack straight down.
You can damage the tablet.
3. Replace the door and press down on it until the latch
pops into the locked position.
4. Charge the Mesa 4 with the AC wall charger that came
with the Mesa 4 or a USB-C cable.
AC wall charger—Attach the appropriate plug
for your country to the AC wall charger that came
with the Mesa 4 (or another approved charger from
Juniper Systems). Plug the other end of the AC wall
charger into the DC power jack on the Mesa 4. With
an approved AC wall charger, the batteries cannot be
overcharged. (See “6.1.2 Wall Charger Warnings” on
page 66.)
USB-C cable—Insert the USB-C cable into the USB-C
port on the Mesa 4. Connect the cable to a computer
or wall charger. The USB-C cable must deliver 20 V
with a minimum 30 Watts.
5. Charge the battery pack at room temperature (68°F or
20°C) for six hours (for the first charge).
While the battery pack is charging, the red LED blinks.
When the battery pack is fully charged and external power
is applied, the red LED is solid.
Note: The Mesa 4 does not recognize an internal battery
until you start charging the batteries.
1.2.3 Set Up Windows
When you power on the tablet for the first time, you are
prompted to set up Windows. Follow the prompts to set up
the tablet.
!

6Mesa 4 Rugged Tablet User’s Manual
1.2.4 Attach the Hand Strap
A hand strap is included with the Mesa 4. This allows you to
securely hold the Mesa 4. To attach the hand strap, fasten it
to the two attachment points on the left or right side of the
tablet, as shown in the images below.
1.2.5 Attach the Stylus Tether
A fine-tip capacitive stylus and tether is included with the
Mesa 4. To attach the stylus tether,
1. Attach one end of the stylus tether to the stylus.
2. Push the free tether loop through one of the tether
attachment points located by each corner on the
Mesa 4.
3. Insert the stylus with the attached tether through this
loop and tighten the loop.
4. Place the stylus into the stylus storage slot located on
the bottom of the Mesa 4.
1 2 3

7Mesa 4 Rugged Tablet User’s Manual

2
Standard
Features

9Mesa 4 Rugged Tablet User’s Manual
2. Standard Features
This chapter discusses the standard features included with
every model of the Mesa 4 Rugged Tablet™.
2.1 Display
The Mesa 4 has a bright color display and capacitive
touchscreen with a diagonal viewing area of 7 inches (178
mm).
You can adjust the display settings, including the
brightness, night light, and battery saver.
2.1.1 Manually Adjust Display Brightness
Use one of the following methods to manually adjust the
brightness of the built-in display.
■ From Settings, select System > Display. Move the
Brightness slider to adjust the display brightness.
To optimize the battery life and adjust the display
brightness and contrast based on the displayed content,
tap Brightness to expand the section. Select
Help improve the battery by optimizing the content
shown and brightness.

10 Mesa 4 Rugged Tablet User’s Manual
■ Tap the Network, Sound, or Battery icons on the right
side of the taskbar. Move the Brightness slider to adjust
the brightness of the display.
2.1.2 Automatically Adjust Display Brightness
The ambient light sensor on the front of the Mesa 4
measures the light around your device and automatically
adjusts the brightness of the display based on the lighting.
To enable the ambient light sensor,
1. From Settings, select System > Display.
2. Tap Brightness to expand the section.
3. Select Change brightness automatically when
lighting changes.
4. Move the Brightness slider to fine-tune the brightness
level.

11 Mesa 4 Rugged Tablet User’s Manual
2.2 Camera
The Mesa 4 has a 13 MP rear-facing camera with auto focus
and flash and 5 MP front-facing camera.
You can capture both still images and videos using the
camera application. Other options include a timer and
brightness settings.
2.2.1 Photo and Video Library
Photos and videos are automatically stored in the Pictures
folder.
2.3 Device Settings App
The Mesa 4 has a built-in app called Device Settings. In this
app, you can see detailed information about your device,
including the serial number, model number, and Juniper
OS version. The Device Settings app also includes options to
adjust the touchscreen profiles, define the programmable
keys, modify the GNSS settings, and update the Mesa 4.
For information on modifying the GNSS settings, see “2.12
GPS/GNSS Receiver” on page 22.
If your Mesa 4 has the optional RS-232 port, you also
configure it from the Device Settings app. (See “3.5 RS-232
Port” on page 48.)
2.3.1 About
From the About screen in the Device Settings app, view the
serial number, model number, OS version, product name,
BIOS version, embedded UUID controller version,
motherboard version, SSD capacity, cell type, expansion ID,

12 Mesa 4 Rugged Tablet User’s Manual
and battery status for your tablet. The About screen also
contains the regulatory information for the Mesa 4.
2.3.2 Keypad Settings
From the Keypad screen in the Device Settings app,
customize the keypad backlight brightness, program the
keypad buttons, and restore the default keypad settings.
To modify the keypad settings,
■ Tap All Users Settings to make keypad changes for all
users who sign in to the tablet.
■ Tap Per User Settings to customize keypad changes for
your individual account. Per User Settings override All
User Settings.
■ Tap Restore Defaults to restore the default settings for
All Users or Per User.

13 Mesa 4 Rugged Tablet User’s Manual
Keypad Backlight Brightness and Timeout
To adjust the keypad backlight brightness and timeout,
1. Tap All User Settings or Per User Settings.
2. Open the drop-down menu for Keypad Backlight
Brightness and select a brightness from 0–100%.
Dimming the keypad backlight extends the battery life
when the Mesa 4 is in use.
3. Open the drop-down menu for Keypad Backlight
Timeout and select the amount of time that the keypad
remains lit after it is inactive.
Programmable Keys
The Mesa 4 has a power/suspend key, Windows key, and
three programmable keys that can be used for various
functions, such as turning up or down the volume, opening
the camera, capturing screenshots, or closing an app.
Key Function
Windows Start screen

14 Mesa 4 Rugged Tablet User’s Manual
Key Function
P1 Volume down (programmable)
P2 Volume up (programmable)
Move left
Move right
Move up
Move down
Enter (return)
P3 On-screen keyboard (programmable)
Power
•Press and release: On or sleep
•Hold for five seconds and slide down the
screen: Power off.
•Hold for 10 or 20 seconds: Electrically
disconnect the battery pack(s). (See “2.15
Mesa 4 is Locked Up” on page 29.)
To assign a new function to a programmable key,
1. From the Device Settings app, tap Keypad.
2. Tap All User Settings or Per User Settings.
3. Select the preferred function for each programmable
key.

15 Mesa 4 Rugged Tablet User’s Manual
2.3.3 Touchscreen Profile Settings
From Touchscreen in the Device Settings app, select
the touchscreen profile that works best for your work
environment.
To change the touchscreen profile,
1. From the Device Settings app, tap Touchscreen.
2. Select the desired touch profile: Finger and Stylus
(default), Finger, Fine Hard-Tipped Stylus, Glove, Wet
and Finger, and Wet and Stylus.
Using the Mesa 4 in Wet Conditions
When using the Mesa 4 in wet conditions, keep the Mesa
4 tilted at a 30° angle to prevent water from pooling on the
screen.
Using a Stylus
The profiles intended for a stylus work best with the fine-
tipped stylus included with the Mesa 4. Touchscreen
performance is not guaranteed with third-party styli.
CAUTION: Do not use the Windows 11 screen
calibration tool. Using it may degrade the touchscreen
performance.
2.3.4 Update the Mesa 4
From the Update screen in the Device Settings app, decide
when and how to get the latest updates to keep your tablet
running smoothly.
!
Other manuals for mesa 4
1
Table of contents
Other Juniper Tablet manuals

Juniper
Juniper Cedar CT8 User manual

Juniper
Juniper Mesa Rugged Notepad User manual

Juniper
Juniper Mesa Pro User manual

Juniper
Juniper mesa 2 Installation and user guide

Juniper
Juniper mesa 2 User manual

Juniper
Juniper Mesa User manual

Juniper
Juniper mesa 2 User manual

Juniper
Juniper Mesa User manual

Juniper
Juniper Mesa 3 User manual

Juniper
Juniper cedar CT8X2 User manual