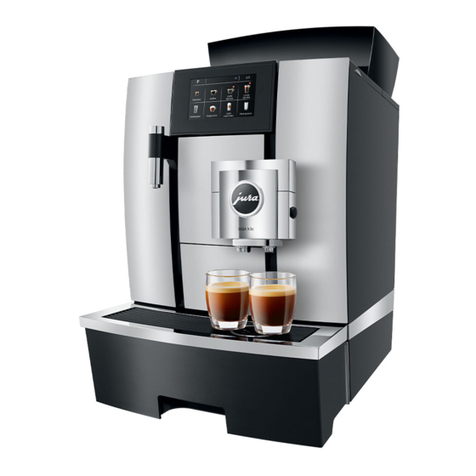
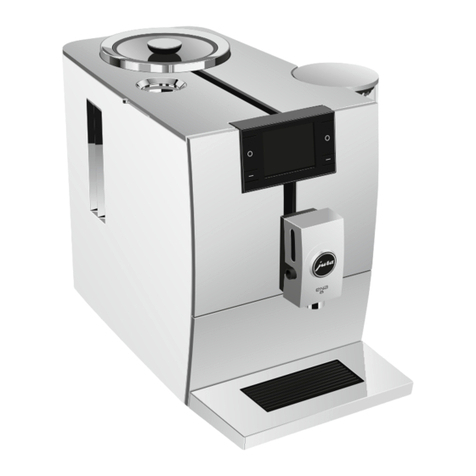
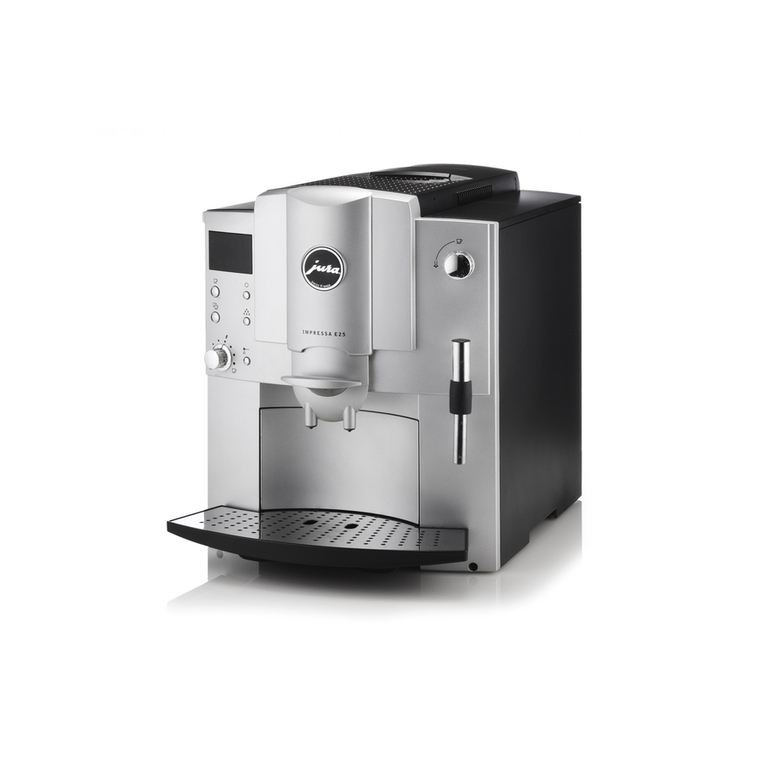
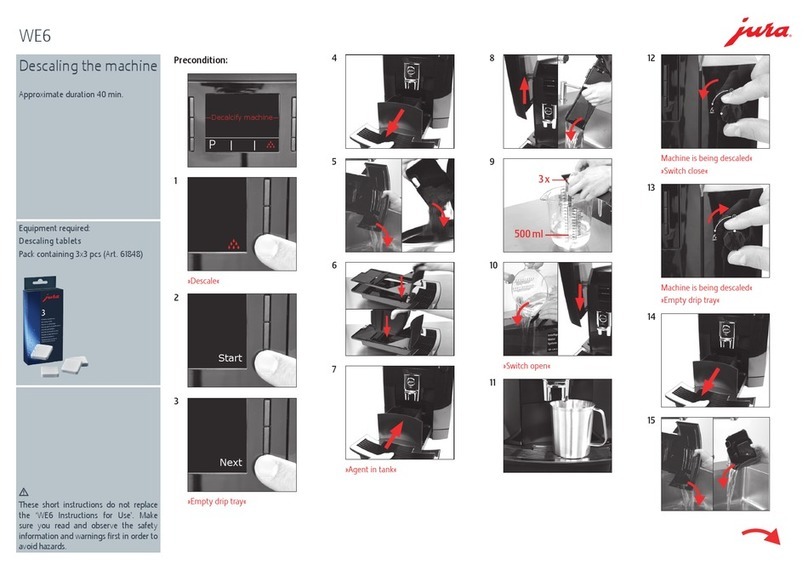
Jura IMPRESSA F55 User manual

IMPRESSA F55/F505
de Veränderter Lieferumfang:
Wichtige Informationen und Ergänzungen zur Bedienungsanleitung Ihrer IMPRESSA
en Modified scope of supply:
Additions and important information about the instructions for use for your IMPRESSA
fr Modification du matériel fourni :
informations importantes et compléments au mode d‘emploi de votre IMPRESSA
it Dotazione modificata:
importanti informazioni e integrazioni per le istruzioni per l‘uso dell‘IMPRESSA
nl Gewijzigde leveringsomvang:
belangrijke informatie en toelichtingen op de gebruiksaanwijzing van uw IMPRESSA
es Equipamiento modificado:
Información y suplementos importantes del modo de empleo de su IMPRESSA
pt Alteração da caixa original:
Informações importantes e complementos ao manual de instruções da sua IMPRESSA
sv Ändrad leverans:
Viktig information och kompletteringar till bruksanvisningen för din IMPRESSA
ru Измененный комплект поставки:
Важная информация и дополнения к руководству по эксплуатации Вашей IMPRESSA
J
de
en
fr
it
nl
es
pt
sv
ru

2
Veränderter Lieferumfang Ihrer IMPRESSA F55/F505
Die beiliegende Bedienungsanleitung für die IMPRESSA F50/F505
gilt ebenfalls für Ihre IMPRESSA F55.
Veränderter Lieferumfang Ihrer IMPRESSA F55/F505
Ihre IMPRESSA ist standardmäßig mit der Profi-Feinschaumdüse
ausgestattet. Die neue, innovative Feinschaum-Technologie liefert
feinporigen Milchschaum von lang anhaltender Konsistenz.
Auf den Abbildungen in der Bedienungsanleitung wird jeweils die
Profi-Cappuccino-Düse gezeigt. Die Beschreibungen (insbeson-
dere in Kapitel 13) gelten jedoch auch für die Profi-Feinschaumdüse.
Beachten Sie hierbei die abweichenden Symbole für die »Position
Milchschaum« und den »Bereich Milch«:
Profi-Feinschaumdüse Profi-Cappuccino-Düse
»Position Milchschaum« é p
»Bereich Milch« è z
Damit die Profi-Feinschaumdüse einwandfrei funktioniert und aus
hygienischen Gründen müssen Sie sie täglich zerlegen und spülen,
wenn Sie Milch zubereitet haben. Sie werden von Ihrer IMPRESSA
nicht aufgefordert, die Profi-Feinschaumdüse zu zerlegen und zu
spülen.
TEntfernen Sie den Milchschlauch und spülen Sie ihn gründ-
lich unter fließendem Wasser.
TZiehen Sie die Profi-Feinschaumdüse mit einer leichten
Drehbewegung vorsichtig vom Connector System©ab.
TZerlegen Sie die Profi-Feinschaumdüse in ihre Einzelteile.
TSpülen Sie alle Teile der Profi-Feinschaumdüse gründlich
unter fließendem Wasser. Bei stark eingetrockneten Milch-
rückständen legen Sie die Einzelteile zunächst in JURA-
Milchsystem-Reiniger ein und spülen Sie sie danach gründ-
lich.
TSetzen Sie die Profi-Feinschaumdüse wieder zusammen.
EAchten Sie darauf, dass alle Einzelteile korrekt und fest zusam-
mengesteckt sind, damit die Profi-Feinschaumdüse optimal
funktioniert.
TStecken Sie die Profi-Feinschaumdüse fest auf das Connec-
tor System©.
J
Profi-Feinschaumdüse
Abweichungen zur
Bedienungsanleitung
Profi-Feinschaumdüse
zerlegen und spülen

3
Changes to products supplied as standard for your IMPRESSA F55/F505
de
en
fr
it
nl
es
pt
sv
ru
The instructions for use enclosed for the IMPRESSA F50/F505 also
apply to your IMPRESSA F55.
Changes to products supplied as standard for your IMPRESSA F55/F505
Your IMPRESSA is fitted with the professional fine foam frother as
standard. The new, innovative fine foam technology delivers fine
milk foam with a long-lasting consistency.
The illustrations in the instructions for use show the Professional
Cappuccino Frother. However, the descriptions (in chapter 13 in par-
ticular) also apply to the professional fine foam frother. Note the dif-
ferent symbols for the "Milk Foam position" and "Milk stage":
Professional fine foam
frother
Professional Cappuccino
Frother
"Milk Foam position" é p
"Milk stage" è z
To make sure the professional fine foam frother works properly, and
in the interests of hygiene, it must be dismantled and rinsed daily if
you have been preparing milk. Your IMPRESSA will not prompt you
to dismantle and rinse the professional fine foam frother.
TRemove the milk pipe and rinse it thoroughly under running
water.
TCarefully remove the professional fine foam frother from the
Connector System©by twisting slightly.
TDismantle the professional fine foam frother into its individ-
ual parts.
TRinse all the parts of the professional fine foam frother thor-
oughly under running water. If there are severely dried-on
milk residues, firstly immerse the individual parts in JURA
milk system cleaner and then rinse them thoroughly.
TRe-assemble the professional fine foam frother.
EEnsure that all individual parts are correctly and firmly con-
nected to ensure optimum operation.
TFirmly attach the professional fine foam frother to the Con-
nector System©.
J
Professional fine foam
frother
Deviations from instructions
for use
Dismantling and rinsing the
professional fine foam
frother

4
Modification du matériel fourni avec votre IMPRESSA F55/F505
Le mode d'emploi ci-joint concernant l'IMPRESSA F50/F505 est éga-
lement valable pour votre IMPRESSA F55.
Modification du matériel fourni avec votre IMPRESSA F55/F505
Votre IMPRESSA est équipée par défaut de la buse mousse fine Pro.
La nouvelle technologie mousse fine innovante permet d'obtenir
une mousse de lait fine à la consistance persistante.
Les illustrations du mode d'emploi présentent la buse Cappuccino
Pro. Cependant, les descriptions (en particulier celles du chapitre 13)
s'appliquent également à la buse mousse fine Pro. Veuillez noter que
les symboles pour la «position Mousse de lait» et la «partie Lait»
diffèrent:
Buse mousse fine Pro Buse Cappuccino Pro
«Position Mousse de lait» é p
«Partie Lait» è z
Pour garantir le bon fonctionnement de la buse mousse fine Pro et
pour des raisons d'hygiène, vous devez obligatoirement la démon-
ter et la rincer quotidiennement si vous avez préparé du lait. Votre
IMPRESSA ne vous demande pas de démonter et de rincer la buse
mousse fine Pro.
TRetirez le tuyau de lait et rincez-le soigneusement sous l'eau
courante.
TRetirez la buse mousse fine Pro avec précaution du Connec-
tor System©en la faisant légèrement tourner.
TDésassemblez la buse mousse fine Pro.
TRincez soigneusement toutes les pièces de la buse mousse
fine Pro sous l'eau courante. En présence de résidus de lait
très secs, placez d'abord les pièces constitutives dans le
détergent pour système de lait JURA puis rincez-les soigneu-
sement.
TRéassemblez la buse mousse fine Pro.
EPour garantir le fonctionnement optimal de la buse mousse
fine Pro, assurez-vous que toutes les pièces sont montées cor-
rectement et solidement.
TInsérez fermement la buse mousse fine Pro dans le Connec-
tor System©.
J
Buse mousse fine Pro
Divergences par rapport au
mode d'emploi
Démontage et rinçage de la
buse mousse fine Pro

5
de
en
fr
it
nl
es
pt
sv
ru
Cambiamenti nella dotazione dell'IMPRESSA F55/F505
Le allegate istruzioni per l'uso per l'IMPRESSA F50/F505 valgono
anche per l'IMPRESSA F55.
Cambiamenti nella dotazione dell'IMPRESSA F55/F505
L'IMPRESSA è dotata di serie di un ugello per microschiuma Pro-
fessional. La nuova, innovativa tecnologia della microschiuma for-
nisce una schiuma di latte soffice e cremosa, con una consistenza
durevole.
Le figure contenute nelle istruzioni per l'uso presentano l'ugello
Professional Cappuccino. Le descrizioni (in particolare nel capitolo
13) valgono tuttavia anche per l'ugello per microschiuma Professio-
nal. In proposito prestare attenzione ai diversi simboli per la «posi-
zione Schiuma di latte» e la «zona Latte»:
Ugello per microschiuma Professional Ugello Professional Cappuccino
«Posizione Schiuma di latte» é p
«Zona Latte» è z
Per fare in modo che l'ugello per microschiuma Professional funzioni
perfettamente e per motivi igienici, è obbligatorio scomporlo e
sciacquarlo giornalmente se è stato utilizzato per preparare il latte.
L'IMPRESSA non segnala la necessità di scomporre e sciacquare l'u-
gello per microschiuma Professional.
TRimuovere il tubo del latte e sciacquarlo a fondo sotto l'ac-
qua corrente.
TSfilare con cautela l'ugello per microschiuma Professional
dal Connector System©ruotandolo delicatamente.
TScomporre l'ugello per microschiuma Professional nei sin-
goli componenti.
TSciacquare a fondo sotto l'acqua corrente tutti i componenti
dell'ugello per microschiuma Professional. In caso di residui
di latte incrostati, immergere innanzitutto i singoli compo-
nenti in detergente per il sistema del latte JURA e quindi
sciacquarli a fondo.
TRiassemblare l'ugello per microschiuma Professional.
EAssicurarsi che tutti i componenti siano assemblati corretta-
mente e saldamente per garantire il funzionamento ottimale
dell’ugello per microschiuma Professional.
TInnestare saldamente l’ugello per microschiuma Professio-
nal sul Connector System©.
J
Ugello per microschiuma
Professional
Variazioni rispetto alle
istruzioni per l'uso
Scomposizione e risciacquo
dell'ugello per
microschiuma Professional
6
Gewijzigde leveringsomvang van uw IMPRESSA F55/F505
De bijgevoegde gebruiksaanwijzing voor de IMPRESSA F50/F505
geldt eveneens voor uw IMPRESSA F55.
Gewijzigde leveringsomvang van uw IMPRESSA F55/F505
Uw IMPRESSA is standaard uitgerust met de Profi-uitloop voor
microschuim. De nieuwe en innovatieve technologie voor micro-
schuim zorgt voor melkschuim met fijne poriën met een lang aan-
houdende consistentie.
Op de afbeeldingen in de gebruiksaanwijzing wordt de Profi Cap-
puccinatore weergegeven. De beschrijvingen (met name in hoofd-
stuk 13) gelden echter ook voor de Profi-uitloop voor microschuim.
Neem hierbij de afwijkende symbolen voor »Stand Melkschuim« en
»Bereik Melk« in acht:
Profi-uitloop voor microschuim Profi Cappuccinatore
»Stand Melkschuim« é p
»Bereik Melk« è z
Voor een correcte werking van de Profi-uitloop voor microschuim
alsmede om hygiënische redenen moet u deze dagelijks demonte-
ren en spoelen als u melk heeft bereid. U wordt door uw IMPRESSA
niet verzocht de Profi-uitloop voor microschuim te demonteren en
te spoelen.
TVerwijder de melkslang en spoel deze grondig onder stro-
mend water af.
TTrek de Profi-uitloop voor microschuim met een lichte draai-
beweging voorzichtig van het Connector System©af.
TDemonteer de Profi-uitloop voor microschuim.
TSpoel alle onderdelen van de Profi-uitloop voor micro-
schuim grondig onder stromend water af. Bij sterk inge-
droogde melkresten legt u de afzonderlijke onderdelen eerst
in de JURA melkesystemrengjøringsmiddel en spoelt u deze
vervolgens grondig af.
TZet de Profi-uitloop voor microschuim weer in elkaar.
ELet erop dat alle onderdelen goed en stevig in elkaar zijn
gezet, zodat de Profi-uitloop voor microschuim optimaal
functioneert.
TPlaats de Profi-uitloop voor microschuim stevig op het Con-
nector System©.
J
Profi-uitloop voor
microschuim
Afwijkingen ten opzichte
van de gebruiksaanwijzing
Profi-uitloop voor
microschuim demonteren
en spoelen

7
Equipamiento modificado de su IMPRESSA F55/F505
de
en
fr
it
nl
es
pt
sv
ru
El modo de empleo que acompaña a la IMPRESSA F50/F505 tam-
bién es válido para su IMPRESSA F55.
Equipamiento modificado de su IMPRESSA F55/F505
Su IMPRESSA viene equipada por defecto con el vaporizador profe-
sional de espuma fina. La innovadora tecnología para espuma fina
permite obtener una espuma de leche de burbujas muy finas y con
una consistencia duradera.
En las figuras incluidas en el modo de empleo se muestra el vapori-
zador Profi Cappuccino. Sin embargo, las descripciones (especial-
mente las incluidas en el capítulo 13) también pueden aplicarse al
vaporizador profesional de espuma fina. Preste atención en este
caso a los diferentes símbolos utilizados para «Posición Espuma de
leche» y «Posición leche»:
Vaporizador profesional de
espuma fina
Vaporizador Profi Cappuccino
«Posición Espuma de leche» é p
«Posición leche» è z
Para un funcionamiento impecable del vaporizador profesional de
espuma fina, y por motivos de higiene, es estrictamente necesario
desmontarlo y enjuagarlo diariamente si ha preparado leche. Su
IMPRESSA no va a solicitar que desmonte y enjuague el vaporizador
profesional de espuma fina.
TRetire el tubo de leche y enjuáguelo a fondo bajo un chorro
de agua corriente.
TRetire el vaporizador profesional de espuma fina cuidadosa-
mente del Connector System©con un ligero movimiento
giratorio.
TDesmonte el vaporizador profesional de espuma fina en
cada uno de sus componentes.
TEnjuague a fondo todas las piezas del vaporizador profesio-
nal de espuma fina bajo un chorro de agua corriente. En caso
de residuos de leche muy resecos, sumerja primero los com-
ponentes en limpiador del sistema de leche JURA y, a conti-
nuación, enjuáguelos a fondo.
J
Vaporizador profesional de
espuma fina
Diferencias con respecto al
modo de empleo
Desmontar y enjuagar el
vaporizador profesional de
espuma fina

8
Equipamiento modificado de su IMPRESSA F55/F505
TVuelva a ensamblar el vaporizador profesional de espuma
fina.
ECompruebe siempre que todos los componentes estén
correcta y firmemente ensamblados de modo que el vapori-
zador profesional de espuma fina pueda funcionar a la perfec-
ción.
TFije el vaporizador profesional de espuma fina al Connector
System©.

9
Alteração da caixa original da sua IMPRESSA F55/F505
de
en
fr
it
nl
es
pt
sv
ru
O manual de instruções fornecido para a IMPRESSA F50/F505 é
válido também para a sua IMPRESSA F55.
Alteração da caixa original da sua IMPRESSA F55/F505
A sua IMPRESSA vem equipada de série com o bocal de espuma
fina pro. A recente e inovadora tecnologia de espuma fina fornece
uma espuma de leite fina e de consistência persistente.
As figuras no manual de instruções apresentam o respetivo bocal
profissional para Cappuccino. Contudo, as descrições (sobretudo
no Capítulo 13) também se aplicam ao bocal de espuma fina pro.
Tenha em atenção os diferentes símbolos para »posição Espuma de
leite« e »posição Leite«:
Bocal de espuma fina pro Bocal profissional para
Cappuccino
»Posição Espuma de leite« é p
»Posição Leite« è z
Para que o bocal de espuma fina pro funcione na perfeição, e por
razões de higiene, ele terá de ser desmontado e lavado diariamente
sempre que tenha preparado leite. A sua IMPRESSA não solicitará a
desmontagem e a lavagem do bocal de espuma fina pro.
TRetire o tubo do leite e lave-o exaustivamente com água cor-
rente.
TCom um ligeiro movimento de rotação, puxe cuidadosa-
mente o bocal de espuma fina pro do Connector System©.
TDesmonte o bocal de espuma fina pro em peças soltas.
TLave bem todas as peças do bocal de espuma fina pro com
água corrente. Em caso de resíduos de leite muito secos, em
primeiro lugar, coloque as peças soltas no produto de lim-
peza do sistema de leite da JURA e, depois, lave bem.
TVolte a montar o bocal de espuma fina pro.
ETenha atenção para que todas as peças soltas estejam devida
e firmemente encaixadas, para que o bocal de espuma fina
pro possa funcionar na perfeição.
TEncaixe firmemente o bocal de espuma fina pro no Connec-
tor System©.
J
Bocal de espuma fina pro
Diferenças em relação ao
manual de instruções
Desmontar e lavar o bocal
de espuma fina pro

10
Förändrad leverans av IMPRESSA F55/F505
Den medföljande bruksanvisningen för IMPRESSA F50/F505 gäller
även för IMPRESSA F55.
Förändrad leverans av IMPRESSA F55/F505
IMPRESSA är som standard utrustad med Professional-finskums-
skummaren. Den nya, innovativa finskumstekniken ger ett fint
mjölkskum som behåller konsistensen länge.
På bilderna i bruksanvisningen visas Profi Cappuccino-skumma-
ren. Beskrivningarna (i synnerhet i kapitel 13) gäller dock med få
undantag även för Professional-finskumsskummaren. Observera de
avvikande symbolerna för ”läge Mjölkskum” och ”området Mjölk”:
Professional-finskumsskum-
mare
Profi Cappuccino-skummare
”Läge Mjölkskum” é p
”Område Mjölk” è z
Av hygieniska skäl och för att Professional-finskumsskummaren ska
fungera felfritt måste du ta isär och skölja den dagligen om du har
tillrett mjölk. Du får ingen uppmaning från IMPRESSA om att ta isär
och skölja Professional-finskumsskummaren.
TTa bort mjölkslangen och skölj den noggrant under rinnande
vatten.
TVrid försiktigt av Professional-finskumsskummaren från
Connector System©.
TTa isär Professional-finskumsskummaren i dess delar.
TSkölj Professional-finskumsskummarens alla delar noggrant
under rinnande vatten. Vid kraftigt intorkade mjölkrester ska
du först lägga delarna i JURA mjölksystemsrengöring och
därefter skölja dem noggrant.
TSätt ihop Professional-finskumsskummaren igen.
ESe till att alla delar sitter fast och är ihopsatta på rätt sätt, så
att Professional-finskumsskummaren fungerar optimalt.
TSätt fast Professional-finskumsskummaren i Connector Sys-
tem©.
J
Professional-
finskumsskummare
Avvikelser från
bruksanvisningen
Isärtagning och sköljning av
Professional-
finkumsskummaren

11
Измененный комплект поставки Вашей IMPRESSA F55/F505
de
en
fr
it
nl
es
pt
sv
ru
Прилагаемое руководство по эксплуатации для IMPRESSA F50/
F505 действительно также для Вашей IMPRESSA F55.
Измененный комплект поставки Вашей IMPRESSA F55/F505
В стандартном исполнении кофе-машина IMPRESSA оснащена
профессиональной насадкой для приготовления мелкояче-
истой пены Profi. Инновационная технология приготовления
мелкоячеистой пены позволяет добиться мелкопористой кон-
систенции молочной пены, сохраняющейся на протяжении дли-
тельного времени.
На изображениях в руководстве по эксплуатации показана про-
фессиональная насадка для приготовления капучино Profi
Cappuccino. Описания (в особенности в главе 13) также действи-
тельны для профессиональной насадки для приготовления
мелкоячеистой пены Profi. Учитывайте при этом отличающиеся
символы для положений «Молочная пена» и «Молоко»:
Профессиональная насадка
для приготовления
мелкоячеистой пены Profi
Профессиональная насадка
для приготовления
капучино Profi Cappuccino
Положение «Молочная пена» é p
Положение «Молоко» è z
Если используется функция приготовления молока, то для обе-
спечения безупречного функционирования профессиональ-
ной насадки для приготовления мелкоячеистой пены Profi, а
также из соображений гигиены насадку необходимо еже-
дневно разбирать и промывать. Кофе-машина IMPRESSA не
выдает запроса на разборку и промывку профессиональной
насадки для приготовления мелкоячеистой пены Profi.
TСнимите молочный шланг и тщательно его промойте
под проточной водой.
TЛегким вращательным движением осторожно отсоеди-
ните профессиональную насадку для приготовления
мелкоячеистой пены Profi от системы сменных насадок
Connector System©.
J
Профессиональная
насадка для
приготовления
мелкоячеистой пены Profi
Отклонения от
руководства по
эксплуатации
Разборка и промывка
профессиональной
насадки для
приготовления
мелкоячеистой пены Profi

12
Измененный комплект поставки Вашей IMPRESSA F55/F505
TРазберите профессиональную насадку для приготовле-
ния мелкоячеистой пены Profi на отдельные детали.
TТщательно промойте все детали профессиональной
насадки для приготовления мелкоячеистой пены Profi
под струей проточной воды. При наличии сильно засо-
хших остатков молока сначала положите детали в сред-
ство для очистки насадки для средство для очистки
системы приготовления молока JURA и затем тщательно
промойте их.
TВновь соберите профессиональную насадку для приго-
товления мелкоячеистой пены Profi.
EДля обеспечения оптимального функционирования про-
фессиональной насадки для приготовления мелкоячеи-
стой пены Profi проследите за тем, чтобы все отдельные
детали были правильно и прочно соединены друг с дру-
гом.
TПрочно вставьте профессиональную насадку для при-
готовления мелкоячеистой пены Profi в систему смен-
ных насадок Connector System©.
J71517/F55/de-ru/201507

IM
IM
PRESSA
PRESSA
F50 / F505
F50 / F505
Instructions for use

2
Legend:
䡲DISPLAY: serves as information.
䡲DISPLAY: please follow the instructions shown. = Note / Tip = Important

3
Fig. 1 Fig. 2 Fig. 3 Fig. 4
Fig. 6 Fig. 7 Fig. 8 Fig. 9 Fig. 10
Fig. 11 Fig. 12 Fig. 13
Fig. 14 Fig. 15 Fig.17
Fig. 5
Fig. 16
Temp. max.
Temp. min.
Fig. 18
Fig. 19
Fig. 20

10
9
13
14
17
18
11
3
1
2
12
20
478
56
15/16
19
Rotary Switch
13
21
22
4
Control elements
1. Rotary Switch
2. Illuminated ring
3. Maintenance button
4. Preparation button, 1 espresso
5. Preparation button, 2 espressi
6. Preparation button, 1 coffee
7. Preparation button, 2 coffees
8. Steam preselection button
9. Display dialogue system
10. Water tank with handle
11. Filler funnel for preground coffee
12. Bean container cover
13. Aroma preservation cover
14. Steam / hot water draw-off tap
15. Removable Professional Cappuccino Frother
with milk pipe
16. Removable hot-water nozzle (see Fig. 5)
17. Height-adjustable coffee spout
18. Coffee grounds container
19. Cup grille
20. Drip tray
21. On/Off button (= Zero-Energy Switch)
22. Metal shelf

5
E
Table of contents
1. Safety instructions ...............................................page 6
1.1 Proper use ..................................................page 6
1.2 Warnings....................................................page 6
1.3 Precautions .................................................page 6
2. Preparing the IMPRESSA ........................................page 7
2.1 Checking the mains voltage .............................page 7
2.2 Checking the electric fuse ................................page 7
2.3 Filling the water tank......................................page 7
2.4 Filling with coffee beans ..................................page 7
2.5 Adjusting the grinder .....................................page 7
3. Using for the first time..........................................page 8
4. Adjusting the water hardness ..................................page 8
5. Using the CLARIS filter cartridge...............................page 9
5.1 Inserting the filter..........................................page 9
5.2 Changing the filter ........................................page 10
6. Rinsing the IMPRESSA...........................................page 10
7. Adjusting the amount of water for coffee....................page 11
8. Preparing 1 cup of coffee .......................................page 11
9. Preparing 2 cups of coffee......................................page 12
10. Preparing preground coffee ....................................page 12
11. Preparing hot water .............................................page 13
12. Preparing steam..................................................page 13
13. Professional Cappuccino Frother ..............................page 14
13.1 Preparing cappuccino with the
Professional Cappuccino Frother ........................page 14
13.2 Preparing hot milk with the
Professional Cappuccino Frother ........................page 15
13.3 Rinsing the Professional Cappuccino Frother..........page 16
13.4 Dismantling and rinsing the
Professional Cappuccino Frother ........................page 16
13.5 Cleaning the Professional Cappuccino Frother ........page 16
14. Switching off the IMPRESSA....................................page 17
15. Programming.....................................................page 17
15.1 Buttons programme item ................................page 19
15.2 Filter programme item....................................page 20
15.3 Water hardness programme item.......................page 20
15.4 Energy programme item .................................page 20
15.5 Automatic switch-off time programme item ..........page 20
15.6 Rinse programme item ...................................page 21
15.7 Reset programme item ...................................page 21
15.8 Information programme item ...........................page 22
15.9 ML/OZ display programme item ........................page 23
15.10 Language programme item..............................page 24
16. Maintenance ......................................................page 24
16.1 Filling with water ..........................................page 24
16.2 Emptying coffee grounds container ....................page 24
16.3 Drip tray missing ..........................................page 25
16.4 Filling with coffee beans ..................................page 25
16.5 Changing the filter ........................................page 25
16.6 Cleaning the IMPRESSA...................................page 25
16.7 IMPRESSA calcification ....................................page 25
16.8 General cleaning instructions ............................page 25
16.9 Emptying the system .....................................page 26
17. Cleaning ...........................................................page 26
18. Descaling..........................................................page 27
19. Disposal ...........................................................page 28
20. Tips for a perfect coffee.........................................page 29
21. Messages..........................................................page 30
22. Problems ..........................................................page 31
23. Legal information ................................................page 32
24. Technical data ....................................................page 32

6
Before you get started
Congratulations on purchasing this IMPRESSA. To ensure that your
IMPRESSA works smoothly, please read these instructions for use
carefully and keep them as a future reference.
If you need more information or if you experience any problems
which are not covered in enough detail in these instructions for use,
please contact your local stockist or ourselves.
1. Safety instructions
1.1 Proper use
The machine is designed and intended for private domestic use. It
should only be used for coffee preparation and to heat milk and
water. Use for any other purpose will be deemed improper. JURA
Elektroapparate AG cannot accept any responsibility for the conse-
quences of improper use.
Before using the machine read these instructions for use thoroughly
and completely and comply with the instructions they contain. Keep
these instructions for use close to the machine and pass them on to
the next user.
1.2 Warnings
䡲Children are not aware of the dangers which may arise when using
electric appliances, so never leave children unattended near electric
appliances.
䡲The IMPRESSA may only be operated by instructed persons.
䡲People, including children, who
– do not have the physical, sensory or mental capabilities to use
the machine safely or
– are inexperienced or lack knowledge in how to use the machine
safely
must be supervised by a responsible person when using it, or must
be instructed in how to use it correctly.
䡲Never start up a defective IMPRESSA or an IMPRESSA with a dam-
aged supply cable.
䡲In the event of signs of damage, for example if there is a smell of
burning, unplug the machine immediately from the mains supply
and contact JURA service.
䡲If the mains cable of this machine is damaged, it must be repaired
either directly by JURA or by an authorised JURA service centre.
䡲Never repair or open the IMPRESSA yourself. Repairs and modifi-
cations to the machine may only be undertaken by authorised JURA
service centres using genuine spare parts and accessories. The
machine contains live parts. If opened, there is a danger of poten-
tially fatal injury.
䡲Do not immerse the IMPRESSA in water.
1.3 Precautions
䡲Never subject the IMPRESSA to environmental influences (rain,
snow, frost) and do not operate with wet hands.
䡲Place the IMPRESSA on a sturdy, horizontal surface resistant to any
water leaks. Never place on hot or warm surfaces (hobs). Select a
site out of reach of children.

7
䡲Be careful to ensure that the mains cable is not trapped and does
not rub against sharp edges.
䡲Always remove the mains plug during long periods of absence
(holidays etc.).
䡲Always remove the mains plug before cleaning.
䡲When removing the mains plug, never tug the supply cable or the
IMPRESSA itself.
䡲The IMPRESSA is connected to the power supply by a supply cable.
Make sure people can’t trip over the supply cable, bringing down
the IMPRESSA. Make sure children and pets cannot reach the ma-
chine.
䡲Never put the IMPRESSA or individual parts of it in the dishwasher.
䡲Install the IMPRESSA in a place where the air can circulate well to
prevent it from overheating.
2. Preparing the IMPRESSA
2.1 Checking the mains voltage
The IMPRESSA is set to the right mains voltage by default.
Check whether your mains voltage matches that stated on the
rating plate on the underside of your IMPRESSA.
2.2 Checking the electric fuse
The IMPRESSA is rated for a current of 10 amps. Check whether
a fuse for this rating is fitted.
2.3 Filling the water tank
Only top up with fresh, cold water. Never fill with milk, mineral
water or other liquids.
䡲Remove the water tank and rinse it well with cold mains water
(Fig. 4).
䡲Then fill the water tank and refit in the IMPRESSA. Be careful to
ensure that the tank is correctly inserted and properly engaged.
2.4 Filling with coffee beans
To make sure you get lasting enjoyment from your machine
and to avoid the need for repairs, please note that the grinder
in your JURA coffee machine is not suitable for coffee beans
that have been treated with additives (e.g. sugar) during or
after roasting. Using coffee blends of this type may damage the
grinder. Any resulting repair costs will not be covered by the
warranty conditions.
䡲Fold the bean container cover (12) open and remove the aroma
preservation cover (13).
䡲Remove any dirt or foreign objects from inside the bean container.
䡲Fill the bean container with coffee beans and close the cover.
2.5 Adjusting the grinder
You can adjust the grinder to the suit the degree of roast of your cof-
fee. Our recommendations:
a light roast 씮a finer setting (the smaller the dots, the finer the
grinding)
a dark roast 씮a coarser setting (the larger the dots, the coarser
the grinding)
E

8
Only use the switch to adjust the consistency of grind when the
grinder is running.
䡲Open the bean container cover (12) and remove the aroma preser-
vation cover (13).
䡲To adjust the consistency of grind, turn the switch to the desired
position during the grinding operation (Fig. 2).
3. Using for the first time
䡲Fill the bean container with coffee beans (12).
䡲Switch your IMPRESSA on with the On/Off button (21).
䡲SPRACHE
DEUTSCH
䡲The illuminated ring (2) is active.
䡲Turn the Rotary Switch (1) until the desired language appears on
the display.
䡲Now confirm your selection by pressing the Rotary Switch (1).
䡲FILL
WATER TANK
䡲Remove the water tank (10) and fill with fresh water. Refit the water
tank in your IMPRESSA.
䡲OPEN TAP
䡲Place receptacle under the Professional Cappuccino Frother (15)
(Fig. 10).
䡲Now open the steam / hot water draw-off tap (14) (Fig. 13).
䡲SYSTEM
FILLING
䡲CLOSE TAP
䡲Close the steam / hot water draw-off tap (14).
䡲SYSTEM
FILLING
䡲HEATING
䡲PRESS
RINSE
䡲Press the Maintenance button (3).
䡲The machine rinses.
䡲RINSING
䡲READY
If FILL BEANS appears on the display, again press any coffee
preparation button. The grinder is not yet filled with coffee
beans.
To get a really good crema you can individually adjust the
height-adjustable coffee spout (17) to your cup sizes (Fig. 3).
4. Adjusting the water hardness
Water is heated in the IMPRESSA. Over time this will result in
calcification and this is displayed automatically. The IMPRESSA
must be set to the hardness of the water used. Use the test
strips provided.
1° German hardness corresponds to 1.79° French hardness.
When the filter is activated, the water hardness programme
item disappears.
This manual suits for next models
2
Table of contents
Other Jura Coffee Maker manuals

Jura
Jura IMPRESSA J9.2 One Touch User manual

Jura
Jura IMPRESSA F90 User manual

Jura
Jura E6 User manual

Jura
Jura IMPRESSA Z9 One Touch TFT User manual

Jura
Jura ENA Micro 90 User manual

Jura
Jura IMPRESSA XJ5 Professional User manual

Jura
Jura Z8 User manual

Jura
Jura SUBITO User manual

Jura
Jura Z6 User manual

Jura
Jura IMPRESSA X9 User manual

Jura
Jura The IMPRESSA Z5 - Generation II User manual

Jura
Jura SUBITO User manual

Jura
Jura IMPRESSA F505 User manual

Jura
Jura IMPRESSA F7 User manual

Jura
Jura Impressa J6 User manual

Jura
Jura IMPRESSA XF70 User manual

Jura
Jura IMPRESSA C5 User manual

Jura
Jura Impressa E User manual

Jura
Jura ENA 9 One Touch User manual

Jura
Jura ENA 5 User manual