Jura IMPRESSA F50 Classic User manual

es
fr
en
es
fr
ru
en
de
IMPRESSA F50 Classic
Instructions for Use
Mode d’emploi
Modo de empleo
KFor your safety: read and understand manual before use.
E
KPour votre sécurité : lisez le manuel et assurez-vous de l’avoir compris avant d’utiliser la machine.
E
KPara su seguridad: lea cuidadosamente y comprenda el manual antes de usar la máquina.
E
Figure: Your machine may look
different to the one shown.
Illustration : l’aspect de votre machine
peut différer de celle illustrée.
Figura: Puede que su máquina tenga
un aspecto diferente al de la figura.

2
Fig. 1 Fig. 2 Fig. 3 Fig. 4
Fig. 5 Fig. 6 Fig. 7 Fig. 8
Fig. 9 Fig. 10 Fig. 11 Fig. 12
Fig. 13 Fig. 14 Fig. 15 Fig. 16
Fig. 17
Fig. 18
Fig. 19
Fig. 20
Temp. max.
Temp. min.

3
Control elements
es
fr
en
es
ru
Control elements
1 Rotary Switch
2 Illuminated ring
3 ON/OFF key Q
4 Programming key O
5 Draw-off key 1 cup o
6 Draw-off key 2 cups d
7 Maintenance key c
8 Steam pre-selection key n
9 Display dialog system
10 Water tank with carrying handle
11 Filler funnel for pre-ground coffee
12 Bean tank cover
13 Aroma preservation cover
14 Steam/hot water selector
15 Professional Cappuccino Frother with milk pipe
16 Interchangeable hot water nozzle (see Fig. 5)
17 Height-adjustable coffee spout
18 Coffee grounds container
19 Cup platform
20 Drip tray
21 Power Switch
22 Metal shelf
21
22
345678
T
T
T
T
T
T
9
1
2
Rotary Switch
10
15/16
Figure: Your machine may look
different to the one shown.
11
19
20
14
13
12
17
18

4
Table of contents
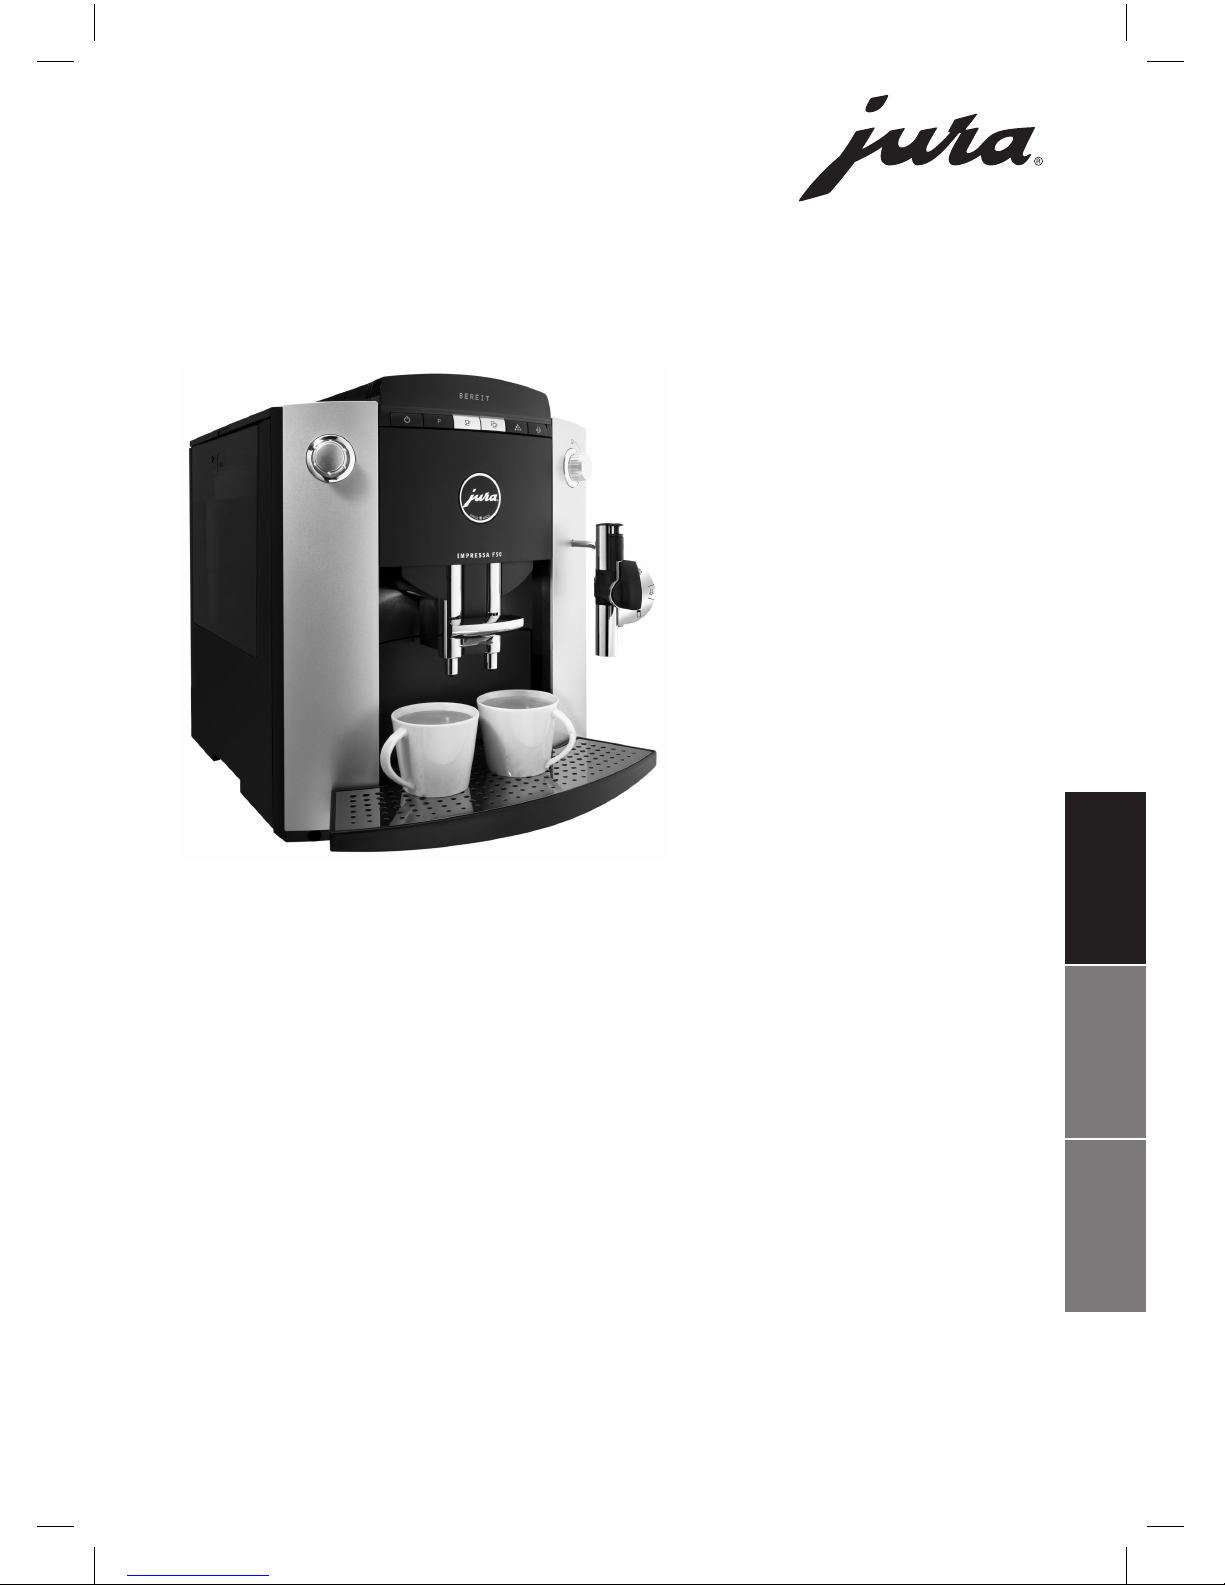
Your IMPRESSA F50 Classic
Control elements 3
IMPORTANT SAFEGUARDS 6
1 Preparing and using for the first time 10
JURA on the Internet....................................................................................................................................10
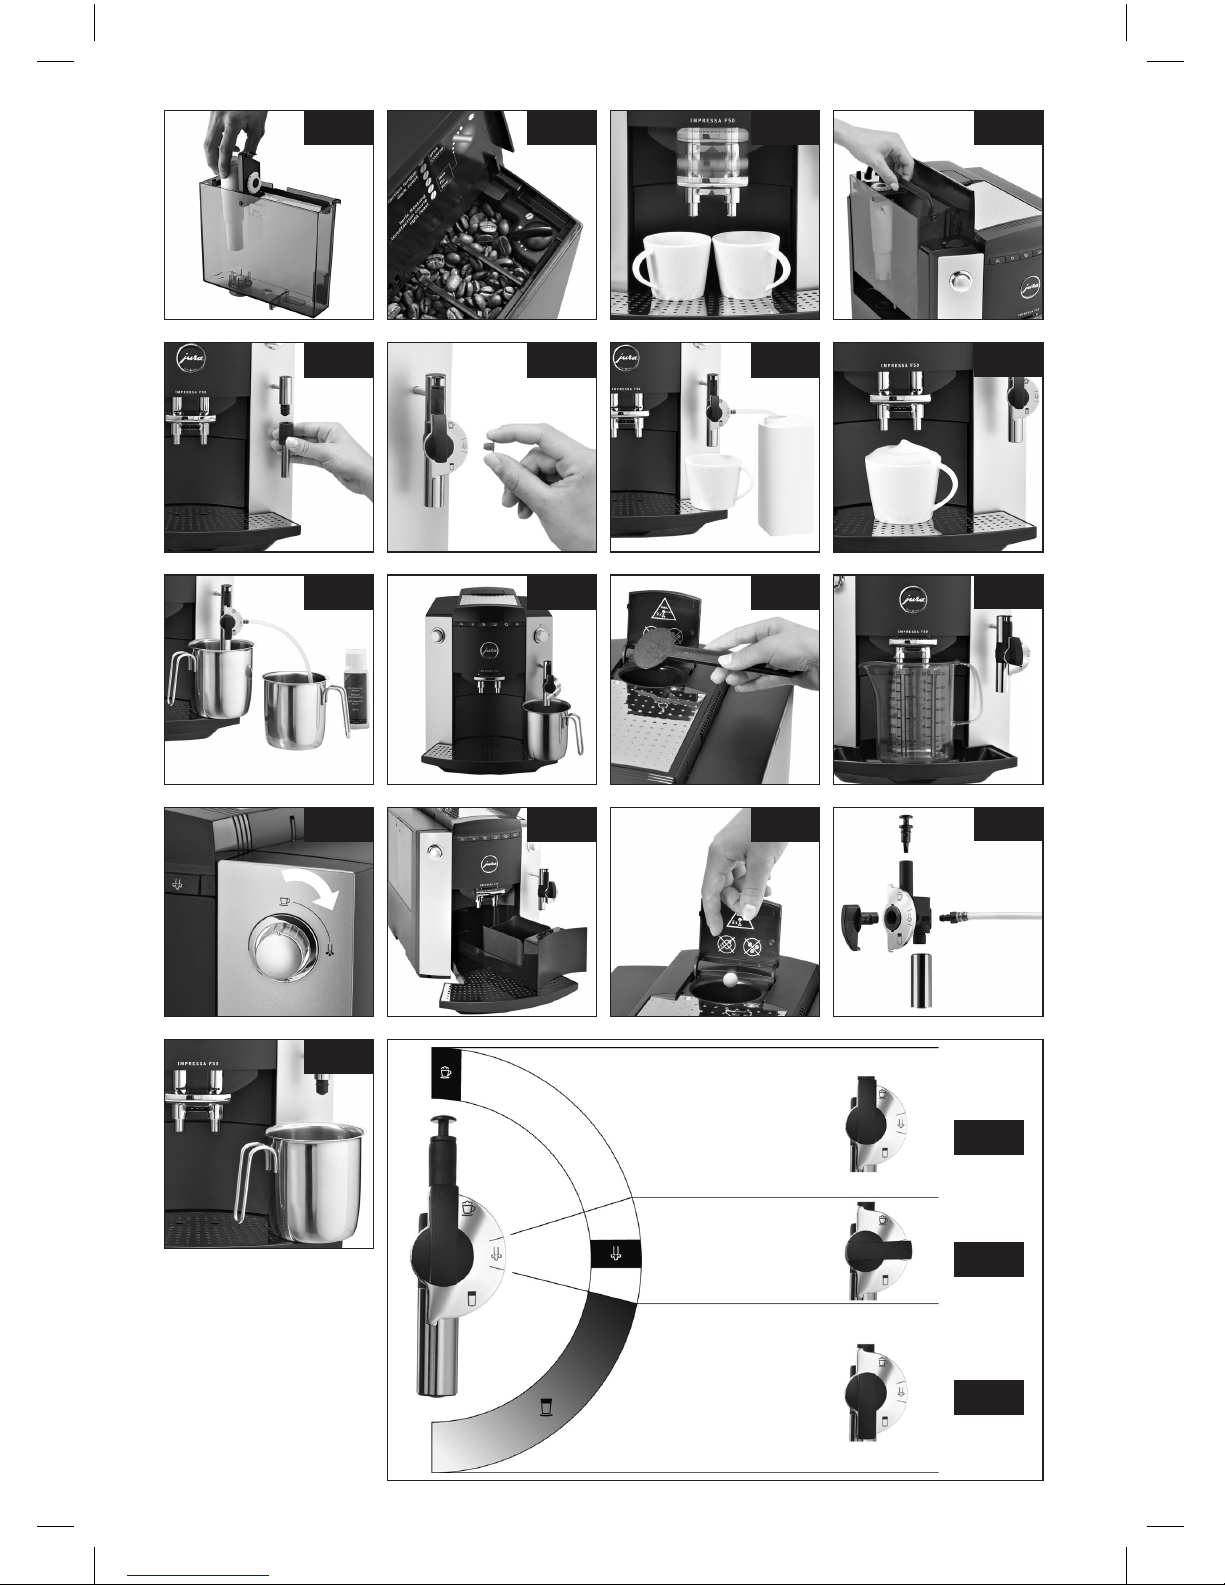
Fill water tank................................................................................................................................................10
Fill coffee beans............................................................................................................................................10
Power switch.................................................................................................................................................10
First use...........................................................................................................................................................11
Determining the water hardness ..............................................................................................................12
Adjusting the water hardness....................................................................................................................12
Installation of CLEARYL Blue filter cartridges..........................................................................................13
Adjusting the grinder ..................................................................................................................................14
2 Preparation 15
Adjusting the water quantity for coffee...................................................................................................15
Drawing off 1 cup of coffee.........................................................................................................................16
Drawing off 2 cups of coffee ......................................................................................................................16
Drawing off pre-ground coffee..................................................................................................................17
Drawing off hot water .................................................................................................................................18
Drawing off steam .......................................................................................................................................18
Dispensing Cappuccino with the Professional Cappuccino Frother..................................................20
Dispensing Hot Milk with the Professional Cappuccino Frother.........................................................21
3 Daily operation 22
Emptying the coffee grounds container.................................................................................................22
Switching off the IMPRESSA......................................................................................................................22
4 Permanent settings in programming mode 23
Programming the aroma ROBUST or STANDARD.................................................................................24
Programming the temperature................................................................................................................24
Programming the time..............................................................................................................................25
Programming the automatic switch-on time........................................................................................26
Programming the automatic switch-off time........................................................................................26
Cup counter..................................................................................................................................................27
Programming the language......................................................................................................................28
Programming Display 24H/AM/PM..........................................................................................................28
Programming the display for ML/OZ.......................................................................................................29
5 Maintenance 30
General cleaning instructions ...................................................................................................................30
Replacing the filter.......................................................................................................................................31
Rinsing the IMPRESSA.................................................................................................................................31
Rinsing the Professional Cappuccino Frother ........................................................................................32
Cleaning the Professional Cappuccino Frother......................................................................................32

5
es
fr
en
es
ru
Table of contents
Symbol description
Warnings
This is the safety alert symbol. lt is used to alert you to potential personal injury
hazards. Obey all safety messages that follow this symbol to avoid possible injury
or death.
DANGER indicates a hazardous situation which, if not avoided, will result in death
or serious injury.
WARNING indicates a hazardous situation which, if not avoided, could result in
death or serious injury.
J CAUTION CAUTION, used with the safety alert symbol, indicates a hazardous situation
which, if not avoided, could result in minor or moderate injury.
NOTICE NOTICE is used to address practices not related to personal injury.
Symbols used
TPrompt to take action. This symbol means that you are being prompted to
perform some action.
EInformation and tips to make it even easier to use your IMPRESSA.
READY Display message
J
J DANGER
J WARNING
Cleaning the IMPRESSA .............................................................................................................................33
De-scaling the IMPRESSA..........................................................................................................................35
6 Display messages 38
7 Troubleshooting 39
8 Transport and environmentally friendly disposal 40
Transport/ Emptying the system.............................................................................................................40
Disposal.........................................................................................................................................................40
9 Technical data 41
10 JURA contact details/ Legal information 42

6
IMPORTANT SAFEGUARDS
SAVE THESE INSTRUCTIONS.
Pass them on to any subsequent user.
When using electrical appliances, basic safety precautions shall
always be followed, to reduce the risk of fire, electric shock, and/or
injury to persons, including the following:
ZRead all instructions.
ZDo not touch hot surfaces. Use handles or knobs.
ZTo protect against fire, electric shock and injury to persons, do
not immerse power cord, plugs, or body of machine in water
or other liquid.
ZClose supervision is necessary when any appliance is used by
or near children.
ZUnplug from outlet when not in use and before cleaning.
Allow to cool before putting on or taking off parts, and before
cleaning the appliance.
ZDo not operate any appliance with a damaged cord or plug or
after the appliance malfunctions, or has been damaged in any
manner. Return appliance to the nearest authorized service
facility for examination, repair or adjustment.
ZThe use of an accessory attachment not recommended by the
appliance manufacturer may result in fire, electric shock, or
injury to persons.
ZDo not use outdoors.
ZDo not let the cord hang over the edge of a table or counter,
or touch hot surfaces.
ZDo not place on or near a hot gas or electric burner, or in a
heated oven.
ZAlways attach plug to appliance first, then plug cord into the
wall outlet. To disconnect, turn any control to ‘OFF’ then
remove plug from wall outlet.
ZDo not use appliance for other than intended use.
ZUse extreme caution when dispensing hot steam, hot water
or hot coffee.
ZFor household use only.
Follow the basic safety
precautions

7
IMPORTANT SAFEGUARDS
es
fr
en
es
ru
The appliance is designed and intended for household use only. It
shall only be used for coffee preparation and to heat milk and water,
according to these instructions. Use for any other purpose will be
deemed improper. JURA Elektroapparate AG cannot accept any
responsibility for the consequences of improper use.
People, including children, who
Zdo not have the physical, sensory or mental capabilities to use
the appliance safely or
Zare inexperienced or lack knowledge in how to use the appli-
ance safely
must be supervised by a responsible person when using it, or must
be instructed in how to use it correctly.
ZThe power cord is provided to reduce the risk resulting from
becoming entangled in or tripping over a long cord.
ZThe cord shall be arranged so that it will not drape over the
counter top or table top where it can be pulled on by children
or tripped over.
ZThis appliance has a 3-pin grounded plug. As a safety feature,
this plug will fit in a polarized outlet only one way.
ZIf the plug does not fit fully in the outlet, reverse the plug. If it
still does not fit, contact a qualified electrician.
ZDo not modify the plug in any way or attempt to defeat this
safety feature.
Do NOT use extension cords.
If the user chooses to use an extension cord,
Zthe marked electrical rating of the extension cord shall be at
least as great as the electrical rating of the appliance, and
Zif the appliance is of the grounded type, the extension cord
shall be a grounding type 3-wire cord, and
Zthe longer cord shall be arranged so that it will not drape over
the counter top or tabletop where it can be pulled on by chil-
dren or tripped over.
To reduce the risk of fire or electric shock, DO NOT remove any ser-
vice covers. DO NOT modify the appliance in any way that is not
described in these instructions. NO user serviceable parts included.
Repair MUST be done by authorized personnel only.
Intended use
Special power cord set
instructions
J WARNING

8
IMPORTANT SAFEGUARDS
In the event of signs of damage, for example if there is a smell of
burning, unplug the machine immediately from outlet and contact
JURA customer service.
This appliance is for household use. Any servicing other than clean-
ing and user maintenance shall be performed by an authorized ser-
vice representative:
ZDo not immerse base in water or try to disassemble.
ZDo not put the appliance or any individual parts in the dish-
washer.
ZCheck voltage to be sure that the voltage indicated on the
name plate complies with your voltage.
ZNever use warm or hot water to fill the water container. Use
cold water only.
ZKeep your hands and the cord away from hot parts of the
appliance during operation.
There is a risk of scalds or burns on the spouts and the cappuccino
frother / nozzle.
ZKeep children away.
ZDo not touch any hot parts. Use the handles or knobs pro-
vided.
ZEnsure that the cappuccino frother / nozzle is correctly fitted
and clean. If incorrectly fitted or if they become blocked, the
cappuccino frother or its parts might come off.
ZNever clean with scouring powders or hard implements.
ZEnsure that the ventilation slots are not covered.
ZNever pull out the drip tray during the brewing process. Only
pull the drip tray when the display instructs you or when the
appliance is ready for use.
ZNever fill instant coffee, chocolate mix etc. into the bean con-
tainer or ground coffee funnel (filler funnel for ground coffee).
It will damage the functioning of the brewing chamber.
ZNever fill sugar coated coffee beans into the bean container.
In case of doubt, call your dealer.
ZNever fill anything other than coffee beans into the bean con-
tainer (no chocolate, no rice, no nuts, no spices, nothing other
than roasted coffee beans).
JCAUTION
NOTICE
NEVER DO
(or you will void your
warranty protection):

9
IMPORTANT SAFEGUARDS
es
fr
en
es
ru
ZNever fill frozen beans into the bean container. If you store
beans in the freezer, let them thaw 3 to 4 hours before filling
them into the bean container.
ZNever fill anything but fresh, cold and clean water into the
water tank, except when decalcifying.
ZNever use mineral or carbonated water. You can use tap water,
bottled water, spring water and reverse osmosis water.
ZNever do anything with the machine which is not described in
these instructions. In case of doubt, call your dealer.

10
1 Preparing and using for the first time
Visit us on the Internet. On the JURA website (www.jura.com) you
will find interesting and up-to-date information on your IMPRESSA
and on every aspect of coffee.
Milk, sparkling mineral water or other liquids can damage the water
tank or the machine.
T Only fill the water tank with fresh, cold water.
TRemove the water tank and rinse it with cold tap water thor-
oughly (Fig. 4).
TThen fill the water tank and reinstall it. Make sure to install
the tank properly, it must engage audibly.
Coffee beans which have been treated with additives (e.g. sugar),
ground coffee or freeze-dried coffee will damage the grinder.
T Only use untreated coffee beans to fill the bean container.
TOpen the bean tank cover (12) and remove the aroma pres-
ervation cover (13).
TRemove any dirt or foreign matter from the bean tank.
TFill coffee beans in the bean tank and close the cover.
If the machine is operated with a defective power cord, there is a
danger of potentially fatal electric shock.
T Never use a machine which is damaged.
T Never use a machine which has a defective power cord.
EActuate the power switch (21) on your IMPRESSA before using
the machine for the first time.
EWe recommend that you switch off your IMPRESSA with the
power switch (21) if you intend not to use the machine for lon-
ger periods of time (e.g.during holidays).
JURA on the Internet
Fill water tank
NOTICE
Fill coffee beans
NOTICE
Power switch
J WARNING

11
1 Preparing and using for the first time
es
fr
en
es
ru
TFill coffee beans in the bean tank (12).
TSwitch on the IMPRESSA using the ON/OFF key (3).
LANGUAGE ENGLISH
The illuminated ring (2) is active.
TConfirm your selection by pressing the Rotary Switch (1).
FILL WATER
TFill the water tank (10) with fresh water.
OPEN TAP
TPlace a receptacle under Professional Cappuccino Frother (15)
(Fig. 10).
TOpen the steam / hot water selector (14) (Fig. 13).
FILLING SYSTEM
CLOSE TAP
TClose the steam / hot water selector (14).
HEATING
PRESS RINSE
TPress the maintenance key c(7).
RINSING, machine carries out a rinsing operation.
READY
EIf BEANS FILL is displayed, press the coffee draw-off key
again. Machine not filled with coffee beans yet.
ETo get an excellent crema, adjust the coffee spout (17) to the
size of your cup (Fig. 3).
First use

12
1 Preparing and using for the first time
You can find out what the water hardness is by using the Aquadur®
test strip supplied as standard.
THold the test strip briefly (for 1second) under flowing water.
Shake off the water.
TWait for about 1minute.
TYou will then be able to read the degree of water hardness
from the discoloration of the Aquadur® test strip and the
description on the packaging.
Level Display Degree
(°dH)
Degrees of general
hardness (°dGH)
Parts per
million (ppm)
Indicator Strip number
of ‘reddish’ fields
Not active – – – –
Very soft water <3 <3 < 53.4 None
Soft water > 4 > 4 > 71 1
Hard water > 8.4 > 8.4 > 150 2
Very hard water > 14 > 14 > 250 3
EWater is heated in the IMPRESSA. As a result, calcification
occurs during normal use and is indicated automatically.
Before using the IMPRESSA for the first time the hardness of
the water used must be adjusted. Use the supplied Test sticks
for this.
EIf the filter is activated, the program step Water Hardness no
longer appears.
EThe IMPRESSA has 5 hardness degrees which can be used and
are displayed while you are adjusting the water hardness
The displayed information means the following.
ULEVEL ––: Water hardness function switched off
ULEVEL 1: water hardness degree 1 to 7°
ULEVEL 2: water hardness degree 8 to 15°
ULEVEL 3: water hardness degree 16 to 23°
ULEVEL 4: water hardness degree 24 to 30°
When the IMPRESSA leaves the factory it is adjusted to LEVEL 3. You
can adjust another hardness. To do this, proceed as follows:
READY
TPress the programming key O(4), illuminated ring (2) is
active.
FILTER
Determining the water
hardness
Adjusting the water
hardness

13
1 Preparing and using for the first time
es
fr
en
es
ru
TTurn the Rotary Switch (1) until the following message is dis-
played: HARDNESS.
TNow press the Rotary Switch (1) to start the programming.
LEVEL 3
TTurn the Rotary Switch (1) until the required level is dis-
played. For example, LEVEL 4.
TPress the Rotary Switch (1) to confirm the required level.
HARDNESS
TPress the programming key O(4) to quit the programming
mode.
READY
EIf the CLEARYL Blue filter cartridge is installed properly, des-
caling of the coffee machine is no longer required.
TFold up the cartridge holder. Install the filter cartridge in the
water tank, applying a gentle pressure (Fig. 1).
TFold down the cartridge holder again until it engages audi-
bly.
TFill the water tank with cold, fresh tap water and install it
again.
TPress the programming key O(4), the illuminated ring (2) is
active.
FILTER
TPress the Rotary Switch (1) to start the programming.
NO -
TTurn the Rotary Switch (1) until the following message is dis-
played: YES w.
TPress the Rotary Switch (1) to activate the filter cartridge.
INSERT / OPEN TAP
TPut a sufficiently large container (at least 17 oz or 0.5 liter)
under the Professional Cappuccino Frother (15) (Fig. 10).
TIf not installed already, insert the CLEARYL Blue filter.
TOpen the steam / hot water selector (14) (Fig.13).
RINSING / FILTER
CLOSE TAP
Installation of CLEARYL
Blue filter cartridges

14
1 Preparing and using for the first time
TClose the steam/hot water selector (14), now the IMPRESSA
will heat up to coffee temperature.
HEATING
READY
ENow you have activated the filter. In Programming Mode the
water hardness selection function is no longer displayed.
You can adjust the grinder on a continuous scale to suit the degree
of roast of your coffee.
If you adjust the consistency of grind when the grinder is not oper-
ating, the grinder adjustment switch could be damaged.
T Only adjust the consistency of grind when the grinder is run-
ning.
The consistency of grind is correct if the coffee flows regularly from
the coffee spout. In addition a fine, thick crema forms.
TOpen the bean tank cover (12) and remove the aroma pres-
ervation cover (13).
TTurn the grinder adjustment switch (Fig. 2) to the desired
position while the grinder is running.
Adjusting the grinder
NOTICE

15
2 Preparation
es
fr
en
es
ru
2 Preparation
Hot coffee, hot steam and hot water can cause scalding. Scalding is
a serious burn.
T Use extreme care when handling hot liquid or steam.
T Allow liquid to cool down before drinking.
T In the event of scalding, rinse affected area with cold water
and seek medical attention.
T Keep children AWAY.
EThe indicated value in OZ is a reference value and may deviate
from the actual value.
EIf you press the draw-off key for 2 cups (6) the water quantity
is doubled automatically.
EYou can change/stop the water quantity during the draw-off
operation, too. Turn the Rotary Switch (1) until the required ML
value is displayed.
You can adjust the water quantity in steps of 0.5 OZ (5 ML) using the
Rotary Switch (1).
READY
TTurn the Rotary Switch (1) until the required water quantity
is displayed. For example, 4.0 OZ (120 ml).
J WARNING
Adjusting the water
quantity for coffee

16
2 Preparation
EYou have the possibility of increasing the strength of the cof-
fee at any time in the grinding process by pressing the 1-cup
draw-off key oagain. For Example: by pressing the 1-cup
draw-off key othree times you get strong coffee: STRONG.
EYou can choose among three strengths at the push of a but-
ton. The longer you press the draw-off key for 1 cup o(5), the
stronger your coffee will be (Display: MILD/NORMAL/
STRONG).
EYou can adjust the water quantity before the draw-off opera-
tion using the Rotary Switch (1).
EYou can stop the draw-off operation at any time by pressing
any coffee draw-off key.
EYou can check the water quantity used for the last draw-off
operation by pressing the Rotary Switch (1).
READY
TPut a cup under the adjustable coffee spout (17).
TPress the draw-off key for 1 cup o(5) until the required
strength is displayed: MILD.
6.0 OZ (180 ml) (water quantity last adjusted), the illumi-
nated ring (2) is active.
TTurn the Rotary Switch (1) again to select the water quantity
individually:
For Example: 5.0 OZ (160 ml).
For Example: MILD.
Your product is being prepared.
READY
ESelecting the coffee strength is not possible when drawing off
2 cups of coffee. You will draw off 2 mild cups automatically.
EYou can adjust the water quantity before the draw-off opera-
tion using the Rotary Switch (1). The adjusted value (ML) refers
to 1 cup.
EYou can stop the draw-off operation at any time by pressing
any coffee draw-off key.
EYou can check the water quantity used for the last draw-off
operation by pressing the Rotary Switch (1).
Drawing off 1 cup of
coffee
Drawing off 2 cups of
coffee

17
2 Preparation
es
fr
en
es
ru
READY
TPut 2 cups under the adjustable coffee spout (17).
TPress the draw-off key for 2 cups d(6).
2 CUPS
4.0 OZ (120 ml) (water quantity last adjusted), the illumi-
nated ring (2) is active.
TTurn the Rotary Switch (1) again to select the water quantity
individually:
For Example: 7.0 OZ (210 ml).
2 CUPS
Your product is being prepared.
READY
ENever use instant coffee or quick-coffee. We recommend that
you always use powder from fresh coffee beans or, preground,
vacuum-packed coffee. Never fill in more than 2 portions of
powder. The pre-ground coffee tank is no storage tank. Make
sure that the pre-ground you use is not too fine. This may
cause blocking of the system. In this case the coffee only drips
out of the coffee spout.
EIf you have filled in too little powder, the message ADD MORE
POWDER will be displayed. The IMPRESSA stops the opera-
tion and returns to “ready for draw off” mode.
EYou can stop the draw-off operation at any time by pressing
any coffee draw-off key.
READY
TPut 1 or 2 cups under the adjustable coffee spout (17).
TOpen the cover of the filler funnel for pre-ground coffee (11).
FILL POWDER
TFill 1 or 2 level spoonfuls of pre-ground coffee in the filler fun-
nel for pre-ground coffee (11) (Fig. 11) and close the cover.
POWDER
SELECT CUP BUTTON
TPress the required draw-off key for 1 cup o(5) or
2 cups d(6).
4.0 OZ (120 ml) (water quantity last adjusted), the illumi-
nated ring (2) is active.
POWDER
Drawing off pre-ground
coffee

18
2 Preparation
TTurn the Rotary Switch (1) again to select the water quantity
individually: For Example: 7.0 OZ (210 ml).
POWDER
Your product is being prepared.
READY
EIf you do not change the settings using the Rotary Switch (1),
the water quantity last adjusted will be drawn off automati-
cally.
EInstall the hot water nozzle (see Fig. 5 ) to obtain perfect water
flow. Do not replace the replaceable hot water nozzle (16)
directly after drawing off water, because the nozzle is hot after
the draw-off operation.
There is a danger of scalding from hot water splashes.
T Avoid direct contact with the skin.
READY
TPlace a cup under the replaceable hot water nozzle (16).
TOpen the steam / hot water selector (14) (Fig. 13).
The illuminated ring (2) is active.
For example, 4.5 OZ (140 ml).
WATER
TAdjust the required water quantity by turning the Rotary
Switch (1).
For example, 6.5 OZ (200 ml).
WATER
If the required water quantity is reached, the following mes-
sage is displayed: CLOSE TAP.
TClose the steam / hot water selector (14).
READY
EBefore CLOSE TAP water may still escape the system.
EThe Steam function is used for preparing milk foam and hot
milk as well as for the Professional Cappuccino Frother (15)
cleaning program.
EWith the optionally available 2-stage frothing nozzle, liquids
can be heated and frothed using the steam function.
Drawing off hot water
JCAUTION
Drawing off steam

19
2 Preparation
es
fr
en
es
ru
EMake sure the nozzle is correctly fitted when drawing off
steam. If the nozzle becomes blocked with particles of milk
residue or is incorrectly assembled, the nozzle may disengage
and come off while the frother is in use.
EDue to the system design, some water will escape at first when
steam is drawn. However, this will not affect the result in any
way.
There is a danger of scalding from hot steam.
T Avoid direct contact with the skin.
READY
TPress the steam pre-selection key n(8).
HEATING
STEAM / READY
TTo draw off steam, open the steam/hot water draw-off
valve (14) (Fig. 13).
The illuminated ring (2) is active.
TYou can adjust the steam dispensing time individually by
turning the Rotary Switch (1) until the required SEC are dis-
played on the screen. For example: 35 SEC.
EIf you do not change the steam dispensing time with the
Rotary Switch (1), the machine will set the steam quantity
according to the previously used settings.
While drawing off steam, STEAM is shown on the display.
Once the desired steam quantity has been reached, CLOSE
TAP appears on the display.
TClose the steam/hot water selector (14).
STEAM / READY
EThe machine is ready to dispense steam as long as STEAM /
READY appears on the display.
EDue to the system design, some steam may be released
before the tap is closed.
ESteam dispensing can be stopped at any time by closing the
steam/hot water selector (13).
JCAUTION

20
2 Preparation
ECappuccino consists of one-third each of espresso, hot milk
and milk foam. The Professional Cappuccino Frother (15) is
used for preparing the milk portion. When steam is drawn, a
vacuum is generated, which the Professional Cappuccino
Frother (15) uses to draw milk and produce the milk foam. You
can also heat up milk by turning the selector lever on the Pro-
fessional Cappuccino Frother to the Milk position (Fig. 20).
ETo avoid malfunctions, the Professional Cappuccino Frother
(15) must be cleaned regularly.
EMake sure that the nozzle is correctly fitted. If the nozzle
becomes blocked with particles of milk residue or is incorrectly
assembled, the nozzle may disengage and come off, when the
frother is used.
TBefore using the Professional Cappuccino Frother for the
first time, remove the protective cover from the nozzle
(Fig. 6). The protective cover is used only during transport to
protect the nozzle against contaminant ingress.
TTake the milk pipe out of the Welcome Pack and connect it
to the Professional Cappuccino Frother.
TInsert the other end of the milk pipe into a milk carton or
connect it to a milk container (Fig. 7).
TPlace a cup under the Professional Cappuccino Frother
(Fig. 7).
TTurn the selector lever on the Professional Cappuccino
Frother to the Milk Foam position (Fig. 18).
READY
TPress the steam pre-selection key n(8).
HEATING
STEAM / READY
TTo draw off steam, open the steam/hot water selector
(Fig. 13).
The milk foam will be prepared. The illuminated ring (2) is
active.
EYou can adjust the steam dispensing time individually by turn-
ing the Rotary Switch (1) until the required SEC are displayed
on the screen. For example, 35 SEC.
Dispensing Cappuccino
with the Professional
Cappuccino Frother
Other manuals for IMPRESSA F50 Classic
1
Table of contents
Other Jura Coffee Maker manuals

Jura
Jura X7 Instruction Manual

Jura
Jura IMPRESSA Z5 User manual

Jura
Jura IMPRESSA Z7 User manual

Jura
Jura Impressa S guide User manual

Jura
Jura D4 User manual

Jura
Jura GIGA X8 Professional User manual

Jura
Jura IMPRESSA A5 One Touch Manual

Jura
Jura GIGA6 User manual

Jura
Jura IMPRESSA E40 User manual

Jura
Jura E8 User manual

Jura
Jura IMPRESSA J9 One Touch User manual

Jura
Jura IMPRESSA F505 User manual

Jura
Jura ENA 8 User manual

Jura
Jura E6 User manual

Jura
Jura 747 User manual

Jura
Jura IMPRESSA XJ9 Professional User manual

Jura
Jura IMPRESSA Z5 User manual

Jura
Jura E8 EB User manual

Jura
Jura WE6 Professional Manual

Jura
Jura 95 User manual