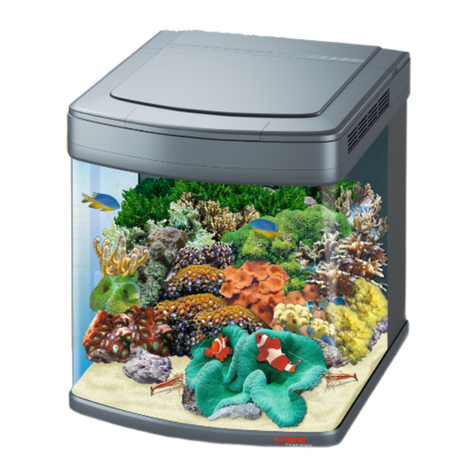
juwel RIO 350 User manual

Introduction
Thank you for choosing a JUWEL Aquarium product.
Our products represent over 50 years experience in the manufacturing of aquariums and their acessories applying most modern
production techniques bringing together the JUWEL Aquarium system, which is both easy to use and simple to maintain.
Please read this instruction manual carefully and completely to make sure you have received all components before setting up the
aquarium. Please observe the safety instructions and maintenance guidelines given in this manual.
This instruction manual has been carefully prepared to provide you with accurate and complete information. All efforts have been made
to ensure that the information given is correct. However, we cannot accept responsibility for printing or other errors. Technical details
are always approximate and are not warranted characteristics and may be subject to change without notice.
Setting up the Aquarium
SAFETY INSTRUCTIONS:
This appliance can be used by children aged from 8 years and above and persons with
reduced physical, sensory or mental capabilities or lack of experience and knowledge
if they have been given supervision or instruction concerning use of the appliance in a
safe way and understand the hazards involved. Children shall not play with the
appliance. Cleaning and user maintenance shall not be made by children without
supervision.
The power plugs of the electrical devices must not become moist. Connect the power
plugs to the power supply at such a height that the connection cable forms a loop
which would enable the water to drip down.
At all times, only operate the electrical devices for your aquarium (lighting, heater,
pump etc.) using an earth leakage circuit breaker (EL circuit breaker) with a maximum
tripping current of 30 mA. If the socket that you are using in your home installation is
not safeguarded with such a circuit breaker, please use a commercially available power
strip with an integrated earth leakage circuit breaker.
The electrical devices may only be operated in rooms.
Pull the power plug of all devices operated in water before coming into contact with
the water.
We have produced your JUWEL Aquarium with the utmost care using most
advanced production techniques. Extra strong packaging has been used to
prevent damage to the aquarium. Please note however, that your aquarium
has been transported and handled several times prior to reaching its final
destination. We recommend therefore, that you test the aquarium for leaks in
a suitable area (e.g. garage), by filling it with water and checking it very
carefully.
Having made your checks, you should select the most suitable and desirable position for
your aquarium. The position selected should have an even and level surface and should
be able to support the weight of the filled aquarium. In order to prevent excessive algae
growth, we recommend that you select a position that is not exposed to direct daylight.
We strongly recommend that the appropriate JUWEL Aquarium cabinet is used. They
have a water-repellent surface and they have been made to match the dimensions and to
bear the weight of the filled aquarium. The cabinet must be positioned on a level surface.
The JUWEL Aquarium is built with a special bottom frame for security. The aquarium
should be placed directly onto the cabinet. DO NOT place any additional support, e.g.
polystyrene, under the aquarium since this is not necessary with our
aquariums.
2

Weight of the aquarium in kg filled with water:Weight of the aquarium in kg filled with water:
Notice:
TIPP Suggestion: JUWEL Backgrounds
For decorative designs on the rear wall of your JUWEL aquarium, we recommend the JUWEL rear walls and posters for various sizes of
aquariums.
JUWEL rear wall motifs
With an attractive 3D rock motif that creates a powerful impression of depth.
JUWEL textured rear walls
With an attractive and distinctive bark texture.
JUWEL Terrace
Attractive terrace modules to match the design of the Cliff Dark, Cliff Light & Stone Granite back panels.
Juwel Conexo Adhesive
The JUWEL motif and structure back panels are affixed to the rear wall of the aquarium using the special Conexo silicon before it is filled
with water.
JUWEL Posters
JUWEL Posters are printed on both sides and provide attractive motifs to create a simple and highly effective background design for your
aquarium. With JUWEL Poster Fix, your JUWEL Poster can then be perfectly applied to the back of your aquarium and can be easily
removed if necessary at a later date.
These JUWEL accessories are available from your specialist retailer.
Please ensure that any air stones or similar aeration devices used are placed in the centre of the aquarium. The use of such
equipment may cause water to splash and condense on the lighting unit and frame, which may then run down on the outer wall of
the aquarium. The occurrence of such effects does not constitute a defect in the product.
•
Do not transport the aquarium when full.•
Make sure that maintenance of the aquarium does not damage the bonding.•
Do not use any toxic substances to clean the aquarium.•
3

Setting up your JUWEL Aquarium
Perform the following steps when putting the aquarium into operation:
Assemble the cabinet if necessary.1.
Arrange the inspected aquarium in a suitable place.2.
Affix the JUWEL structured backgrounds if necessary, please observe the drying time of between 48 and 72 hours.3.
Prepare the filter for operation as described in the chapter "Putting the JUWEL filter system into operation".4.
Complete the decoration with ground material etc. as desired.5.
Plant the short plant species in the aquarium if applicable.6.
Slowly fill the aquarium with water through the filter to half way up.7.
Plant higher plant species in the aquarium if applicable.8.
Slowly fill the aquarium with water through the filter up to the water level line.9.
Connect the circulating pump and the heater to the power supply.10.
Install and connect the cover light.11.
Connect the aquarium with the designated flaps.12.
We recommend introducing fish in steps. You may put in the first fish (4-5) after a few days. These also ensure that the biological
filter develops. The run-in period of the filter may last 6 - 8 weeks. You may increase the number of fish in steps during this time.
13.
4

The JUWEL filter system Bioflow
The JUWEL filter system Bioflow is a highly effective biological filter system with two
stages that includes components complementing each other in an ideal manner.
Installing the filter in the aquarium makes hose connections unnecessary and prevents
leaks. The pump output is not negatively affected by hose couplings, intake tubes etc.
The capacity of the pump is designed in such a manner that an ideal level of biological
filtering is ensured by a sufficient level of percolation through the filter material.
In that context, the large filter volume ensures excellent mechanical filtering and
facilitates long cleaning intervals.
The construction of the filter system enables you to quickly access the individual heater,
pump, and filter media components. This way, the filter system may comfortably be
operated during cleaning and while performing maintenance work.
5

All Bioflow filter systems are delivered with five top-quality filter
media:
1. bioPad – filter wadding (white)
The fleece wadding acts as a mechanical pre-filter. It stops coarse
dirt, such as dead plant parts, from penetrating deeper into the
filter.
2. bioCarb – activated carbon sponge (black)
The sponge containing bound activated carbon removes toxins
from the water, e.g. harmful heavy metals and organic impurities.
4. Nitrax – nitrate remover (green)
The sponge contains micro-organisms that are able to break down
nitrates. The JUWEL filter offers a particularly good environment
to this end.
5. bioPlus coarse – coarse filter sponge (blue)
The coarse-pored filter sponge in the middle of the filter causes
the biological clarification of the water through the accumulation
of bacterial cultures.
7. bioPlus fine – fine filter sponge (blue)
The fine-pored filter sponges in the lower section of the filter
retain even the smallest suspended particles and ensure crystal-
clear water.
Other optional filter media round off the options that are
available for the optimum use of your JUWEL inside filter:
Between 1. & 2. bioBoost – filter accelerator
JUWEL bioBoost immediately activates new filter media and
accelerates the filtration performance in your aquarium. It
promotes the vitality of fish and plants.
6. Amorax – ammonium remover
Amorax is a highly efficient filter medium made of natural zeolite.
It quickly and effectively binds ammonium, thereby preventing
the formation of ammonia and promotes the vitality of your fish.
3. Carbax – highly effective activated carbon
Carbax's excellent absorption properties permanently and quickly
bind discolourations, odours and toxic substances and ensure
crystal-clear water.
6. Cirax – ceramic granules
Cirax is a biological filter medium which creates the perfect
colonisation conditions for useful bacteria, due to its large, highly
porous surface.
6. Phorax – phosphate remover
JUWEL Phorax is a highly effective filter medium used to break
down phosphates in your aquarium. This effectively reduces the
growth of algae and can contribute to improved plant growth.
6

Getting Started - The JUWEL filter system Bioflow M/3.0, L/6.0 and
XL/8.0
You should prepare the filter for operation prior to setting up the aquarium. However, do
not connect the electrical components to the power supply yet.
Please observe the following notes regarding commissioning the JUWEL filter system
Bioflow:
The JUWEL filter system consists of:
- 1 heater (included in complete aquariums only)
- 1 heater holder
- 1 pump
- 1 outlet nozzle
- 2 filter basket
- 3 sets of white filter wool - bioPad, packaged
- 1 carbon sponge - bioCarb, packaged
- 1 green nitrate remover sponge - Nitrax, packaged
- 1 blue filter sponge - bioPlus coarse
- 2 blue filter sponges - bioPlus fine
1. Insert the base of the pump into the pump holder of the filter and firmly push it into
position. In that context, the pump outlet faces in the direction of the outlet opening.
Confirm the proper arrangement of the gasket in the outlet opening (it is used to
minimize the transmission of vibrations).
2. Carefully attach the outlet nozzle from the outside through the opening to the pump
outlet and ensure its firm connection.
3. Insert the heater holder into the guide rail of the filter separation wall.
4. Insert the heater from above into the heater holder.
5. Now start preparing the filter sponges by removing the plastic packaging from the
carbon sponge and the nitrate remover sponge. Thoroughly rinse the blue filter sponges
only under running water.
6. After this, insert the blue "fine" filter sponges into the lower filter basket.
Following that, place the blue "rough" filter sponge, the green nitrate remover sponge,
the carbon sponge, and filter wool in the top position into the upper filter basket and
push both filter baskets into the filter housing.
7. Place the filter cover on the filter housing.
8. The JUWEL filter system Bioflow is now ready for operation.
The JUWEL Aquarium Filter System is a biological filter system. For it to work
effectively, bacteria cultures will need to grow inside the blue sponges. This
process can take up 6-8 weeks for the filter to fully mature. Consequently we
recommend to decorate and plant the aquarium and add just a few (3-5)
hardy fish in order to help the maturation process. Please test the water on a
weekly basis to monitor the water conditions and once the water is safe you
can begin to add more fish.
Notice:
The use of JUWEL bioBoost at the beginning and at every (partial) water change will
shorten the running-in phase of your JUWEL Aquarium inside filter.
Recommendation
OxyPlus - O2 Air Diffuser
The special OxyPlus - O2 Air Diffuser provides additional oxygen to the aquarium if
desired. This can be ordered from your JUWEL Aquarium retailer (Part No. 85145).
7

Care and maintenance of the JUWEL Filter System
The JUWEL Filter System requires very little maintenance if you follow the following
instructions.
bioPad
Replace the white filter wool pad once a week. If you have large fish, then this may
require changing slightly more frequently. This will ensure that the filter sponges will
not be clogged by larger dirt particles.
bioCarb
Replace the black activated carbon sponge every 4-6 weeks. Again, if you have large fish
then this may be to be more frequent. This ensures that any chemical impurities from the
water will be removed. Please note that the chemicals which are absorbed by the
activated carbon contained in the sponge, will be released to the water again if the
change intervals are too long.
bioPlus coarse/bioPlus fine
If the filter wool and the activated carbon sponge are replaced as suggested, then it is
sufficient to carefully clean or replace the coarse blue sponges at 6-12 weeks and the fine
blue sponges at 3-9 months only.
- Cleaning or replacing the blue sponges or the Cirax filter medium affects the impact of
the bacterial culture. For that reason, it is recommended not to clean or replace the blue
sponges and the Cirax filter medium at the same time, but rather successively in an
alternating manner.
You do not need to worry about the liquid dirt accumulating at the bottom of the filter
housing. Normally, this dirt contains important biological substances which enhance the
water quality.
Please do not worry if some dirt gets into the water during the cleaning process causing
cloudiness. After the filter system is back in operation, the water will soon clear again.
Nitrax
In order to allow a proper level of micro-organisms in the filtration system it is
recommended to exchange the sponge every 8 weeks. The nitrate removal sponge
contains bacteria, which will after a while reduce the nitrate level in the aquarium
significantly.
OPTIONAL:
BioBoost
JUWEL bioBoost immediately activates new filter media and accelerates the filtration
performance in your aquarium. It promotes the vitality of fish and plants. After 4 weeks,
the bag with the nutrient residues can be removed or replaced, if required.
Amorax
Amorax is a highly efficient filter medium made of natural zeolite. It quickly and
effectively binds ammonium, thereby preventing the formation of ammonia and
promotes the vitality of your fish. Replace the JUWEL Amorax every 3 months.
Carbax
Carbax's excellent absorption properties permanently and quickly bind discolourations,
odours and toxic substances and ensure crystal-clear water. We recommend replacing
JUWEL Carbax every 2 months.
Cirax
Cirax is a biological filter medium which creates the perfect colonisation conditions for
useful bacteria, due to its large, highly porous surface. We recommend changing JUWEL
Cirax every 12 months.
Phorax
JUWEL Phorax is a highly effective filter medium used to break down phosphates in your
aquarium. This effectively reduces the growth of algae and can contribute to improved
plant growth. Change JUWEL Phorax every 2 weeks.
8

Maintenance of the pump JUWEL Eccoflow in the filter system
Bioflow Super, M/3.0, L/6.0, XL/8.0
The JUWEL Eccoflow pump should be checked with regard to functionality and cleaned at regular intervals (at least once a month).
Please proceed as follows to this end:
After that, please reinstall the pump in reverse order in the filter.
SAFETY INSTRUCTIONS:
Never operate the power head out of water.
Always unplug the power head from the power supply before removing it from the filter.
The power head is intended for indoor use and for use in fluids up to 35°C.
Never repair the electrical cord or plug. In case of damage replace the complete power head.
Recommendation:
We recommend that you replace the parts subjected to wear and tear, e.g. the impeller, axle and the rubber axle holders, at intervals of
approx. 12 months in order to ensure the optimum function and operating quietness of the pump. Inquire at your specialist retailer for
assistance.
Important:
Always use original JUWEL Aquarium filter media to ensure the optimum performance of
your system.
Disconnect all electrical devices that are operated in the water from the power grid.1.
Remove the outlets.2.
Remove the pump from the pump retainer of the filter.3.
Disconnect the adapter (A) from the motor by turning it counter-clockwise and remove the impeller from the chamber.4.
Now clean all components thoroughly. Deposits and dirt should in particular be removed from the pump chamber, the impeller and
pump shaft. Otherwise the functionality of the pump will be impaired.
5.
Check the impeller for damage and possible signs of wear of the magnet. You should also ensure that the two rubber bearings are
located on the ends of the pump shaft.
6.
9

JUWEL AquaHeat - Operation and maintenance of the heater
JUWEL AquaHeat - Installing the heater in the JUWEL filter system
Recommendation:
The JUWEL automatic heater warms the water of your aquarium up to 28°C depending on a nomal room temperature of 21°C. If you keep
your aquarium in rooms below this or your fish need a higher temperature, we recommend to purchase a second heater.
Safety instructions:
Only connect the heater once the aquarium is filled with water at least to the minimum water level of the heater.
Maximum operating depth 80 cm.
Never use the heater outside the aquarium.
Operate the heater indoors only.
SAFETY INSTRUCTIONS:
Always unplug the heater and allow it to cool before removing it from the filter.
Never attempt to open or repair the heater. Any signs of damage or malfunction and the heater should be replaced with an original
JUWEL Aquarium heater.
Never repair the electrical cord or plug. In case of damage replace the complete heater.
Once removed never place on a flammable surface.
The JUWEL Aquarium adjustable heater is an essential component of the JUWEL filter
system. It’s positioning within the filter housing and consequently in the water stream
facilitates even warming of the water in the aquarium, the Juwel AquaHeat is also
particularly energy-saving.
You control the temperature of the water via the adjusting knob in the heater head. You
may specify the temperature the heater is supposed to heat the water to in accordance
with your individual requirements. The centre position between "+" and "-" corresponds
to a water temperature of approximately 23 – 26°C or 74 – 78°F depending on the
ambient temperature.
Please note that the JUWEL AquaHeat adjustable heater is designed to heat up to 8°C
above room temperature. Please also note that depending on the starting temperature
of the water in the aquarium, it may take approx. 12 hours and longer until the heater has
heated the water to the desired temperature. After that, the heater will automatically
keep the water at the desired temperature and switch on or off, accordingly. The red
glowing lamp indicates that the heater is working.
We also recommend that you to check the temperature of the water by means of a
thermometer at regular intervals. The heater does not require further care or
maintenance.
The JUWEL aquarium heater is supplied with the heater holder (fig. 1) which you will
need for the installation.
Please perform the following steps for all JUWEL Aquarium filter systems:
(You may need to start by removing an installed separation wall holder.)
1. Install the heater holder.
2. Attach the heater to the filter housing on the inside of the filter and/or initially insert
the heater holder into the guide rail of the separation wall.
The heater is properly positioned if the heater holder rests on the upper edge of the
housing and/or the separation wall.
The heater is now operational.
10

MultiLux LED light unit
The MultiLux LED is a high-performance LED light unit for your aquarium. The replaceable LED tubes enable maximum lighting of your
aquarium and ensure an energy saving of up to 50% compared to T5 fluorescent lamps.
The light unit itself is waterproof and therefore allows you to maintain your aquarium with full lighting.
Installation of the MultiLux LED light unit
Maintenance and Care of the MultiLux LED light unit
Recommendation
JUWEL Digital Thermometer 2.0
To monitor the temperature we recommend the JUWEL Digital Thermometer (Part No.
85702). Available from your JUWEL Aquarium retailer.
The water tightness can only be guaranteed if the tube holders
have been firmly connected to their sockets and we recommend
that you check this prior.
The MultiLux LED light unit may now be placed on the top frame
of the aquarium and connected to the power supply. Then, attach
the flaps and close the aquarium.
In that context, ensure that the top frame of the aquarium and the
guide rails of the cover hatches are free of foreign objects, e.g.
sand or gravel.
The JUWEL Aquarium MultiLux LED light unit requires little care
and maintenance. Only clean the frame with a soft cloth and warm
water.
Changing the LED tubes:
In order to fault-free functionality of the light unit, it is absolutely
necessary to disconnect the power plug prior to replacing the
LED tubes!
Only reconnect the MultiLux LED to the power supply after this!
Unscrew the tube holders and slide them over the LED tube.•
Remove the LED tubes from the fittings.•
Prepare the new LED tube for use by sliding the tube holders
over the tube.
•
Insert the new LED tube into the fitting as shown in the
illustration. Check the correct position.
•
Screw the tube holders on tightly.•
Switch the light unit back on.•
11

Notice:
If a defect occurs on the MultiLux LED light unit, it switches itself off automatically.
If a replacement of both LED tubes does not make the light function again, we recommend that you purchase a new light unit, which is
available as a spare part.
SAFETY NOTICES:
LED module – do not look into the light source! Risk Class 2
Never stare directly into the source of light for any period of time as you will
otherwise risk damaging your eyes.
Pull the power plug for each LED tubes replacement.
The connection line may not be repaired. Always replace the entire light unit in case
of damage.
Do not operate the light unit under water.
Do not attempt to open the light unit or repair it in case of a malfunction! This would
endanger the water-tightness.
The JUWEL LED tubes are coordinated with the electronic components of the MultiLux
LED light unit. Therefore, only use these LED tubes as original JUWEL Aquarium spare
parts.
Tip:
SmartFeed - automatic feeder
We offer you the SmartFeed automatic feeder matching all JUWEL aquariums.
It is available from specialist retailers as original JUWEL Aquarium accessory (item No.
89010).
Notice: LED tubes
The energy-saving LED light media in your MultiLux LED light unit helps you to achieve up
to 50% energy saving compared with T5 tubes. The LED lighting media are available as an
original JUWEL spare part.
The energy-saving LED DAY light medium with bright, invigorating light, ensures
brilliant illumination of the aquarium and promotes plant growth at the same time.
•
The energy-saving LED NATURE light medium produces a warm and natural light.
The special light spectrum of the lighting medium promotes plant photosynthesis
whilst highlighting the green colours in your aquarium.
•
The energy-saving LED COLOUR light medium creates a stimulating red light in
your aquarium. The special spectrum particularly emphasizes the many red and blue
tones of your fish and plants.
•
The energy-saving LED BLUE light medium was specially developed to simulate
the lighting conditions on coral reefs at depths of around six metres. Corals are
specifically encouraged to grow thanks to the special spectrum of light that LED
BLUE produces.
•
The energy-saving LED MARINE light medium impresses by being particularly
bright. The special spectrum from the LED MARINE produces a bright white light that
simulates the lighting conditions found in coral reefs.
•
12

Proper disposal (electrical waste)
The labelling on the product or on the accompanying literature declares that it must not be disposed of, at the end of its service life,
together with household rubbish. Please dispose of this equipment separately from other waste, to protect the environment or public
health from damage by unregulated waste disposal.
Recycle the equipment and support the sustained recycling of material resources.
Private users should contact the dealer who sold them the product or the responsible authorities, for a demonstration on how to
recycle the equipment in an environmentally friendly way.
Notice: Salt water
All JUWEL aquariums have already been prepared for use with seawater.
Nothing stands in the way of creating a unique seawater aquarium thanks to the
optionally available SeaSkim protein skimmer and the LED Marine and LED Blue LED tubes
that have been specifically adapted for use with seawater.
You can find further information about our products or use with seawater on our website
at www.juwel-aquarium.com.
JUWEL End Caps
To ensure the water tightness of your Multilux light system always use genuine JUWEL
Aquarium spare parts.
Please note the tube holders are available from your JUWEL Aquarium retailer.
13

Guarantee
We guarantee the performance of the JUWEL-Aquarium product or its accessories to the purchaser for a period of 24 months from the
date of purchase according to the following conditions:
§ 1 Extent of the guarantee
(1) This guarantee extends to the JUWEL-Aquarium product and its components excluding items subject to wear and tear such as T5 and
T8 light tubes and filter media. It is limited to the product as such and does not cover damage to other property and/or individuals. In
addition, the provisions of the product liability law apply. These provisions are not limited by the aforementioned arrangement.
(2) It is the prerogative of JUWEL-Aquarium to decide whether the guarantee is performed by means of repair or replacement. If neither
repair nor replacement can ensure the performance of the JUWEL-Aquarium product the purchaser is entitled to demand a reduction in
price or to return the product against repayment of the purchase price.
§ 2 Guarantee period and settlement procedure
(1) The guarantee period begins on the day of the purchase of the JUWEL Aquarium product from the retailer. Claims under this
guarantee will not be honoured, if
(a) the damage is caused as a result of improper use or maintenance or nonobservance of the instructions given in this manual
(b) the product or its components have been maintained by persons or companies not authorised by the manufacturer to do so
(c) the product or its components have been damaged by mechanical means of whatsoever kind, in particular broken glass
(2) All claims under this guarantee have to be notified to the retailer, from whom the aquarium has been purchased without delay,
however, not longer than 2 weeks from the day of first occurrence of defects. Rights under the consumer protection laws will remain
unaffected.
(3) Guarantee claims will only be accepted if the validity of the claim is supported by evidence of purchase of the JUWEL-Aquarium
product. This declaration of guarantee is a translation only. In case of doubts the original
German language version prevails.
We reserve the right to make technical alterations.
© JUWEL AQUARIUM
® JUWEL, Trigon, Vision, Rekord, Rio, Lido, Vio, Primo, Korall,
MonoLux, DuoLux, MultiLux, KoralLux, Violux, NovoLux, PrimoLux,
SeaSkim, EccoSkim AquaHeat, EasyFeed, SmartFeed, High-Lite,
Warm-Lite, Colour-Lite, Day-Lite, Juwel Twin-Lite, HiFlex,
SmartControl, Juwel Eccoflow, Bioflow, Cirax, Nitrax, Phorax, Carbax,
BioPad, BioCarb, BioPlus, bioBoost, OxyPlus, Silexo,Conexo.
JUWEL AQUARIUM AG & CO. KG
Karl-Göx-Straße 1 27356 Rotenburg/Wümme . GERMANY
Telefon +49(0)42 61/93 79-32
Telefax +49(0)42 61/93 79-856
Service-Mail service@juwel-aquarium.de
JUWEL AQUARIUM UK Branch
Gateway 11 Business Park
Penfold Drive, Wymondham Norfolk NR18 0WZ
Tel.: 01953 606 363 Fax: 01953 603 839
E-Mail: info@juwel-aquarium.co.uk
Service-Mail: info@juwel-aquarium.co.uk
14

16

Aquarium Rio 125 / Lido 120 RIO 180, 240/ Lido 200/
Vision 180/ Trigon 190 Rio 350/ Vision 260 Rio 450/ Vision 450/ Trigon
350
Filter Type Bioflow M Bioflow M Bioflow L Bioflow XL
Product Code Product Code Product Code Product Code
1. Eccoflow 500 Eccoflow 600 Eccoflow 1000 Eccoflow 1000
INT: 85752 INT: 85754 INT: 85756 INT: 85756
UK: 85762 UK: 85764 UK:85766 UK:85766
AU: 85772 AU: 85774 AU: 85776 AU: 85776
2. 85091 85093 85095 85095
3. AquaHeat 100 W AquaHeat 200W AquaHeat 300 W AquaHeat 300 W
INT: 85605 INT: 85610 INT: 85615 INT: 85615
UK: 85805 UK: 85810 UK: 85815 UK: 85815
AU: 85855 AU: 85860 AU: 85865 AU: 85865
4. 85990 85990 85990 85990
5. 90046 90046 90046 90046
6. 90017 90017 90018 90019
18

Aquarium Primo 60 & 70 Primo 110
Rio 125, 180, 240 /
Lido 120, 200/
Vision 180/ Trigon
190
Rio 350/ Vision 260 Rio 450/ Vision
450/ Trigon 350
Filter Type Bioflow ONE Bioflow Super Bioflow M Bioflow L Bioflow XL
Product Code Product Code Product Code Product Code Product Code
7. BioPad --- 88038 88049 88099 88149
8. BioCarb --- 88037 88059 88109 88159
9. Nitrax --- 88055 88055 88105 88155
10. BioPlus coarse ---- --- 88050 88100 88150
11. BioPlus fine 88021 88051 88051 88101 88151
12. OPTIONAL Amorax --- 88054 88054 88104 88154
Carbax --- 88058 88058 88108 88158
Cirax --- 88056 88056 88106 88156
Phorax --- 88057 88057 88107 88157
20
This manual suits for next models
4
Table of contents
Other juwel Aquarium manuals
Popular Aquarium manuals by other brands

Wave Point
Wave Point BlueStar 01046 manual

Innovative Marine
Innovative Marine NUVO AQUARIUM Micro 30 owner's manual

Dennerle
Dennerle Nano quick start guide

Red Sea
Red Sea REEFER Peninsula 500 Assembly manual

Ecoxotic
Ecoxotic EcoPico Simplicity All-In-One quick start guide

Ultra Reef
Ultra Reef PSK-SDC instruction manual

Blue Marine
Blue Marine MaxLed 85 instruction manual

Aqua Medic
Aqua Medic Magnifica 100 CF Operation manual

Aqua One
Aqua One Nautilus 2700 Troubleshooting

Casa Del Vetro
Casa Del Vetro Acquario Milo 30 Cubik Ekoline Black instructions

TMC
TMC V2Skim Series Instructions for installation and use

Ultra Reef
Ultra Reef UKS-160 instruction manual