3
ENGLISH
How to reset your unit ........................... 2
How to forcibly eject a disc................... 2
How to read this manual........................ 4
How to use the MODE button ............... 4
Control panel
— KD-G416/KD-G415 ............... 5
Parts identification................................. 5
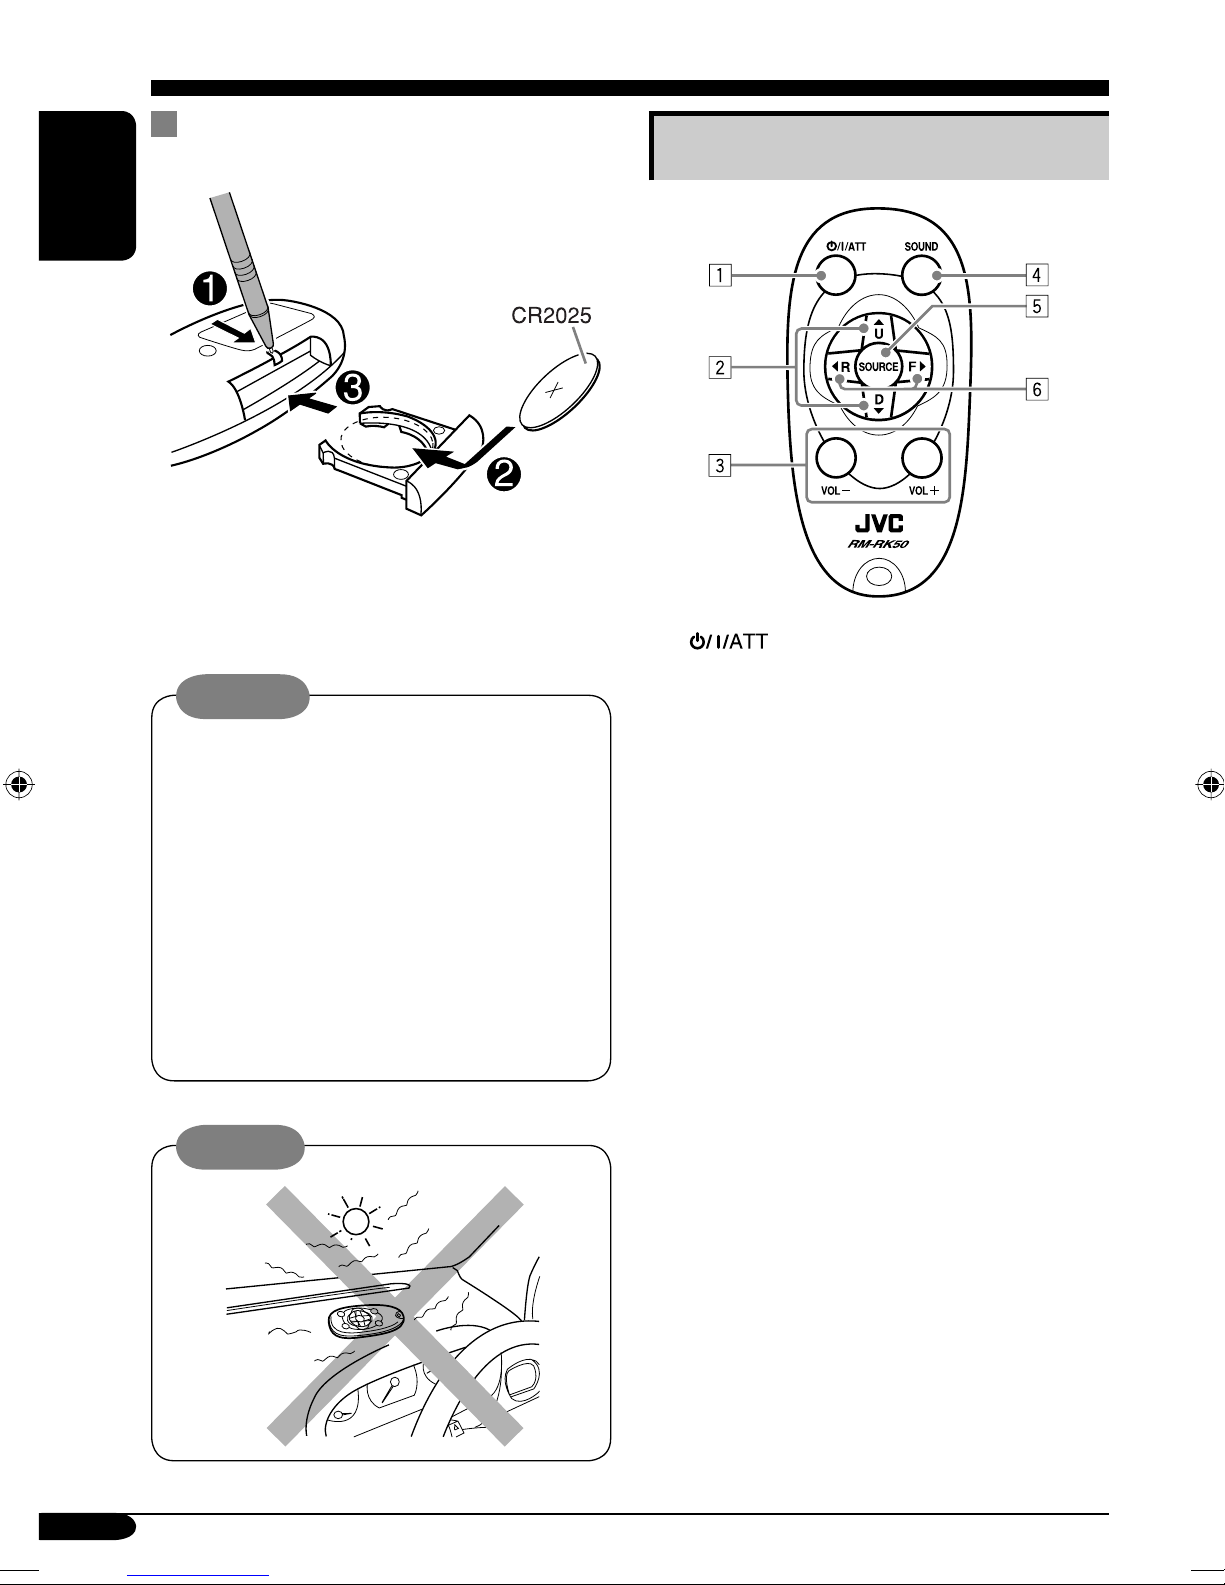
Remote controller — RM-RK50
... 6
Main elements and features ................... 6
Getting started....................... 7
Basic operations.................................. 7
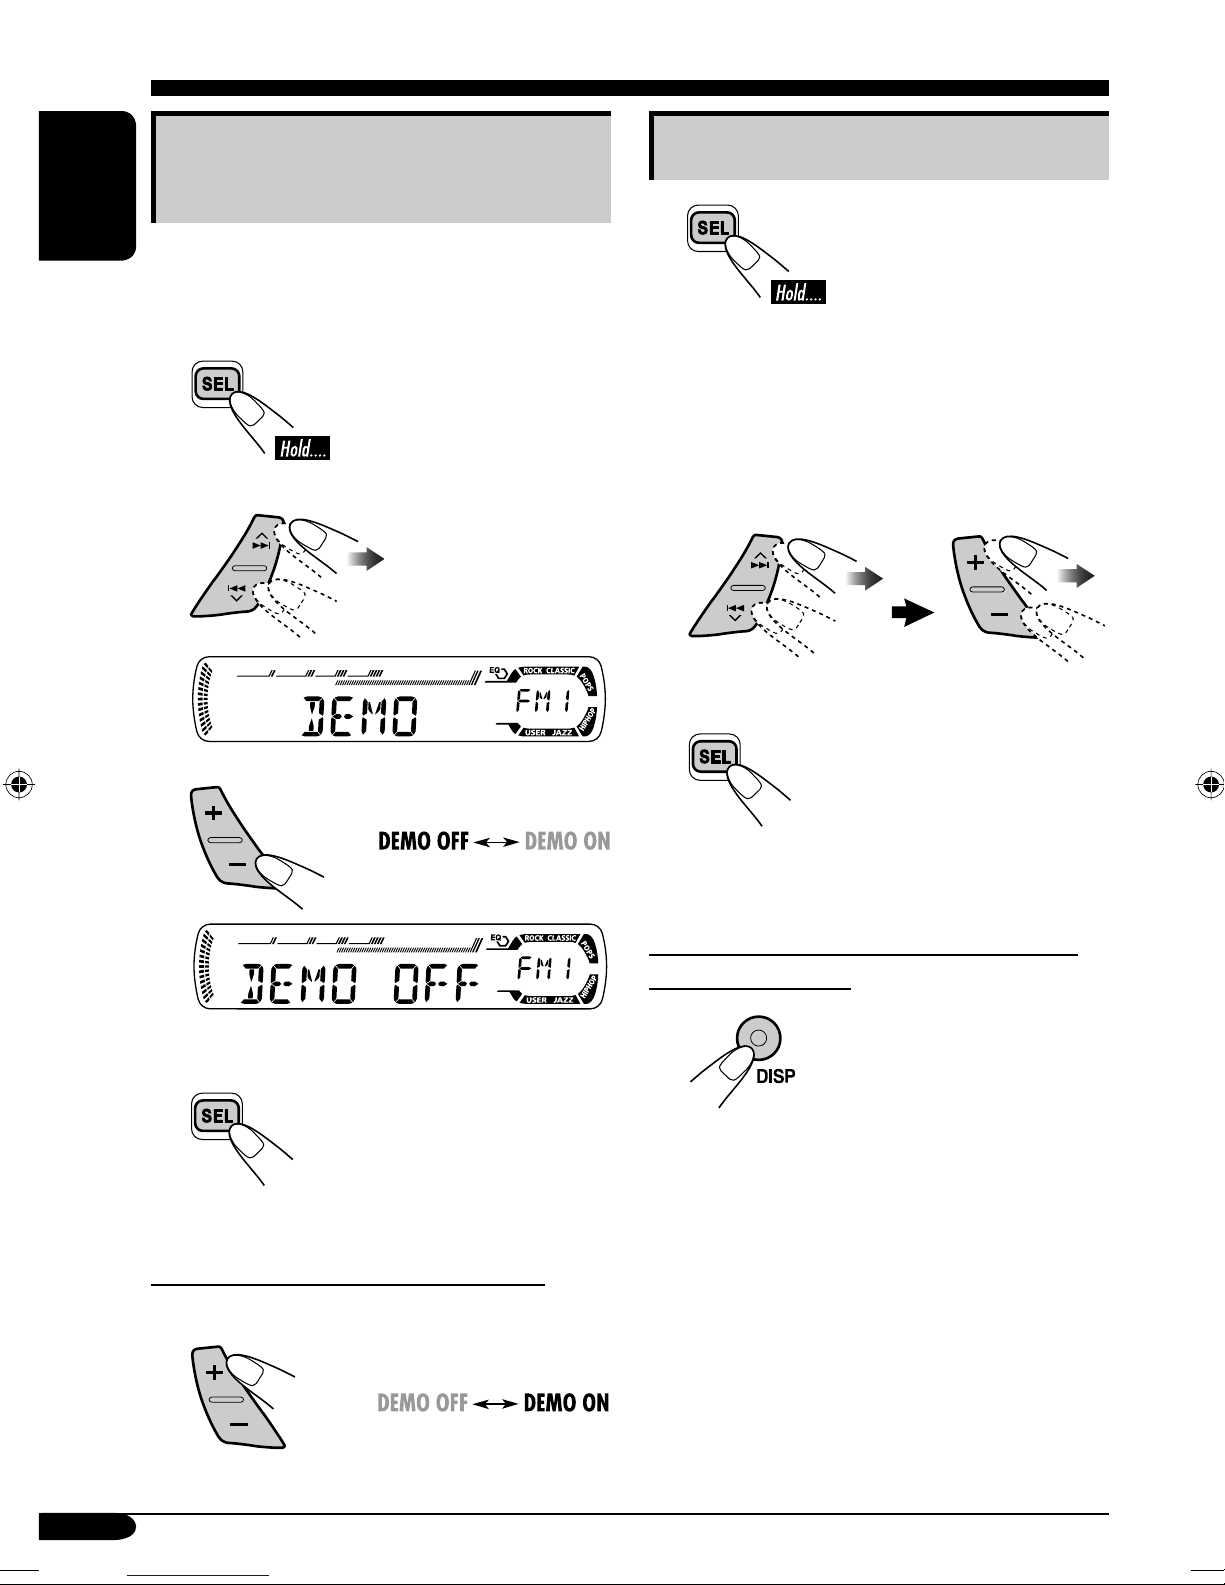
Canceling the display demonstrations ... 8
Setting the clock .................................... 8
Radio operations ................... 9
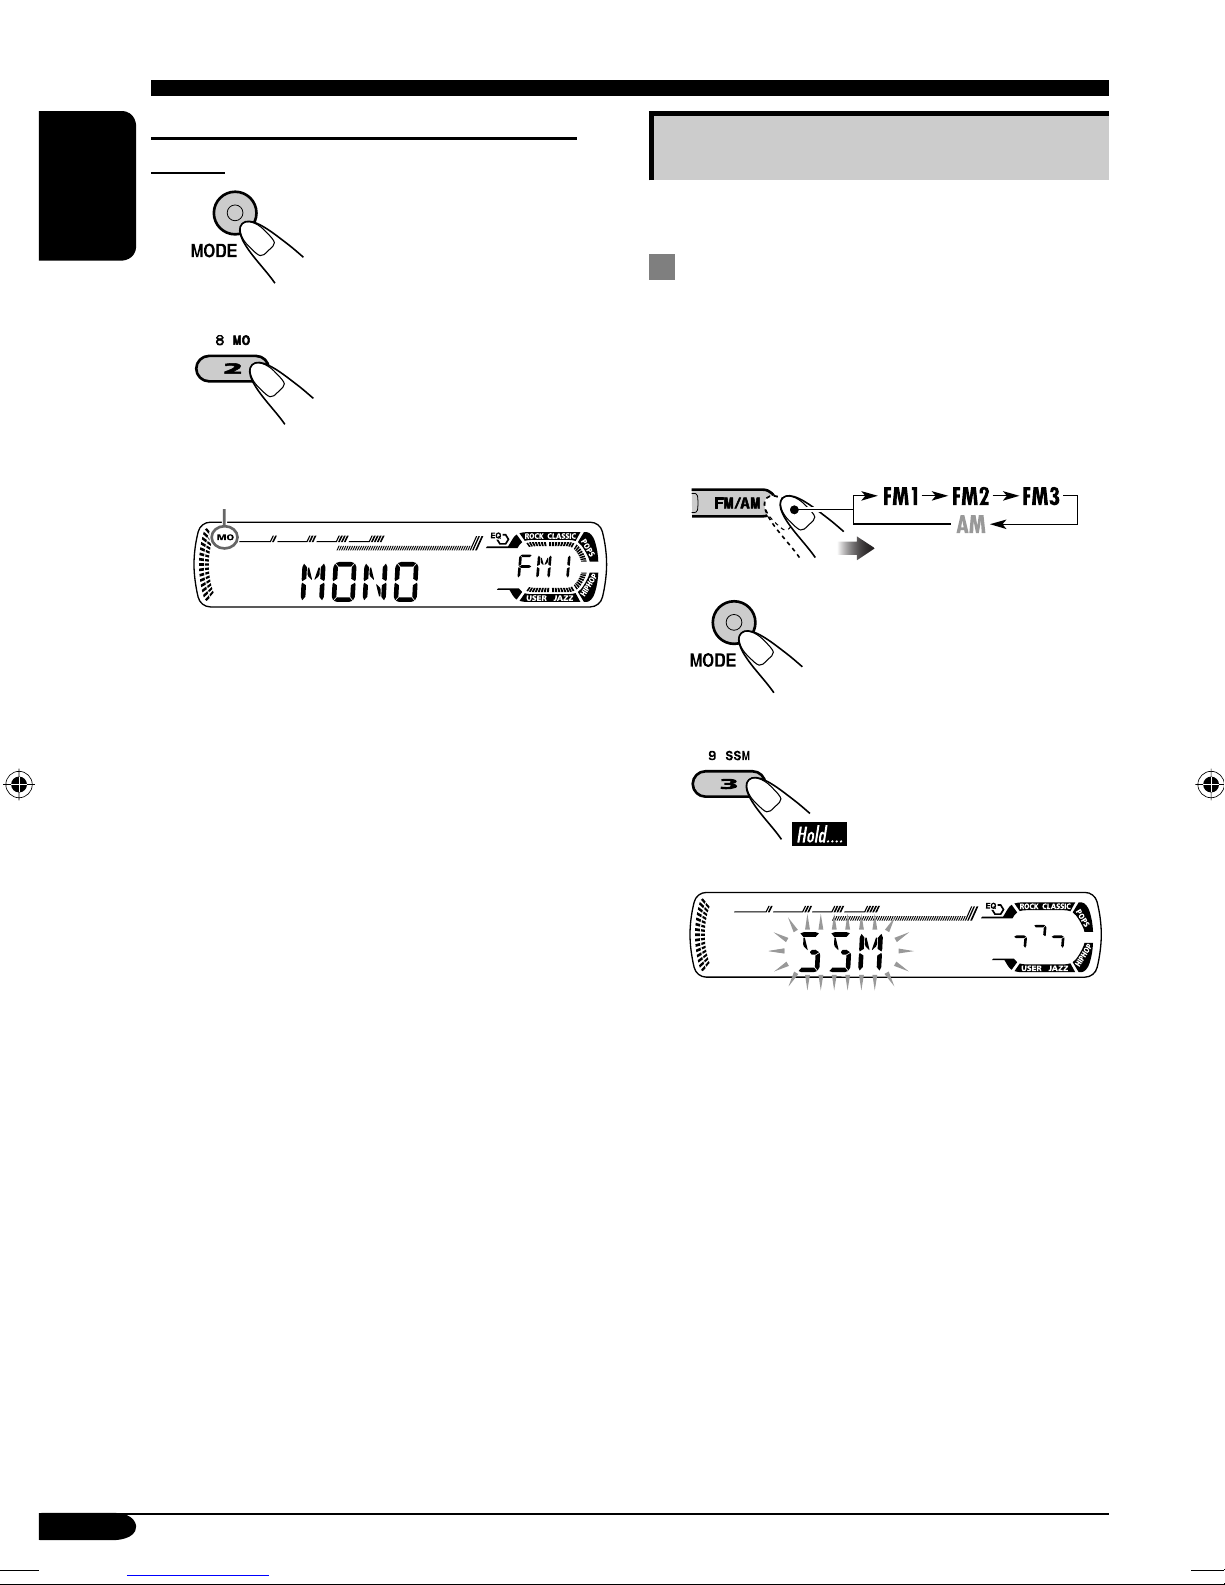
Listening to the radio........................... 9
Storing stations in memory.................... 10
Listening to a preset station ................... 11
Disc operations ...................... 12
Playing a disc ..................................... 12
Changing the display information ......... 14
Selecting the playback modes................ 15
Sound adjustments ................ 16
Selecting preset sound modes
(C-EQ: custom equalizer) .................. 16
Adjusting the sound ............................... 17
General settings — PSM ......... 18
Basic procedure ..................................... 18
Detaching the control panel.... 19
Maintenance .......................... 20
More about this receiver ........ 21
Troubleshooting ..................... 23
Specifications ......................... 25
*For safety....
• Do not raise the volume level too much, as
this will block outside sounds, making driving
dangerous.
• Stop the car before performing any
complicated operations.
Contents
*Temperature inside the car....
If you have parked the car for a long time in
hot or cold weather, wait until the temperature
in the car becomes normal before operating the
unit.
EN02-05KD-G416_415[U_UH]3.indd 3EN02-05KD-G416_415[U_UH]3.indd 3 10/28/04 5:40:52 PM10/28/04 5:40:52 PM