JVC KD-SX1000R User manual

CD RECEIVER
CD-RECEIVER
RECEPTEUR CD
CD-RECEIVER
INSTRUCTIONS
VNN3874-312S
[E]
BEDIENUNGSANLEITUNG
MANUEL D’INSTRUCTIONS
GEBRUIKSAANWIJZING
For installation and connections, refer to the separate manual.
Angaben zu Einbau und Verkabelung entnehmen Sie bitte der gesonderten Anleitung.
Pour l’installtion et les reccordements, se référer au manuel séparé.
Zie de afzonderlijke handleiding voor details aangaande het installeren en verbinden van het toestel.
NEDERLANDS
DEUTSCHFRANÇAIS ENGLISH
Detachable
KD-SX1000R
TP
RDS
PTY
SOUND
LO/RPT
INT
MO/RND
DISP
SSM
123456
40W
X
4
CD-
CH
TUNER
CD
/I
ATT
KD-SX1000R
BANDEXT
SEL
TEXT
VCR789101112
VCR CONTROL
KD-SX1000R[E]COVER 98.7.14, 10:40 AM3

2
Note:
For security reasons, a numbered ID card is provided with this unit, and the same ID number is
imprinted on the unit’s chassis. Keep the card in a safe place, as it will help the authorities to
identify your unit if stolen.
BEFORE USE
* For safety....
• Do not raise the volume level too much, as this
will block outside sounds, making driving
dangerous.
• Stop the car before performing any complicated
operations.
* Temperature inside the car....
If you have parked the car for a long time in hot
or cold weather, wait until the temperature in the
car becomes normal before operating the unit.
Position And Reproduction Of Labels
Bottom panel of the main unit
IMPORTANT FOR LASER
PRODUCTS
Precautions:
1. CLASS 1 LASER PRODUCT
2. DANGER: Invisible laser radiation when
openandinterlockfailed or defeated.Avoid
direct exposure to beam.
3. CAUTION: Do not open the top cover.
Therearenouser-serviceablepartsinside.
Leave all servicing to qualified service
personnel.
4. CAUTION: This CD player uses invisible
laser radiation and is equipped with safety
switches to prevent radiation emission
when unloading CDs. It is dangerous to
defeat the safety switches.
5. CAUTION:Useofcontrols,adjustmentsor
performance of procedures other than
those specified herein may result in
hazardous radiation exposure.
CAUTION on Volume Setting
CDs produce very little noise compared with
other sources. If the volume level is adjusted
for the tuner, for example, the speakers may
be damaged by the sudden increase in the
output level. Therefore, lower the volume
before playing a CD and adjust it as required
during playback.
Caution:
This product contains a laser component
of higher laser class than Class 1.
CLASS
LASER 1
PRODUCT
DANGER: Invisible laser
radiation whenopen and
interlock failedordefeated.
AVOID DIRECT EXPOSURE
TO BEAM. (e)
ADVARSEL: Usynlig laser-
stråling ved åbning, når
sikkerhedsafbrydere erude
af funktion.Undgåudsæt-
telse for stråling. (d)
VARNING:Osynliglaser-
strålning när denna del
är öppnadoch spärren är
urkopplad. Betrakta ej
strålen. (s)
VARO: Avattaessa ja suo-
jalukitus ohitettaessa olet
alttiina näkymättömälle
lasersäteilylle. Älä katso
säteeseen. (f)
Name/Rating plate
EN02-04.KD-SX1000R[E]/1 98.6.3, 5:32 PM2

3
ENGLISH
Thank you for purchasing a JVC product. Please read all instructions carefully before operation, to
ensure your complete understanding and to obtain the best possible performance from the unit.
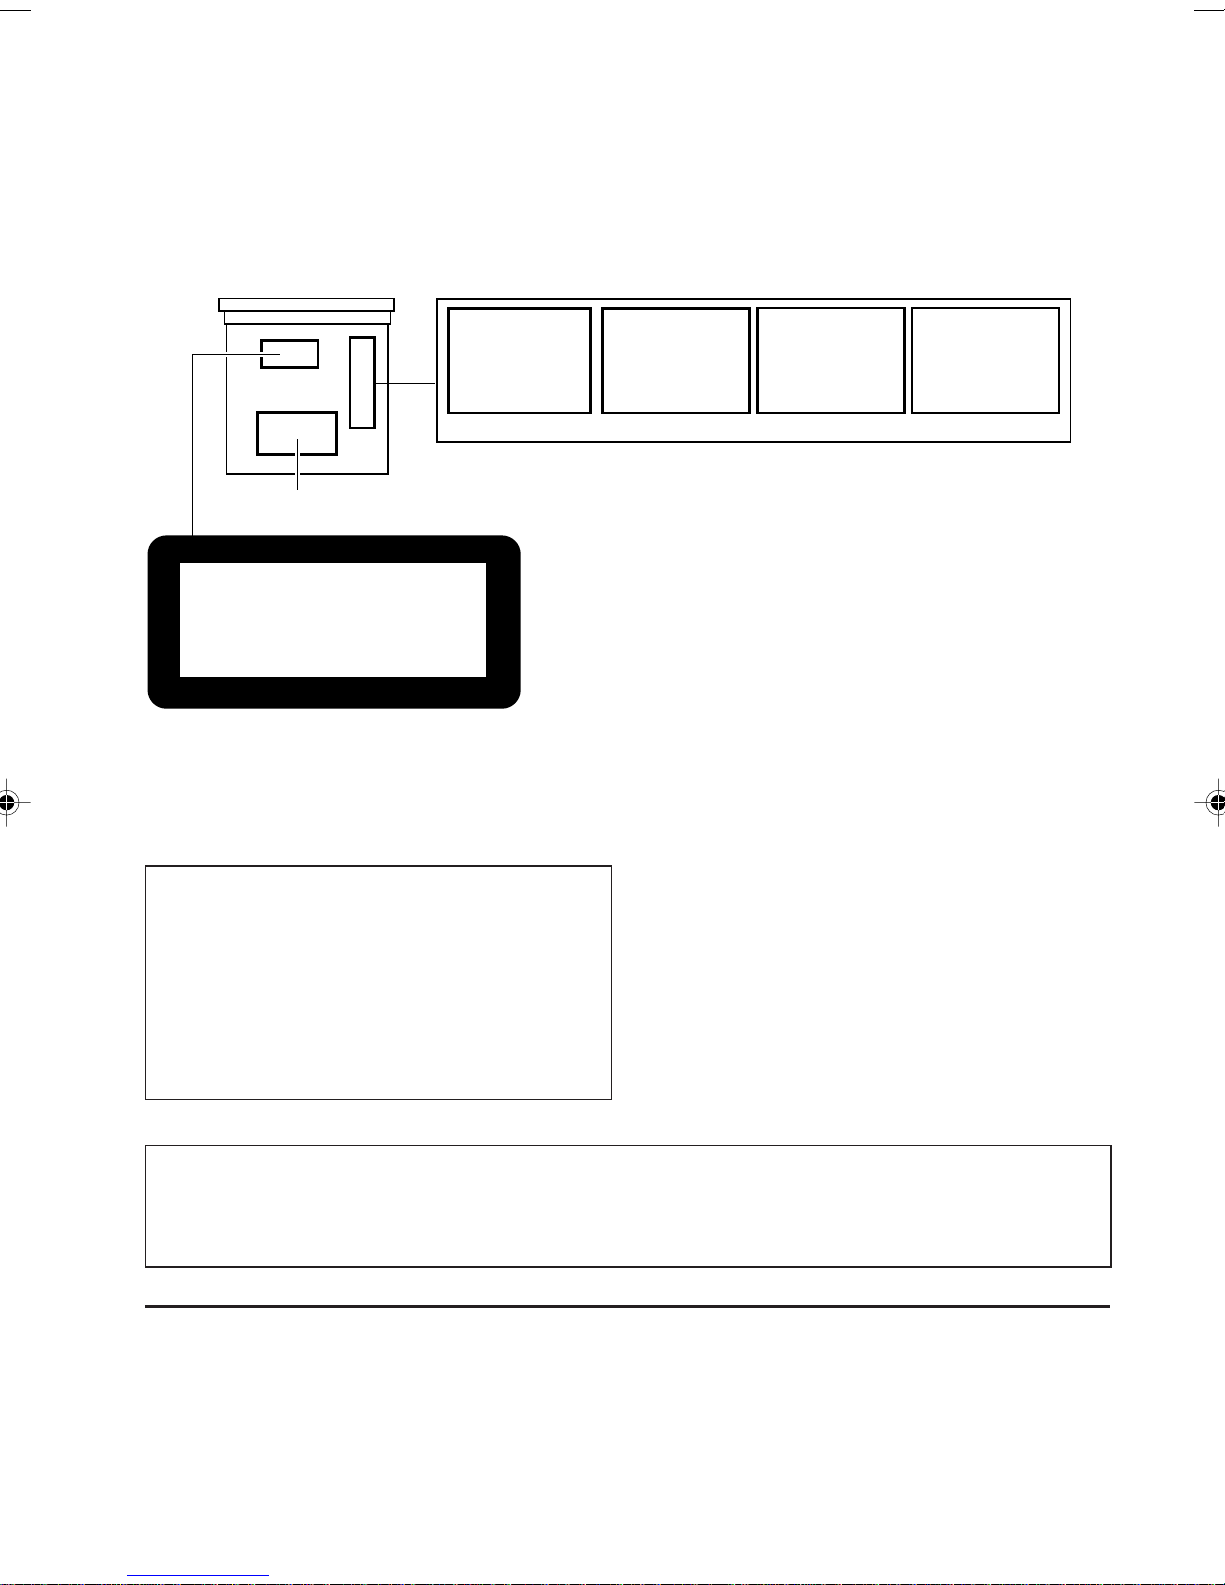
CONTENTS
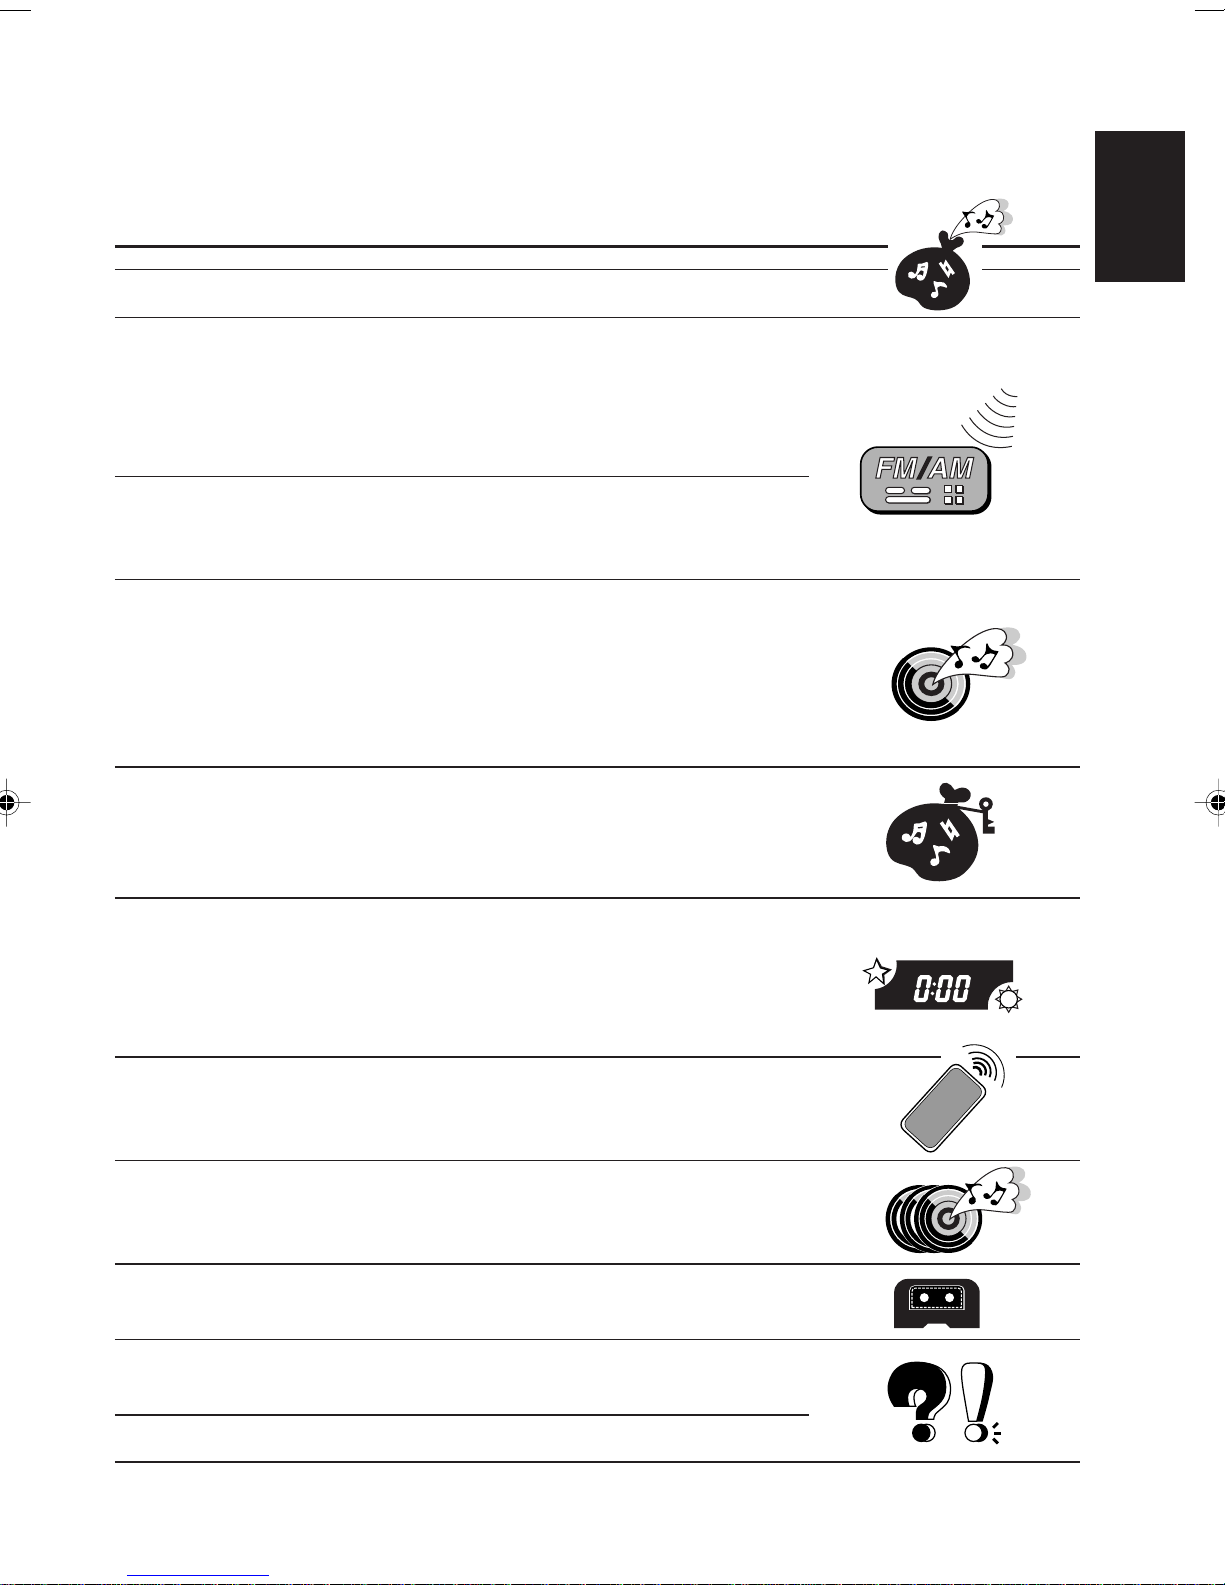
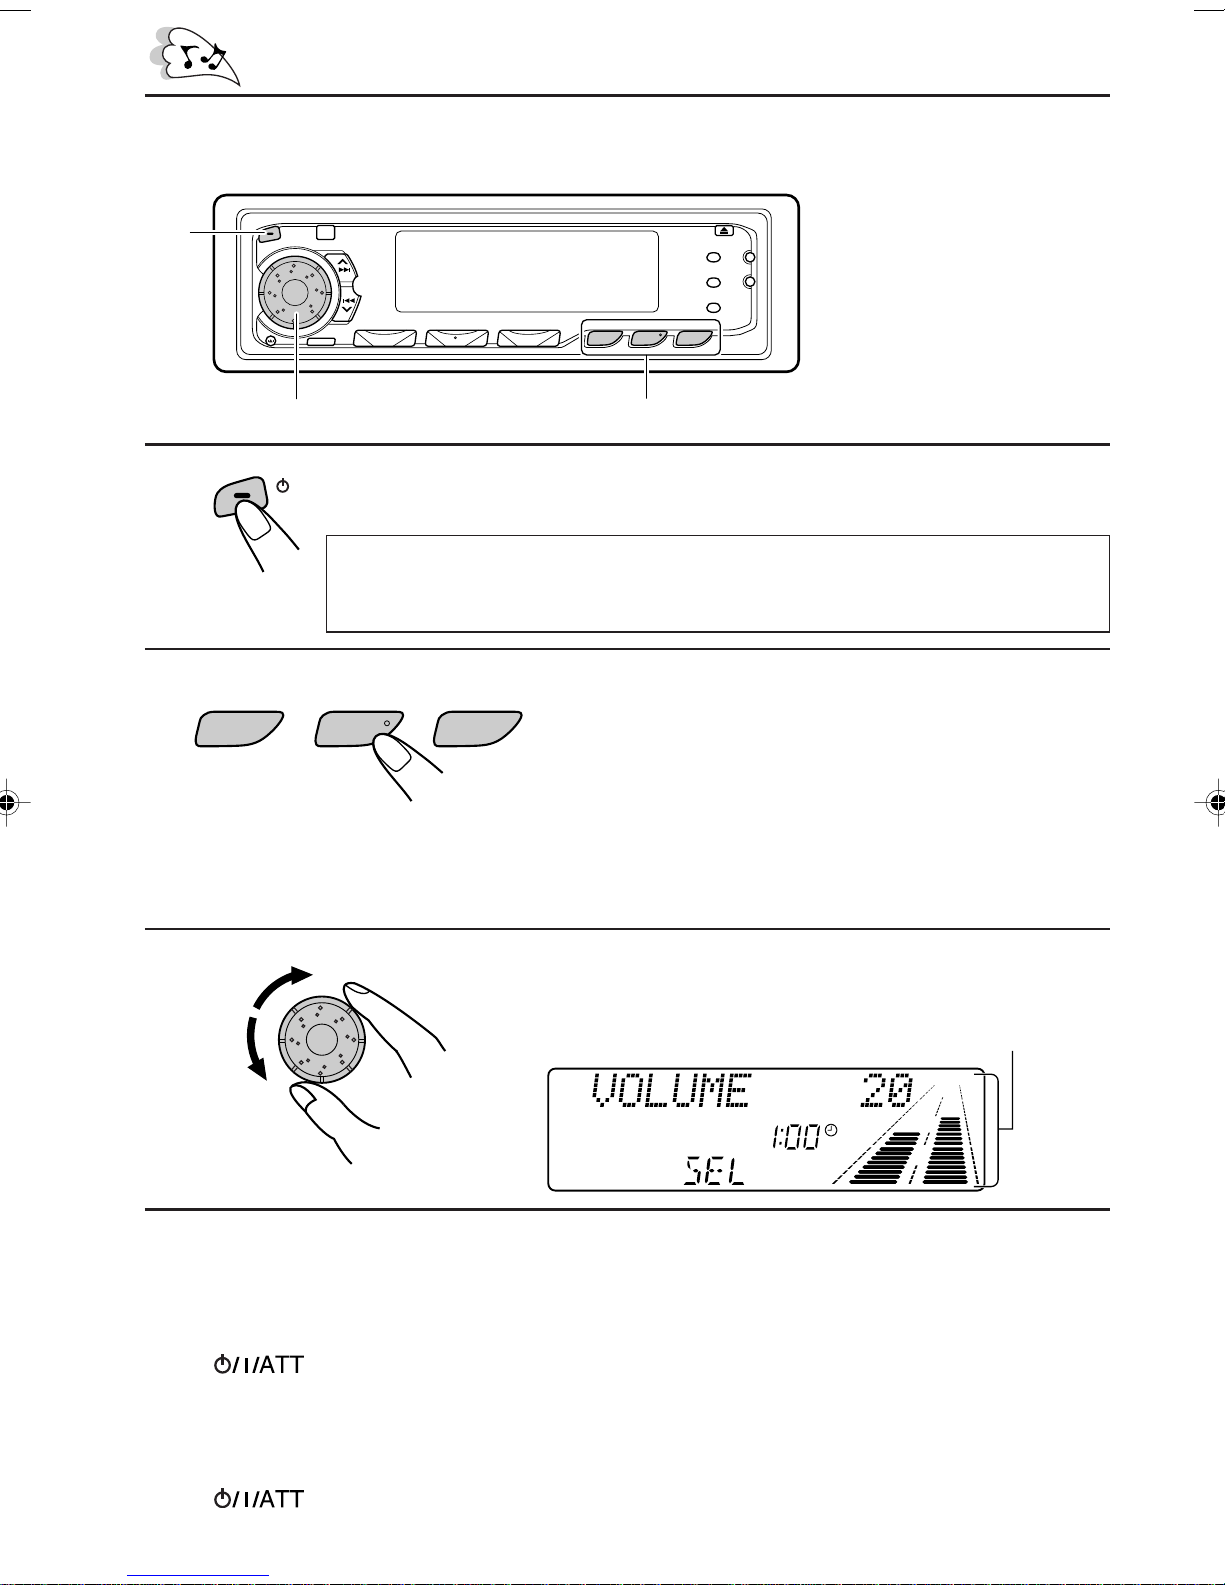
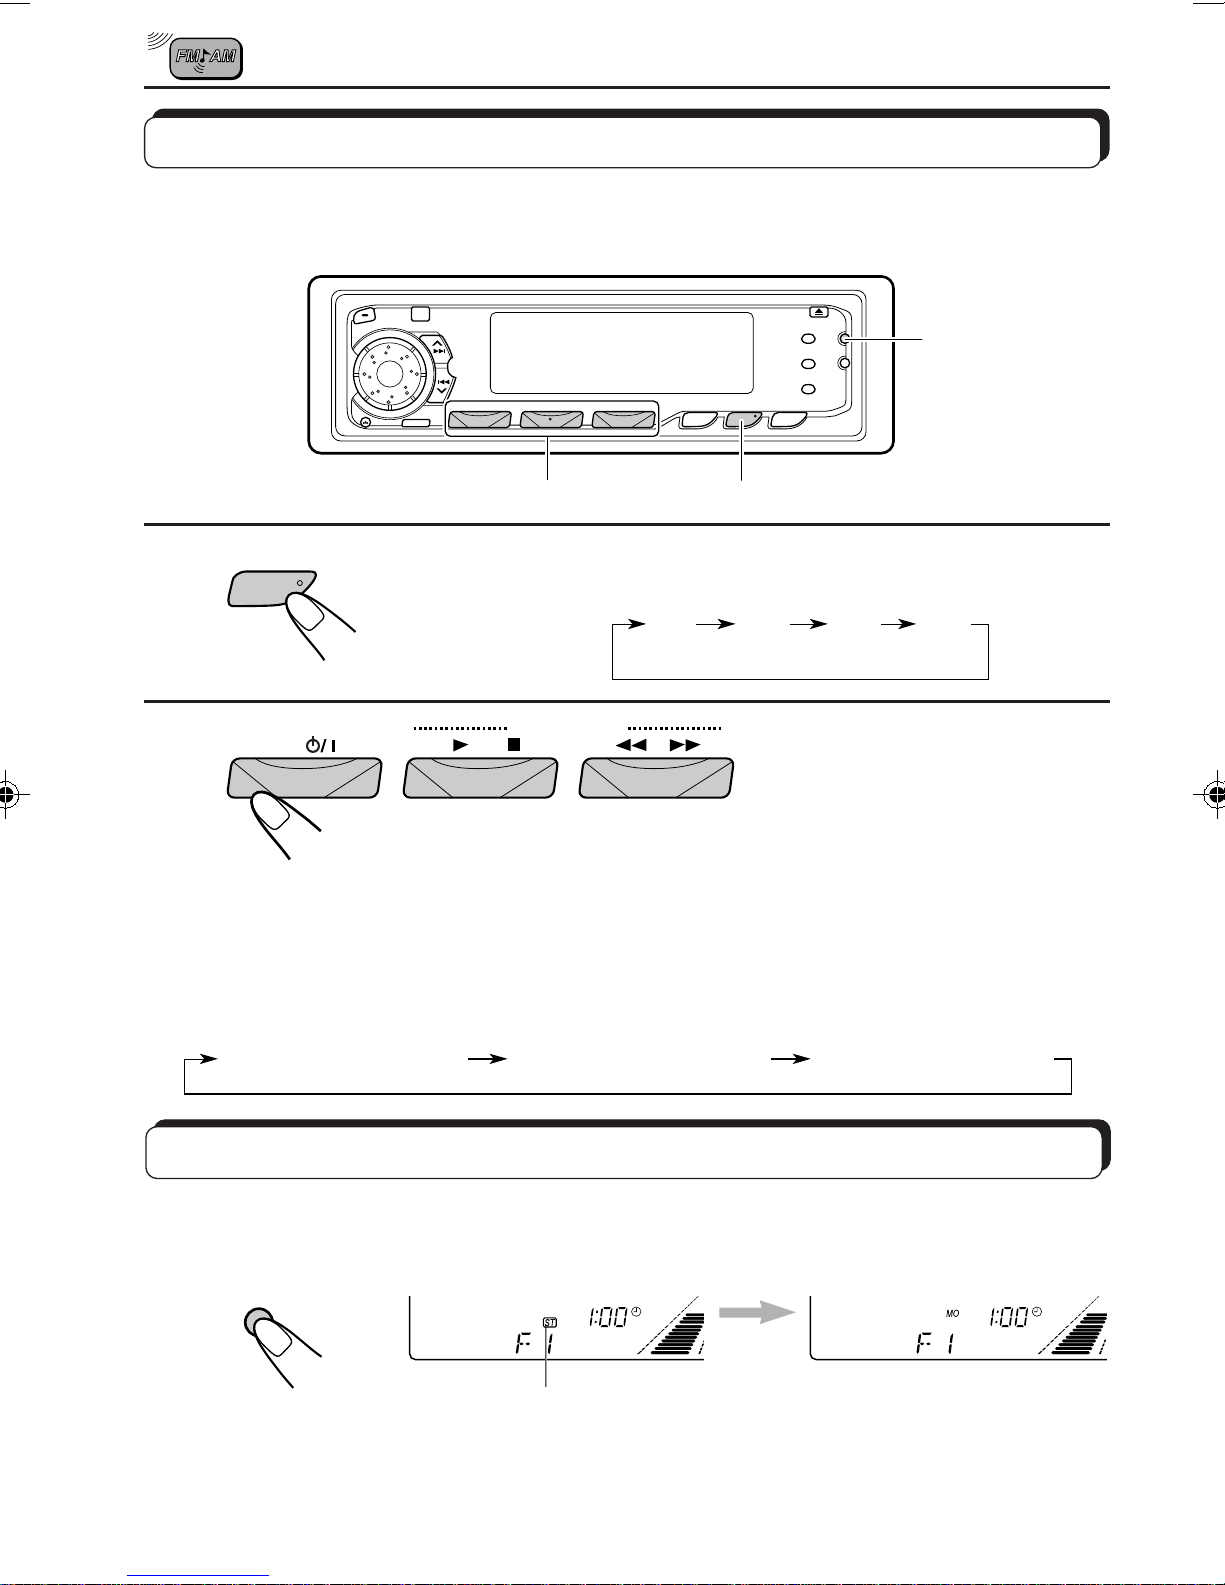
BASIC OPERATIONS ....................................................4
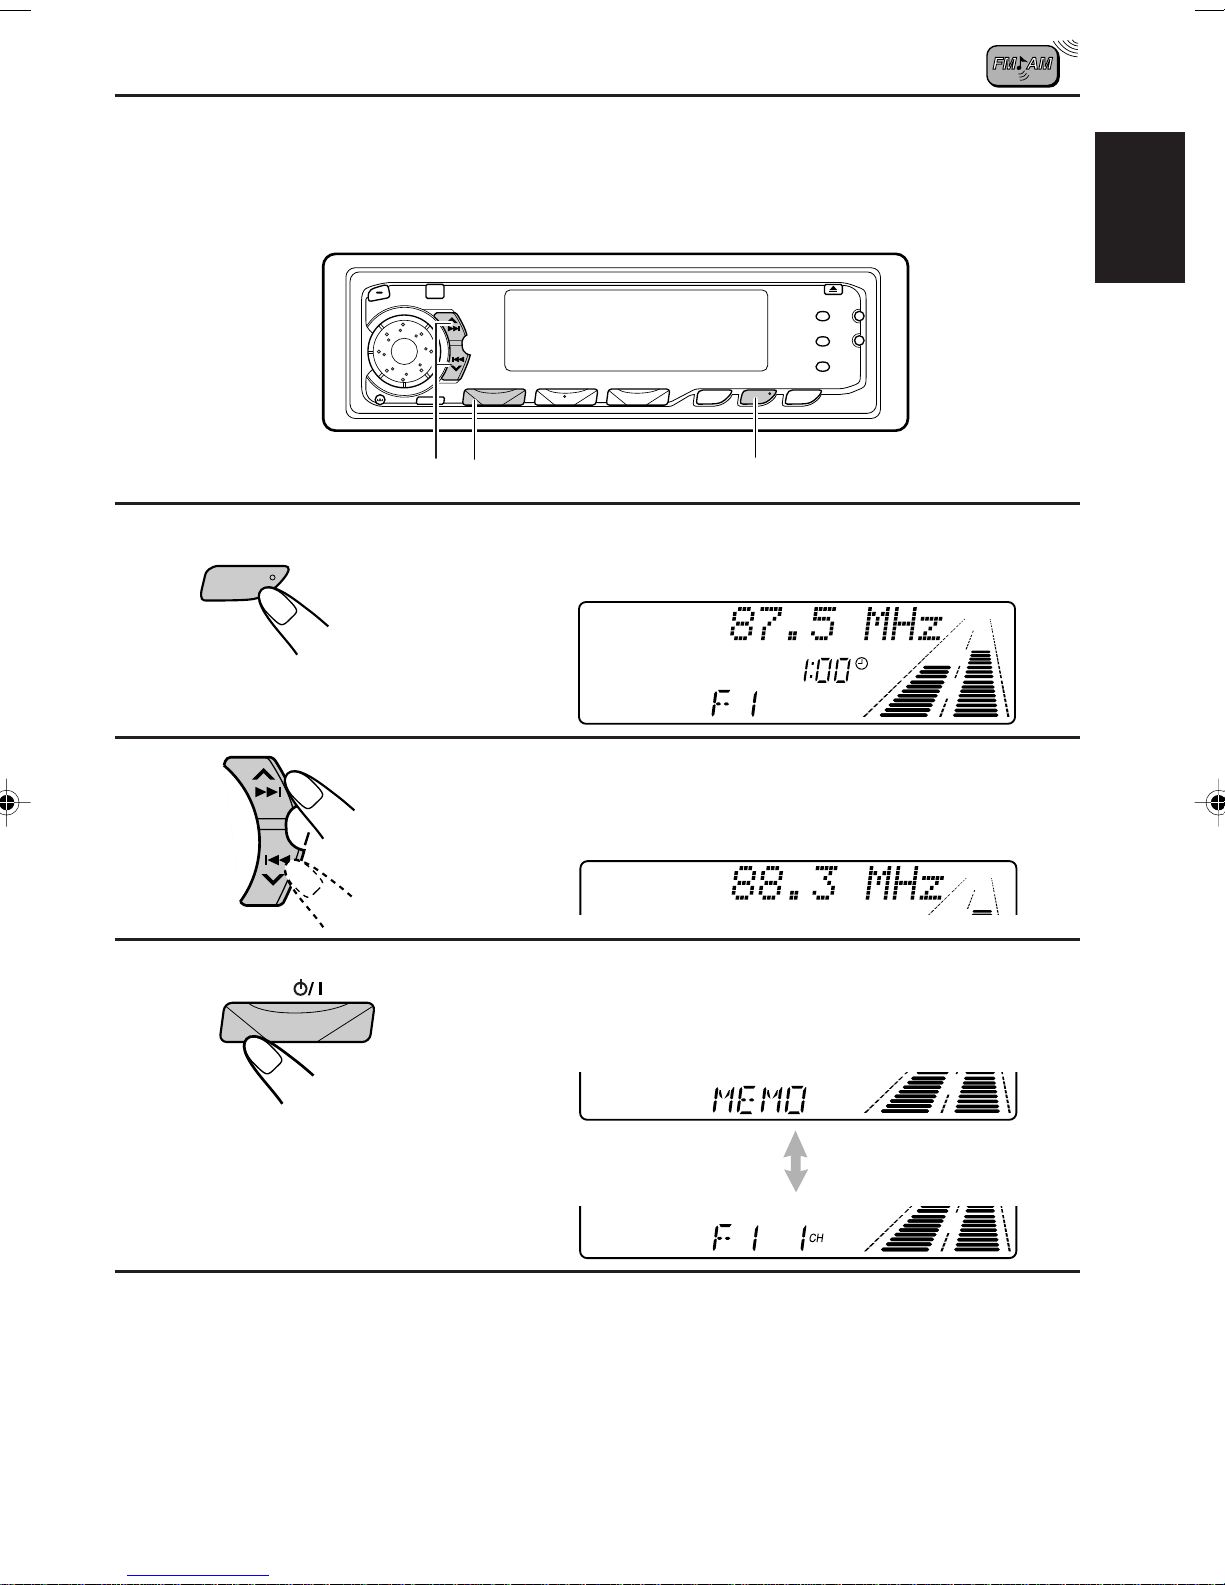
RADIO BASIC OPERATIONS .........................................5
Listening to the radio .....................................................................5
Storing stations in memory............................................................6
Tuning into a preset station ...........................................................8
Selecting FM reception sound .......................................................8
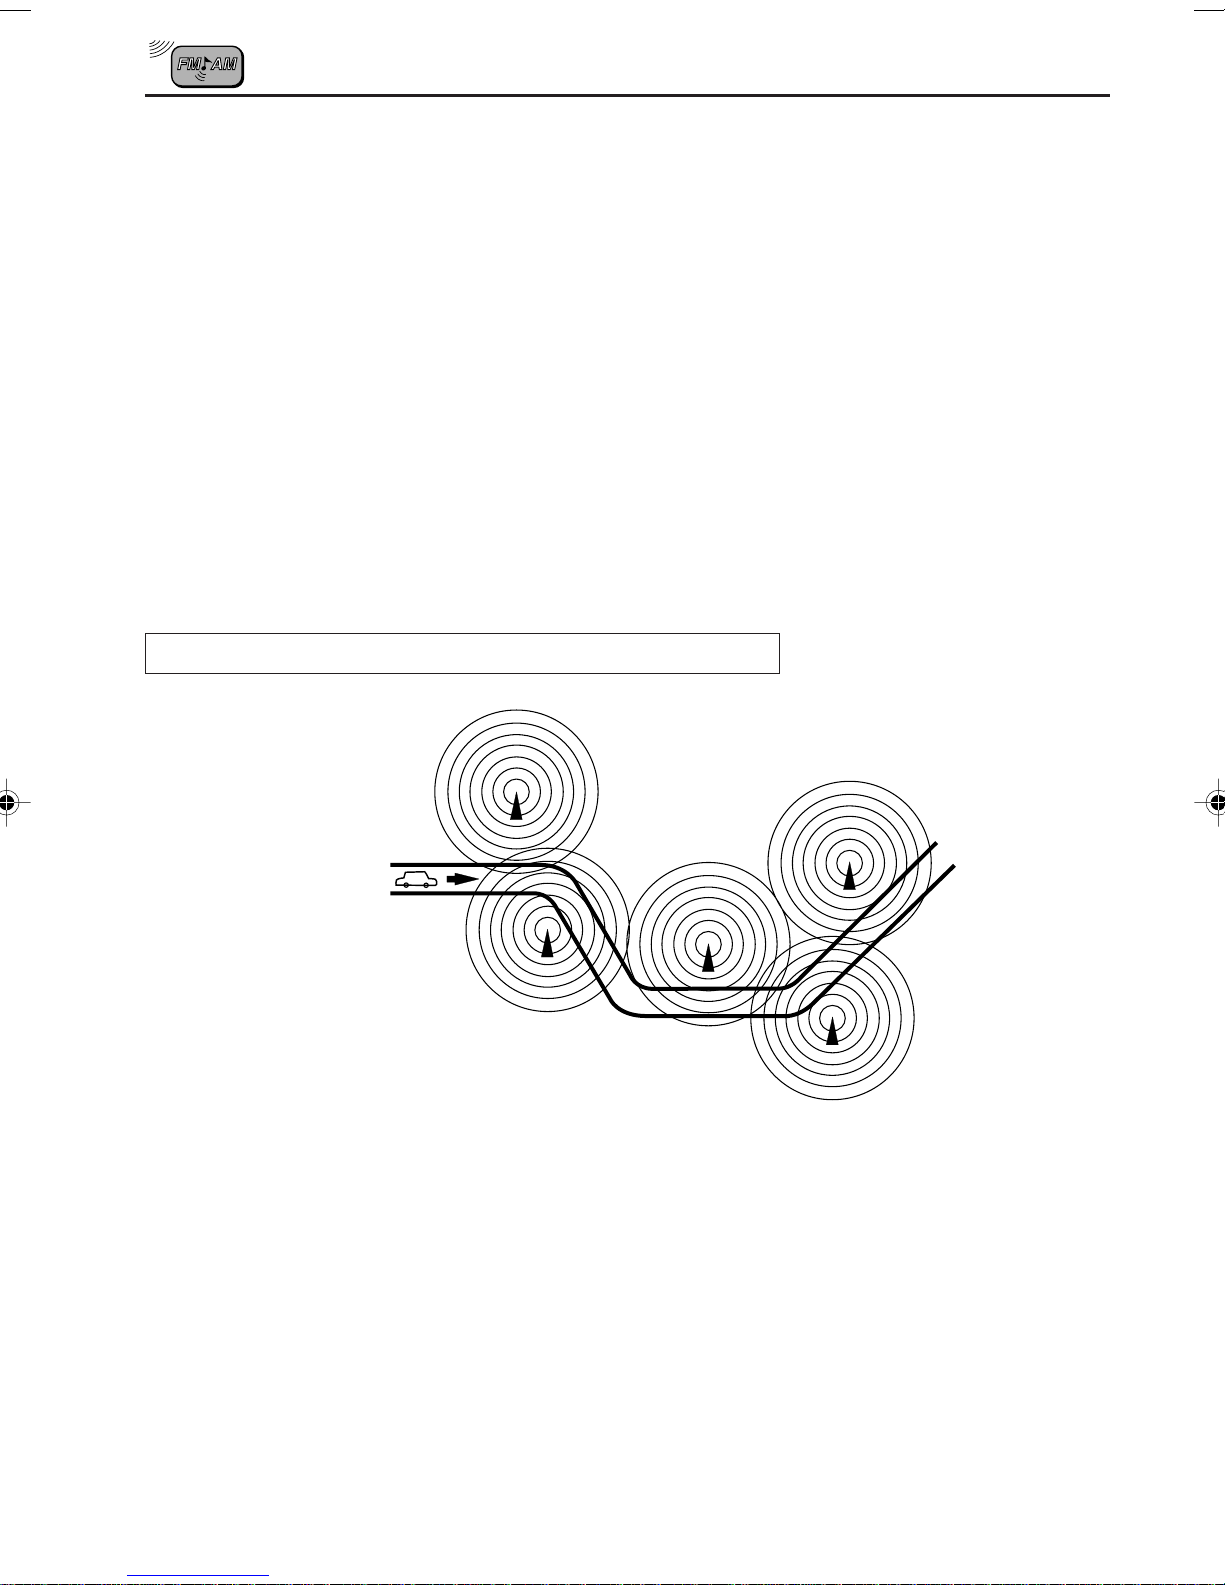
RDS OPERATIONS ....................................................... 9
What you can do with RDS EON ..................................................9
Other convenient RDS functions and adjustments....................15
CD OPERATIONS ....................................................... 18
Playing a CD .................................................................................18
Locating a track or a particular portion on a CD .....................19
Selecting CD playback modes......................................................20
Prohibiting CD ejection ...............................................................21
Playing the CD Text......................................................................22
SOUND ADJUSTMENTS .............................................23
Selecting preset sound modes ......................................................23
Adjusting the sound......................................................................24
Storing your own sound adjustments .........................................25
OTHER MAIN FUNCTIONS .........................................26
Setting the clock ............................................................................26
Changing the general settings (PSM) .........................................27
Assigning names to the sources ...................................................34
Detaching the control panel .........................................................37
REMOTE OPERATIONS...............................................38
Installing the batteries..................................................................38
Using the remote controller .........................................................39
CD CHANGER OPERATIONS ......................................40
Playing CDs ...................................................................................40
Selecting CD playback modes......................................................42
EXTERNAL COMPONENT OPERATIONS ..................... 43
Playing VCRs ................................................................................43
MAINTENANCE......................................................... 44
Handling CDs................................................................................44
TROUBLESHOOTING .................................................45
SPECIFICATIONS .......................................................46
EN02-04.KD-SX1000R[E]/1 98.6.3, 5:32 PM3

4
BASIC OPERATIONS
Note:
Whenyou use this unit for the
first time, set the built-in
clock correctly, see page 26.
1
Turn on the power.
2
Select the source.
To operate the tuner, see pages 5 – 17.
To operate the CD player, see pages 18 – 22.
To operate the CD changer, see pages 40 – 42.
To operate the external component connected to the
LINE IN plugs, see page 43.
3
Adjust the volume.
Volume level appears.
4
Adjust the sound as you want (see pages 23 – 25).
To drop the volume in a moment
Press briefly while listening to any source.“ATT” starts flashing on the display, and
the volume level will drop in a moment.
To resume the previous volume level, press the button briefly again.
To turn off the power
Press for more than 1 second.
1
23
/ I
ATT
Note on One-Touch Operation:
When you select a source in step 2 below, the power automatically comes on.
You do not have to press this button to turn on the power.
BANDEXT
TUNER C DCD-
CH
Volume level indicator
(see page 29).
EN02-04.KD-SX1000R[E]/1 98.6.3, 5:32 PM4

5
ENGLISH
RADIO BASIC OPERATIONS
Listening to the radio
1
Select the band (FM1, FM2, FM3 or AM).
You can select any one of FM1, FM2, and FM3 to listen to an
FM station.
2
Start searching a station.
When a station is received, searching stops.
To stop searching before a station is received, press the same button you have pressed
for searching.
To tune in a particular frequency without searching
1Press TUNER/BAND repeatedly to select the band (FM or AM).
2Press and hold ¢or 4until “M” starts flashing on the display.
Now you can manually change the frequency while “M” is flashing.
3Press ¢or 4repeatedly until the frequency you want is reached.
• If you hold down the button, the frequency keeps changing (in 50 kHz intervals for FM and
9 kHz intervals for AM-MW/LW) until you release the button.
To tune in only stations with strong signals
PresstheLO/RPT/INT (Local/Repeat/Intro) buttonso that“LOCALON”appears onthedisplay.
Each time you press the button, “LOCAL ON” and “LOCAL OFF” appears alternately.
Note:
This function only works while searching stations including SSM preset (see page 6).
Selected band appears.
F1
(FM1) F2
(FM2) F3
(FM3) AM
BAND
TUNER
To search stations
of lower
frequencies.
To search stations
of higher
frequencies.
SSM
LO/RPT
INT
1
2
EN05-17.KD-SX1000R[E]/1 98.6.3, 5:33 PM5

6
1
Select the FM band number (FM1,FM2 or
FM3) you want to store FM stations into.
2
Press and hold both buttons for more than
3 seconds.
Local FM stations with the strongest signals are searched and stored automatically in the
band number you have selected (FM1, FM2 or FM3).These stations are preset in the number
buttons — No. 1 (lowest frequency) to No. 6 (highest frequency).
When automatic preset is over, the station stored in number button 1 will be automatically
tuned in.
“SSM” appears, then disappears when
automatic preset is over.
Storing stations in memory
You can use one of the following two methods to store broadcasting stations in memory.
• Automatic preset of FM stations: SSM (Strong-station Sequential Memory)
• Manual preset of both FM and AM stations
FM station automatic preset: SSM
You can preset 6 local FM stations in each FM band (FM1,FM2 and FM3).
1
2
BAND
TUNER
F1
(FM1) F2
(FM2) F3
(FM3) AM
SSM
EN05-17.KD-SX1000R[E]/1 98.6.3, 5:33 PM6

7
ENGLISH
Preset number and “MEMO”
flashes alternately for a while.
Manual preset
You can preset up to 6 stations in each band (FM1,FM2,FM3 and AM) manually.
EXAMPLE: Storing an FM station of 88.3 MHz into the preset number 1 of the FM1 band
1
Select the FM1 band.
2
Tune into a station of 88.3 MHz.
See page 5 to tune into a station.
3
Press and hold the number button (in this
example, 1) for more than 2 second.
4
Repeat the above procedure to store other stations into other
preset numbers.
Notes:
• A previously preset station is erased when a new station is stored in the same preset number.
• Preset stations are erased when the power supply to the memory circuit is interrupted (for example,
during battery replacement). If this occurs, preset the stations again.
1
23
BAND
TUNER
SSM
12
VCR78
EN05-17.KD-SX1000R[E]/1 98.6.3, 5:33 PM7

8
Tuning into a preset station
You can easily tune into a preset station.
Remember that you must store stations first. If you have not stored them yet, see pages 6
and 7.
1
Select the band (FM1,FM2,FM3 or AM) you
want.
2
Selectthenumber(1–6)forthepresetstation
you want.
To change the display information while receiving an FM RDS
station
Press DISP.Each time you press the button, the display changes as follows:
BAND
TUNER
21
DISP
F1
(FM1) F2
(FM2) F3
(FM3) AM
123456
VCR789101112
VCR CONTROL
Station Frequency PS (Station name)PTY (Program type)
Selecting FM reception sound
When an FM stereo broadcast is hard to receive:
Press MO/RND (Mono/Random) while listening to an FM stereo broadcast. The sound you
hear becomes monaural but reception will be improved.
To restore the stereo effect, press the same button again.
Lights up when receiving an FM broadcast in stereo.
MO/RND
EN05-17.KD-SX1000R[E]/1 98.7.14, 9:52 AM8

9
ENGLISH
What you can do with RDS EON
RDS OPERATIONS
RDS (Radio Data System) allows FM stations to send an additional signal along with their
regular program signals. For example, the station send their station names, as well as
information about what type of program they broadcast, such as sports or music, etc.
Another advantage of RDS function is called “EON (Enhanced Other Networks).” The EON
indicator lights up while receiving an FM station with the EON data. By using the EON data
sent from a station, you can tune into a different station of a different network broadcasting
your favorite programme or traffic announcement while listening to another programme or to
another source such as CD.
By receiving the RDS signals, this unit can do the following:
• Tracing the same programme automatically (Network-tracking Reception)
• Standby Reception of TA (Traffic Announcement) or your favorite programme
• PTY (Program Type) search
• TA (Traffic Announcement) search
• And some other functions
Tracing the same programme automatically (Network-
Tracking Reception)
Whendrivinginan area whereFMreceptionisnot good, thetunerbuiltinthis unit automatically
tune in another RDS station, broadcasting the same programme with stronger signals. So,
you can continue to listen to the same programme in its finest reception, no matter where you
drive. (See illustration.)
Two types of the RDS signals are used to make Network-Tracking Reception work correctly
— PI (Programme Identification) and AF (alternative Frequency) data.
Without receiving these data correctly from the RDS station you are listening to, Network-
Tracking Reception will not operate.
To use Network-Tracking Reception, press and hold TP/RDS (Traffic
Programme/Radio Data System) for more than 1 second. Each time you
press and hold the button, Network-Tracking Reception modes change as
follows:
TP
RDS
Mode 1 Mode 2 Mode 3
EN05-17.KD-SX1000R[E]/1 98.6.3, 5:33 PM9

10
Mode 1 (AF:on / REG:off)
Network-Tracking is activated with Regionalization set to “off.”
Switches to another station within the same network when the receiving
signals from the current station become weak.
Note:
In this mode, the programme may differ from the one currently received.
Mode 2 (AF:on / REG:on)
Network-Tracking is activated with Regionalization set to “on.”
Switchestoanotherstation, within the same network,broadcastingthesame
programmewhen thereceivingsignalsfrom the current stationbecomeweak.
Mode 3 (AF:off / REG:off)
Network-Tracking is deactivated.
The same programme can be received on different frequencies.
Programme 1 broadcasting on
frequency B
Programme 1 broadcasting
on frequency A
Programme 1 broadcasting on frequency E
Programme 1 broadcasting on frequency D
Programme 1 broadcasting on frequency C
EN05-17.KD-SX1000R[E]/1 98.6.3, 5:33 PM10

11
ENGLISH
Using Standby Reception
Standby Reception allows the unit to switch temporarily to a programme of your favorite
programme (PTY: ProgrammeType) and Traffic Announcement (TA) from the current source
(another FM station, CD, and other connected components).
Note:
Standby Reception will not work if you are listening to an AM station.
TA Standby Reception
• When TP/RDS is pressed briefly in the FM mode, the TP indicator is lit
during reception of a TP station and the TA standby mode is engaged.
Note:
When the station being received is not a TP station, the TP indicator flashes. Press
¢or 4to engage the TA standby mode. “SEARCH” appears on the
display, andTP station search starts.When a TP station is tuned in, theTP indicator
is lit.
• If you are listening to a CD and wish to hear aTA broadcast, pressTP/RDS
to enter the TA standby mode. (The TP indicator lights up.)
If a TA programme starts broadcasting while theTA standby mode is active,
“TRAFFIC” appears and the FM mode is engaged.The volume increases to
the preset “TA VOLUME” level and the TA programme can be heard (see
page 15).
Note:
To deactivate the TA standby mode, press TP/RDS again.
PTY Standby Reception
• When PTY is briefly pressed in the FM mode, the PTY indicator is lit during
reception of a PTY station and the PTY standby mode is engaged. The
selected PTY name stored on page 12 flashes for 5 seconds.
Note:
When the station being received is not a PTY station, the PTY indicator flashes.
Press ¢or 4to engage the PTY standby mode. “SEARCH” appears on
the display, and PTY station search starts. When a PTY station is tuned in, the PTY
indicator is lit.
• If you are listening to a CD and wish to hear a selected PTY broadcast,
press PTY to enter the PTY standby mode.(The PTY indicator lights up.)
If the PTY starts broadcasting while the PTY standby mode is active, the
selected PTY name appears and the FM mode is engaged. The selected
PTY can then be heard.
Note:
To deactivate the PTY standby mode, press PTY again.
TP
RDS
PTY
EN05-17.KD-SX1000R[E]/1 98.6.5, 5:51 PM11

12
Selecting Your Favorite Programme for PTY Standby
Reception
You can select your favorite programme for PTY Standby Reception to store in memory.
When shipped from the factory, “NEWS” is stored as the programme type for PTY Standby
Reception.
1
Press and hold the button for more than 2
secondstocall up the PreferredSetting Mode
(PSM: see page 27).
2
Select “PTY STANDBY” if not shown on the
display.
3
Select one of twenty-nine PTY codes. (See
the table on page 17.)
Selected code name appears on the display and is stored
into memory.
4
Finish setting.
Searching Your Favorite Programme
You can search one of your 6 favorite programme types stored in memory.
When shipped from the factory, the following 6 programme types have been stored in the
number buttons (1 to 6).
SEL
SSM
SEL
3
1, 4
2
POP M
123456
CLASSICS AFFAIRS VARIED
ROCK M EASY M
EN05-17.KD-SX1000R[E]/1 98.6.3, 5:34 PM12

13
ENGLISH
To store your favorite programme types
1
Press and hold the button for more than 2
seconds to call up the Preferred Setting Mode
(PSM: see page 27).
2
Select “PTY SEARCH” if not shown on the
display.
3
Select one of twenty-nine PTY codes. (See the
table on page 17.)
Selected code name appears on the display.
• If the code already stored in memory is selected, it will flash
on the display.
4
Press and hold the number button for more than 2 seconds to
store the PTY code selected into the preset number you want.
PTY preset number appears, and selected code name and “MEMORY” alternates on
the display.
5
Finish setting.
SEL
3
1, 5
2
4
SSM
SEL
123456
VCR789101112
VCR CONTROL
EN05-17.KD-SX1000R[E]/1 98.6.3, 5:34 PM13

14
To search your favorite programme type
PTY
1
Press and hold the button for more than 1
second while listening to an FM station.
The last selected PTY code and preset number appear.
2
Select one of PTY codes stored in preset
number buttons (1 to 6).
PTY search for your favorite programme starts after 5
seconds.
• If there is a station broadcasting a programme of the same PTY code you selected, that
station is tuned in.
• If there is no station broadcasting a programme of the same PTY code you selected, the
station will not change.
Note:
In some areas, the PTY search will not work correctly.
2
1
123456
VCR789101112
VCR CONTROL
Ex. When “CLASSICS” is stored in preset number button 2.
EN05-17.KD-SX1000R[E]/1 98.6.3, 5:34 PM14

15
ENGLISH
Other convenient RDS functions and adjustments
Automatic selection of the station when using the number
buttons
Usually when you press the number button, the preset station is tuned in.
However, when the preset station is an RDS station, something different will happen. If the
signals from that preset station are not sufficient for good reception, this unit starts searching
anotherstationbroadcastingthesameprogrammeastheoriginalpreset stationisbroadcasting,
then if any station broadcasting the same programme is found, the station will be tuned in.
Changing the display mode while listening to an FM
station
You can change the initial indication on the display to either station name (PS) or to station
frequency, while listening to an FM RDS station.
• See also“Changing the general settings (PSM)” on page 27.
1. Press and hold SEL (select) for more than 2 seconds so that“PSM” appears on the lower
part of the display.
2. Select “DISPLAY MODE” with ¢or 4.
3. Set to the desired indication (either station name or station frequency) with the control dial.
Note:
By pressing DISP, you can also change the display while listening to an FM RDS station.
Each time you press the button, the display changes to show the following:
Setting the TA volume level
You can preset the volume level for TA Standby Reception. When a traffic programme is
received, the volume level automatically changes to the preset level.
• See also“Changing the general settings (PSM)” on page 27.
1. Press and hold SEL (select) for more than 2 seconds so that“PSM” appears on the lower
part of the display.
2. Select “TA VOLUME” with ¢or 4.
3. Set to the desired volume with the control dial.
Station Frequency PS (Station name)PTY (Program type)
EN05-17.KD-SX1000R[E]/1 98.7.14, 9:52 AM15

16
Automatic clock adjustment
When shipped from the factory, the clock built in this unit is set to be readjust automatically
using the CT (Clock Time) data in the RDS signal.
If you do not want to use automatic clock adjustment, follow the procedure below.
• See also “Changing the general settings (PSM)” on page 27.
1. Press and hold SEL (select) for more than 2 seconds so that“PSM” appears on the lower
part of the display.
2. Select “AUTO ADJUST” with ¢or 4.
3. Select “ADJUST OFF” by turning the control dial counterclockwise.
Now automatic clock adjustment is canceled.
To reactivate clock adjustment, repeat the same procedure and select “ADJUST ON” in
step 3 by turning the control dial clockwise.
Note:
It takes about 2 minutes to adjust the time using the CT data. So, you must tune to the station for more
than 2 minutes continuously; otherwise, the clock time will not be adjusted.
EN05-17.KD-SX1000R[E]/1 98.6.3, 5:34 PM16

17
ENGLISH
PTY codes
Descriptions of the PTY Codes
NEWS: News
AFFAIRS: Topical programmes
expanding on current news or
affairs
INFO: Programmes which impart
advice on a wide variety of
topics.
SPORT: Sport events
EDUCATE: Educational programmes
DRAMA: Radio plays
CULTURE: Programmes on national or
regional culture
SCIENCE: Programmes on natural
sciences and technology
VARIED: Other programmes like
comedies or ceremonies
POP M: Pop music
ROCK M: Rock music
EASY M: Easy-listening music
LIGHT M: Light music
CLASSICS: Classical music
OTHER M: Other music
WEATHER: Weather information
FINANCE: Reports on commerce,
trading, the Stock Market,
etc.
CHILDREN: Entertainment programmes
for children
SOCIAL: Programmes on social
activities
RELIGION: Programmes dealing with any
aspect of belief or faith, or the
nature of existence or ethics
PHONE IN: Programmes where people
can express their views either
by phone or in a public forum
TRAVEL: Programmes about travel
destinations, package tours,
and travel ideas and
opportunities
LEISURE: Programmes concerned with
recreational activities such as
gardening, cooking, fishing,
etc.
JAZZ: Jazz music
COUNTRY: Country music
NATION M: Current popular music from
another nation or region, in
that country’s language
OLDIES: Classic pop music
FOLK M: Folk music
DOCUMENT: Programmes dealing with
factual matters, presented in an
investigative style
No. No. Indications on
the display
Indications on
the display
116 WEATHER
217
NEWS
318
AFFAIRS
419
INFO
520
SPORT
621
EDUCATE
722
DRAMA
823
CULTURE
924
SCIENCE
10 25
VARIED
11 26
POP M
12 27
ROCK M
13 28
EASY M
LIGHT M
14 29
CLASSICS
15 OTHER M
FINANCE
CHILDREN
SOCIAL
RELIGION
PHONE IN
TRAVEL
LEISURE
JAZZ
COUNTRY
NATION M
OLDIES
FOLK M
DOCUMENT
EN05-17.KD-SX1000R[E]/1 98.6.3, 5:34 PM17

18
CD OPERATIONS
1
Open the control panel.
2
1. Insert a disc into the loading slot.
Th The unit turns on, draws a CD and starts playback
automatically.
2. Close the control panel by hand.
Playing a CD
1
Notes:
• When a CD is inserted up side down, “PLEASE EJECT” appears on the display.
When you open the control panel by pressing 0, the CD automatically ejects.
• When you play the CD Text, the disc title and performer appear on the display. Then the current track
and elapsed playing time appears on the display.
If a CD Text includes much text information, some may not appear on the display.
Elapsed
playing timeCurrent track
Total playing time of
the inserted disc
Total track number
of the inserted disc
To stop play and eject the CD
Press 0.
CD play stops, the control panel opens, then the CD automatically ejects from the loading slot.
If you change the source to AM/FM, CD changer or external component, the CD play also
stops (without ejecting the CD this time).
Notes:
• If the ejected disc is not removed for about 15 seconds, the disc is automatically inserted again into
the loading slot to protect it from dust. (CD play will not start this time.)
• You can eject the CD even when the unit is turned off.
To show the assigned name while the elapsed playing time
appears
Press DISP. Each time you press the button, elapsed playing time and assigned name (see
page 34) appears alternately on the display.
• See also “Playing the CD Text” (page 22) and “Selecting the scroll mode” (page 33).
Note on One-Touch Operation:
When a CD is already in the loading slot, pressing CD turns on the unit and starts playback
automatically.
EN18-22.KD-SX1000R[E]/1 98.6.3, 5:34 PM18

19
ENGLISH
To fast forward or reverse the track
Press and hold ¢, while playing a CD, to fast forward the track.
Press and hold 4, while playing a CD, to reverse the track.
To go to the next track or the previous track
Press¢briefly,whileplayinga CD,to go ahead to thebeginning ofthe
next track. Each time you press the button consecutively, the beginning of
the next track is located and played back.
Press 4briefly, while playing a CD, to go back to the beginning of the
current track. Each time you press the button consecutively, the beginning
of the previous track is located and played back.
To go to a particular track directly
Press the number button corresponding to the track number to start its
playback.
• To select a track number from 1 – 6:
Press 1 (7) – 6 (12) briefly.
• To select a track number from 7 – 12:
Press and hold 1 (7) – 6 (12) for more than 1 second.
Number buttons
Locating a track or a particular portion on a CD
SSM
SSM
¢
4
123456
VCR789101112
VCR CONTROL
EN18-22.KD-SX1000R[E]/1 98.6.3, 5:35 PM19

20
Selecting CD playback modes
To play back tracks at random (Random Play)
You can play back all tracks on the CD at random.
Each time you press MO/RND (Mono/Random) while playing a CD, CD
random play mode turns on and off alternately.
When the random mode is turned on, the RND indicator lights up on the
display and a track randomly selected starts playing.
To play back tracks repeatedly (Repeat Play)
You can play back the current track repeatedly.
Each time you press and hold LO/RPT/INT (Local/Repeat/Intro) for more
than 1 second while playing a CD, CD repeat play mode turns on and off
alternately.
When the repeat mode is turned on, the RPT indicator lights up on the
display.
MO/RND
Track number of the currently playing track
LO/RPT
INT
MO/RND
LO/RPT
INT
EN18-22.KD-SX1000R[E]/1 98.6.3, 5:35 PM20
Other manuals for KD-SX1000R
1
Table of contents
Other JVC Car Receiver manuals