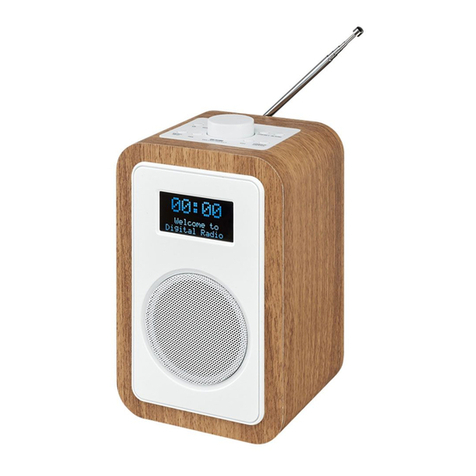
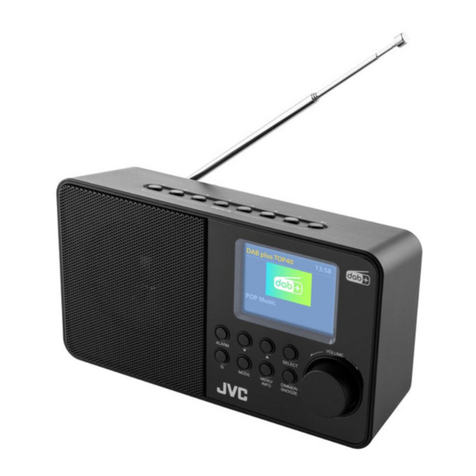
JVC RA-D58B User manual

JVE
lnstnuction
lntennet
Fladio
FA-D588
Manual
Bluetooth@ DAB
D,{; a6itarraiffi $iluetooth.


Safety Warnings
. Read all the instructions carefully before
using the unit and keep them for. frtrr"
reference.
. Retain the manual. lf you pass the unit
onto a third party make sure to include this
manual.
. Check that the voltage marked on the
rating label matches your mains voltage.
Damage
. Please inspectthe unitfordamageafter
unpacking.
. ?_: 1", con,tinue to operate the unit if you
are rn any doubt about it working normally,
or if it is damaged in any way _ switch off,
withdraw the mains plug and consult your
dealer.
Location of Unit
. The- unit must be placed on a flat stable
surtace and should not be subjected to
vi brations.
. Donot placethe unitonsloped orunstable
surfaces as the unit may faf f off or. tip ovui
. The mains socket must be located nearthe
unit and should be easily accessible.
. This unit is designed for indoor, domestic
use only.
Temperature
. 1l:id extreme degrees of temperature,
etther hot or cold. place the unit well away
from heat sources such as radiators or gall
electric fires.
. Avoid exposure to direct sunlight and other
sources of heat.
Naked Flames
. Neverplace anytype of candle ornaked
ilame on the top of or near the unit.
Moisture
. To reduce the risk offire, electric shock or
product damage, do not expose this unit
l: ,:if., i"':ly,:, drippins or sprashins.
r\o objects filled with liquids, such as
vases, should be placed on the unit. Do
not operate the unit with wet hands, near
water or other liquid.
. lf you spill any liquid into the unit, it can
cause serious damage. Switch it offat the
marns tmmediately. Withdraw the mains
prug and consult your dealer.
Ventilation
. To prevent the risk of electric shock or
fire hazard due to overheating, ensure
that curtains and other materials do not
obstruct the ventilation vents.
. A minimum distance of 5 cm around the
unit should be maintained to allow for
sufficient ventilation.
. Do not install or place thrs unit in a
bootcase, built_in cabinet or in another
confined space. Ensure the unit is well
ventilated.
Safety
. Always.disronnect the unit from the mains
supply before connecting / disconnectino
otner devices or moving the unit.
. Unplug the unit from the mains socket
during a lightning storm.
. ln the interests ofsafety and to avoid
unnecessary energy consumption,
never leave the unit switched on while
:.|:j::ld.d for lons periods of time, e.s.
overnrght, while on holiday or while oui of
the. house. Switch it off and ai..onne.i itru
mains plug from the mains socket.
Mains Adapter Cable
. Make sure the unit or unit stand is not
resting on top ofthe mains adapter cable,
as,the weight of the unit may damage the
cable and create a safety hazard.
Mains Adapter
. The mains adapter will continue to
oraw etectricity from the mains supply
wnen plugged in the mains sockei.'
ln the interests ofsafety and to avoid
unnecessary energy consumption, never
reave the adapter plugged in the mains
socket while unattended for long periods
of time. Disconnect the adapter trom the
power supply.
Use only power supplies listed in the
user tnstructions.
The mains plug is used as disconnect
oevrce, the disconnect device shall
remain readily operable.
lnterference
. Do not place the unit on or near appliances
wntcn may cause electromagnetic
lnterterence. lf you do, it may adversely
afiect the operating performance ofthe
,rJfi::. cause a distorted picture or
A
A
Supervision
. Children should be supervised to ensure
that they do not play with the unit.
. Never let anyone especially children push
anything into the holes, slots or any other
openings in the case - this could result in a
fatal electric shock.
AffiA
The lightning flash with arrowhead
symbol, within an equilateral
triangle, is intended to alert the
user to the presence of uninsulated
"dangerous voltage" within the
unit's enclosure that may be of
sufficient magnitude to constitute a
risk of electric shock.
The exclamation point within an
equilateral triangle is intended to
alert the user to the presence of
important operating and
maintenance (servicing)
instructions in the manual
accompanying the unit.
Service
. To reducethe riskof electricshock, do not
remove screws. The unit does not contain
any user-serviceable parts. Please leave all
maintenance work to qualified personnel.
. Do notopen anyfixed covers asthis may
expose dangerous voltages.
Maintenance
. Ensure to unplug the unit from the mains
socket before cleaning.
. Do not useanytypeof abrasive pad or
abrasive cleaning solutions as these may
damage the unit's surface.
. Do not use liquids to clean the unit.
To prevent the
spread of fire, keep
candles or other
open flames away
from this product
at all times.
This equipment is a Class ll or double
insulated electrical appliance. lt has
been designed in such a way that it
does not require a safety connection
to electrical earth.
- AC voltage:This symbol indicates that the
rated voltage marked with the symbol is AC
voltage.
: DC voltage: This symbol indicates that the
rated voltage marked with the symbol is DC
voltage.
6

Thank }fOU ior purchasing your new product.
We recommend that you spend some time reading this instruction manual
in order that you fully understand all the operational features.it offers. You
will also find some hints and tips to help you resolve any issues.
Read al'l the safety instructions carefully before use and keep this
instruction.manual for future reference.
Unpacking
Remove all items from the packaging. Retain the packaging. lf you dispose of it please do so
according to local regulations.
The following items are included:
Main Unit
Mains Adapter lnstruction Manual
lf you require additional assistance:
For UK please call our UK Call Centre on 0344 561 1 234.
For lreland, please call our lreland Call Center on 1 890 8f8 575.
r-l
tLJ,n
ff//\\
o o o o{{ l)
o 6 b 6\ ll
'";- ''" -' -:r:: \\ /
o 9)*\:

Product 9,y--e-,t-v.i9*ry-,:r,ri:,:.:,ii:rr:i:,;.r,!..:.::ir::r,r.:,,:,,
FrontView
1. DisPlaY
2. Speaker
3. 0 On/StandbY Button
4. SLEEP/SNOOZE Button
5. -VOLUME+ Dial
6. Mode Button
RearView
1. DAB / FM Aerial
2. NETWORK Socket
3. Qsocket
8 910 11 12
7. INFO Button
8. MENU Button
9. PRESET Button
1 0. l{< /Dl SCROLL/SELECT Dial
'l 1. )lI/PAIR Button
12. BACKButton
4. AUX lN Socket
5. USB5V:lASocket
6. DClN@Socket
34 561

Connections
Using the AUX Connection
ConnecttheAUXlNsocketattherearoftheunittothelineoutputsocketsontheauxiliary
equipment using a 3.5 rn* ;;';t;;ereo audio cable (not included)' as illustrated'
AuxiliarY
Equipment
o t-----_l @
o I r--------------l l'"
Rear ofthe Unit o
g
Ell 6'd e6"
.t:'T$i"t'il ncruded)
Using EarPhones
Turn down the volume before connecting the earphones' Slowly raise the volume with the
earphones on until you t"t;;;;;'iei uotume' when earphones are connected' the
speaker is automaticallY muted'
Rear of the Unit
:rl;4.:rtL....,t,r,,:r:..iii..::i...:a..r.,:i, ::::ii::tir"..:i'.::::i:r"r::':i'r::r':i..:g'ii:::'i:::':::
''L.tiiq-te.mexbosrratouua*uiiii;"i;'i;n";;naimusaiiri;tesiioivi:ioafttoiir6voluniewlien' 'l
uiin-g "urpnon"t, "specially for extended periods'

Charging from the USB Charging port
The USB 5V-- 1A socket is designed only for charging mobile devices (e.g. Mp3 player,
mobile phone, etc.). rt suppries sv oc at a .r't.rgin j.u"rrunt of up to r 000 mA (1 A).
Use a USB cabre (not incruded) to connect mobile device to the usB 5v= 1A socket of the
unit and the mobile device will start charging.
Rear of the Main Unit
@ nEo
ffia ue#
10

9e.n n 9*5,!1tg.,,!9.,! n l er n e t
lHrff,:rr be connected to a locar area network (LAN) via the network port at the rear
Wired network
connect the NETWoRK socket on the unit to the corresponding port on your Router using
a commercially available LAN or Ethernet cable (CAT5 or better with RJ45 connector).
using a wired network provides a better performance than a wireress connection because
lnl:L.L".1 devices connect directty to ir," n",*ort una are not sublect,o ,.!"io ir"qru".y
EI
1 \T
-ta- -t'-
Rear of the Main Unit
%:
@ L__illo
t]g l v
^ llEll o ueai
To the Network Socket
!-l
nii:*ffi11ffi Jio;.l!*ii;j6n&!&$ u,*.ir,,!qooe*jii6ii:r;*iaar,,.;
when plugging or unprugging the LAN cabre, hord the prug portion 01 the cabre. when unprugginq,
do not putt on the LAN cabte but unprrg ,rhir" pr;riing-Jl"*l"on in" ,o.*.
Do not connect a modular phone cable to the network socket.
;ffi$""J:ffi:[:ii1i"ili':il':ili,":,x,":J;,:5ffi:""i?:"n:;i"T;[1;::il:i:*u.t on, of I
lnternet
Wired Router
+
it E EmEm lt
"T__-_ru
11
Ethernet cable (not included)

Wireless network
ln the example configuration for a wireless connection below the unit would be able to
access content from your computer connected to the same wireless network.
The network configuration and connection method may vary depending on the equipment
in use and the network environment.
Main Unit
Wireless Router
lnternet
A
.:]]],;:].,,.1iii;:ijiiiii;niiibl,hGlcgnrieaedtoaiiindalcinemodemdirectly.Arouteroramodeminidfpii6ted
with a router has to be used.
. Since there are various connection configurations, please follow the specifications and instructions of l
your telecommunication carrier, Internet service providet and router setting guidebook.
_iL
rE-EE-ry1
E
/ \T
\^ )-
tc

Turning the Radio On for the FirstTime
Connecting to the Mains SUPPIY
. Connecting the unit to any other power source may damage the unit' Unwind the
mains adapter cable to its full length. Connect the end of the unit and then connect the
mains adapter to the mains socket. Make sure the mains adapter is firmly inserted into
the mains socket.The unit is now connected and ready to use.
. To switch the unit off completely, remove the mains plug from the mains socket'
Rear of the Main Unit
lgij!.a!.5s[ttR,.,,**.*,'',,,,,,,,,.
^'''-'-
ttitiinneilid,b'efuietindnnqilinti.tcrlihtt:irlail15lipol,!6i:llti:ket:r:::,:i:
Make'suii'tti,e,m;iirs::iifug is,firiirty inieited intctih€'rirairitsiidiet.
To switih the,unit off completely, remove the mains plug from the mains socket-
Please turn the unit off completely to save energy when not in use.
To the mains socket
Etr
a
. Extend the aerial before switching
to DAB mode for the first time.
This will ensure that the initial scan
captures all stations in your area.
ii+ -r. -"
IHJ 6'd B?
ba:iet tio differint angles for best r-ll
,AtL___ll ,A
// \ ----,vc // \
{l l)ooooll l)
\ ll66bb\ ll
\/O-O'\/

conneS,!!19,!gf'hg.!Rl9ll.ret,ForTheFilqtf !--g.,..-.,
1. When your radio is connected to power, the display will
show "JVC" logo for about l 5 seconds, and then the unit
will switch into Standby mode. press the 0 On/Standby
button to switch on the unit.
You now have to decide if you want to connect your radio to
the internet now or later. lfyou want to connect nory then
select YES in the'Setup wizard,or if later then select NO. To get
the most out of your radio we recommend you select yES and
connect it to the internet now.
2. The Setup wizard menu will now appear on the screen. The
word'YES' wlll be highlighted, press the t( / Dt SCROLL/
SELECT dialto confirm.
The Date/Time screen will now appear you can choose to
display the time using a l2 hour clock or 24 hour clock.
3. Turn l<</>}ISCROLL/SELECTdial to select 12 or 24, and
then press the l<K / Dt SCROTL/SEIECT dial to confirm.
The Auto update screen will now appear, here you can choose
where you would like the time and date to be updated from.
4. Turn t<< / >>t SCROLL/SELECT dial to select Update from
DAB, Update from FM or Update from network (the
internet). Then press the lt{ /Dt SCROLL/SELECTdial to
confirm.
lf you chose to'Update from networkl the Set timezone
screen will now appear, here you can choose your time zone.
lf you chose'Update from DAB, or,Update fiom FMi go to
step 7.
5. Turn t(/DISCROIL/SEIECT dial to select your desired
time zone. Then press the t<< / >>t SCROLL/SELECT dial to
confirm.
JVE

The Daylight saving screen will now appear' here you c
.f.r"*"if ,f't" set daylight saving oN or OFF'
6. Turn the l<< / >|l SCROLL/SELECT dial to select ON or OFF'
Then press the l<< / DI SCROLLiSELECT dial to confirm'
7. Select YES and then press the l( / )>l SCROLL/SELECT dial
to keeP network connected'
The display will show "Please select Wlan regionl'and
then the Wlan region menu' Turn the l( / Dl SCROLL/
seieiioi.rtoselecttheregion'andthenpressthel{{i
>>l SCROLL/SELECT dial to confirm'
Your radio will now scan for your wirelesl nltwolf:lhr]s maV
take a few seconds then a list of allthe wireless networks will
appear on the screen'
8. Turn the l<< / >>l SCROLL/SELECT dial to select-your
wireless network Then press the lt{ / Dl SCROLL/SELECT
dial to confirm'
To connect your radio to your router using the WPS button follow the instructions
below (con#i''i iting tn" wps button on yout Router)'
OR
To connect your radio to your router using yourpassword follow the instructions
on the next pan" i;;;;;' itiiiiou' wiretess Network Password)'
Connecting using the WPS button on your router
ConnectingusingtheWPS(Wi-FiProtectedSetup)buttononyourrouterisaquickandeasy
;.;;;"il. y-our radio without having to type in a password'
lf your router has a WPS button you will notice [WPS] at the front of your network name'
o
lf vou don't see your wireless network scroll down to rescan and try
.# ;;;;;;i;;eed to move vour radio closer to vour wireless
router, the ( lo(er the better'
9. Turn thel<</>>ISGROLL/SELECT dial to select'Push
button'then Press OK'
You will now see a message on the screen telling
you to press the WPS button on your router'
15

10. Press the WPS button on your router. Check your routers
instruction manual if you are unsure which button is the
WPS button.
Best connection speed as
close as possible Maximum distance 5 mPress the WPS
button
}A
\_:{;3
Wireless Router
Connection using your wireless network password
1 1. Press the t<< /Dt SCROLT/SELECT dial to confirm. your
radio will now connect to your router, this may take a few
s.econds.The message,Setup wizard compleied,will be
displayed when your radio has connected, press the l+< /
Dl SCROTL/SELECT dial to exit the menu.
lf your router hasn,t got a WpS button you will now be asked to
enter your wireless network password, or you can select SKlp
WPS which will also take you to the password screen.
'12. Turn the t<< I >>l SCROII/SELECT dial to select each letter/
number of your password. Then press the tt( / Dl SCROLL/
SETECT dial to enter the selected letter/number.
I 3. When you have entered your password, the l<K / >>l
SCROII/SELECT dial to select OK on the right of the
screen.Then press the t( /Dt SCROIL/SEIECT dial to
confirm. The screen will show the words,please wait
connecting'for a few seconds. Then you will see the
message 'Setup wizard completedi press the l( / >>t
SCROLL/SEtECT dial to exit.
Your radio is now connected to the internet.
16

Basic on
Switching ON/OFF
press 0 button on the unit to switch the unit between the On and Standby mode.
@
i"nlou" tr," ,ains plug from the mains socket if you want to switch the unit off completely. I
Selecting Modes
Press MODE button on the unit, and then turn the l{< / }}l sCROLL/SELECT dial to switch
between lnternet radio, Music player, DAB radio, FM radio, Bluetooth Audio and AUX
in mode. Press the lt( / Dl SCROLL/SELECT dial to confirm'
o
r:',::,r,tii iiiiafiiieiriadiir;:tiilaraia,plriFr6A6lradio;Bluetooth Audlo and AUX lnrmode;the unitwill':
automitically go to Standby mode after 1 5 minutes if it has no audio playback. Press standby button to I
resume.
Adjusting theVolume
Turn -VOLUME+ dial to adjust the volume.
Automatically Setting the Clock
The clock can be set and updated automatically if the unit receives lnternet / DAB / FM
signals in your location. ln order for the clock to synchronise to the current local time you
must leave it on lnternet / DAB / FM station for a short period of time. You can also choose
how you would like to keep the clock up to date from lnternet, DAB or FM radio signals. Go
to Menu - System Settings - Time/Date - Auto Update'

System Settings
Equaliser
The unit support a variety of equalizers and sound effects.
1 . Press MENU button, and then turn the rt{ / }>r scRotl/sEtEcr diar to serect system
settings. Press the t{{ / Dt SCROLL/SEIECT dial to confirm.
2. Turnther{</>)r scRotl/sELEcrdial toselectEqualiser.pressthel(/)>lscRoLL/
SELECT to confirm.
3. Turn the l<< / >>l scRoLL/sELEcr diar to serect a profire through Frat, crassic, Rock,
Pop and tazz, and then press the r<K / }}r scRoLL/sEtECT dia I to confi rm.
Network Settings
The Network settings menu has allthe setting for connecting your radio to yourwi_Fi. so if
you have to re-connect your radio at any time go into the Network settings menu.
SSID - select the desire wireless network.
Rescan - Scan for available networks.
Wired * select wired network.
Manual config - select wired/wireless network with DHCp enable/
disable.
Press the WPS button on the modem device that you *irh to
connect with. Press the t<< i Dt SCROLL/SELECT dial to continue.
Display the ,utting on th" ,nit.
Select a region of your choice.
Select wired/wireless network with DHCp enable/disable.
View the connected network.
To delete the connected network memory in Network profile.

Setting the Time and Date
l.PressMENUbutton,andthenturnthel(/DlSCRoLL/SELECTdialtoselectSystem
,"i ingr. Press the l{'i / }>l SCROLL/SELECT dial to confirm'
2.Turnthel<</DlscRoLL/sELEcTdialtoselectTime/Date.Pressthel{(/)>lscRoLL/
SELECT dial to confirm'
3.Turnthel<</DISCRoLL/SELECTdialtoselectoptions,andthenpressthel<</>>l
SCROLL/SELECT dial to confirm the setting'
lnactive StandbY
Use the Inactive Standby to turn offthe unit after a certain time in play mode'
1 . Press MENU button, and then turn the l({ / Dl SCRoLL/SELECT dial to select System
' settings. Press the l( / Dl SCROLL/SELECT to confirm'
2.Turnthel.(/>>ISCRoLL/SELECTdialtoselectlnactiveStandby.Pressthel<</>>l
SCROLL/SELECT dial to confi rm'
3. Turn the l<< / }}l SCROLL/SELECT dial to select between Off' 2 hours' 4 hours' 5
hours and 6 hours. Press the lt{ / Dl SCROLL/SELECT to confirm'
Language
This feature enables you to change menu language'
l.PressMENUbutton,andthenturnthel(/DlscRoLL/sELE€TdialtoSelectsystem
settings. Press the l{( / }>l SCROLL/SELECT dial to confirm'
2.Turnthel<K/>>lScRoLL/sELEcTdialtoselectLanguage.Pressthel(/DlscRoLL/
SELECT dial to confirm.
3. Turn the l( / )>l sCRoLL/SELECT to select a language, and then press the l<< / >>l
SCROLL/SELECT dial to confirm'
Here you can manually set the time and date'
lno*" ho* Vou want the time to be automatically up-dated'
Upl"a" tt.rn DAB / Update from FM / Update from Network / No
Update
Set 12 Hour or 24 Hour disPlaY
s" - ' --t".t
u tir'r.'" -* (only available when Auto update from Network
is on.)
Select daylight savings. (Only available when Auto update from
Network is on.)
19

Factory Reset
lf you want to delete all your stations and settings, you can return your radio back to the
default setting by running a Factory Reset.
I . Press MENU button, and then turn the t{{ / )>l scRoLL/sELECT dial to select system
settings. Press the t{{ / )>t SCROTL/SELECT dial to confirm.
2. Turn the l<< / }}r scRoLL/sELEcr dial to select Factory reset. press the r<K / )>r
SCROLL/SELECT dial to confirm.
3. Turn the I<< / >>! scRoLL/sELEcr dial to select yes. press the t({ / >>l scRoLt/sELEcr
dial to confirm.
4. The display will show the "JVC" logo, and then the unit will swltch into standby mode
after factory reset is done.
e
After the system reset, all the tuned stations, preset stations will be erased.
Software update
.l . Press MENU button, and then turn the tt( / Dt scRoLL/sELECT dial to select system
settings. Press the t( / )>t SCROTL/SELE€T dial to confirm.
2. Turn the l<K / >>t scRoLL/sELEcr dial to select software update. press the t( / Dr
SCROLL/SELECT dial to confirm.
3. Turn the t<.( / >>t scRoLL/sELEcr dial to select Auto-check setting or check now.
Press the l( / >}l SCROLL/SELECT dial to confirm.
Before downloading software, ensure that the radio is plugged into a stable mains power connection.
lnterrupting the mains supply during software download can lead to functional disiurbances and/or
damaqe to the unit!
Setup wizard
The setup wizard is available in the system settings section; you
can run through this to configure settings for date/time and
network. Once this has finished, your radio is ready to use.
o
It is not necessary to run through the setup wizard if a wired neiwork
is being used.
20
Other manuals for RA-D58B
1
Table of contents
Other JVC Radio manuals

JVC
JVC KT-HDP1 - HD Radio Tuner User manual

JVC
JVC KT-HD300 - Add-On HD Radio Tuner Works User manual

JVC
JVC RD-D70 User manual

JVC
JVC RA-E431B User manual

JVC
JVC RA-E731B-DAB User manual

JVC
JVC RA-E411B User manual

JVC
JVC NIVICO 8500E User manual

JVC
JVC RA-E611B-DAB User manual

JVC
JVC Sirius KT-SR3000 User manual

JVC
JVC FR-DS100 User manual