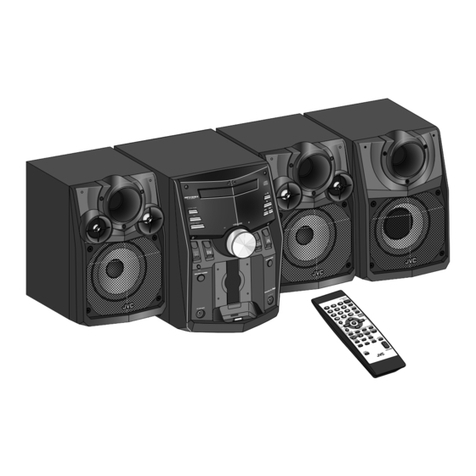
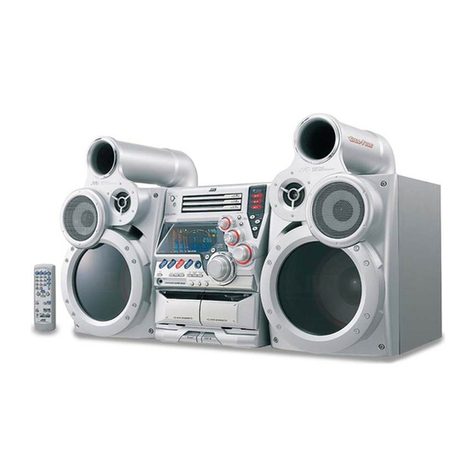
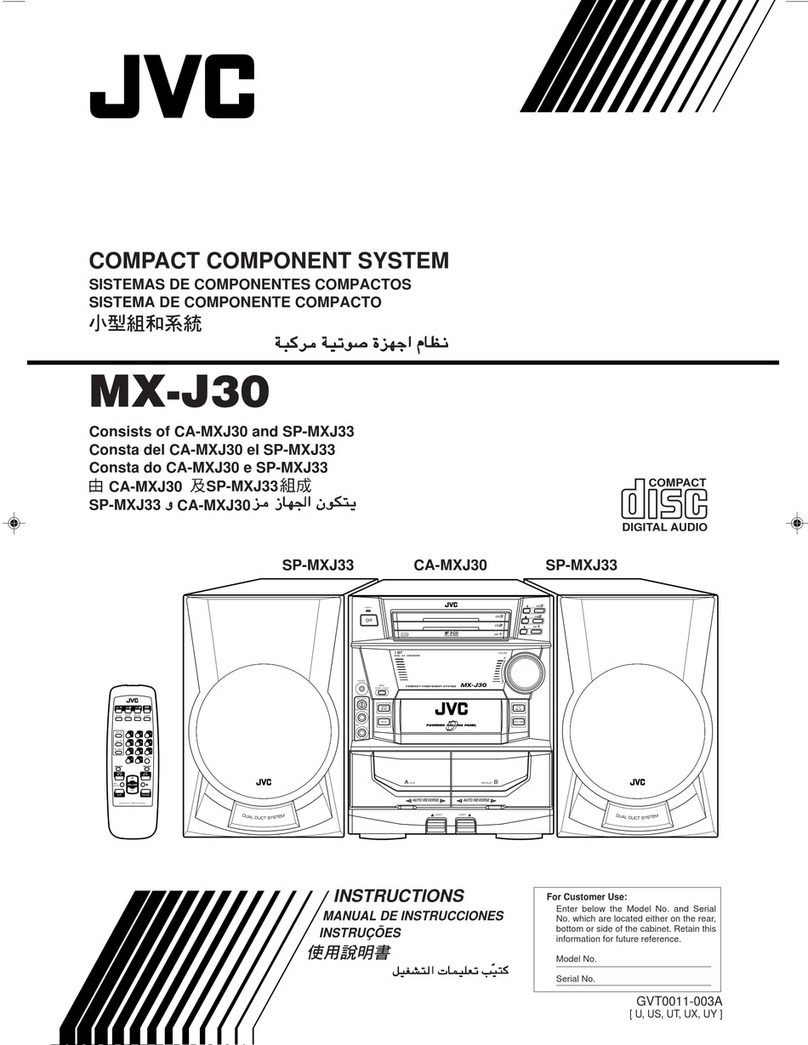
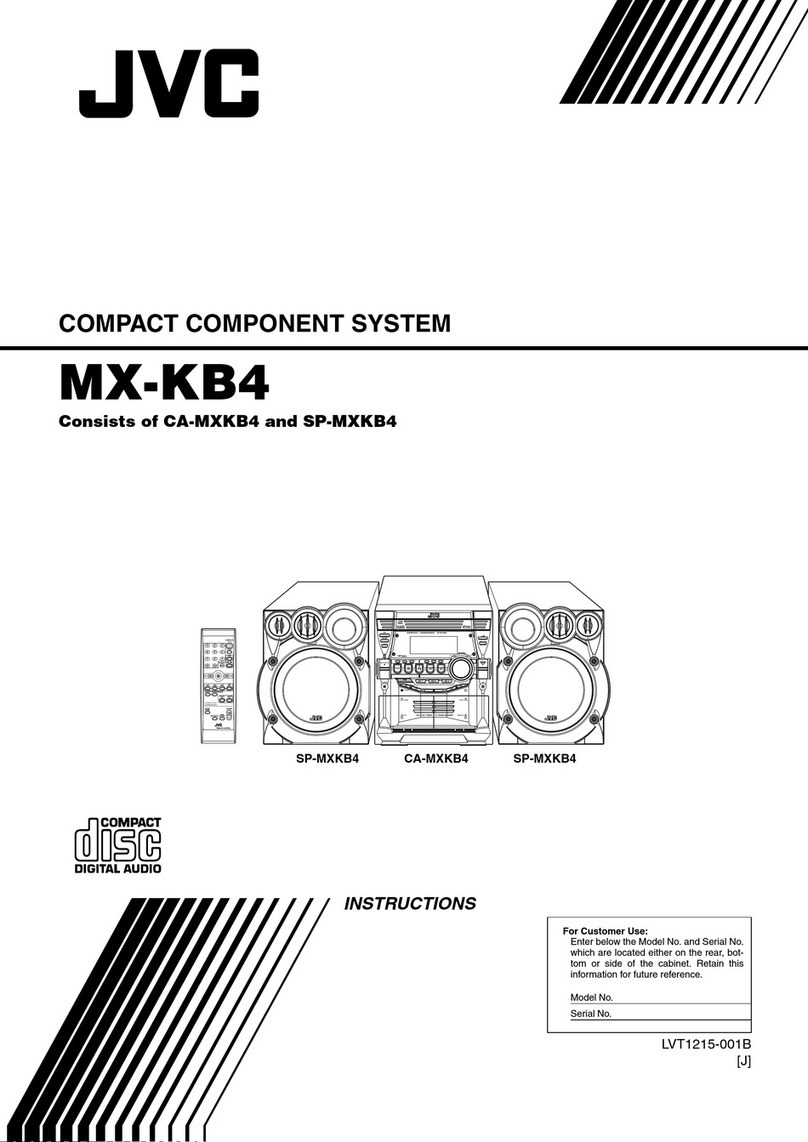
JVC MX-C55J User manual

SERVICE MANUAL
COPYRIGHT © 2006 Victor Company of Japan, Limited No.MB508
2006/6
COMPACT COMPONENT SYSTEM
MB50820066
MX-C55J,MX-C55C
Lead free solder used in the board (material : Sn-Ag-Cu, melting point : 219 Centigrade)
TABLE OF CONTENTS
1 PRECAUTION. . . . . . . . . . . . . . . . . . . . . . . . . . . . . . . . . . . . . . . . . . . . . . . . . . . . . . . . . . . . . . . . . . . . . . . . . 1-3
2 SPECIFIC SERVICE INSTRUCTIONS . . . . . . . . . . . . . . . . . . . . . . . . . . . . . . . . . . . . . . . . . . . . . . . . . . . . . . 1-5
3 DISASSEMBLY . . . . . . . . . . . . . . . . . . . . . . . . . . . . . . . . . . . . . . . . . . . . . . . . . . . . . . . . . . . . . . . . . . . . . . . 1-6
4 ADJUSTMENT . . . . . . . . . . . . . . . . . . . . . . . . . . . . . . . . . . . . . . . . . . . . . . . . . . . . . . . . . . . . . . . . . . . . . . . 1-10
5 TROUBLESHOOTING . . . . . . . . . . . . . . . . . . . . . . . . . . . . . . . . . . . . . . . . . . . . . . . . . . . . . . . . . . . . . . . . . 1-11
ECO DISC SKIP
SP-MXC55 SP-MXC55CA-MXC55

1-2 (No.MB508)
SPECIFICATION
Design and specifications are subject to change without notice.
Amplifier section
CA-MXC55
Output Power SUBWOOFERS 170 W per channel, min. RMS, driven into 3 Ωat
63 Hz with no more than 10% total harmonic distor-
tion
MAIN SPEAKERS 80 W per channel, min. RMS, driven into 6 Ωat 1
kHz with no more than 10% total harmonic distor-
tion
Audio input sensitivity/Impedance
(at 1 kHz, measured at MAIN SPEAKERS)
AUX 400 mV/47 kΩ
USB USB Version 1.1
Speakers/Impedance Subwoofers 3 Ω- 6 Ω
Main speakers 6 Ω- 16 Ω
Tuner FM tuning range 87.50 MHz - 108.00 MHz
AM tuning range 530 kHz - 1 710 kHz
CD player CD Capacity 3 CDs
Dynamic range 85 dB
Signal-to-noise ratio 85 dB
General Power requirement AC 120 V , 60 Hz
Power consumption 80 W /136 VA (at operation)
7.3 W (on standby)
1 W (in ECO mode)
Dimensions (approx.) 270 mm ×317 mm ×402 mm (W/H/D)
(10 11/16 in. ×12 1/2 in. ×15 7/8 in.)
Mass (approx.) 5.9 kg (13 lbs)
Speaker section
SP-MXC55
Type 3-way bass-reflex type
Speaker units Subwoofer 16 cm (6 5/16 in.) cone ×1
Main Woofer 10 cm (3 15/16 in.) cone ×1
Tweeter 5 cm (2 in.) cone ×1
Power handling capacity Subwoofer 170 W
Main speaker 80 W
Impedance Subwoofer 3 Ω
Main speaker 6 Ω
Frequency range Subwoofer 30 Hz - 1 000 Hz
Main speaker 100 Hz - 20 000 Hz
Sound pressure level Subwoofer 74 dB/W·m
Main speaker 81 dB/W·m
Dimensions (approx.) 220 mm ×435 mm ×316 mm (W/H/D)
(8 11/16 in. ×17 13/16 in. ×12 1/2 in.)
Mass (approx.) 5.7 kg (12.6 lbs) each

(No.MB508)1-3
SECTION 1
PRECAUTION
1.1 Safety Precautions
(1) This design of this product contains special hardware and
many circuits and components specially for safety purpos-
es. For continued protection, no changes should be made
to the original design unless authorized in writing by the
manufacturer. Replacement parts must be identical to
those used in the original circuits. Services should be per-
formed by qualified personnel only.
(2) Alterations of the design or circuitry of the product should
not be made. Any design alterations of the product should
not be made. Any design alterations or additions will void
the manufacturers warranty and will further relieve the
manufacture of responsibility for personal injury or property
damage resulting therefrom.
(3) Many electrical and mechanical parts in the products have
special safety-related characteristics. These characteris-
tics are often not evident from visual inspection nor can the
protection afforded by them necessarily be obtained by us-
ing replacement components rated for higher voltage, watt-
age, etc. Replacement parts which have these special
safety characteristics are identified in the Parts List of Ser-
vice Manual. Electrical components having such features
are identified by shading on the schematics and by ( ) on
the Parts List in the Service Manual. The use of a substitute
replacement which does not have the same safety charac-
teristics as the recommended replacement parts shown in
the Parts List of Service Manual may create shock, fire, or
other hazards.
(4) The leads in the products are routed and dressed with ties,
clamps, tubings, barriers and the like to be separated from
live parts, high temperature parts, moving parts and/or
sharp edges for the prevention of electric shock and fire
hazard. When service is required, the original lead routing
and dress should be observed, and it should be confirmed
that they have been returned to normal, after reassem-
bling.
(5) Leakage shock hazard testing
After reassembling the product, always perform an isola-
tion check on the exposed metal parts of the product (an-
tenna terminals, knobs, metal cabinet, screw heads,
headphone jack, control shafts, etc.) to be sure the product
is safe to operate without danger of electrical shock.Do not
use a line isolation transformer during this check.
• Plug the AC line cord directly into the AC outlet. Using a
"Leakage Current Tester", measure the leakage current
from each exposed metal parts of the cabinet, particular-
ly any exposed metal part having a return path to the
chassis, to a known good earth ground. Any leakage cur-
rent must not exceed 0.5mA AC (r.m.s.).
• Alternate check method
Plug the AC line cord directly into the AC outlet. Use an
AC voltmeter having, 1,000Ωper volt or more sensitivity
in the following manner. Connect a 1,500Ω10W resistor
paralleled by a 0.15µF AC-type capacitor between an ex-
posed metal part and a known good earth ground.
Measure the AC voltage across the resistor with the AC
voltmeter.
Move the resistor connection to each exposed metal
part, particularly any exposed metal part having a return
path to the chassis, and measure the AC voltage across
the resistor. Now, reverse the plug in the AC outlet and
repeat each measurement. Voltage measured any must
not exceed 0.75 V AC (r.m.s.). This corresponds to 0.5
mA AC (r.m.s.).
1.2 Warning
(1) This equipment has been designed and manufactured to
meet international safety standards.
(2) It is the legal responsibility of the repairer to ensure that
these safety standards are maintained.
(3) Repairs must be made in accordance with the relevant
safety standards.
(4) It is essential that safety critical components are replaced
by approved parts.
(5) If mains voltage selector is provided, check setting for local
voltage.
1.3 Caution
Burrs formed during molding may be left over on some parts
of the chassis.
Therefore, pay attention to such burrs in the case of pre-
forming repair of this system.
1.4 Critical parts for safety
In regard with component parts appearing on the silk-screen
printed side (parts side) of the PWB diagrams, the parts that are
printed over with black such as the resistor ( ), diode ( )
and ICP ( ) or identified by the " " mark nearby are critical
for safety. When replacing them, be sure to use the parts of the
same type and rating as specified by the manufacturer.
(This regulation dose not Except the J and C version)
Good earth ground
Place this
probe on
each exposed
metal part.
AC VOLTMETER
(Having 1000
ohms/volts,
or more sensitivity)
1500 10W
0.15 F AC TYPE

1-4 (No.MB508)
1.5 Important for laser products
1.CLASS 1 LASER PRODUCT
2.CAUTION :
(For U.S.A.) Visible and/or invisible class II laser radiation
when open. Do not stare into beam.
(Others) Visible and/or invisible class 1M laser radiation
when open. Do not view directly with optical instruments.
3.CAUTION : Visible and/or invisible laser radiation when
open and inter lock failed or defeated. Avoid direct
exposure to beam.
4.CAUTION : This laser product uses visible and/or invisible
laser radiation and is equipped with safety switches which
prevent emission of radiation when the drawer is open and
the safety interlocks have failed or are defeated. It is
dangerous to defeat the safety switches.
5.CAUTION : If safety switches malfunction, the laser is able
to function.
6.CAUTION : Use of controls, adjustments or performance of
procedures other than those specified here in may result in
hazardous radiation exposure.
!Please use enough caution not to
see the beam directly or touch it
in case of an adjustment or operation
check.

(No.MB508)1-5
SECTION 2
SPECIFIC SERVICE INSTRUCTIONS
This service manual does not describe SPECIFIC SERVICE INSTRUCTIONS.

1-6 (No.MB508)
SECTION 3
DISASSEMBLY
3.1 Main body section
3.1.1 Removing the top cabinet
(See Figs.1 and 2)
(1) From the both sides of the main body, remove the six
screws Aattaching the top cabinet. (See Fig.1.)
(2) From the back side of the main body, remove the three
screws Battaching the top cabinet. (See Fig.2.)
(3) Take out the top cabinet from the main body while lifting the
rear section of the top cabinet in the direction of the arrow.
(See Fig.1.)
3.1.2 Removing the CD deck assembly
(See Figs.2 to 4)
• Remove the top cabinet.
(1) From the back side of the main body, remove the two
screws Battaching the CD deck assembly to the rear cab-
inet. (See Fig.2.)
(2) From the bottom side of the CD deck assembly, turn the
gear cam in the direction of the arrow and draw the tray
disc out of the CD deck assembly in the direction of the ar-
row 1. (See Figs.3 and 4.)
(3) Remove the CD door from the tray disc in the direction of
the arrow 2. (See Fig.4.)
(4) From the left side of the main body, disconnect the wire
from the connector CN103 on the main AMP board. (See
Fig.4)
(5) Disconnect the card wire from the connector CW105 on the
CD board. (See Fig.4)
(6) From the both sides of the main body, remove the two
screws Dand then take out the CD deck assembly from the
main body. (See Fig.4.)
Fig.1
Fig.2
Fig.3
Fig.4
Top cabinet
A
Rear cabinet
C
B
CD deck
Gear cam
OPEN
Main AMP board
D
CD deck
2
CD board
CD doo
r
Tray disk
1
CN103
CW105

(No.MB508)1-7
3.1.3 Removing the main AMP board
(See Figs.5 to 7)
• Remove the top cabinet and CD deck assembly.
(1) From the right side of the main body, remove the screw E
attaching the main AMP board to the main body. (See
Fig.5)
(2) From the top side of the main body, disconnect the wire
from the connector CN108 on the main AMP board. (See
Fig.6.)
(3) Disconnect the card wire from the connector CN101 on the
main AMP board. (See Fig.6.)
(4) Disconnect the wire from the connector CN102 on the main
AMP board. (See Fig.6.)
(5) Disconnect the wires from the connectors (SMCN01,
SMCN02) on the SMPS board. (See Fig.6.)
(6) From the back side of the main body, remove the three
screws Gattaching the main AMP board to the rear cabi-
net. (See Fig.7.)
(7) Take out the main AMP board from the bottom cabinet.
3.1.4 Removing the SMPS board and rear cabinet
(See Figs.6 to 8)
• Remove the top cabinet, CD deck assembly and main AMP
board.
(1) From the top side of the main body, remove the screw Fat-
taching the earth wire on the bottom cabinet. (See Fig.6.)
(2) From the back side of the main body, remove the three
screws Hattaching the rear cabinet. (See Fig.7.)
(3) Remove the sections atoward this side and take out the
rear cabinet. (See Fig.7.)
(4) From the inside of the rear cabinet, remove the four screws
Mattaching the SMPS board. (See Fig.8.)
(5) Release the claw band take out the SMPS board from the
rear cabinet assembly. (See Fig.8.)
3.1.5 Removing the fan motor
(See Figs.7 and 8)
• Remove the top cabinet, CD deck assembly and main AMP
board.
(1) From the back side of the main body, remove the two
screws Kattaching the fan motor to the rear cabinet. (See
Fig.7.)
(2) Take out the fan motor from the rear cabinet. (See Fig.8.)
Fig.5
Fig.6
Fig.7
Fig.8
Bottom cabinet
Main AMP board
E
CN108
SMCN101
SMCN102
SMPS board
Bottom cabinet
Main AMP board
CN101
F
CN102
Rear cabinet
G
G
H
K
H
J
a
Rear cabinet
SMPS board
FAN moto
r
M
b
b
b
M

1-8 (No.MB508)
3.1.6 Removing the front cabinet assembly
(See Figs.9 to 11)
• Remove the top cabinet and CD deck assembly.
(1) From the top side of the main body, remove the screw Nat-
taching the earth wire on the bottom cabinet. (See Fig.9.)
(2) Disconnect the card wire from the connector CN101 on the
main AMP board. (See Fig.10.)
(3) Disconnect the wire from the connector CN102 on the main
AMP board. (See Fig.10.)
(4) From the both sides of the main body, remove the two
screws Pattaching the front cabinet assembly. (See
Fig.11.)
(5) From the both and bottom sides of the main body, release
the joints (c, d) and then take out the front cabinet assem-
bly from the main body in the direction of the arrow. (See
Figs.11.)
Fig.9
Fig.10
Fig.11
N
Front cabinet assembly
Bottom cabinet
Main AMP board CN101
CN102
Bottom cabinet
P
c
d
d
Front cabinet assembly

(No.MB508)1-9
3.1.7 Removing the VFD board
(See Figs.12 and 13)
• Remove the top cabinet, CD deck assembly and front cabinet
assembly.
(1) From the front side of the front cabinet assembly, pull out
the two knobs. (See Fig.12.)
(2) From the inside of the front cabinet assembly, remove the
seven screws Qattaching the VFD board. (See Fig.13.)
(3) Take out the VFD board from the front cabinet assembly
and then disconnect the wires from the connectors
(UW101, UW201, FW102, FW104) on the VFD board. .
(See Fig.13.)
3.1.8 Removing the front board
(See Fig.12)
• Remove the top cabinet, CD deck assembly, front cabinet as-
sembly and VFD board.
(1) From the inside of the front cabinet assembly, remove the
four screws Rattaching the front board.
(2) Take out the front board from the front cabinet assembly.
Fig.12
Fig.13
Front cabinet assembly
Knob
RR
Q
Front board
VFD board
FW104
FW102UW201UW101

1-10 (No.MB508)
3.1.9 Removing the USB board
(See Fig.14)
• Remove the top cabinet, CD deck assembly, front cabinet as-
sembly, Knobs and VFD board.
(1) From the inside of the front cabinet assembly, remove the
three screws Sattaching the USB board.
(2) Take out the USB board from the front cabinet assembly.
3.1.10 Removing the LED1 board, LED2 board and LED3
board
(See Fig.14)
• Remove the top cabinet, CD deck assembly, front cabinet as-
sembly, knobs and VFD board.
(1) From the inside of the front cabinet assembly, release the
claws eand then take out the LED1 board from the front
cabinet assembly.
(2) Remove the screw Tattaching the LED2 board.
(3) Release the claw fand then take out the LED2 board from
the front cabinet assembly.
(4) Take out the LED3 board from the front cabinet assembly.
Fig.14
SECTION 4
ADJUSTMENT
This service manual does not describe ADJUSTMENT.
SSS
T
LED1 board
USB board
LED2 board
LED3 board
e
f

(No.MB508)1-11
SECTION 5
TROUBLESHOOTING
5.1 Amplifier
5.1.1 Power Malfunction
5.1.2 No Output
Front pcb
u-com Vdd
normal?
SMPS pcb
SMIC42 input
voltage normal?
check the
SMIC01,SMD43
Check amp PCS
wire CN107
Front pcb dose
UX101(10MHz)
oscillate?
Front pcb p-
sense voltage
normal?(#82)
Check the SMPS
SMD44
Front pcb
When the power on
"H" pin
no.94(UIC01)
Replace u-COM IC
(UIC01)
CHECK the AMP PCB
AIC01,FIC01,WIC01,WIC02
YES
YES YES
YES YES
NO
NO NO
NO
NO
Amp pcb
AIC01,WIC01,02
pin No.4,7,12,15
B+ normal?
Check
the SMPS
pcb SMIC02
check the
SMIC01,SMd43
Check amp pcb
wire CN107
Amp pcb
AIC01,pin No.51
normal?
(2.5 5V)
Check amp pcb
BIC02 pin #3,6,7
voltage(3.0 5V)
Amp pcb
BIC01, pin No14
normal?(3.3V)
Replace of
BIC02
Check the
master clock
(12.288MHz)
Check the FIC01
NO
NO
NO
NO
YES
YES
YES
YES

1-12 (No.MB508)
5.1.3 USB Malfunction
5.1.4 Compact Disc Player
Front Jack
pcb UIC03 pin#10
voltage 5V
normal?
Front Jack
pcb UIC03 pin #7
voltage more than
2.5V? or normal?
Check the amp pcb
Front pcb
UIC02 pin #14
voltage 5V
normal?
Front jack pcb
JIC01 pin #14,15
analog signal
normal?
Check the amp pcb
EIC01 function IC
Replace of JIC01
Check the front pcb JIC01
pin #4 voltage
Check the oscillator
frequency 12MHz
Check the USB cable
NO
NO
NO
NO
YES
YES
YES
YES
CD playing N.G
CD pack
5V,8V(motor)
normal?
Roulette
operating?
1. Mecha reset
2. IC401 8V check
3. Mecha to CD pcb 8 pin cable check
4. CD pcb to front pcb 22 pin cable check
1. CD pack to amp pcb
8 pin wire check
(CW106)
2. Amp pcb 5V,8V
supply check
Check
pickup LD
1. Pickup to CD pcb 6 pin wire check
2. Replace pickup
LD and sied
operating?
1. Check the Q302 output 3.3V
2. Check the IC101 pin No.6 voltage 3.3V
3. Check the IC301 pin No.21,22 voltage 8V
Spindle
operationg?
1. Check the IC201, JW11 voltage 1.2V
2. Check the Q303 output 2.0V
3. Check the IC201 pin No.87 reset normal?
1. Replace IC101
2. Replace IC201

(No.MB508)1-13
5.1.5 SMPS
5.1.6 Tuner Malfunction (FM/AM)
Standby LED
normal?
Check
P-SENSE
(smCN02
pin 9)
Replace SMPS
Check amp pcb
Set play is
O.K.?
Check
3V,5V,12V
(SMCN02 pin
3,4,5,6 SMCN01
pin 9)
Check
SMIC42,SMIC43
SMIC44 input
(pin No.1)
Replace SMPS
Check AIC01
at amp pcb
Replace
SMIC42,43 or 44
Sound output
O.K.?
Check
SMCN01
pin 1 to 3
SMNC01
pin 1, pin 4
short?
Replace SMPS
Check
display circuit at
amp pcb
Check amp pcb Check amp pcb
NO NO
NO NO
NO NO NO
NO
YES
YES
YES YES
YES
YES
YES
YES
Amp pcb t
tuner pack
pin No.4
voltage12V
normal?
Check the Amp PCB SZ105
Check the SMPS PCB SMIC44
Amp pcb
check the by-pass
condenser
EE01L,EE01R
Check the amp pcb ER01R,
ER01L open?
Check the amp pcb EIC1, EIC02
Rreplace tuner pack
Amp pcb
check the
EIC02
pin #1,2
Replace of EIC02
Check the arround
EIC02, ER02R/L
EE10R/L
NO
NO
NO
YES
YES
YES

(No.MB508)
Audio/Video Systems Category 10-1,1chome,Ohwatari-machi,Maebashi-city,371-8543,Japan
Victor Company of Japan, Limited
VPT
Printed in Japan

SCHEMATIC DIAGRAMS
MX-C55J,MX-C55C
Contents
Block diagrams
Standard schematic diagrams
Printed circuit boards
2-1
2-3
2-11 to 17
CD-ROM No.SML200606
COMPACT COMPONENT SYSTEM
No.MB508SCH
2006/6
COPYRIGHT 2006 Victor Company of Japan, Limited.
Lead free solder used in the board (material : Sn-Ag-Cu, melting point : 219 Centigrade)
ECO DISC SKIP
SP-MXC55 SP-MXC55CA-MXC55

In regard with component parts appearing on the silk-screen printed side (parts side) of the PWB diagrams, the
parts that are printed over with black such as the resistor ( ), diode ( ) and ICP ( ) or identified by the " "
mark nearby are critical for safety.

< MEMO >

2-1
Block diagram
FM / AM
CD / CD
-
R
AUX / GAME
USB
u
-
COM
V
.
F
.
DISPLAY
FRONT PCB ASS'Y
FUNCTION
P
W
M
MUL
PRO
C
R
-
CH[RED]
L
-
CH[
W
HITE]
INPUT1
INPUT2
INPUT3
INPUT4
A / D
DIGITAL SIG.
ECO CONTROL
KEY COMMAND
REMOCON
-
VP
VFD
5
.
6
V
PO
W
E
R
USB ON
V
-
IN
H/PHONE
USB AUDIO IC
5V REG
P. S E
N
DATA/CLK COMMAND

2-2
SMPS
M AUDIO
U
LTI
-
OCESSOR
O
W
ER ON
VFD
ECO P/T
AC INPUT
AC
SIGNAL12V
MOTOR12V
CD8. 5V
REG. IC
P
. SENS
PO
W
ER STAGE
FRONT
MAIN
PO
W
ER STAGE
S
-
WOOFER
PO
W
ER STAGE
S
-
WOOFER
SUBWOOFER

2-3
Standard schematic diagrams
CN101
32P, ST
1
3
5
7
9
11
13
15
17
19
21
23
25
27
29
31
2
4
6
8
10
12
14
16
18
20
22
24
26
28
30
32
1
3
5
7
9
11
13
15
17
19
21
23
25
27
2
4
6
8
10
12
14
16
18
20
22
24
26
28
FL+
FL
-
-
VPP
FAN
SCL
SDA
PROTECT
P
-
ON/OFF
RESET
H/P_SENSE
+5. 6V
+5V
EQ_IN
U. GND
D. GND
M. MUTE
P
-
SENSE
USB_SSPND
T_DO
T_CE
TUNED
STEREO
F
-
DA
V
-
OFF
U92/DISPCS
U96/DISPS2D
U95/DISPD2S
U97/DISPCK
U27/DISPBUSY
U91/DISPRST
V
-
MUTE
I/P
U91/DISPRST
U27/DISPBUSY
U92/DISPCS
U97/DISPCK
U95/DISPD2S
U96/DISPS2D
+3. 3V
TX
M9V
EE011
ER112
820K
ER105
47
ER 111
EE009
EE01L
2. 2uF
TU_L
TU_R
CD_L
CD_R
AUX_R
+5V
+3. 3V
H/P_R
D. GND
M9VM9V
+5V
+5V
M. GND
D. GND
M. MUTE
+5V
+1. 2V
+1. 2V
D4V
5VforPICKUP
COMPOSITE
Y/B
Y/R
C_OUT
Y/G_OUT
H/P_L
V
-
IN
USB_L
USB_R
USB_SSPND
H/P_SENSE
CN102
15, ST
CN103
28P, ST
1
3
5
7
9
A6V
A6V
A6V
A. GND
CD_L
A. GND
CD_R
A6V
N. C
A6V
2
4
6
8
10
1
2
3
4
5
6
7
8
1
2
3
4
5
6
7
8
9
15
14
13
12
11
10
9
8
7
6
5
4
3
2
1
M. GND
+5V
+5V
+3. 3V
+3. 3V
D.GND
D.GND
P
-
SENSE
P
-
CNTL
+5. 6V
U. GND
HT4. 3V(+)
FL
-
-
VP
CN104
CR01L
27K CR02L
4. 7K
CR02R
4. 7K
CR01R
27K
CR101
56K
CR102
100uF
100uF
10V
10V
V
-
OFF
CR105 1K
CD101
CE102
1SS355 1SS355
CD102
+5V
CE101
CR104
M. GND
M. GND
M9V
56K 18K
CR103
CQ102
CQ103
KSR2101
CQ101
KTD1304
KTD1304
18K
CD_L FL+
FL
-
-
VPP
RESET
CD_R
10P, ST
CN105
8P, ST
A. GND
MUTE
CD
OPTION
PVdd
CN106
9P, WIRE
+12V +12V
+5. 6
V
1SS355
DR104
560
270
DR102
SQ107 SR004
10K
KTA1268
2. 7K
SR001
10K
SR002
SQ104
SQ105
SQ106
KSR
2103
KTC3199
-
Y
SQ102
HR014
HL01L
HR001
HR12R
HC04L
HE002
HC006
HC04R
HR09R
HC02R
HC01R
0. 1nF
10K 100nF
47uF16
V
HR09L
HC02L
10K
0. 1nF
0. 22nF
HC01L
HIC01
4560
HR08L
HR10L
HE01R
HR10R
HIC01
HR11R
HR05R
HR06R
10K
4560
10K
HC05R
HC03R
HR07R
0. 22nF
0. 22nF
100uF
16
V
HE01L
HC03L
4560
HIC01
HR05L
HR06L
HR11L
10K HC05L
0. 22nF
0. 22nF
HR07L
4. 7K
4. 7K
HR03L
4. 7K
4. 7K
HR04L
4. 7K
4. 7K
HR03R
4. 7K
4. 7K
HR04R
4. 7K
4. 7K
7
6
5
0. 22nF
1
2
3
4
8
100uF16
V
10
10K
HR08R
10
HR12L
H
Q
01L
1K
1K
KTD1304
H
Q
01R
KTD1304
600
HL01R
600
47
HR013
KTD1304
H
Q
002
+
12
V
FL
+
10K
47K
KSC2331
-
Y
KSC2331
-
Y
SQ103
KTC3199
-
Y
330K
22K
SR104
SD101 SR106
330K
82
SR105
SR103
1SS355
390
DR103
SR003
SR005
SZ102
SZ103
SZ104
SE103
RLZ5. 6A
RLZ5. 6A
RLZ7. 5B
220uF 16V
SZ106
UZP33B
22uF
27K
50V
SE102
560
MR107
EMC04
100nF
EMC01
100nF
EMC02
100nF
EMC03
100nF
10K
MR108
10K
SD102
SDA
-
Vpp
SCL
M9V
D. GND
M. GND
-
VP
+5. 6V
P-ON/OFF
D.GND
HT4. 3V(+)
D. GND
D. GND
15P CN107
A. GND
AUX_L
EQ101
KTD1304
330K
50V
4. 7uF
U.GND
EQ_IN
4. 7
uF
50V 1SS355
ED102
EE010
ER108
ER110
EE110
16V
EC101
100nF
5. 6nF
5. 6nF
100nF
1. 2nF
R2S15904SP
10K
470K
47uF
ER109
EE07L
EE07R
EE005
ER103 47
ER104
ER03L
ER03R
EC03R
EC03L
EC103
EC104
47
47K
47K
ER08L
1K
AR103
22K
AR102
2. 2K
AE101
47uF16V
KSC2331
-
Y
AQ101
FE101
ER08R
1K
FR005
PROTECT
1K
FC011
100nF
FC012
100nF
FL003
600
FC014
100nF
FC015
100nF
FR004
10K
FC013
2. 2uF
SZ105
1N4739A
10uF 16V
1uF
1uF
50V
50V
FIC01
120
+12V
F
-
DA
P
-
ON/OFF
SCL
220nF50V
+
+
+
+
EE06L
ER101
EC102
EE006
EE007
10uF
16V
10V
50V
220uF
600
EL101
EC106
EE10R
EE10L
10uF
10uF
8
7
6
5
4
3
2
1
9
10
11
12
13
14
15
16
SDTO
LRCK
MCLK
SCLK
PDN
DIF
CKS2
CKS0
DGND
VD
VA
AGND
VCOM
CKS1
AINL
AINR
EIC02
AK5358
2. 2uF
100nF
ED101
1SR154-400
EC105
100nF
ER102 EE06R
ER01R
1uF
1uF
50V
150K
150K
3. 3K
ER01L
EC01R 220nF
EC01L 220nF
EC02R
EC02L
220nF
220nF
3. 3K
50V
++
+
+
+
+
EE01R
EE03L
EE03R
2. 2uF
1uF
1uF
+
+
+
EE02R
EE02L
EE04L
1uF
1uF
1uF
+
+
+
EE04R
1uF
+
ER02R
ER02L
220
+12V
FAN
220
1
2
3
4
5
6
7
8
9
10
11
12
13
14
@pinLa
@pinLa
@pinLa
@pinLa
@pinLa
@pinLa
@pinLa
@pinLa
@pinLa
@pinLa
@pinLa
@pinLa
@pinLa
@pinLa
@pinLa
@pinLa
@pinLa
@pinLa
@pinLa
@pinLa
@pinLa
@pinLa
@pinLa
@pinLa
@pinLa
@pinLa
@pinLa
@pinLa
28
27
26
25
24
23
22
21
20
19
18
17
16
15
1
2
3
4
5
6
7
8
9
10
11
12
13
14
15
600
EL102
0. 047nF
M
R102
M
R112
10K
M
R002
100
100nF
1K
EC107
0. 022nF
M
C105
M
C116
M
C115
100nF
M
C114
100nF
M
C101
M
R101
M
R001
1. 2nF
100nF
M
C102
100nF
10K
47
M
R103
47
100nF
M
R104
AIC02
KIA7029
OUT
GND
1
2
3
VCC
47
470
330
330
M
C104
0. 022nF
12. 288
MHz
XC101
0. 022nF
XC102
XT101
XR102
XIC01
M
74HCU04
XR101
XE101
XC103
10uF
100nF
100
100
M
R105
M
R106
100nF
M
C110
1. 2nF
0. 1nF
0. 1nF
M
C117
3. 3K
M
R111
M
C107
M
C108
M
C109
M
E101
100nF
100nF
22uF16
V
M
C111
16
V
M
R110
M
C106
100nF
1
M
ER106
M
L103
600
M
L1
0
600
M
L
1
0
60
0
EE008
220uF 10V
600
ML104
ER107
3. 3
2
W
+3. 3V
A
K
T
AR101
10K
FIC02
STA508
1
2
3
4
5
6
7
8
9
10
11
12
13
14
15
16
17
18
1
2
3
4
5
6
7
1
2
3
4
5
6
7
8
9
10
11
12
13
14
15
16
MVO
GND_1
VDD_1
GND_2
NC_1
SDI_78
SDI_56
SDI_34
SDI_12
LRCKI
BICKI
VDD_2
GND_3
NC_2
RESET
PLLB
17
18
19
20
21
22
23
24
25
26
27
28
29
30
SA
SDA
SCL
XTI
FIL TER_PLL
VDDA
GNDA
VDD_3
CKOUT
NC_3
GND_4
VDD_4
OUT8_B
OUT8_A
64
63
62
61
60
59
58
57
56
55
54
53
52
51
PWDN
SDO_78
SDO_56
NC_7
GND_8
VDD_8
SDO_34
SDO_12
LRCKO
BICKO
NC_6
GND_7
VDD_7
EAPD
14
13
12
11
10
9
8
A1
Y1
A2
Y2
A3
Y3
GND
VCC
A6
Y6
A5
Y5
A4
Y4
36
35
34
33
32
31
30
29
28
27
26
25
24
23
22
21
20
19
VccSign_2
VccSign_1
Vss_2
Vss_1
IN2B
IN2A
IN1B
IN1A
TH_WAR
FAULT
TRI
-
STATE
PWRDN
CONFIG
VL
VDD_2
VDD_1
GND
-
Reg
GND
-
Clean
GND
-
SUB
OUT2B_1
OUT2B_2
Vcc2B
GND2B
GND2A
Vcc2A
OUT2A_1
OUT2A_2
OUT1B_1
OUT1B_2
Vcc1B
GND1B
GND1A
Vcc1A
OUT1A_1
OUT1A_2
NC
MC
103
AIC01
STA308A
Amplifier section
This manual suits for next models
1
Table of contents
Other JVC Speakers System manuals