5
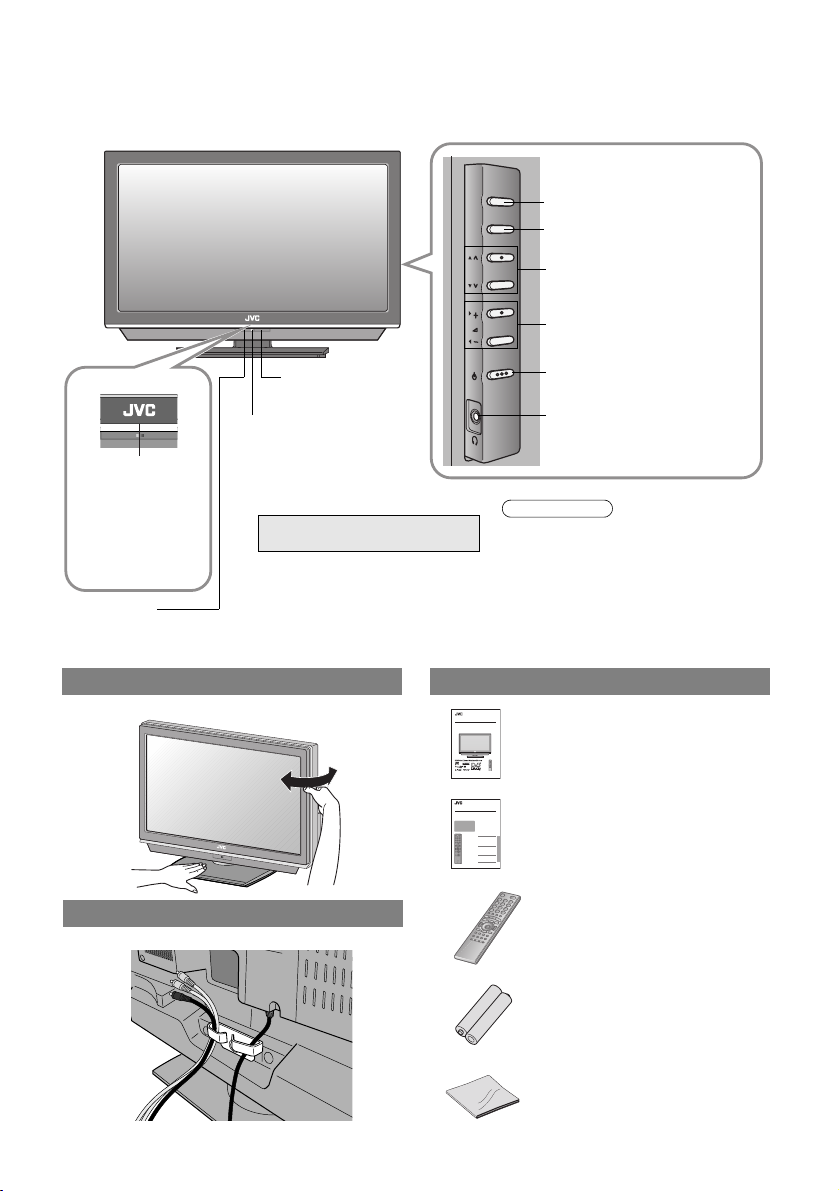
Names of all the parts
TV/AV
MENU
/OK
P
Remote control
sensor
Switch between TV
(digital / analogue channels)
and AV devices (P. 24)
Display on-screen menu /
set
Change channel / page
Volume
Power On / Off
To headphones (P. 9)
Illumination lamp
zIllumination lamp
lights while the TV
is on.
g“Illumination”
(P. 36)
zPeel off the protection films pasted on the
glossy finish of the TV after the TV has
been placed properly. (P. i)
Note
Change the direction of TV
Tidying the cables
Check accessories
TradeMarkof the DVB Digital Video Broadcasting
Project(1991to 1996) Number : 4820, 4821, 4822
INSTRUCTIONS
WIDELCD PANEL TV
LT-42DP8BJ
LT-37DP8BJ
LT-32DP8BJ
LCT2288-001A-U
Remote control
(RM-C1911)
“AAA/R03” Batteries
(For confirming the TV works)
User manual
“INSTRUCTIONS”
(this book)
Beforereading this manual
Readthe separate user manual (INSTRUCTIONS), “IMPORTANT”section (P. 3 - 4),
andunderstand how to use the TV safely. After that follow the instructions in the
“PREPARE”section (P.5 - 16) to connect the aerial and other external devices to
theTV, and configure thesettings for the TV.
LCT2289-001A-U
Digitalterrestrial broadcasting (DVB-T)
gDigitalchannels
Analogueterrestrial broadcasting
(VHF/ UHF) and analogue cable TV
gAnaloguechannels
Contents
Watchingdigitalchannels ................................. 1
Displaythe programme information .............. 3
Viewsubtitles................................................ 3
Selectaudiolanguage .. ................................ 4
Viewteletext information............................... 4
UsingEPG........................................ ................ 5
CustomisingyourTV ................. .......................7
Timer ................ ...................... ....................... 9
EditPR (Edit PR List)............ ..................... 11
Configuration .................. ............................13
Setup ..................... .....................................15
Installation .................... ..............................17
Troubleshooting..............................................19
TechnicalInformation......................................21
USE SETTING TROUBLE?
Thismanual only provides
informationon watching digital
channels.Other information is
explainedin the
“INSTRUCTIONS”.Please read
boththis manual and the
“INSTRUCTIONS”manual.
WATCHINGDIGITAL CHANNELS
Separate manual
“WATCHING DIGITAL
CHANNELS”
Cleaning cloth
(For details on using the
cleaning cloth, see P. i.)
Eco Sensor
g“What is “Eco Mode”?” (P. 43)
Power lamp
ON: Lit (Green)
OFF: Unlit
zThe power lamp will light in
green or orange during
recording. g
zWhen “Power Lamp” is set to “Off”, the
Power lamp will not light up.
g“Power Lamp” (P. 36)
WATCHING DIGITAL CHANNELS
“Timer” (P. 10)
LT-42DV8BJ.book Page 5 Friday, July 6, 2007 11:23 AM