--
C
ONTENT
S
--
IMPORTANT SAFETY INFORMATION…………………………………
1
DESCRIPTION OF APPLIANCE AND INSTALLATION
…………….
3
KS54TL/ KS54TR
.............................................................................................................
3
KS106TL/ LS106TR
............................................................................................................................... 4
KS194TL/ KS194TR
................................................................................................................................
5
ACCESSORY INSTALLATION BEFORE OPERATING
………..…….
6
UNPACKING AND CLEANING THE WINE
C
OOLER
........................................................................
6
LOCK & UNLOCK THE DOOR (FOR OPTION)..................................................................................... 6
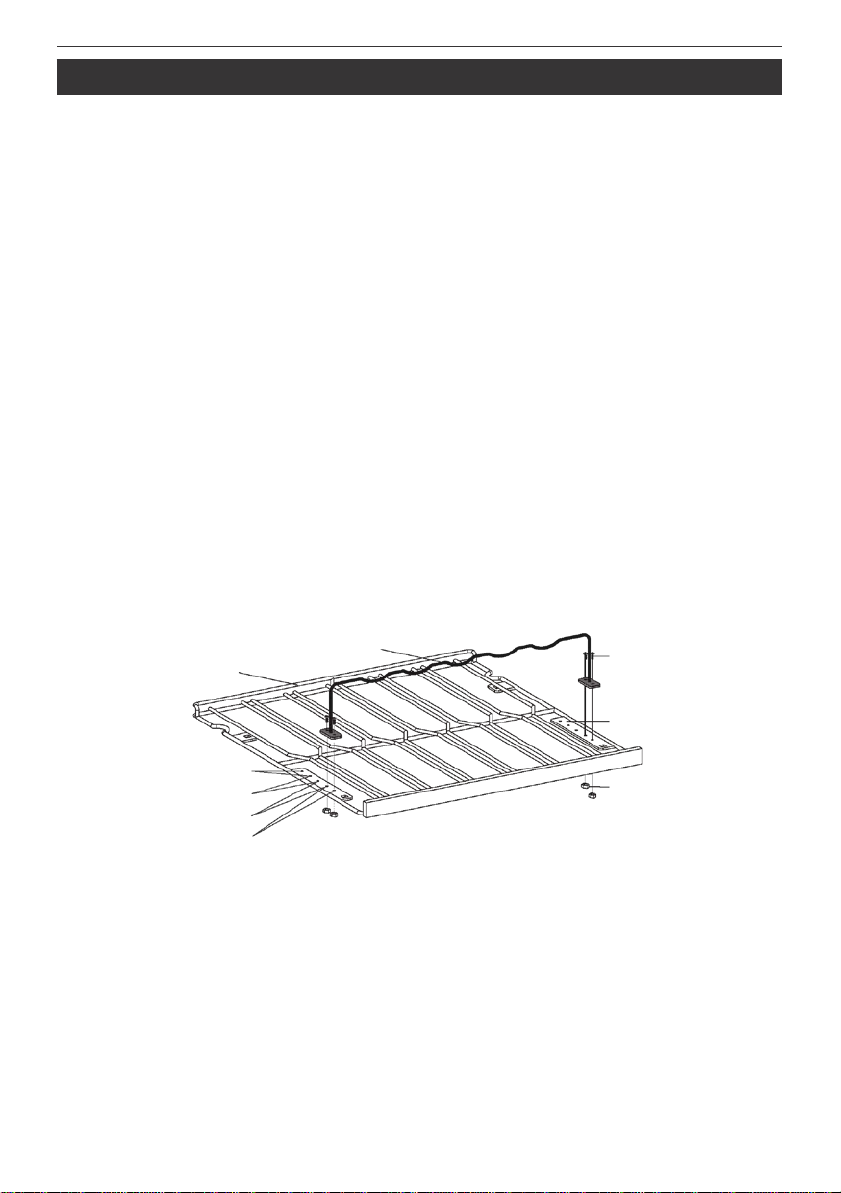
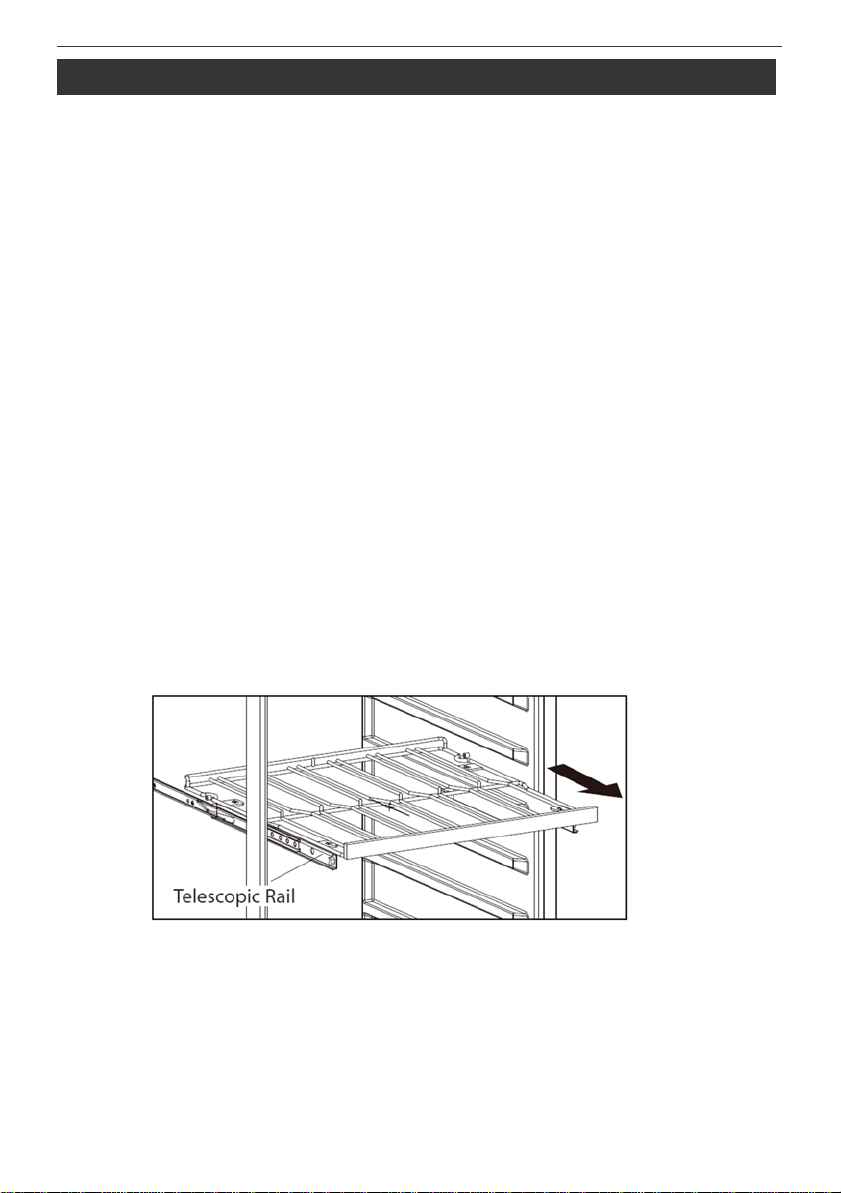
DISPLAY SHELF (FOR OPTION) ..............................................................................................................
6
OPERATING THE WINE
COOLER
……………………………………..
7
WORKING CLIMATE .................................................................................................................................... 7
WINE
ST
OR
A
GE
............................................................................................................................................ 7
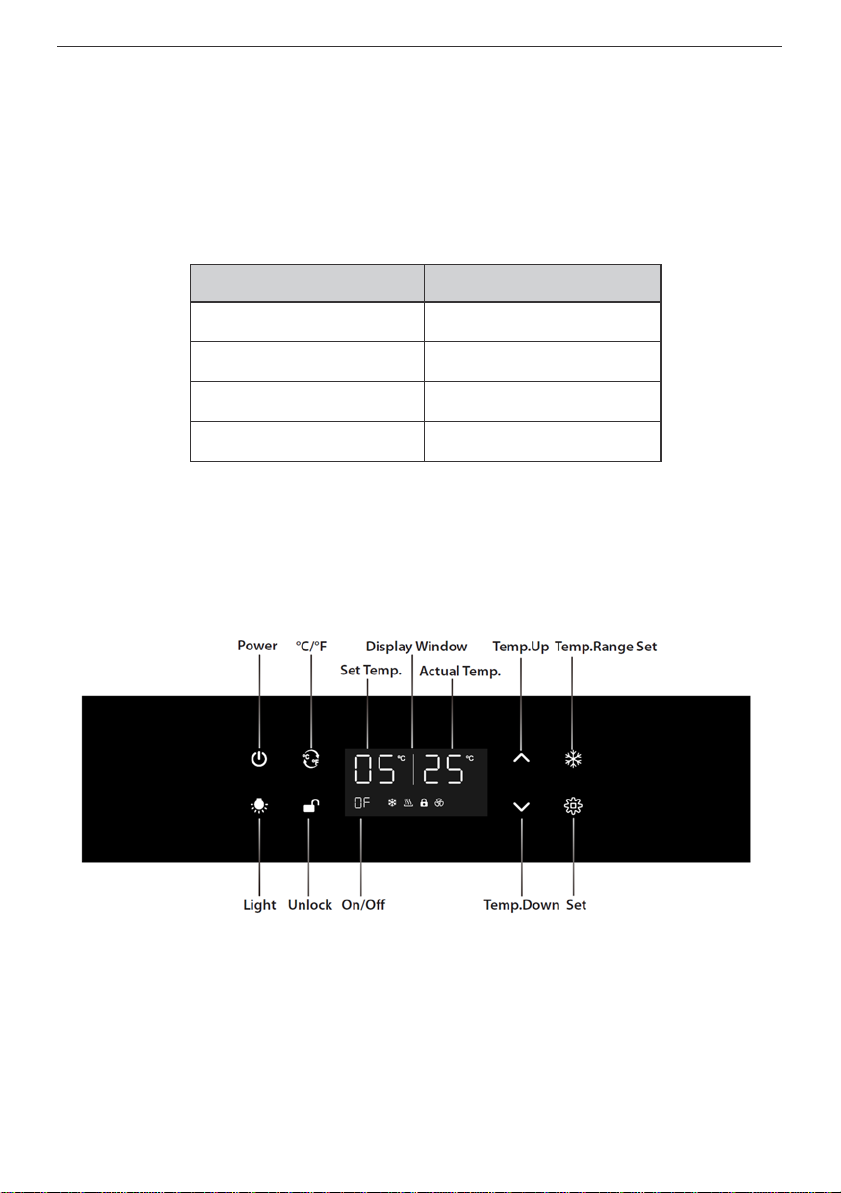
CONTROL PANEL
.......................................................................................................................................
8
POWER ON/OFF
CONTROL................................................................................................................... 9
UNLOCKING THE CONTROL PANEL.....................................................................................................
9
INTERIOR LIGHTING
ON/OFF CONTROL
.........................................................................................
9
SELECTING FAHRENHEIT(ºF) & CELSIUS (ºC)
DISPLA
Y
...............................................................
10
TEMPERATURE SE
T
TING
..........................................................................................................................
10
TEMPERATURE DISPLAY
WINDOW
...................................................................................................
11
CARE AND MAINTENANCE
………………………………………………………………………………………………………………………………………………….
12
CLEANING THE WINE COOLER............................................................................................................
12
REMOVING THE SHELVES .....................................................................................................................
13
POWER F
AIL
URE
..........................................................................................................................................
13
MOVING THE WINE COOLER
..............................................................................................................
13
ENERGY SAVING
TIPS
...............................................................................................................................
13
TROUBLESHOOTING …………………………………………..……..
14