Operation Manual PPH-500
KAKA Industrial®
— 1 —
Unpacking
The Pneumatic Planishing Hammer is shipped
from the manufacturer in a carefully packed
Carton box. Thoroughly inspect the product
upon opening the package.
After unpacking the unit, carefully inspect for
any damage that may have occurred during
transit. Check for loose, missing, or damaged
parts. Shipping damage claims must be led
with the carrier and are the responsibility of
the user.
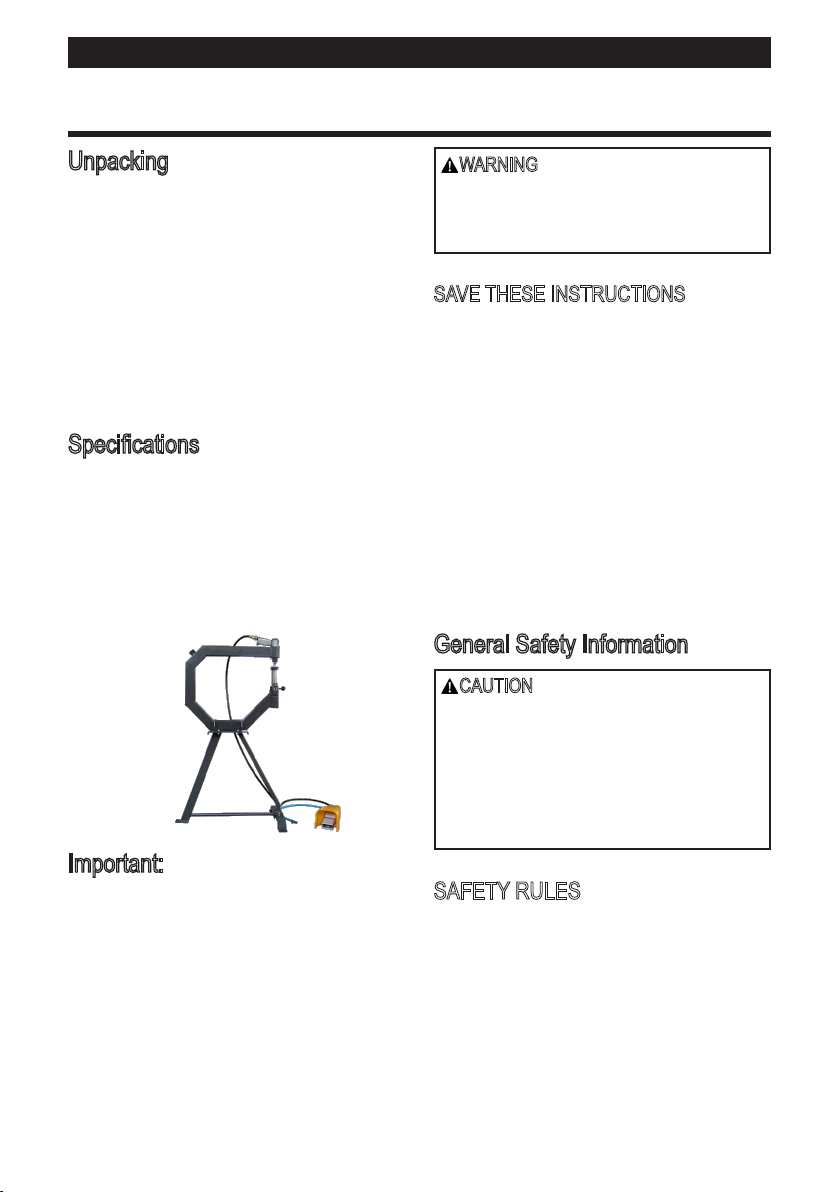
Specications
Operating Air Pressur......... 50-100 (Max.) PSI
Air Inlet …...……...........…1/4", 18 NPT, female
Maximum thickness……...………...…20 gauge
Throat Size........................................... 19-5/8"
Anvil Sizes…………….….....1", 2" & 3" Radius
Overall Size….......………..........28" x 16" x 46"
Weight ....................................................57 lbs
Important:
The pneumatic planishing hammer is coated
with a protectant. To ensure proper fit and
operation, remove coating. Coating is easily
removed with mild solvents, such as mineral
spirits, and a soft cloth. Avoid getting cleaning
solution on paint or any of the rubber or plastic
parts. Solvents may deteriorate these nishes.
Use soap and water on paint, plastic or rubber
components. After cleaning, cover all exposed
surfaces with a light coating of oil.
WARNING
Never use highly volatile solvents.
Non-ammable solvents are recommended
to avoid possible re hazard.
SAVE THESE INSTRUCTIONS
Thank you for purchasing PPH-500
Pneumatic Planishing Hammer machine.
Before attempting to operate your new tool
please read these instructions thoroughly.
You will need these instructions for the
safety warnings, precautions, assembly,
operation, maintenance procedures, parts
list and diagrams. Keep your invoice number
with these instructions. Write the invoice
number on the inside of front cover. Keep the
instructions and invoice in a safe, dry place for
future reference.
General Safety Information
CAUTION
Always follow proper operating procedures
as defined in this manual even if you are
familiar with use of this or similar tools.
Remember that being careless for even a
fraction of a second can result in severe
personal injury.
SAFETY RULES
1. Wear proper apparel. Do not wear loose
clothing, gloves, neckties, rings, bracelets or
other jewelry which may get caught in moving
parts of machine.
2. Wear protective hair covering to contain
long hair.
3. Wear safety shoes with non-slip soles.
4. Wear safety glasses complying with United
States ANSI Z87.1.


